- Overview
- Prerequisites
- Enable Camera
- Install Apache 2
- Install ImageMagick
- Install Video software
- Install piLapse
- VNC Install
- Camera Focus
- First Time Lapse
Shell Script for automating time-lapse video creation from images, hosts on an Apache Web Server for easy viewing.
Another over a much shorter period in HD which was taken every 10 minutes.
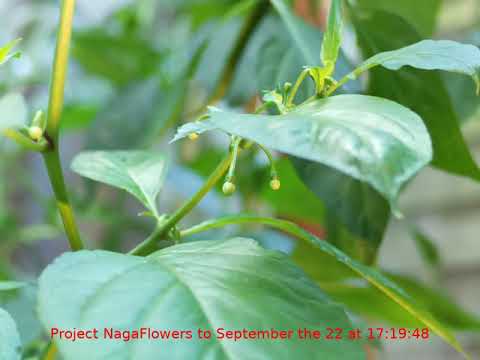
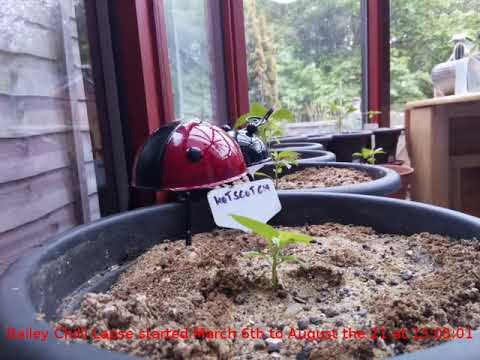
Here's an example time-lapse video I recorded of chilli peppers growing over a 7 month period (click to view on YouTube):
There are other examples in my Timelapses playlist on YouTube.
First, make sure the camera interface is enabled, if you don't, you'll see the message Camera is not enabled. Try running 'sudo raspi-config':
- Run
sudo raspi-config - Go to 'Interfacing Options'
- Select 'Camera'
- Select 'Yes' for enabling the camera
- Select 'Finish' in the main menu and then 'Yes' to reboot the Pi
Update the package lists first ;
sudo apt update
sudo apt-get install apache2 -y
Adjust the Apache permissions to allow the pi user to write so the script does not need to run as root and remove the default index.html so we see the pictures in the web root.
sudo usermod -a -G www-data pi
sudo chown -R -f www-data:www-data /var/www/html
sudo chmod g+w /var/www/html
sudo rm /var/www/html/index.htmlRequired to add timestamps to the jpg files
sudo apt-get install imagemagickCheck it installed by checking the version
convert --versionInstall ffmpeg
sudo apt install -y ffmpegCheck it installed by checking the version
ffmpeg -versionInstall Pi-Lapse as Pi
cd ${HOME}
curl -LJO https://raw.githubusercontent.com/mrmebailey/pitimelapse/v1.1/timeLapse.sh
chmod 755 ./timeLapse.sh
Check it downloaded fine ;
./timeLapse.shYou should see the output
This script will create a folder in the HTML Root with the project name and is intended to run from cron.

Usage: ./timeLapse.sh [Project-Name] [WIDTH] [HEIGHT] [QUALITY]

Example below...

./timeLapse.sh my_first_lapse 1024 768 30Because the Pi runs headless we need to use VNC to logon to the Pi in order to focus the camera as no display is attached.
sudo apt update
sudo apt install realvnc-vnc-server realvnc-vnc-viewer
Now we need to enable VNC in raspi-config
sudo raspi-configNavigate to Interfacing Options.
Scroll down and select VNC › Yes.
The final configuration item is to allow direct capture mode in VNC Viewer highlighted below, if this is not done then live capture will just hang.

Edit the file /boot/config.txt and uncomment the line below otherwise you may experience the cannot display VNC Desktop error.
# uncomment if hdmi display is not detected and composite is being output
hdmi_force_hotplug=1
Connect to the pi by downloading VNC Viewer and execute raspistill in live mode using the command below.
raspistill -t -0
Focus the camera on your subject in live view, do not forget to lock off the lens screws and to exit this you must use CNTL ^C from the terminal, ensure you do this before moving onto the next steps as only one process can access the camera at any one time.

Now we have the script we can start testing, execute this command which will create the first picture and the project directory in the web root for us.
./timeLapse.sh my_first_laspe 1024 768 30 If there was an issue with the camera or it is not connected properly you will get the error now, check the connections and that you have enabled the camera properly. It is also worth noting that you will need to cancel the live view mode executed above as only one process can access the camera at any one time. You can do this by hitting CNTL ^C.
ls -ltr /var/www/html/my_first_laspe/total 244
-rw-r--r-- 1 pi pi 247283 Sep 30 11:12 1.jpgNow when we run the script the second time it will create picture number 2 and build the videos with the data overlay.
./timeLapse.sh my_first_laspe  1024 768 30
ls -ltr /var/www/html/my_first_laspe/
The output will look like this.
total 592
-rw-r--r-- 1 pi pi 247283 Sep 30 11:12 1.jpg
-rw-r--r-- 1 pi pi 248216 Sep 30 11:12 2.jpg
-rw-r--r-- 1 pi pi  31630 Sep 30 11:13 timelapse.mp4
-rw-r--r-- 1 pi pi  33383 Sep 30 11:13 timelapse_banner.mp4
-rw-r--r-- 1 pi pi  33383 Sep 30 11:13 timelapse_banner_static.mp4
Now visit the pi with a browser and check your pictures and video all work...
http://<PI IP ADDRESS>
The final part is to define the crontab entry, now the settings here will depend on the quality you want which is not currently tuneable but essentially the smoother the timelapse the more pictures you need but depends on how quickly your target lapse environment changes.
So, for example to catch ice melting that out be each minute in a house as it will only last about 30 or 40 minutes. The chilli peppers growing over months I found each hour was enough to show the plants growing.
Chill flowers came and went within 2-3 days but that required a medium of every 10 minutes but experiment.
In this example we will run every minute and show a melting lolly so let's get started....
Add the cron entry by executing the below command.
(crontab -l ; echo "* * * * * /home/pi/timeLapse.sh my_first_laspe 1024 768 30") | crontabYou can remove it or hash it out when you are done with this command
( crontab -l | grep -v -F "/home/pi/timeLapse.sh my_first_laspe 1024 768 30" ) | crontab -