Angular JS is a client-side Javascript framework used for simplifying the process of developing maintainable web applications. In this tutorial we'll design a basic Angular app that highlights much of what the framework has to offer.
Before going any further, to fully understand this tutorial you need to be comfortable with vanilla Javascript, not just jQuery. For a crash course in Javascript, check out the Codeacademy Javascript track.
First off, what are we building? Well, forget the overdone hello world and todo apps, let's build something more - a Bitcoin Calculator!
This app details how much you could potentially profit if you invested X amount of dollars in Bitcoins. Through this tutorial, we'll walk you through the basics of designing a web app using Angular (v1.4.5), highlighting many of the key features of the framework - including templating, two-way data binding, directives, and filters.
Last updated on 09/14/2015 - added the latest version of Angular (1.4.5) as well as dynamic charts via D3.
- Part 1 - What is Angular?
- Part 2 - Basic Project
- Part 3 - Bitcoin Calculator
- Part 4 - Data Visualization
- Part 5 - Historical Price Chart
Angular is designed for creating dynamic, single page applications as well as full web applications within the Model View Controller (MVC) pattern (Or, more precisely: the MVVM pattern).
Working within the MVC paradigm, it's easy to add (bind) data to your page, which automatically updates because the framework is always watching for changes. Put another way, with Angular, we can write front-end code without having to directly manipulate the DOM. It's also easy to learn since it works directly with HTML, by simply extending its functionality.
Before we start building, read over some of Angular's main features:
- Templates: Templates reside directly in your HTML, displaying dynamic data to the end user .
- Two-way data binding: Changes to your JavaScript module automatically update the DOM. In other words, it doesn't require an explicit refresh.
- Routing: Routing represents the possible application states; controllers and templates are employed to serve this purpose.
- Directives: Directives are used for extending HTML with new functionality as well as encapsulating code for easy reuse.
Let's start with the very basics with a barebones HTML5 project boilerplate:
<!DOCTYPE html>
<html>
  <head>
    <title>Bitcoin Investment Calculator</title>
    <meta charset="utf-8">
    <meta name="viewport" content="width=device-width, initial-scale=1.0">
    <!-- stylesheets -->
    <link href="https://maxcdn.bootstrapcdn.com/bootswatch/3.3.5/yeti/bootstrap.min.css" rel="stylesheet" media="screen">
    <!-- scripts -->
    <script src="https://code.jquery.com/jquery-2.1.4.min.js"></script>
    <script src="https://maxcdn.bootstrapcdn.com/bootstrap/3.3.5/js/bootstrap.min.js"></script>
    <script src="https://ajax.googleapis.com/ajax/libs/angularjs/1.4.5/angular.min.js"></script>
  </head>
  <body>
    <h1>Bitcoin Investment<br>Calculator</h1>
  </body>
</html>
Check out this link if you'd like to know more about this structure. Notice how I included Angular in the page - <script src="https://ajax.googleapis.com/ajax/libs/angularjs/1.4.5/angular.min.js"></script>. You must do this before the closing <body> tag.
Save this as index.html.
Next, we'll dive right into Angular. First, let's define a scope for our project:
<!-- define our angular app -->
<html ng-app>
This simply binds or bootstraps an unnamed Angular app to the DOM. Angular allows us to have multiple apps within the same HTML page, so this simple directive, ng-app, defines where each app begins and ends (scope), literally telling Angular where the app is active. In this case, since we are placing the app in the <html> tag as an HTML attribute, we are essentially saying, "We have one Angular app that spans the entire page - from <html> to </html>".
Just remember that you can place this directive anywhere on your page, and your app will run within that defined scope - such as a <div>, for example.
Finally, let's add in the model and get our app working:
<h3>How many Bitcoins do you have?</h3>
<!-- model -->
<input type="number" ng-model="somenumber" placeholder="20">
<br><br>
<h4>You have <span class="number">{{ somenumber }}</span> Bitcoins - nice!</h4>
Here we are defining the directive ng-model in the input box as ng-model="somenumber". By doing so, we have bound the value within the input box to the model, so when the input value changes, Angular automatically updates the model. This is two-way binding in action. Get used to this concept as this is part of what makes Angular so powerful - and fun to use.
Next, by wrapping the model value, somenumber in double curly braces - which are used as delimiters for the results from expressions - we are simply telling Angular to replace that text with the actual value, which, again, comes from the number added to the input box.
Here's the final code, which includes some Bootstrap styles:
<!DOCTYPE html>
<!-- define our angular app -->
<html ng-app>
  <head>
    <title>Bitcoin Investment Calculator</title>
    <meta charset="utf-8">
    <meta name="viewport" content="width=device-width, initial-scale=1.0">
    <!-- stylesheets -->
    <link href="https://maxcdn.bootstrapcdn.com/bootswatch/3.3.5/yeti/bootstrap.min.css" rel="stylesheet" media="screen">
    <!-- scripts -->
    <script src="http://code.jquery.com/jquery-1.11.0.min.js"></script>
    <script src="http://netdna.bootstrapcdn.com/bootstrap/3.1.1/js/bootstrap.min.js"></script>
    <script src="http://cdnjs.cloudflare.com/ajax/libs/angular.js/1.2.10/angular.min.js"></script>
    <style>
      .number {font-weight: bold;}
    </style>
  </head>
  <body>
    <div class="jumbotron">
      <h1>Bitcoin Investment<br>Calculator</h1>
      <br>
      <h3>How many Bitcoins do you have?</h3>
      <!-- model -->
      <input type="number" ng-model="somenumber" placeholder="20">
      <br><br>
      <h4>You have <span class="number">{{ somenumber }}</span> Bitcoins - nice!</h4>
    </div>
  </body>
</html>
Run this in your browser. You should see this:
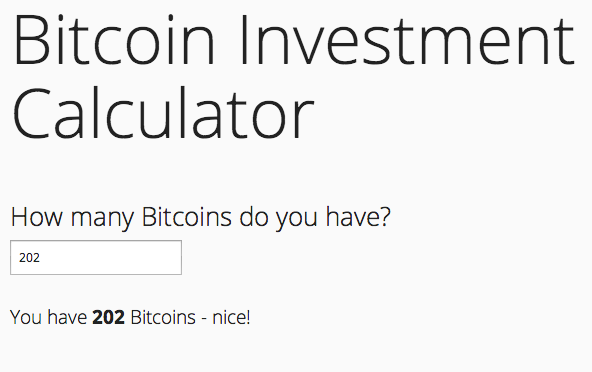
Watch what happens when you change the value in the input box. Two-way binding! The DOM changes with each keystroke, without the need for any code to refresh the page.
Play around with code here: http://jsfiddle.net/mjhea0/9ear3/. You can also grab the actual HTML from this repo.
With the basics out of the way, let's move on and create a more robust app.
We'll be building on the same file from before. Feel free to save it as something new, or in a new directory, like - btc-calculator/index.html, for example.
First, let's add in a controller and give our Angular app a name:
<!-- define our angular app and set the controller -->
<html ng-app="bitcoinCalculator" ng-controller="bitcoinController">
The Controller, ngController, is a directive that will run the bitcoinController controller, which controls, or talks to, the view. Controllers link and provide information to the model and our view. You'll also notice that we assigned a value to our ng-app directive, ng-app="bitcoinCalculator". This tells angular which module we'll be using in our app.
If you try the app now, you'll notice it's broken. That's because we defined a controller, but we have not defined how said controller works. Let's do that.
Add an Angular module:
<!-- angular module -->
<script type="text/javascript">
  var bitcoinCalculator = angular.module('bitcoinCalculator', []);
    bitcoinCalculator.controller('bitcoinController', ['$scope', function ($scope) {
      // attaching 0 to the DOM
      $scope.somenumber = 0;
    }]);
</script>
Angular modules are used for organizing JavaScript code into separate, self-contained components.
Inside the modules we can add:
- controllers
- directives
- filters
- routes
In the current app:
angular.module("name",[])instantiates and returns a new modulefunction ($scope) {$scope.somenumber = 0;}binds the controller with the view
When Angular initializes this controller, it creates and injects the $scope object into the function with dependency injection. Don't worry if this doesn't make sense, it's a bit of Angular magic for creating and using the $scope object.
In this case, we are simply binding the number 0 to somenumber within the view.
Try your application now in the browser. It should now work.
You do not have to assign a variable to a module for your app to work, but it is a best practice.
Before moving on with more Angular, let's step back and look at the functionality of our final app: The application we'll be developing is a Bitcoin investment calculator that details how much you could potentially profit if you invested X amount of dollars in Bitcoins.
What does that mean in terms of the HTML structure? Well, we need an input box for the initial investment and a table that shows IF the price of 1 BTC reaches X, THEN your starting investment would be X AND your profit is X. Let's create the HTML for that now:
<!DOCTYPE html>
<!-- define our angular app and set the controller -->
<html ng-app="bitcoinCalculator" ng-controller="bitcoinController">
  <head>
    <title>Bitcoin Investment Calculator</title>
    <meta charset="utf-8">
    <meta name="viewport" content="width=device-width, initial-scale=1.0">
    <!-- stylesheets -->
    <link href="http://netdna.bootstrapcdn.com/bootswatch/3.1.1/yeti/bootstrap.min.css" rel="stylesheet" media="screen">
    <!-- scripts -->
    <script src="http://code.jquery.com/jquery-1.11.0.min.js"></script>
    <script src="http://netdna.bootstrapcdn.com/bootstrap/3.1.1/js/bootstrap.min.js"></script>
    <script src="http://cdnjs.cloudflare.com/ajax/libs/angular.js/1.2.10/angular.min.js"></script>
    <style>
      .number {font-weight: bold;}
    </style>
    <!-- angular module -->
    <script type="text/javascript">
      var bitcoinCalculator = angular.module('bitcoinCalculator', []);
        bitcoinCalculator.controller('bitcoinController', ['$scope', function ($scope) {
          // attaching 0 to the DOM
          $scope.somenumber = 0;
        }]);
    </script>
  </head>
  <body>
    <div class="jumbotron">
      <div class="row">
        <div class="col-sm-12">
          <h1>Bitcoin Investment<br>Calculator</h1>
          <br><br>
          <form role="form">
            <label for="starting-investment">Initial Investment (USD)</label>
            <input type="number" class="form-control">
          </form>
        </div>
      </div>
      <div class="row">
        <div class="col-sm-7">
          <br><br>
          <table class="table table-bordered">
            <thead>
              <tr>
                <th>Price of 1 BTC</th>
                <th>Starting Investment</th>
                <th>Profit</th>
              </tr>
            </thead>
            <tbody>
              <tr>
                <td>price</td>
                <td>new amt</td>
                <td>new profit</td>
              </tr>
            </tbody>
          </table>
        </div>
        <div class="col-sm-5">
          <img src="img/btc.png" width="200">
        </div>
      </div>
    </div>
  </body>
</html>
Check it out in your browser. It should look like this:
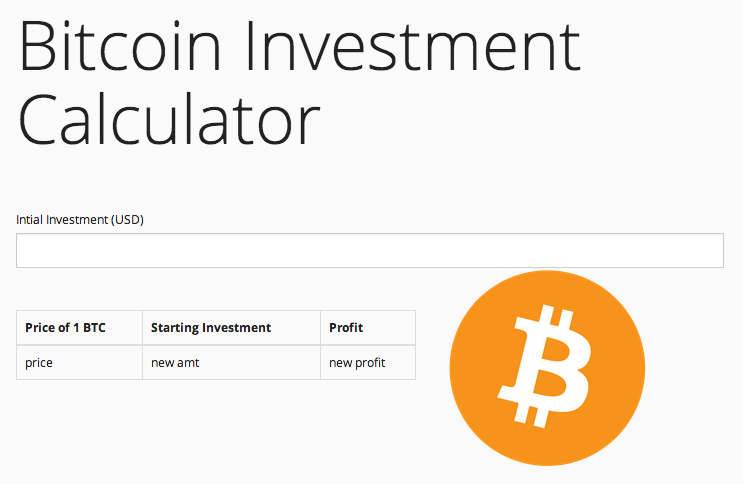
Nothing too exciting happening; just another input box and a table, along with more Bootstrap styles. You can grab the Bitcoin image here.
Next, update our module and controller.
<!-- angular module -->
<script type="text/javascript">
  var bitcoinCalculator = angular.module('bitcoinCalculator', []);
    bitcoinCalculator.controller('bitcoinController', function($scope, $http){
      // calling the api, grabbing the value for USD, appending it to the dom
      $http.get("https://bitpay.com/api/rates")
      .success(function(data){
        $scope.rates = data;
        for(var i=0;i<data.length;i++){
          if (data[i].code == "USD"){
            $scope.currRate = data[i].rate;
          }
        }
      });
    });
</script>
Without going into too much detail, because I assume you are comfortable with JavaScript, we are grabbing data from the BitPay API, then grabbing the current value of a Bitcoin in USD. We assign this value to the variable currRate.
Let's add this to the DOM:
<p>Current Price (USD): ${{currRate}}</p>Now, do some basic calculations in the module:
<!-- angular module -->
<script type="text/javascript">
  var bitcoinCalculator = angular.module('bitcoinCalculator', []);
    bitcoinCalculator.controller('bitcoinController', function($scope, $http){
      // calling the api, grabbing the value for USD, appending it to the dom
      $http.get("https://bitpay.com/api/rates")
      .success(function(data){
        $scope.rates = data;
        for(var i=0;i<data.length;i++){
          if (data[i].code == "USD"){
            $scope.currRate = data[i].rate;
          }
        }
        $scope.initialAmt  = 5000;
        $scope.newAmt     = function(price){return price/$scope.currRate * $scope.initialAmt;}
        $scope.profit     = function(price){return price/$scope.currRate * $scope.initialAmt - $scope.initialAmt;}
      });
    });
</script>
I'll let you evaluate those calculations for now. We'll break one further down. Notice how we have to pass a price into the function.
Next, go ahead and append them to the DOM, making sure to pass in a price:
<tbody>
  <tr>
    <td>1000</td>
    <td>{{ newAmt(1000) }}</td>
    <td>{{ profit(1000) }}</td>
  </tr>
</tbody>
Check this out in the browser. Depending upon the current price of 1 Bitcoin, you should see:
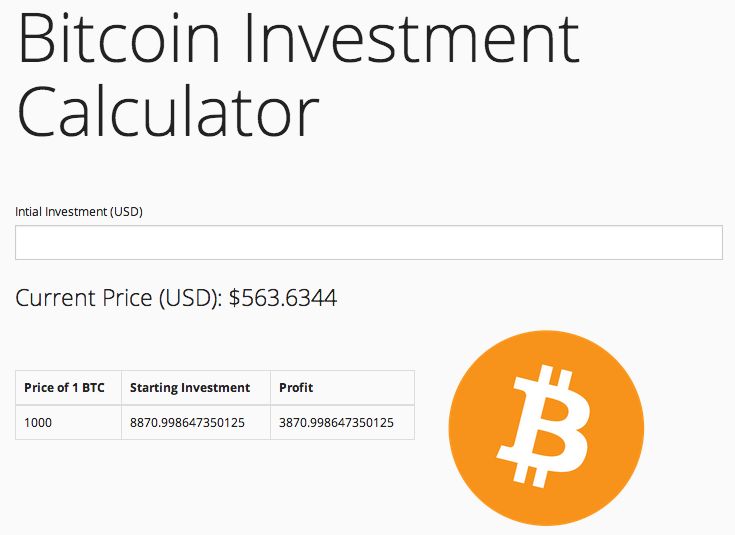
For clarity, if we look at the first calculation, newAmt, let's plug in the values: $scope.newAmt = function(1000){return 1000/563.64 * 5000;}. Make sense?
Add more values into the table:
<tbody>
  <tr>
    <td>$1,000</td>
    <td>{{ newAmt(1000) }}</td>
    <td>{{ profit(1000) }}</td>
  </tr>
  <tr>
    <td>$5,000</td>
    <td>{{ newAmt(5000) }}</td>
    <td>{{ profit(5000) }}</td>
  </tr>
  <tr>
    <td>$10,000</td>
    <td>{{ newAmt(10000) }}</td>
    <td>{{ profit(10000) }}</td>
  </tr>
  <tr>
    <td>$25,000</td>
    <td>{{ newAmt(25000) }}</td>
    <td>{{ profit(25000) }}</td>
  </tr>
  <tr>
    <td>$50,000</td>
    <td>{{ newAmt(50000) }}</td>
    <td>{{ profit(50000) }}</td>
  </tr>
</tbody>
Check to make sure that worked before moving on.
Angular Filters are used to update the value of an expression, but we are going to use them to simply alter the returned output.
<p>Current Price (USD): {{currRate | currency }}</p>

...

<tr>
  <td>$1,000</td>
  <td>{{ newAmt(1000) | currency }}</td>
  <td>{{ profit(1000) | currency }}</td>
</tr>
<tr>
  <td>$5,000</td>
  <td>{{ newAmt(5000) | currency }}</td>
  <td>{{ profit(5000) | currency }}</td>
</tr>
<tr>
  <td>$10,000</td>
  <td>{{ newAmt(10000) | currency }}</td>
  <td>{{ profit(10000) | currency }}</td>
</tr>
<tr>
  <td>$25,000</td>
  <td>{{ newAmt(25000) | currency }}</td>
  <td>{{ profit(25000) | currency }}</td>
</tr>
<tr>
  <td>$50,000</td>
  <td>{{ newAmt(50000) | currency }}</td>
  <td>{{ profit(50000) | currency }}</td>
</tr>
As you probably guessed, the currency filter formats a number as currency. When used, you can either define a currency, | currency:"USD$", or let Angular decide which to use based on your geolocation, | currency.
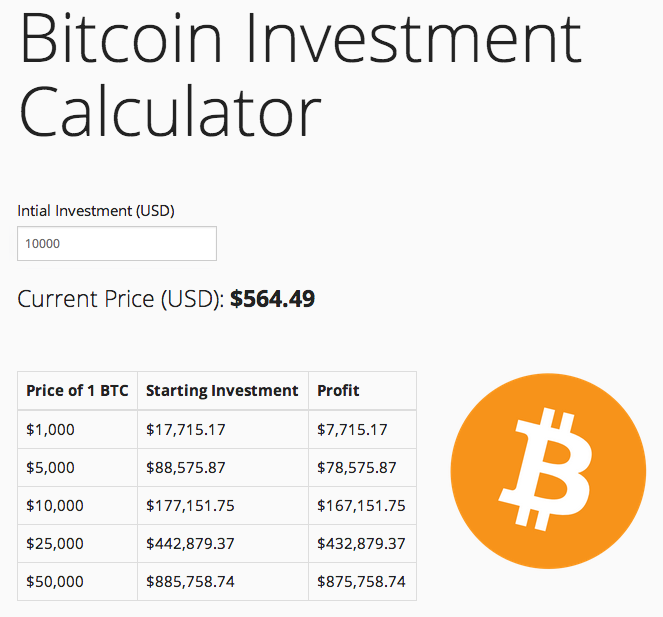
<input type="number" ng-model="initialAmt" class="form-control" placeholder="{{initialAmt}}">Remember how models work? Here we are binding a model called InitialAmt to the input form. This is a perfect example of two-way binding:
- If we update the model, we update the view with
placeholder="{{initialAmt}}". - We can also update the view (by entering a new value in the input box), so that it updates the model, making our app dynamic.
It's circular: edit the model, and it updates the view; edit the view and it updates the model!
Test it out!
Finally, update the styles and HTML structure:
<!DOCTYPE html>
<!-- define our angular app and set the controller -->
<html ng-app="bitcoinCalculator" ng-controller="bitcoinController">
  <head>
    <title>Bitcoin Investment Calculator</title>
    <meta charset="utf-8">
    <meta name="viewport" content="width=device-width, initial-scale=1.0">
    <!-- stylesheets -->
    <link href="http://netdna.bootstrapcdn.com/bootswatch/3.1.1/yeti/bootstrap.min.css" rel="stylesheet" media="screen">
    <!-- scripts -->
    <script src="http://code.jquery.com/jquery-1.11.0.min.js"></script>
    <script src="http://netdna.bootstrapcdn.com/bootstrap/3.1.1/js/bootstrap.min.js"></script>
    <script src="http://cdnjs.cloudflare.com/ajax/libs/angular.js/1.2.10/angular.min.js"></script>
    <style>
      .number {font-weight: bold;}
      label, table {font-size: 15px;}
      input {max-width: 200px;}
    </style>
<!-- angular module -->
<script type="text/javascript">
  var bitcoinCalculator = angular.module('bitcoinCalculator', []);
    bitcoinCalculator.controller('bitcoinController', function($scope, $http){
      // calling the api, grabbing the value for USD, appending it to the dom
      $http.get("https://bitpay.com/api/rates")
      .success(function(data){
        $scope.rates = data;
        for(var i=0;i<data.length;i++){
          if (data[i].code == "USD"){
            $scope.currRate = data[i].rate;
          }
        }
        $scope.initialAmt  = 5000;
        $scope.newAmt     = function(price){return price/$scope.currRate * $scope.initialAmt;}
        $scope.profit     = function(price){return price/$scope.currRate * $scope.initialAmt - $scope.initialAmt;}
      });
    });
</script>
  </head>
  <body>
    <div class="jumbotron">
      <div class="row">
        <div class="col-sm-12">
          <h1>Bitcoin Investment Calculator</h1>
          <br><br>
          <form role="form">
            <label for="starting-investment">Initial Investment (USD)</label>
            <input type="number" ng-model="initialAmt" class="form-control" placeholder="{{initialAmt}}">
          </form>
          <br>
          <p>Current Price (USD): <span class="number">{{currRate | currency }}</span></p>
        </div>
      </div>
      <div class="row">
        <div class="col-sm-7">
          <br><br>
          <table class="table table-bordered">
            <thead>
              <tr>
                <th>Price of 1 BTC</th>
                <th>Starting Investment</th>
                <th>Profit</th>
              </tr>
            </thead>
              <tbody>
                <tr>
                  <td>$1,000</td>
                  <td>{{ newAmt(1000) | currency }}</td>
                  <td>{{ profit(1000) | currency }}</td>
                </tr>
                <tr>
                  <td>$5,000</td>
                  <td>{{ newAmt(5000) | currency }}</td>
                  <td>{{ profit(5000) | currency }}</td>
                </tr>
                <tr>
                  <td>$10,000</td>
                  <td>{{ newAmt(10000) | currency }}</td>
                  <td>{{ profit(10000) | currency }}</td>
                </tr>
                <tr>
                  <td>$25,000</td>
                  <td>{{ newAmt(25000) | currency }}</td>
                  <td>{{ profit(25000) | currency }}</td>
                </tr>
                <tr>
                  <td>$50,000</td>
                  <td>{{ newAmt(50000) | currency }}</td>
                  <td>{{ profit(50000) | currency }}</td>
                </tr>
              </tbody>
          </table>
          <span>* IF the price of 1 Bitcoin reaches X, THEN your starting investment becomes X AND your profit becomes X.</span>
        </div>
        <div class="col-sm-5">
          <br><br>
          <img src="img/btc.png" width="200">
        </div>
      </div>
    </div>
  </body>
</html>
Your app should now look like this:
Next, let's look at adding data visualization. Need the code for Part 3? Grab it here.
We'll be utilizing the Angularjs-nvd3-directives to add powerful charts to our app based on D3, a JavaScript charting library. Before that though, let's quickly update the app's styles and move the Angular module to an external JavaScript file.
Add a main.css file and move the styles from the HTML document to the newly created file:
label, table {
  font-size: 15px;
}

input {
  max-width: 200px;
}

.number {
  font-weight: bold;
}

.jumbotron {
  height: 100%;
  margin-bottom: 0;
}
Then reference a link to the stylesheet in index.html, just below the Bootstrap CSS reference:
<link rel="stylesheet" type="text/css" href="main.css">Next, grab the scripts from the HTML document and add them to a new file called main.js:
var bitcoinCalculator = angular.module('bitcoinCalculator', []);
  bitcoinCalculator.controller('bitcoinController', function($scope, $http){
    // calling the api, grabbing the value for USD, appending it to the dom
    $http.get("https://bitpay.com/api/rates")
    .success(function(data){
      $scope.rates = data;
      for(var i=0;i<data.length;i++){
        if (data[i].code == "USD"){
          $scope.currRate = data[i].rate;
        }
      }
      $scope.initialAmt = 5000;
      $scope.newAmt= function(price){
        return price/$scope.currRate * $scope.initialAmt;
      };
      $scope.profit = function(price){
        return price/$scope.currRate * $scope.initialAmt - $scope.initialAmt;
      };
    });
  });
Make sure to add a script tag to index.html as well:
<script type="text/javascript" src="main.js"></script>Then move the script tags to the bottom of the file, just before the closing </body> tag.
Finally, update the HTML like so:
<!DOCTYPE html>
<!-- define our angular app and set the controller -->
<html ng-app="bitcoinCalculator" ng-controller="bitcoinController">
  <head>
    <title>Bitcoin Investment Calculator</title>
    <meta charset="utf-8">
    <meta name="viewport" content="width=device-width, initial-scale=1.0">
    <!-- stylesheets -->
    <link href="https://maxcdn.bootstrapcdn.com/bootswatch/3.3.5/yeti/bootstrap.min.css" rel="stylesheet" media="screen">
    <link rel="stylesheet" type="text/css" href="main.css">
  </head>
  <body>

    <div class="jumbotron">

      <div class="row">
        <div class="col-sm-6 col-sm-offset-3">
          <h1>Bitcoin Investment<br>Calculator</h1>
          <br><br>
        </div>
      </div>

      <div class="row">
        <div class="col-sm-6 col-sm-offset-3">
          <div class="col-sm-6">
            <form role="form">
              <label for="starting-investment">Initial Investment (USD)</label>
              <input type="number" ng-model="initialAmt" class="form-control" placeholder="{{initialAmt}}">
            </form>
            <br>
            <p>Current Price (USD): <span class="number">{{currRate | currency }}</span></p>
          </div>
          <div class="col-sm-6">
            <img src="img/btc.png" width="100">
          </div>
        </div>
      </div>

      <div class="row">
        <div class="col-sm-6 col-sm-offset-3">
          <br><br>
          <table class="table table-bordered">
            <thead>
              <tr>
                <th>Price of 1 BTC</th>
                <th>Starting Investment</th>
                <th>Profit</th>
              </tr>
            </thead>
              <tbody>
                <tr>
                  <td>$1,000</td>
                  <td>{{ newAmt(1000) | currency }}</td>
                  <td>{{ profit(1000) | currency }}</td>
                </tr>
                <tr>
                  <td>$5,000</td>
                  <td>{{ newAmt(5000) | currency }}</td>
                  <td>{{ profit(5000) | currency }}</td>
                </tr>
                <tr>
                  <td>$10,000</td>
                  <td>{{ newAmt(10000) | currency }}</td>
                  <td>{{ profit(10000) | currency }}</td>
                </tr>
                <tr>
                  <td>$25,000</td>
                  <td>{{ newAmt(25000) | currency }}</td>
                  <td>{{ profit(25000) | currency }}</td>
                </tr>
                <tr>
                  <td>$50,000</td>
                  <td>{{ newAmt(50000) | currency }}</td>
                  <td>{{ profit(50000) | currency }}</td>
                </tr>
              </tbody>
          </table>
          <span>* IF the price of 1 Bitcoin reaches X, THEN your starting investment becomes X AND your profit becomes X.</span>
        </div>
      </div>

    </div>
    <!-- scripts -->
    <script src="https://code.jquery.com/jquery-2.1.4.min.js"></script>
    <script src="https://maxcdn.bootstrapcdn.com/bootstrap/3.3.5/js/bootstrap.min.js"></script>
    <script src="https://ajax.googleapis.com/ajax/libs/angularjs/1.4.5/angular.min.js"></script>
    <script type="text/javascript" src="main.js"></script>
  </body>
</html>Let's chart the historical Bitcoin rate, which we can download as a CSV from CoinDesk. We need to convert this into JSON, but first let's get Angularjs-nvd3-directives installed.
Add the following dependencies to your scripts in index.html, just below Angular:
<script src="https://cdnjs.cloudflare.com/ajax/libs/d3/3.5.6/d3.min.js"></script>
<script src="https://cdnjs.cloudflare.com/ajax/libs/nvd3/1.8.1/nv.d3.min.js"></script>
<script src="https://cdnjs.cloudflare.com/ajax/libs/angularjs-nvd3-directives/0.0.7/angularjs-nvd3-directives.min.js"></script>
Then add the following CSS reference:
<link rel="stylesheet" href="https://cdnjs.cloudflare.com/ajax/libs/nvd3/1.8.1/nv.d3.css">Now we can get a basic chart up!
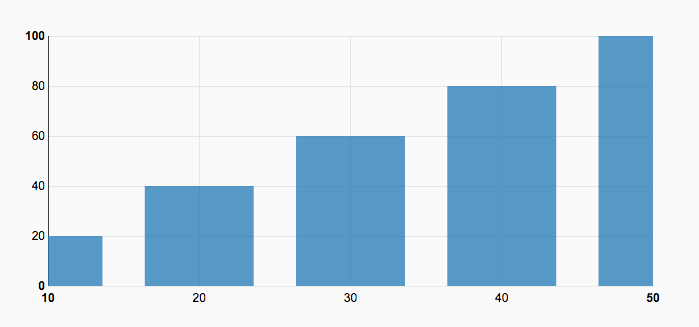
Add the following code just before the </div> that closes out the jumbotron:
<div class="row">
  <div class="col-sm-6 col-sm-offset-3">
    <nvd3-historical-bar-chart height="350" data="exampleData" showXAxis="true" showYAxis="true" showLegend="true">
    </nvd3-historical-bar-chart>
  </div>
</div>
Then add the exampleData to the controller in main.js:
$scope.exampleData = [{
  "key": "Quantity",
  "bar": true,
  "values": [
    [10, 20],
    [20, 40],
    [30, 60],
    [40, 80],
    [50, 100]
  ]
}];
Be sure to inject the directive into the module:
var bitcoinCalculator = angular.module('bitcoinCalculator', ['nvd3ChartDirectives']);And you should see a chart at the bottom that looks like this:
Grab the updated code from the repo.
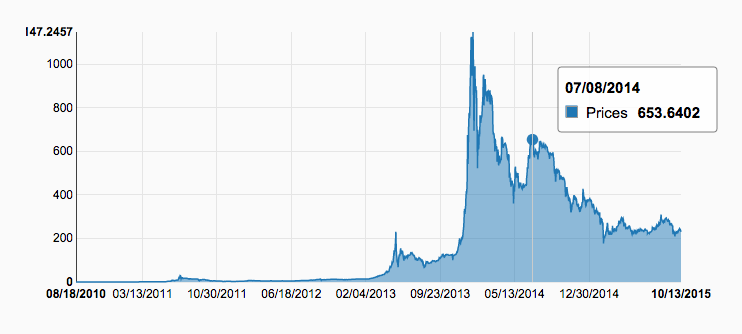
For the historical price chart, let's utilize a line chart.
First, remove the chart we created in Part 3 from both index.html and main.js. Then update the controller, like so:
$scope.xAxisTickFormatFunction = function(){
  return function(date){
    return d3.time.format('%x')(new Date(date));
  };
};

$scope.bitcoinHistoricalData = [{
  "key": "Prices",
  "values": values
}];
Again, we're assigning data to a $scope. The actual values come from a variable called values; and the data for this can be found here. For now, go ahead and add this variable to the main.js file, just below the controller.
The xAxisTickFormatFunction function formats the date correctly in the DOM.
Next, add the directive to the DOM:
<div class="row">
  <div class="col-sm-6 col-sm-offset-3">
    <nvd3-line-chart
      data="bitcoinHistoricalData"
      xAxisTickFormat="xAxisTickFormatFunction()"
      height="350"
      showXAxis="true"
      showYAxis="true"
      isArea="true"
      useInteractiveGuideLine="true">
    <svg></svg>
  </div>
</div>
Test this out! You should see an interactive chart. Try selecting parts of the line to see tool tips.
For more configuration options, check out the official documentation.
Well, we accomplished a lot but, in actuality, really just scratched the surface of Angular. The framework has so much more to offer. Go back and review what you've learned thus far, and see if you can learn more by extending this application on your own. Start by looking at the BitPay API to see what else you can implement. You could also break apart your controllers into two separate controllers and even abstract some of the logic out to factories and services. Want more? Check out creating your own, reusable custom directives!
Grab the final code from the repo. Cheers!
Add some new functionality? Create a PR and we'll add a link to this post.