| Currency | Address | QR Code |
|---|---|---|
| 1Nr5UcqckCoHiuoYD9D37yTCWaeRp6Lgi8 |  |
|
| 0x251B1582941aa514B42906a41882f2F2B99cCB48 |  |
The file VideoCamera.py contains the code used for this project. The code will wait for someone to press the button before recording a 10 second video. While the video is recording, a LED will light up to let the user know that it is recording. Once finished, the video will be saved with the current date and time as the filename. To play the video, go to the directory it is stored in from Terminal and type omxplayer "name of video file" and press enter
Components
- Raspberry Pi 3
- 330 ohm resistor
- A Push Button
- Breadboard
- Jumper Wires
- LED
- Raspberry Pi Camera V2

The file PIRCamera.py contains the code used for this project. The code will initialize a PIR(Passive Infared) sensor that is used to detect motion. If the PIR sensor detects motion, the Raspberry Pi camera will take a photo in the area of motion and email the photo to a specified email address.
The following lines in the file should be modified with the information you will use.
fromAddr = 'Address Sending Email'
toAddr = 'Address Receiving Email'
username = 'Email Address'
password = 'Password'
Components
- Raspberry Pi 3
- Jumper Wires
- PIR Sensor
- Raspberry Pi Camera V2
- Breadboard (Optional)

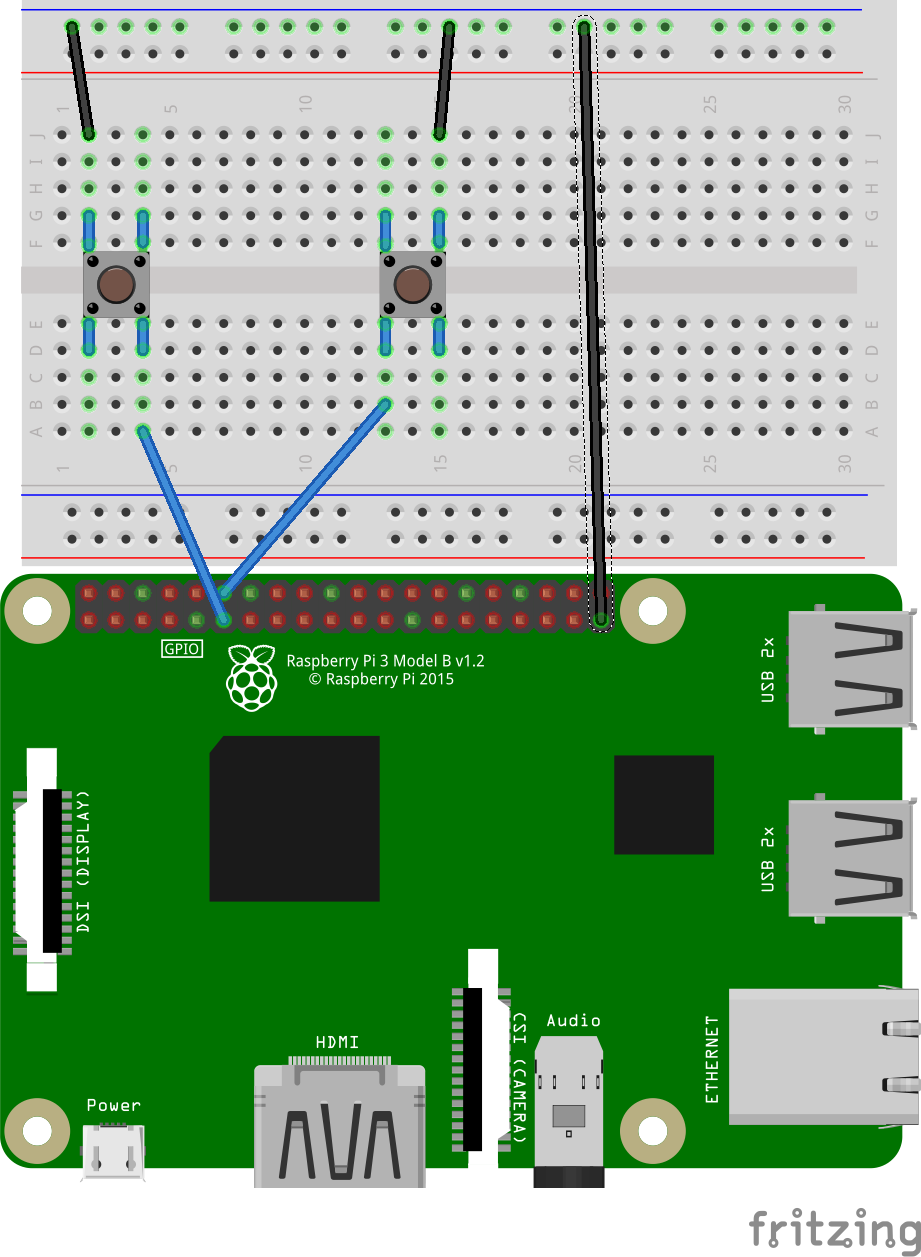
The file Two Button Camera.py contains the code used for this project. The code will set GPIO pins 17 and 18 as Input with the internal pull up resistors. One button (connected to GPIO 17) records a 10 second video. The other button (connected to GPIO 18) captures a picture. Both video and picture files are saved to the Documents folder with the current date and time as the filename. Since the code contains an infinite loop, it should be run from the Terminal. To end the program press Ctrl + c.
Components
- Raspberry Pi 3
- Jumper Wires
- 2 Press Buttons
- Raspberry Pi Camera V2
- Breadboard
The file RecordBySeconds.sh contains a script that will record video based on the number of seconds that you pass into it in Terminal. Raspivid is already installed on Raspian by default, but you will need to install MP4Box in order to convert the .h264 video to MP4. The script will take the number of seconds you wish to record. It will then convert the file to MP4 and save the MP4 with the filename as the current date and time. It will then remove the original .h264 file.
To install MP4Box you will open Terminal and run:
sudo apt install -y gpac
Once installed, you can run the script on your Raspberry Pi. To run the script, place it in a location where you want to store the videos and type into Terminal
./RecordBySeconds.sh 'Number of Seconds' Ex. ./RecordBySeconds.sh 10 will record 10 seconds of video.
If the script will not run using that command, you will need to change the permissions on the file so that you can execute it. To change permissions type sudo chmod +x RecordBySeconds.sh into Terminal and then run the above commands.