The easiest way to design your resume with Tailwind and automatically export it to PDF via Github Actions.
🖐 Don't forget to 🌟 star this repo if you like it! 💥 More templates are coming!
Codespaces is a Github feature that « Spin up fully configured dev environments in the cloud that start in seconds »
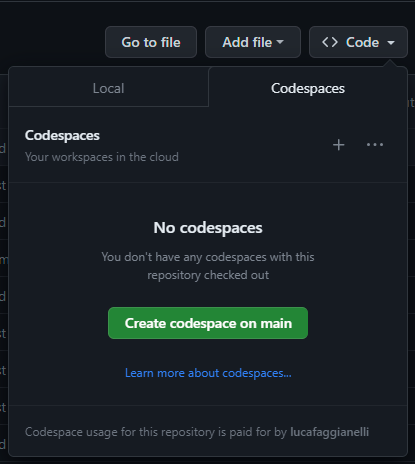
Click on the Code button in this repo, then on the Codespaces tab and Create a Codespace on main.
A new tab will open in your browser, just wait few seconds and a code editor and a preview pane with the resume will appear.
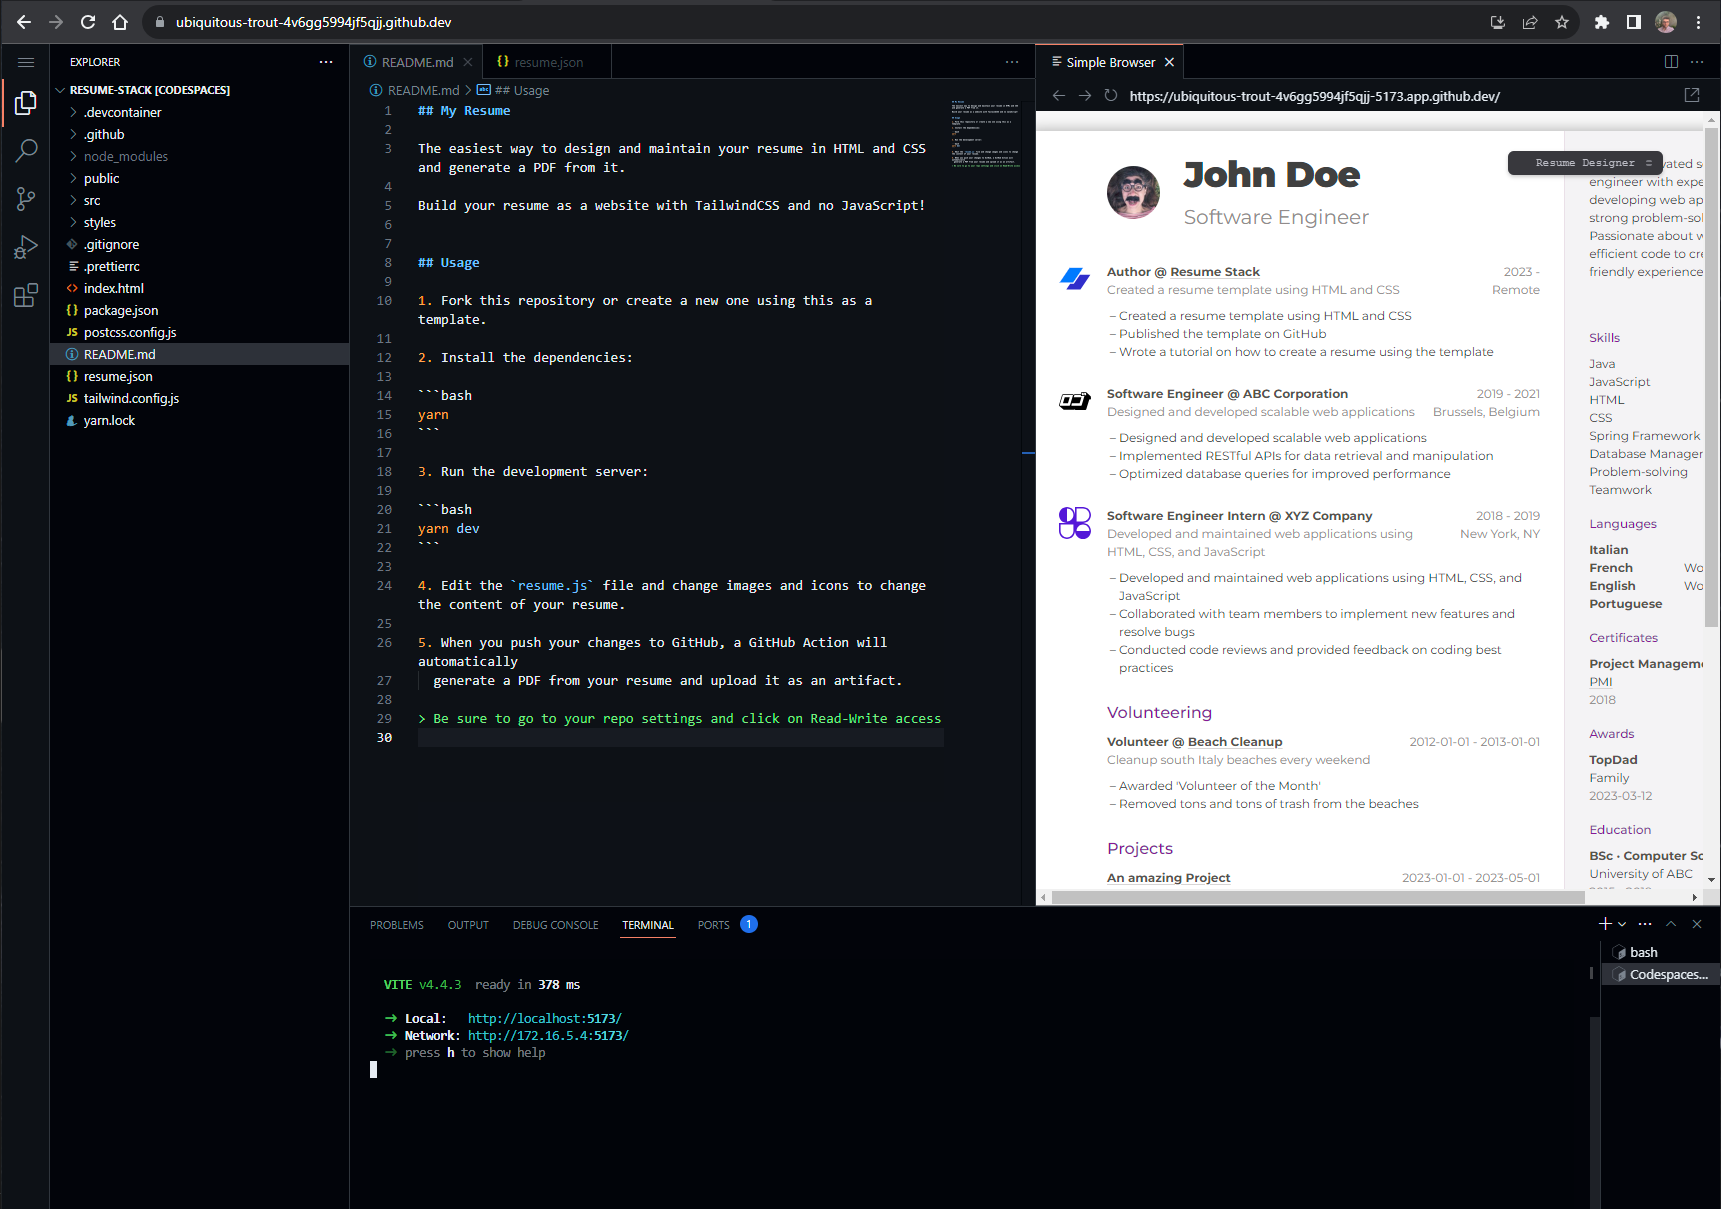
If you edit the resume.json file, changes will be reflected in the UI.
To develop your resume locally on your PC you need:
-
Create a new repository using
resume-stackas template, clicking on the green Use this template button and then Create a new repository. Or, as a shortcut, click on this link.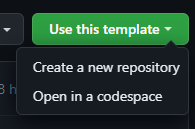
-
Clone the newly created repository via git or equivalent tools (i.e. Github Desktop, etc.) or obtain the source code downloading it as a zip file.
-
Install the project dependencies:
# Run this in a terminal
yarn- Run the development server and click on the link printed in the terminal, typically http://localhost:5173:
# Run this in a terminal
yarn dev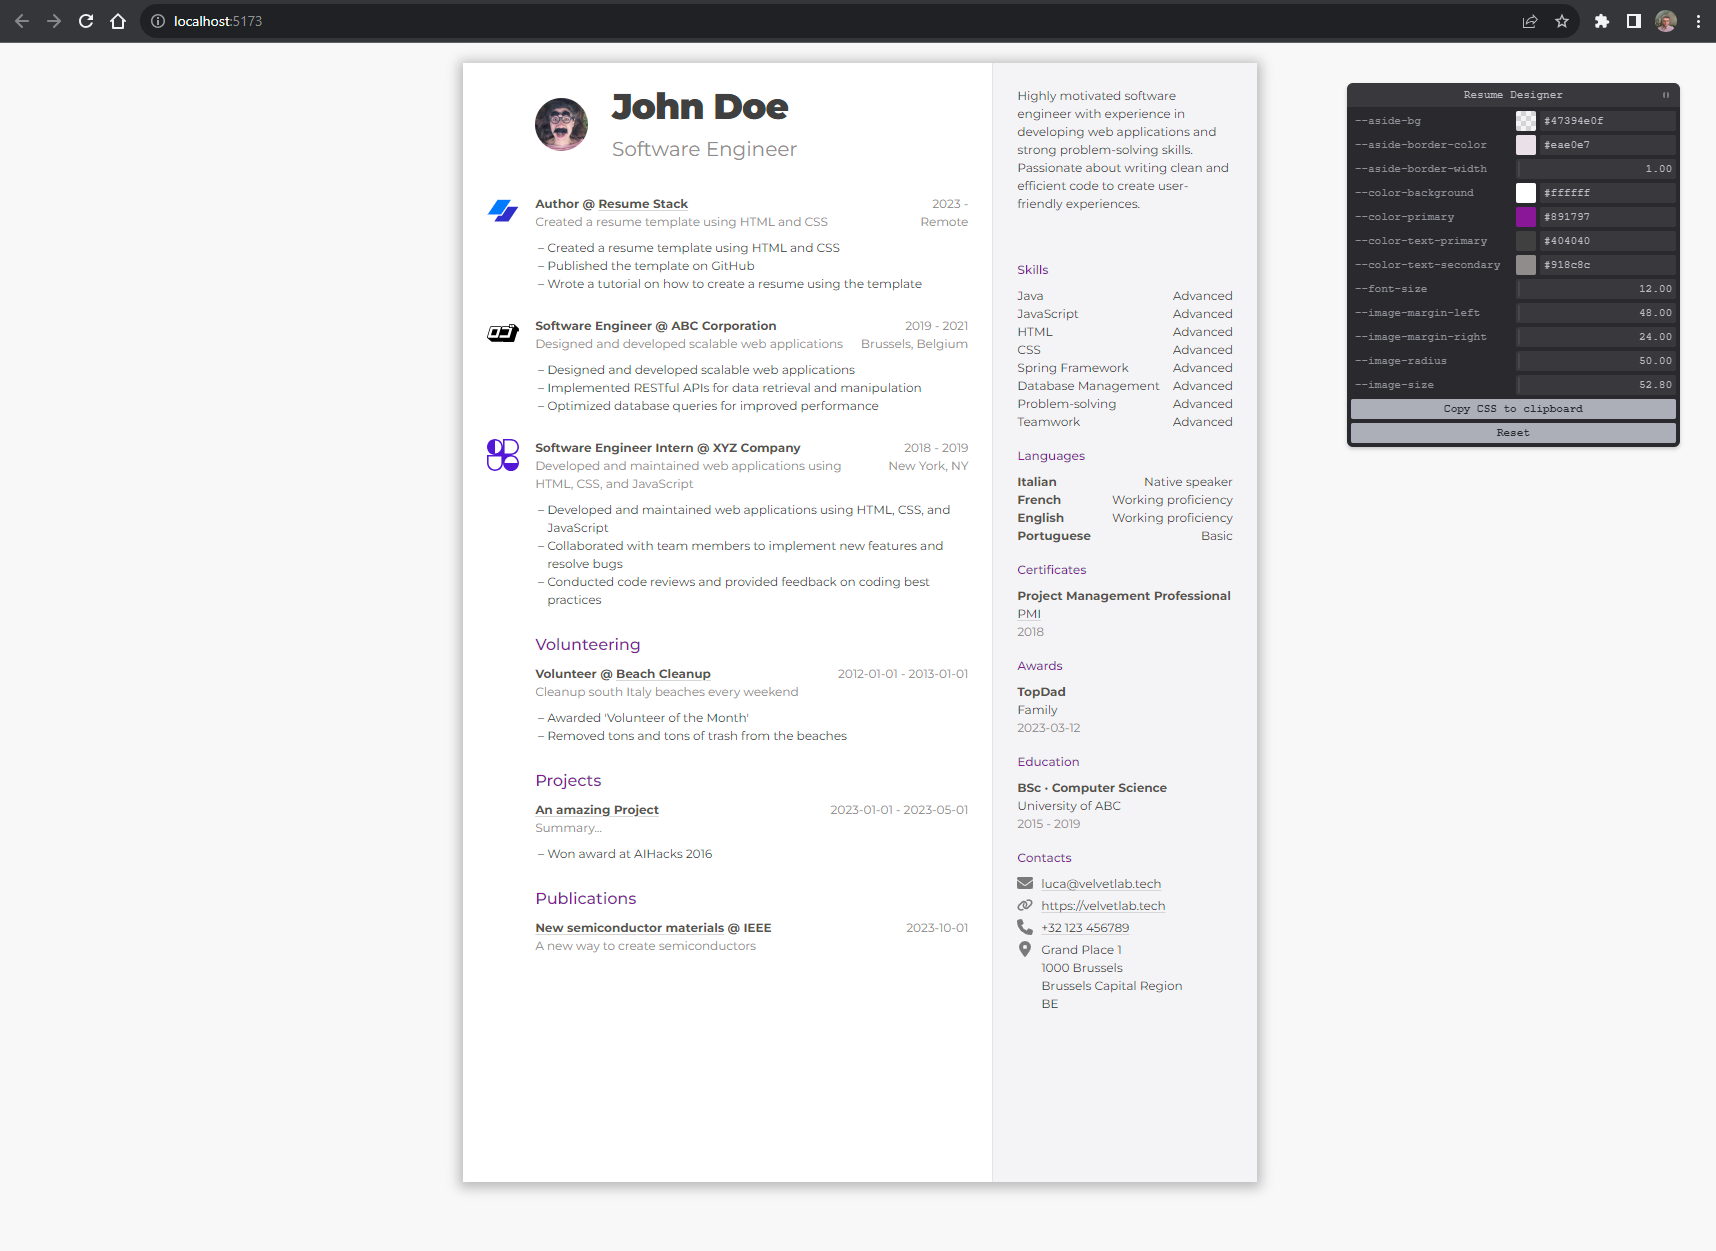
Once you have the project running, either on Codespaces, on your computer or anywhere else, you can finally edit and export your resume.
Edit the resume.json file modifying the existing properties.
If you don't need something, that is, a specific property or
even an entire section, you can delete it.
To use images you need to specify their URLs in the resume.json
file.
If you have the image yourself, you can add it anywhere into the
public/ folder like the public/logo/company-1.svg image, in that
case the URL of the image is a relative one and is equivalent
to the file path starting after public, so in the previous example
it would be /logo/company-1.svg.
Image URLs can also be absolute, that is starting with http:// or https://
like the one used as an example profile picture
https://i.pravatar.cc/150?u=myprofile, in this case the image
is hosted by someone else on a server.
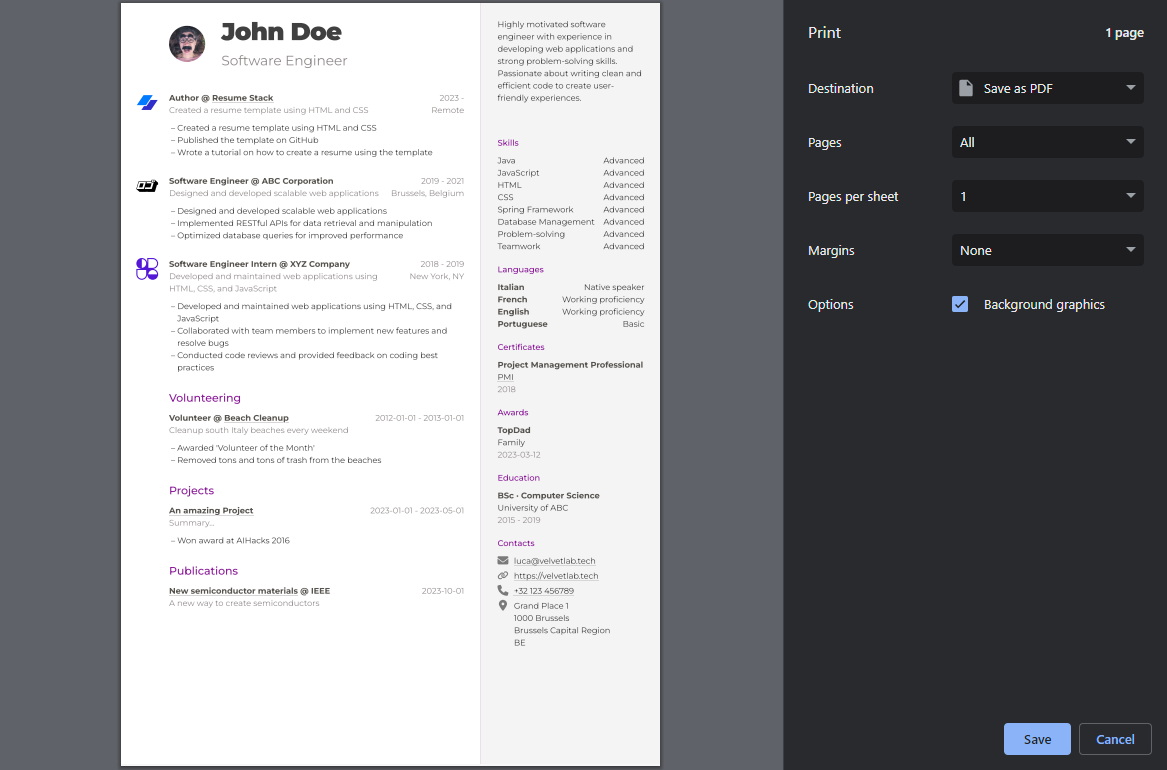
To export your resume in PDF just print the browser page
from the browser menu or
hitting Ctrl + P (win, linux) or ⌘ + P (mac) on the keyboard.
Then be sure to select these options:
- PDF format
- No margins
- Include background graphics
(the specific naming may vary depending on OS and browser)
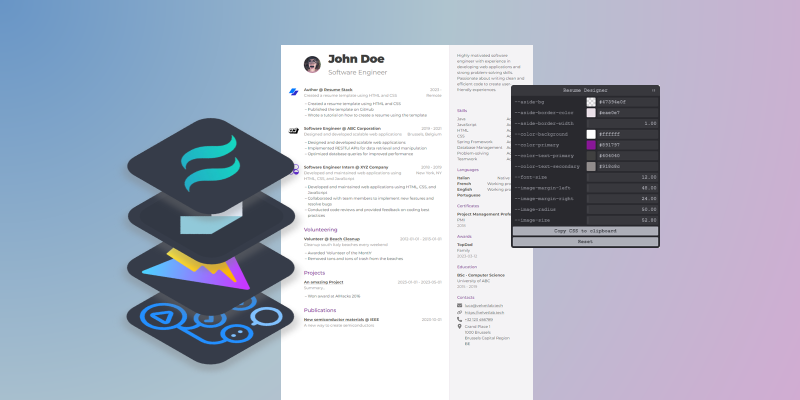
The resume design can be customized in 2 ways: via a user-friendly UI (the Resume Designer) or changing the HTML and CSS source code of the resume itself.
The Resume Designer provides some styling options in a user friendly UI, the available options depend on the specific resume template in use:
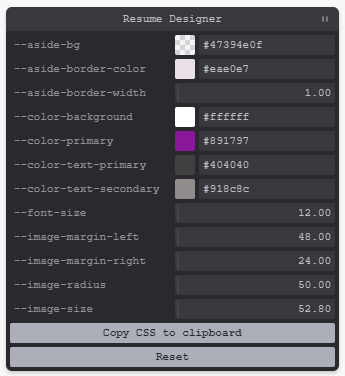
Once you're happy with the new settings, click on the
Copy CSS to clipboard button and paste the content
into the styles/main.scss file, you'll find some helpful
comment to understand where to paste the code.
If you want to customize your resume more than what is possible via the Resume Designer, then you need to modify the source code itself.
A resume template is defined by an HTML file that contains the structure of the resume and by 1 or more (S)CSS files that contain the styling, specifically these files are:
index.htmlstyles/main.scss
ℹ SCSS is an extension over the CSS language as it provides more advanced features than plain CSS, you're not obliged to use it though!
For more information on how to customize these files, check the section Creating a template
If you want to step-up your game and love automations, then you'll love this!
Resume Stack includes a Github Actions Workflow that automatically generates a PDF from your resume everytime you push a code change to your Github repo.
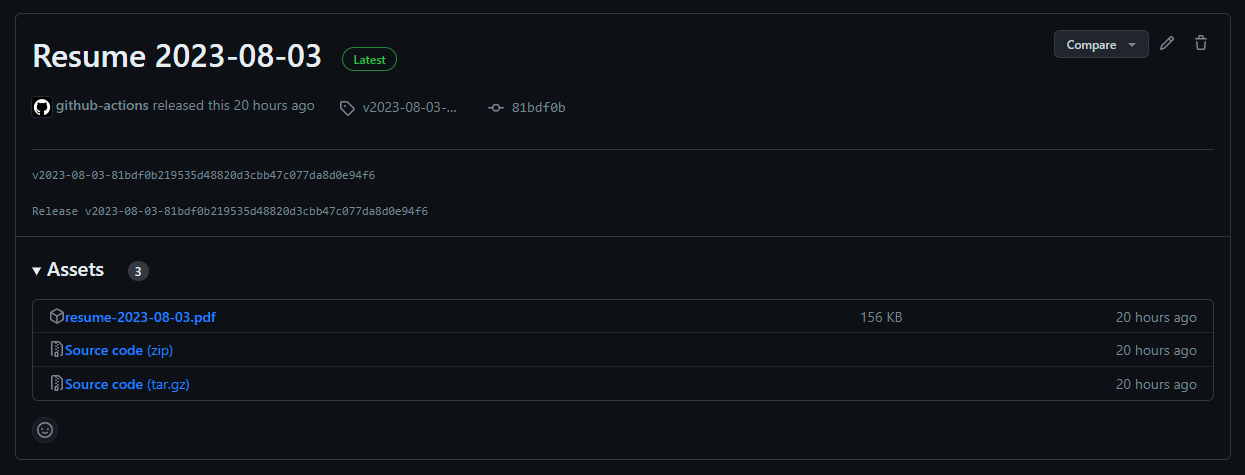
The exported PDFs are available as Releases in your repo, the release name is the date of the release, so you can easily find different versions of your resume:
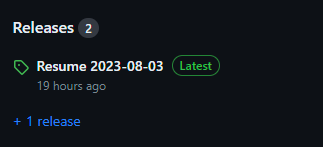
To download the PDF, just click on the release and find the PDF among the assets:
When you create a Github repo from a template or you fork another repo, Github disables the workflows for security reasons, so the Workflow included with Resume Stack must be manually enabled:
- click on the Actions tab in your repository
- click the Enable workflow button
- click on the Settings tab
- in the left-side menu, click on Actions > General
- in Workflow permissions choose Read and write permissions
- save the settings
👉 Read and write permissions are required by the workflow for creating the releases
In the software jargon a stack is a set of components used to execute an application or more generally a system.
And that's what Resume Stack is, an ensemble of HTML, CSS, TailwindCSS and invisible 👻 JavaScript to give you a resume!
Invisible 🙄 … well behind the scene there's some JavaScript into the stack: AlpineJS to connect the content of your resume to the HTML page and Vite to reflect changes in the code to the browser in realtime. Though you won't see and you won't write any JavaScript!
A more detailed guide on how to create templates is coming
The index.html file support is an AlpineJS template,
check their website for the syntax.
The resume content is available as the resume variable in the AlpineJS template.
You can use TailwindCSS classes and custom CSS/SCSS
styles, just modify the styles/main.scss or create a new file and import it
in main.scss.
The Resume Designer is setup automatically, it picks the CSS variables defined
in main.scss, you can add other variables to the rule :root[designer-params] {}.