Home
Simple steps to run the trackers on Windows 7, 8.1 using Visual Studio 2013, cmake and OpenCV 3.0. It is assumed that a 64bit Windows is installed. If you use a 32bit Windows, update to 64bit.
- Download "OpenCV for Windows" from www.opencv.org.
- Execute the file. It is a self-extracting archive. Throughout this tutorial,
H:\opencv-3-0-0-releaseis used as install path for opencv: - Setup the required OpenCV Paths:
- Right-click on Computer -> Properties -> Advanced System Settings -> Environment Variables
- On the
System variablesscroll list, selectPathand clickEdit. CAUTION: if you screw up your environment variables, you can break your system. Thus, ensure that you do not change anything else!: Prepend:H:\opencv-3-0-0-release\opencv\build\x64\vc12\bin;and clickok. - Click on
newand create a system variable with nameOPENCV_DIRand valueH:\opencv-3-0-0-release\opencv\build\x64\vc12


- Download cmake Windows Installer from http://www.cmake.org/
- Execute it. Install it anywhere on your system. Use default options for the rest of the dialogues.
- If you don't have Visual Studio: Microsoft provides a free version for individual developers (Read the license terms and ensure that these apply to you!): https://www.visualstudio.com/en-us/products/visual-studio-community-vs.aspx
- Install it anywhere on your system.
-
Download https://github.com/klahaag/cf_tracking/archive/master.zip to
H:\ -
Extract the zip files to
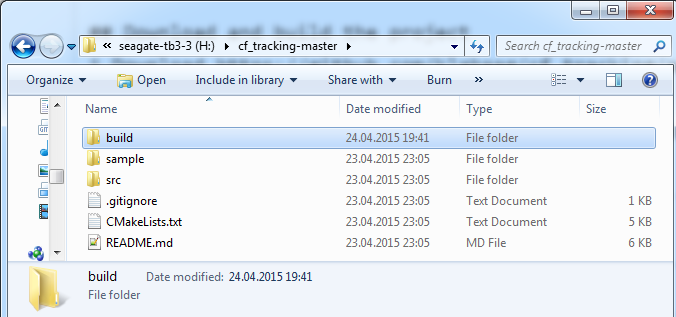
H:\cf_tracking-master -
Create the directory
H:\cf_tracking-master\buildThe directoryH:\cf_tracking-mastershould look like this: -
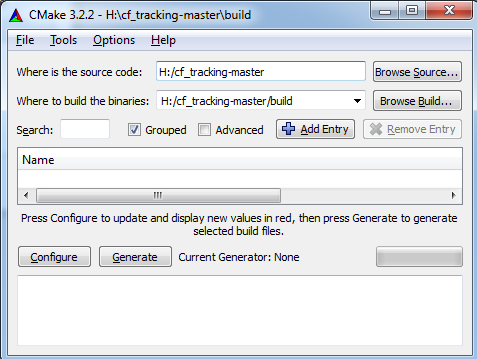
Run
cmake-gui. -
Enter the src and build folder in the cmake gui like it is shown in the screenshot:
-
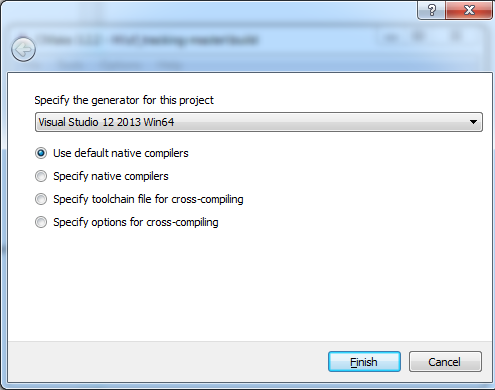
Click on configure. A popup will open: Select
Visual Studio 12 2013 Win64from the generator dropdown. -
Click on Finish.
-
You will see a couple of messages in the cmake-gui.
-
Click above the messages on
Generate. This will create aCfTracking.slnVisual Studio solution file in the folderH:\cf_tracking-master\build\. -
Open
CfTracking.slnin Visual Studio. -
Select
Releaseand build. -
The trackers are now located in
H:\cf_tracking-master\build\Release. -
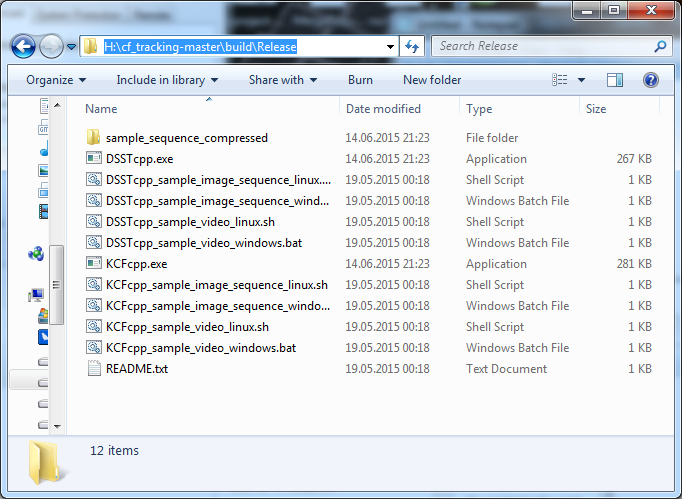
Copy the contents of
H:\cf_tracking-master\sampletoH:\cf_tracking-master\build\Release. -
`H:\cf_tracking-master\build\Release``should now look like this:
-
Execute
KCFcpp_sample_image_sequence_windows.batto testKCFcpporDSSTcpp_sample_image_sequence_windows.batto testDSSTcpp. -
Execute
KCFcpporDSSTcppwithout arguments to use your webcam.
Guide based on http://docs.opencv.org/doc/tutorials/introduction/linux_install/linux_install.html:
sudo apt-get install build-essential cmake git libgtk2.0-dev pkg-config libavcodec-dev libavformat-dev libswscale-devgit clone https://github.com/Itseez/opencv.gitcd opencvgit checkout tags/3.0.0mkdir build && cd buildcmake -D CMAKE_BUILD_TYPE=RELEASE -D CMAKE_INSTALL_PREFIX=/usr/local ../make -j 8sudo make install
cd ~ && mkdir trackers && cd trackersgit clone https://github.com/klahaag/cf_tracking.gitmkdir -p cf_tracking/build && cd cf_tracking/buildcmake -DCMAKE_BUILD_TYPE=Release -DWITH_OPENMP=ON ../make -j 8cp -r ../sample/* ./