![]() Pure Ruby library for reading and writing png and apng (animated png). Current API may change (not stable). Example usage below. See also the wiki for additional examples. Most figures also act as a link to a related wiki entry. Also feel free to use the discussion board.
Pure Ruby library for reading and writing png and apng (animated png). Current API may change (not stable). Example usage below. See also the wiki for additional examples. Most figures also act as a link to a related wiki entry. Also feel free to use the discussion board.
This library has full support for reading and writing png and animated png (apng) files. There is also limited support for bmp-files (24-bit color). In the future, gif support may be added. Additionally, there is some support for manipulating image data (e.g. pixel-wise adding/subtracting/multiplying/dividing of images, manipulating specific channels, image filtering, convolutions, mathematical morphology, and image resizing).
There is also support for user-defined ancillary chunks. Further down in this document, an example of embedding audio as metadata in a png-file by defining a new ancillary chunk is shown. In a similar manner, other types of metadata can, if so desired, be added inside user-defined ancillary chunks.
Reads all standard types of png files, namely:
- Grayscale
- Truecolor
- Indexed color
- Grayscale with alpha
- Truecolor with alpha
- Interlaced
for any applicable bit-depth.
Also has full support for the apng format and limited support for bmp.
Supports creating and writing png, apng, and bmp images.
  image = Imgrb::Image.new("img.png")
  image.save("new_img.png")
#image.save("new_img.bmp") resaves as .bmp image = Imgrb::Image.new("img.png", :only_metadata)
image.reportSplitting an rgb-image into its three component channels, creating a new bgr-image and saving it. Also inverting the red channel and saving it as a grayscale png:
  image = Imgrb::Image.new("rgb_image.png")
  image_r = image.get_channel(0)
  image_g = image.get_channel(1)
  image_b = image.get_channel(2)

  image_bgr = Imgrb::Image.new(image_b, image_g, image_r)
  image_bgr.save("bgr_image.png")

  #Negate values. Add 255 to shift into expected range (0..255)
  image_r_inverted = -image_r + 255
image_r_inverted.save("r_image_inv.png")To add text as metadata to an image (png/apng), you may use add_text:
  image = Imgrb::Image.new(100,100,0)
  keyword = "Title"
  text = "Black Square"
  image.add_text(keyword, text)

  keyword = "Comment"
  text = "This is an example of adding text data to a png image."
  image.add_text(keyword, text)

  keyword = "Comment"
  long_text = "[A VERY LONG STRING OF TEXT...]"
  #This stores a compressed version of the text
  image.add_text(keyword, long_text, true)
For a full list of predefined keywords and more details, see the png specification: https://www.w3.org/TR/2003/REC-PNG-20031110/#11textinfo
These predefined keywords should be used where appropriate, but if no predefined keyword fits, you can use any 1-79 byte long character string without
leading or trailing spaces using only printable Latin-1 characters and spaces. The text string should also use the Latin-1 character set.
The add_text method expects Latin-1 (ISO-8859-1) characters. If you need to store UTF-8 encoded text, use add_international_text instead.
See details on the iTXt chunk here: https://www.w3.org/TR/2003/REC-PNG-20031110/#11iTXt
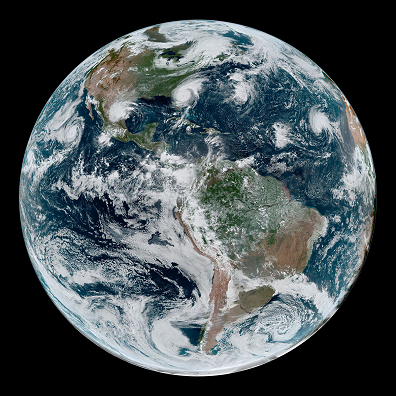
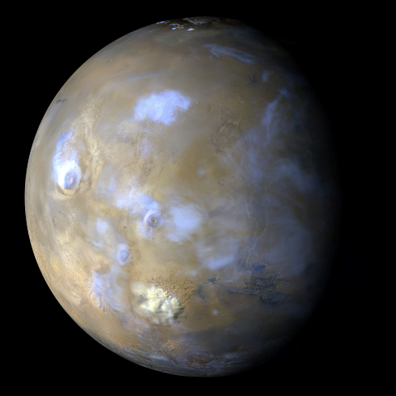
Image credit: NASA
After setting the alpha channel of the mars image to 180, overlaying the transparent foreground on top of the background yields:
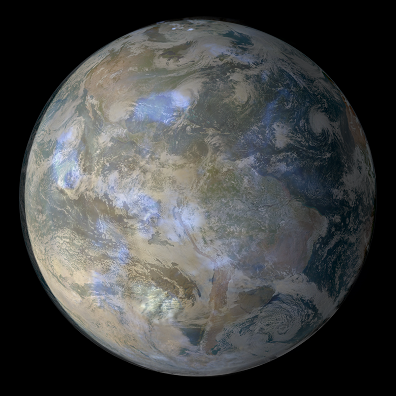
image_bg = Imgrb::Image.new("nasa_earth_small.png")
image_fg = Imgrb::Image.new("nasa_mars_small.png")

alpha = 180 #Out of 255
alpha_channel = Imgrb::Image.new(image_fg.width, image_fg.height, alpha)
image_fg.set_channel(3, alpha_channel)
image_alpha_overlay = image_fg.alpha_over(image_bg)

image_alpha_overlay.save("earth_mars_overlay.png")
Drawing a line on top of an image can be done in the following manner:
image.draw_line(x_start, y_start, x_end, y_end, color, width)
Note that the positions of the end points can be specified using floats and that the coordinates do not need to be inside the bounds of the image (only the visible part of the line will be drawn). The width argument specifies the thickness of the line and can also be a float.
Similarly, a disk can be drawn as follows:
image.draw_disk(x_origin, y_origin, radius, color)Again, the coordinates of the origin as well as the radius of the disk can be floats.
In this example we will generate a simple animated png, save it and read it back.
Assuming an array of images
frames_of_animation = [...]that represent the frames of the animation, one may generate an animated png by a few lines of code:
  animation = frames_of_animation[0]
  frames_of_animation[1..-1].each do
    |frame|
    animation.push_frame(frame)
  end
That is, we pick out the first frame of the animation, then iteratively add the following frames using push_frame. Note that this may result in a rather large file if there are many large component frames. Also note that neither the width nor the height of subsequent frames should exceed those of the first frame. Smaller subsequent frames are allowed (overlaying starting from top left).
To save the apng, simply save as a png
animation.save("animated.png")Reading the apng also works the same as for a normal png:
animation_r = Imgrb::Image.new("animated.png")Stepping forward one frame can be done by calling animate_step:
animation_r.animate_stepIn many cases, the file size of the animation can be kept smaller by making use of the blend and dispose operations, as well as the x and y offsets. The following shows such an example:
For illustration purposes we will iteratively generate a Sierpinski triangle as shown in the figure below:

We first set up a black 400x400 grayscale image with an alpha channel at full opacity
  width = 400
  height = 400

  #Grayscale image of size 400x400 filled with black
  image_0 = Imgrb::Image.new(width, height, [0, 255])
Then we set up some variables that control the number of frames generated and the size of the triangle
  #Iterated Sierpinski triangle generates the sequence
  #used for the animation.
  rng = Random.new(0) #Seeded for reproducibility
  frames = 24*8 #Number of frames of animation
  points_per_frame = 600 #Number of points to generate per frame

  #Vertices of the triangle
  p0 = [width/2, 0]
  p1 = [width-1, height-1]
  p2 = [0, height-1]

  #Starting point
  new_p = [(p0[0]+p1[0]+p2[0])/3, (p0[1]+p1[1]+p2[1])/3]
Finally, we generate each frame, add it to the animation and at the end, save the animated png. Note the use of the blend operation :over used when pushing the frame data.
  #Generating frames
  frames.times do
    #Create the next frame in the sequence
    image_i = Imgrb::Image.new(width, height, [0, 0])
    points_per_frame.times do
      move_towards = p0
      vertex_idx = rng.rand(3)
      if vertex_idx == 1
        move_towards = p1
      elsif vertex_idx == 2
        move_towards = p2
      end

      new_p[0] = new_p[0]/2 + move_towards[0]/2
      new_p[1] = new_p[1]/2 + move_towards[1]/2

      image_i.set_pixel(new_p[0], new_p[1], [255, 10])
    end
    #Add new frame data with 0 offset
    x_offset = 0
    y_offset = 0

    #Each frame should display for 1/24 of a second
    delay_numerator = 1
    delay_denominator = 24

    #In this case we can leave the pixels from the last frame and
    #simply blend in the pixels that have been added using alpha
    #compositing. I.e., we do nothing for the dispose step, and
    #use the :over blend option to overlay the pixel data of the
    #next frame. This way we end up with a much smaller file, since
    #the pixel data of each frame consists of mostly 0s.
    dispose_op = :none
    blend_op = :over

    image_0.push_frame(image_i, x_offset, y_offset,
                      delay_numerator, delay_denominator,
                      dispose_op, blend_op)

  end

  #Add a comment describing the image.
  image_0.add_text("Comment",
                   "Animated png illustrating an iterated approach to constructing the Sierpinski triangle.")

  image_0.save("animated_sierpinski.png")
An animated png may be read in the same manner as a regular png:
animated_image = Imgrb::Image.new("animated_sierpinski.png")This will act as a regular, static image, with values reflecting the first frame of the animated png. However, we can check to see that animated_image is indeed animated:
  if animated_image.animated?
    puts "An animated image!"
  else
    puts "This is not an animation!"
  end
To read values from any given frame, one may call
animated_image.animate_stepthe desired number of times. For example, if frame 10 is of interest
10.times{animated_image.animate_step}will yield the 10th frame, assuming we started from frame 0 (i.e. the initial frame). To get to an earlier frame one may call animate_step until the animation loops around. It is also possible to use jump_to_frame to skip to a given frame number, i.e.
animated_image.jump_to_frame(10)will set the current frame of animated_image to 10.
Png-files consist of a collection of chunks identified by a four-letter (ISO 646) name. Depending on the case of these four letters, different properties are determined. In short:
- The first letter is upper case if it is a critical chunk (i.e. necessary for displaying the contents of the file) and lower case if ancillary (i.e. not strictly necessary for decoding the image data, meaning unknown ancillary chunks can be ignored when decoding).
- The second letter specifies whether the chunk is public (i.e. defined in the png specification/registered by the Registration Authority), if upper case, or private (i.e. unregistered, e.g. as a result of some extension used by an application), if lower case.
- The third letter must be upper case (lower case is reserved for possible future extension)!
- The fourth letter relates to copying unrecognized ancillary chunks after modifying critical chunks. If upper case, the chunk is not safe to copy (i.e. such unrecognized chunks should not be copied if modifications have been made to critical chunks). If lower case, the chunk is safe to copy (i.e. the chunk does not depend on critical chunks, so can be copied even after modifying such chunks).
In the following example, we add an ancillary, private, safe-to-copy chunk: "auDi". This chunk contains audio along with some properties. Namely, the length of the audio clip in milliseconds (4 bytes), the initial delay before the sound should be played (by some hypothetical application) in ms (4 bytes), the delay before the sound is repeated (4 bytes), and the number of times to loop the clip (4 bytes). The format of the audio data itself is not specified.
  #Define a chunk class
  class ChunkauDi
    include Imgrb::Chunks::AbstractChunk, #Normally included
            Imgrb::Chunks::Ancillary,     #Included for ancillary chunks
            Imgrb::Chunks::Private,       #Included for private chunks
            Imgrb::Chunks::Safe           #Included for safe-to-copy chunks


    #Used to create new chunks
    def self.assemble(sound_data, sound_length = 0,
                      initial_delay = 0, repeat_delay = 0, num_plays = 0)

      data_packed = [sound_length,
                     initial_delay,
                     repeat_delay,
                     num_plays].pack("NNNN") + sound_data

      new(data_packed)
    end

    #Used to decode the contents of the chunk (data is a string of bytes
    #containing the packed data passed to new)
    def get_data
      #Sound duration in milliseconds (0 to leave undefined)
      duration = data[0..3].unpack("N")[0]

      #Number of milliseconds to wait before first starting the audio
      initial_delay = data[4..7].unpack("N")[0]

      #Number of milliseconds to wait before repeating
      repeat_delay = data[8..11].unpack("N")[0]

      #Number of times to repeat (0 indicates infinite loop)
      num_plays = data[12..15].unpack("N")[0]

      sound_data = data[16..-1]

      return {:duration => duration,
              :initial_delay => initial_delay,
              :repeat_delay => repeat_delay,
              :num_plays => num_plays,
              :sound_data => sound_data}
    end

    def self.type
      "auDi"
    end
  end

  #Register the new chunk so that any auDi-chunks found in png-files read from
  #here on will be decoded
  Imgrb::Chunks::register_chunk(ChunkauDi)


  #Create apng alternating between black and white at 1 sec intervals.
  img_black_anim = Imgrb::Image.new(100,100,0)
  img_white = Imgrb::Image.new(100,100,255)

  x_off = 0
  y_off = 0
  delay_frac = [1, 1]
  img_black_anim.push_frame(img_white, x_off, y_off,
                      delay_frac[0], delay_frac[1])


  #Load some sound data of length 500 ms that we want to add to the png
  tick_sound = IO.binread("tick_500ms.ogg")

  #Build a new auDi chunk
  sound_length = 500
  initial_delay = 1000 #No tick sound until first change
  repeat_delay = 1000 - sound_length #Wait until a second has passed
  chunk = ChunkauDi.assemble(tick_sound, sound_length,
                             initial_delay, repeat_delay)
  img_black_anim.add_chunk(chunk)


  #Save the apng that switches between black and white every second, which
  #contains an auDi chunk describing a short repeating sound that loops every
  #second.
  img_black_anim.save("black_white_ticking.png")
Reading any png with an auDi-chunk will now add a ChunkauDi instance to the ancillary_chunks (as long as ChunkauDi is registered):
  img_with_auDi_chunk = Imgrb::Image.new("black_white_ticking.png")
  #Since there may be multiple chunks of the same name in a png, chunks of the
  #same type are stored in an array in a hash associated with the key given by
  #the chunk type (as a symbol).
auDi_data_hash = img_with_auDi_chunk.ancillary_chunks[:auDi][0].get_dataRecently (July 2017), the eXIf chunk was added in an extension to the PNG 1.2 specification ("Extensions to the PNG 1.2 Specification, Version 1.5.0"). This chunk, essentially, contains an Exif profile. Reading of this chunk is supported by Imgrb. To get a hash whose keys are the Exif-tags present in the chunk and which contains the associated values you may use
  img = Imgrb::Image.new("png_with_eXIf_chunk.png")
  exif_hash = img.ancillary_chunks[:eXIf][0].get_data
Writing new eXIf chunks is not currently supported, but is a planned feature.
If a png with an unknown, ancillary chunk is read, an entry will still be added
to ancillary_chunks. However, the chunk object that is created is of a
more generic class, e.g. ChunkSafe for an unknown ancillary chunk that is safe
to copy. The raw data contained in such chunks can still be read by calling
get_data on the generic chunk instance and it is still possible to query
chunk properties such as safe?, critical?, and public?.
The wiki shows an example of computing the image gradient and related information:
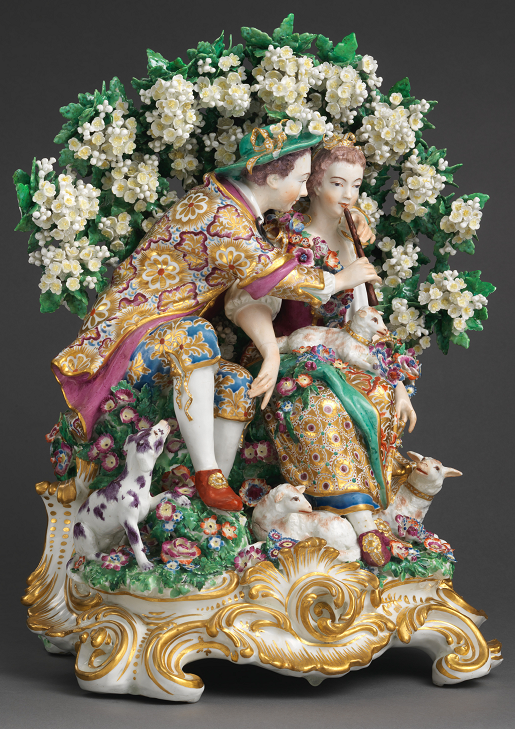
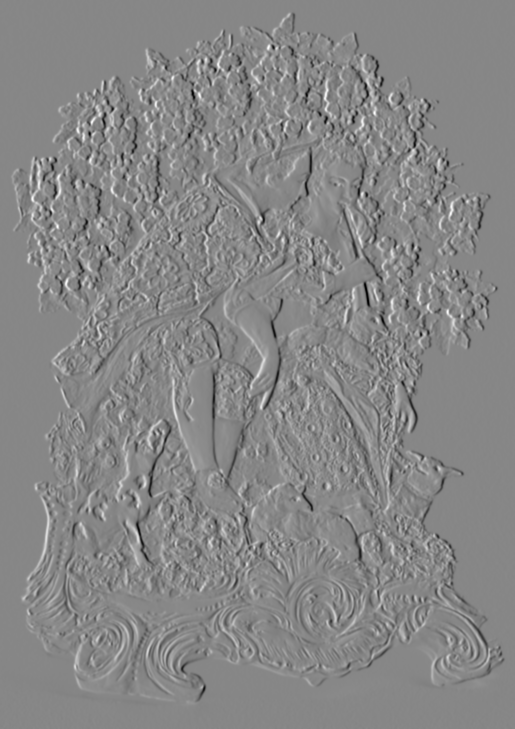
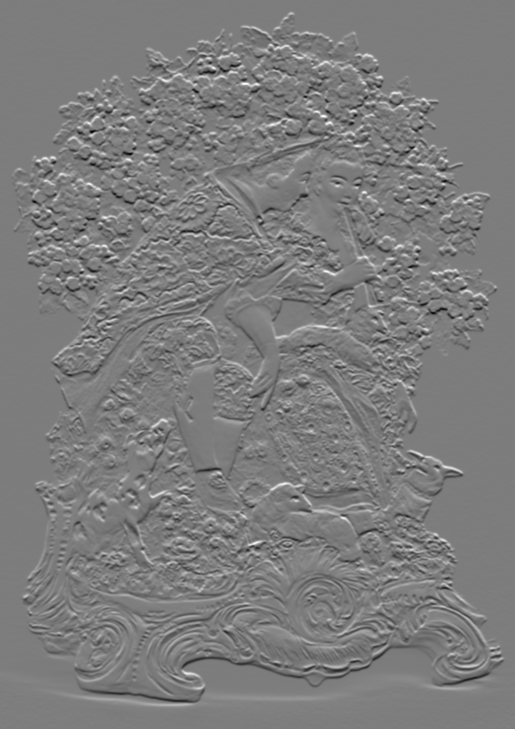
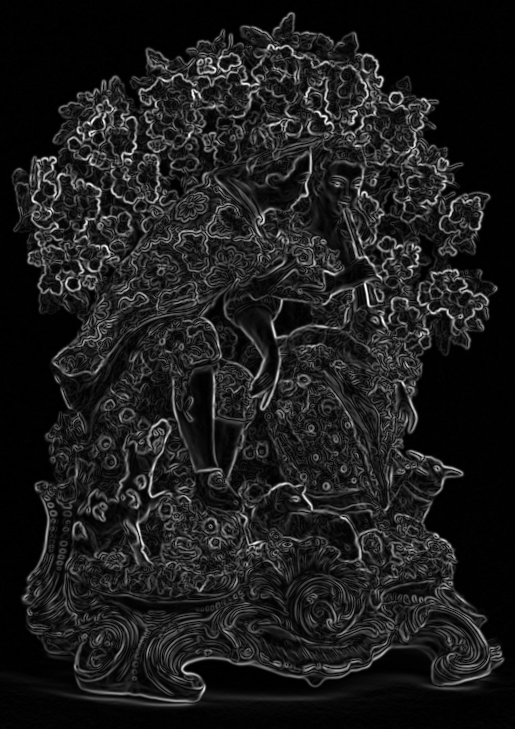
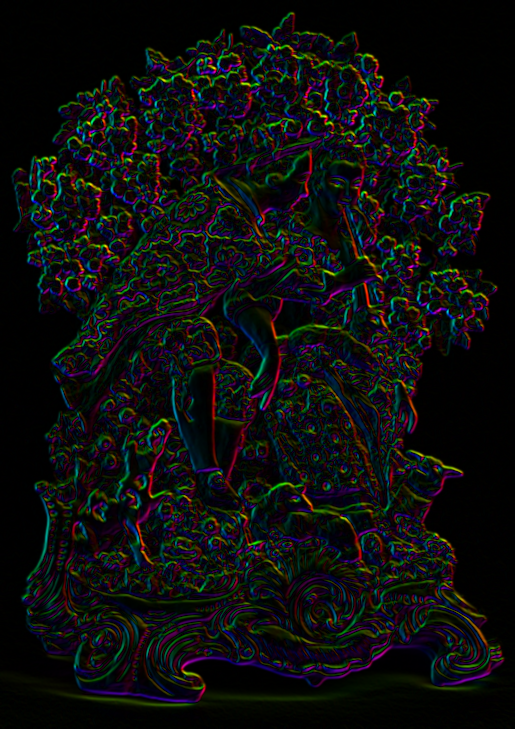
The original image depicts "The Music Lesson" by Chelsea Porcelain Manufactory from the collection of the Metropolitan Museum of Art and is licensed under CC0 1.0.
- Ruby >= 1.9.3 (may work with earlier versions)
- Clean up tests, write more and add to repo
- Work on refactoring
- Add support for gif