Last updated: 2023-09-12
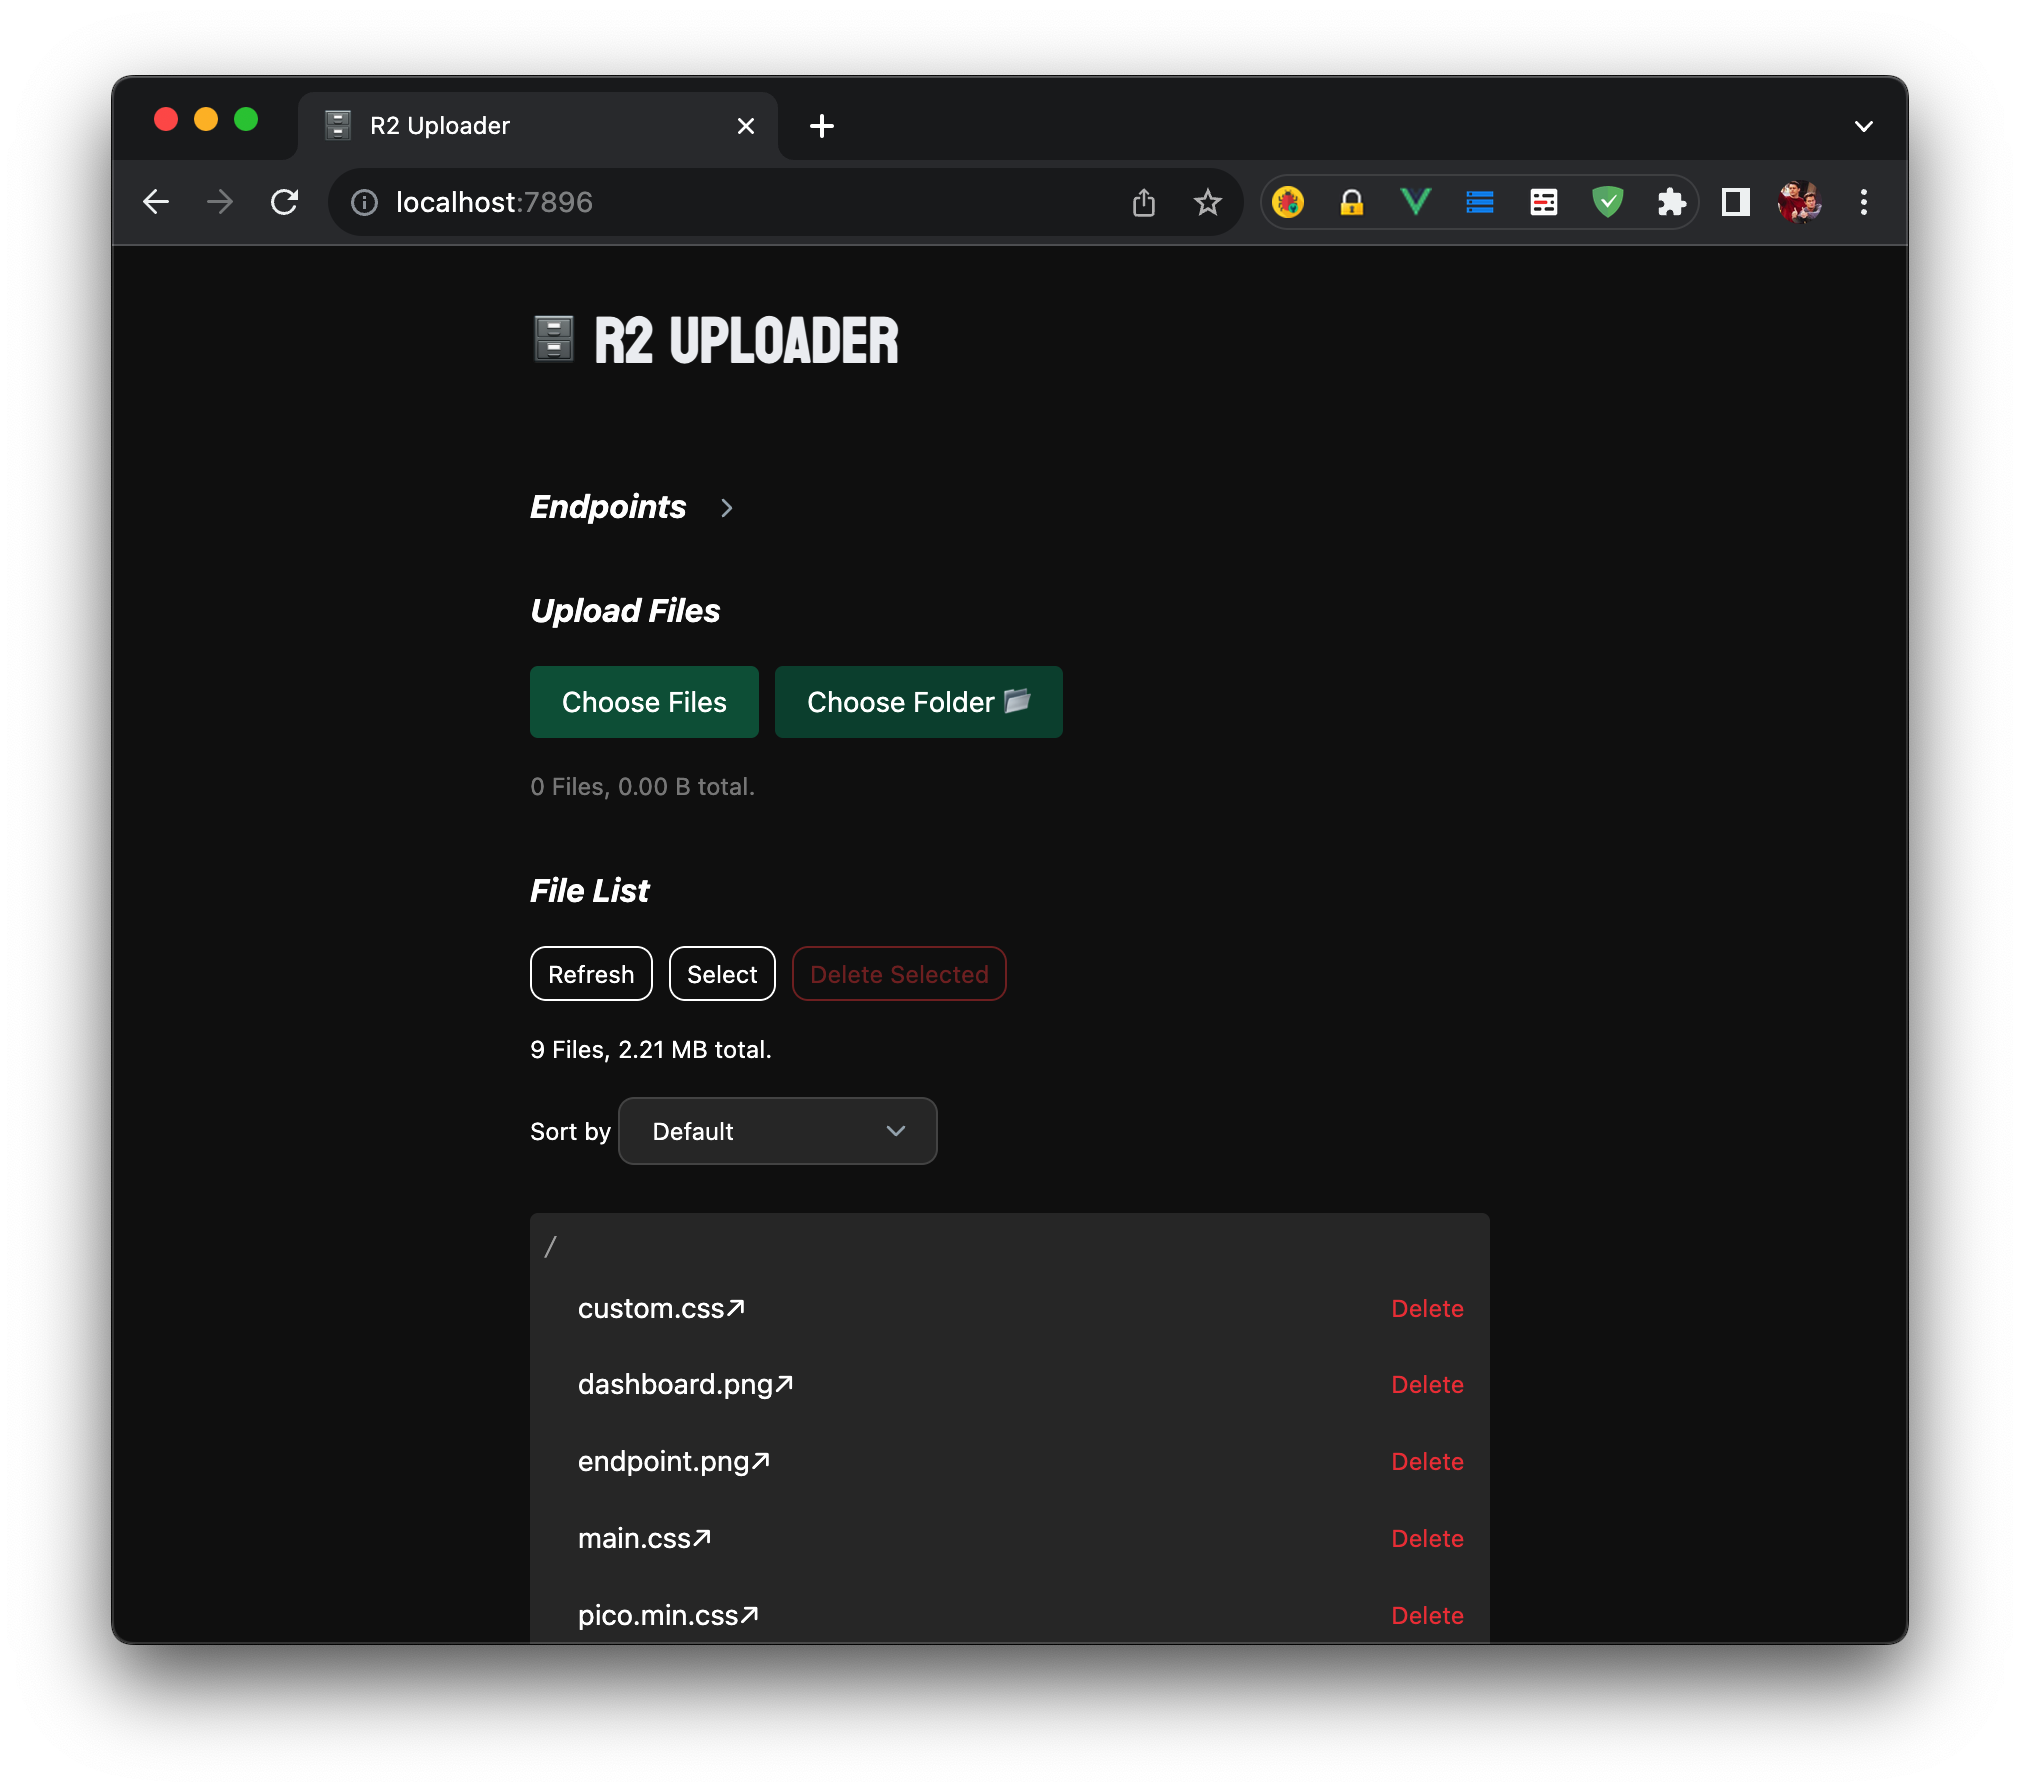
In May 2022, Cloudflare launched R2 into open beta, a new S3-like object storing platform with generous free tier. It is a great alternative to AWS S3, especially for small projects and personal use. However, Cloudflare dashboard could only upload files smaller than 300MB, which is not ideal for large files. This tool is a simple web interface for R2, which allows you to manage your files in R2 buckets.
- Cloudflare account
- Cloudflare R2 Subscription (has a free quota)
- Cloudflare Workers Subscription (free plan would be enough)
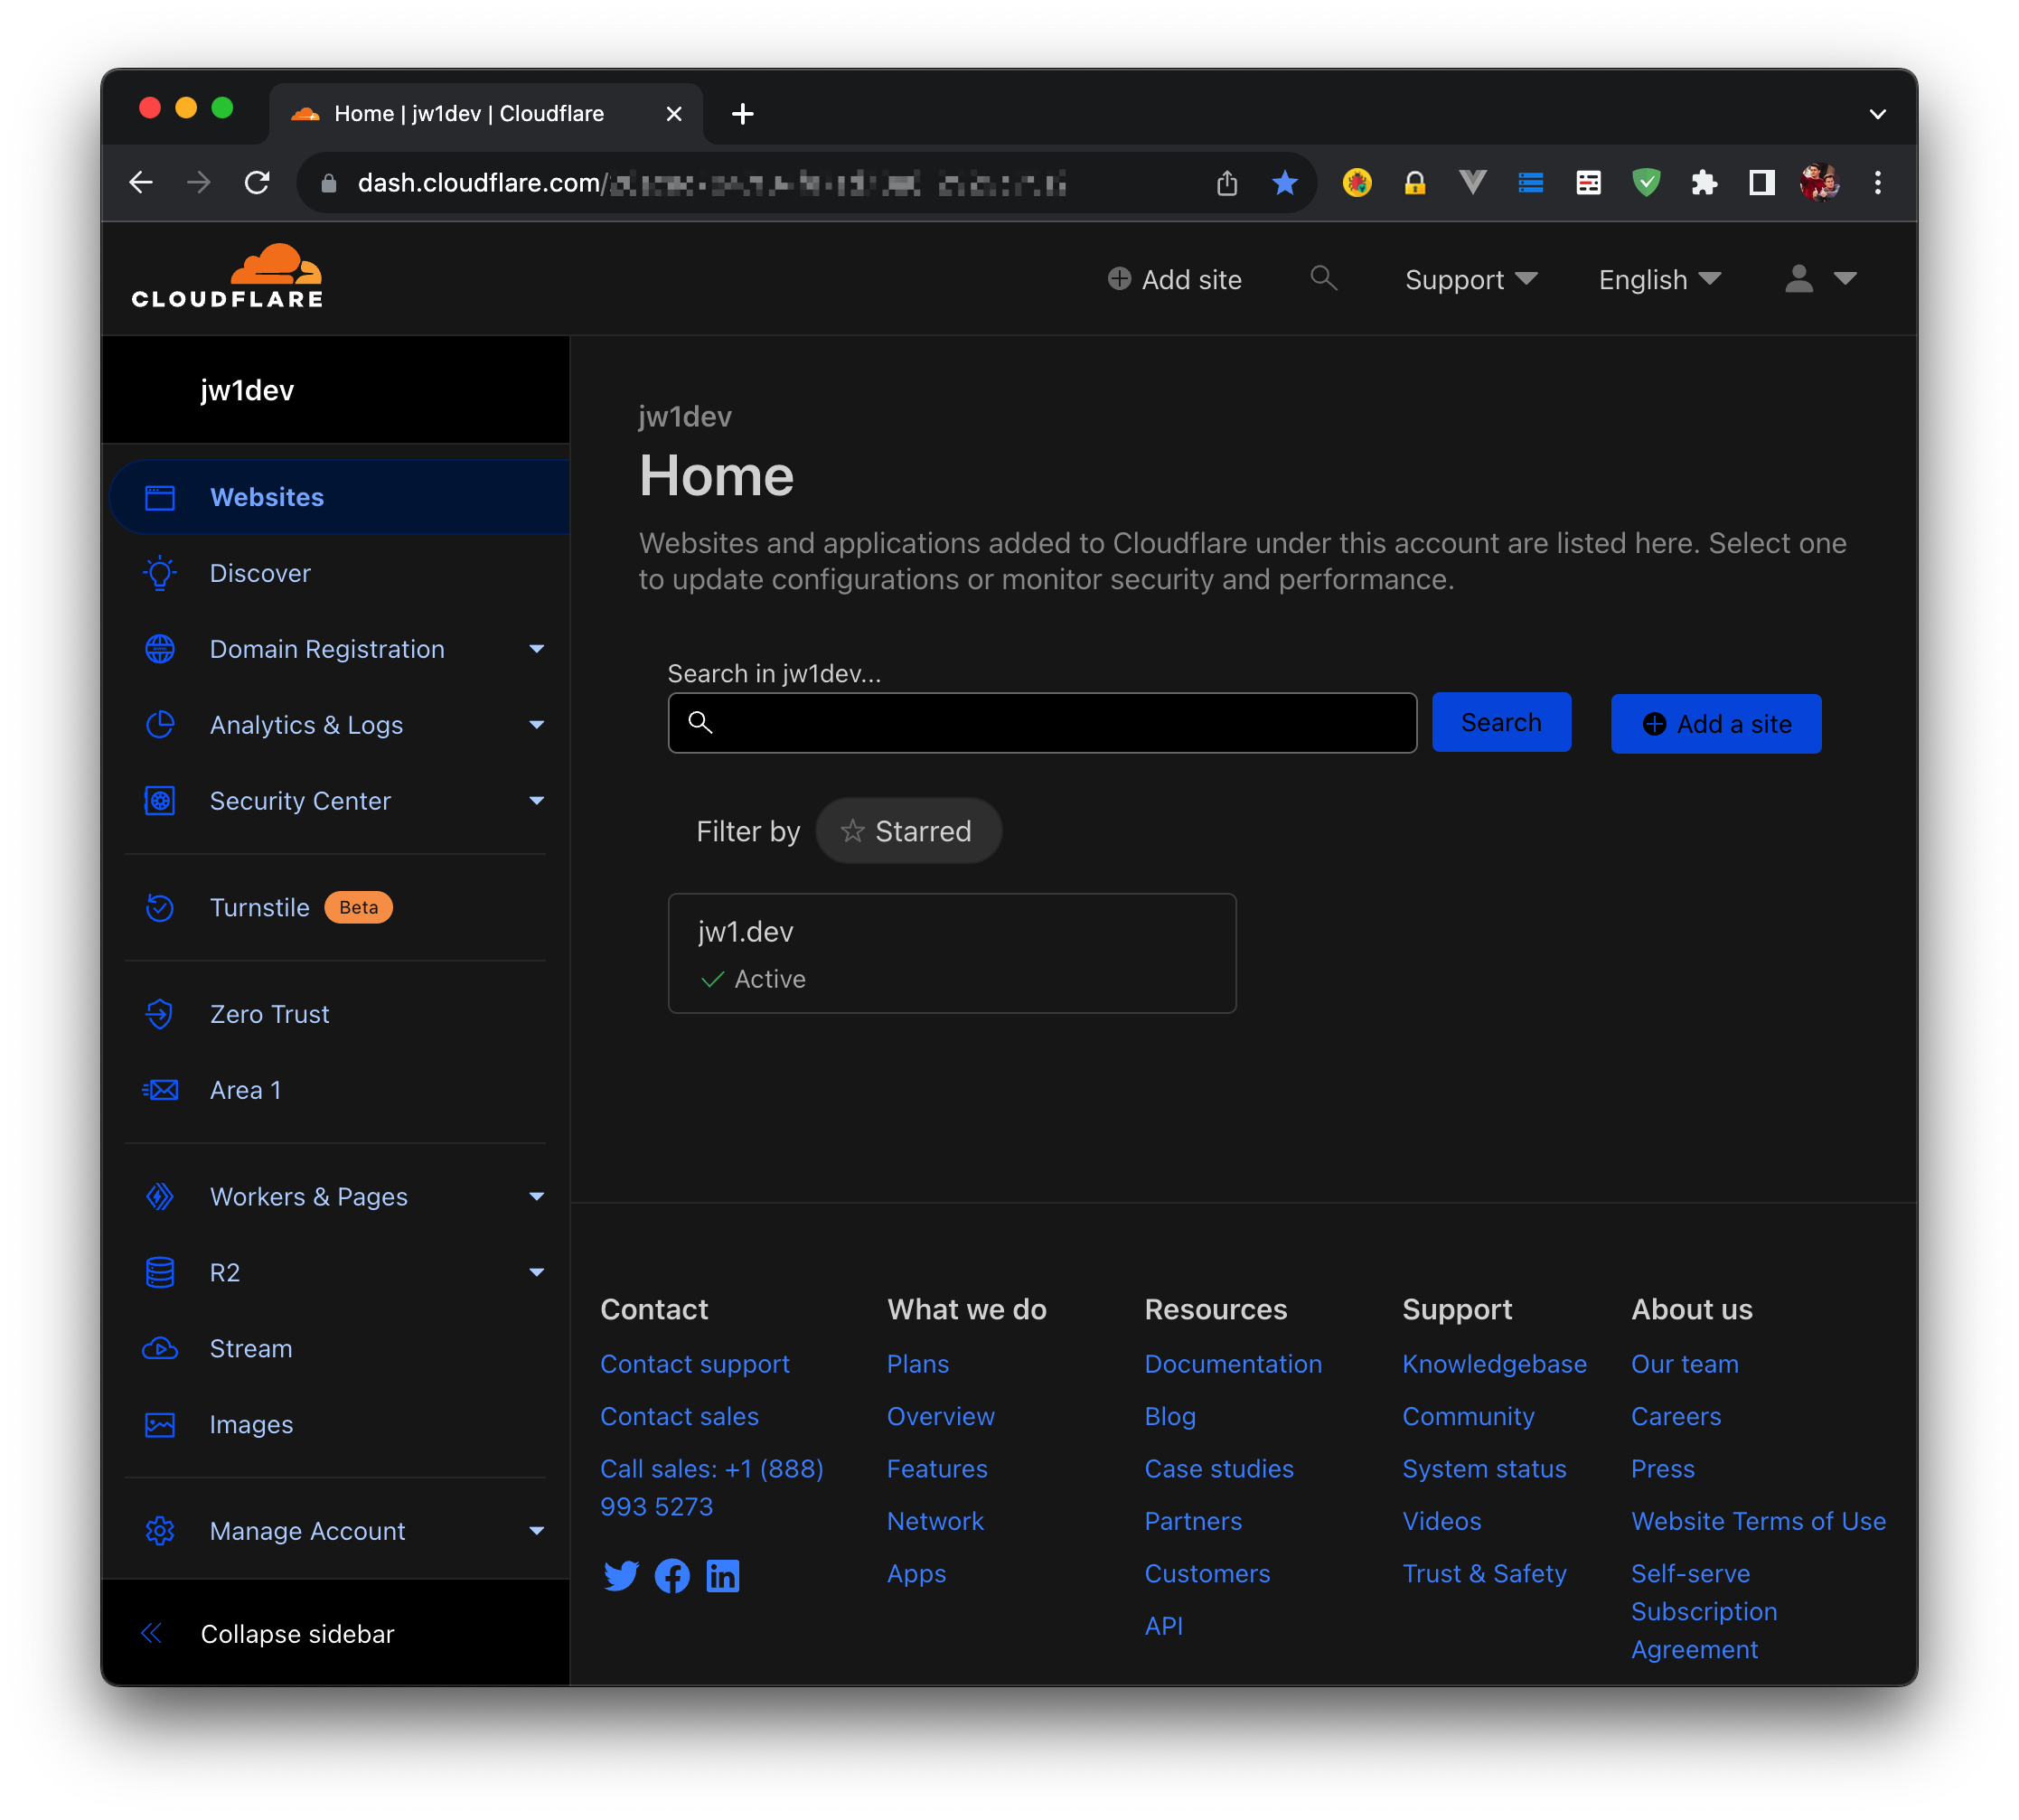
- Go to Cloudflare Dashboard.
- On the left panel, there is a section called "R2". Click on it.
- Create a new bucket by clicking on the "Create Bucket" button. (You will need to input the bucket name)
And that's it, now we set up the workers.
A Worker is like the backend of a website, it allows the R2 Uploader to communicate with the R2 bucket. This is the most important part of the setup, so please follow the steps carefully.
-
Go to Cloudflare Dashboard.
-
On the left panel, there is a section called "Workers & Pages". Click on it.
-
Click on the "Create Application" button and the click on the "Create Worker" button.
-
So now Cloudflare will automatically generate a name for your Worker, you can either enter a name you like or leave it as it is. Ignore that code preview section, and now click the "Deploy" button.
-
Click on the button "Edit code", now you will see a code editor, delete all the code in it and paste the code below:
Expand the code
var hasValidHeader = (request, env) => {
  return request.headers.get('x-api-key') === env.AUTH_KEY_SECRET
}
function authorizeRequest(request, env, key) {
  switch (request.method) {
    case 'PUT':
      return hasValidHeader(request, env)
    case 'DELETE':
      return hasValidHeader(request, env)
    case 'PATCH':
      return hasValidHeader(request, env)
    case 'GET':
      if (env.PRIVATE_BUCKET) {
        return hasValidHeader(request, env)
      } else {
        return true
      }
    case 'OPTIONS':
      return true
    default:
      return false
  }
}
var worker_default = {
  async fetch(request, env) {
    const url = new URL(request.url)
    const key = url.pathname.slice(1)
    if (!authorizeRequest(request, env, key)) {
      return new Response('Forbidden', { status: 403 })
    }
    switch (request.method) {
      case 'PUT':
        await env.R2_BUCKET.put(key, request.body)
        return new Response(`Put ${key} successfully!`, {
          headers: {
            'Access-Control-Allow-Origin': '*'
          }
        })
      case 'PATCH':
        let list = await env.R2_BUCKET.list()
        return new Response(JSON.stringify(list), {
          headers: {
            'Content-Type': 'application/json',
            'Access-Control-Allow-Origin': '*'
          }
        })
      case 'GET':
        const object = await env.R2_BUCKET.get(key)
        if (object === null) {
          return new Response('Object Not Found', { status: 404 })
        }
        const headers = new Headers()
        object.writeHttpMetadata(headers)
        headers.set('etag', object.httpEtag)
        headers.set('Access-Control-Allow-Origin', '*')
        return new Response(object.body, {
          headers
        })
      case 'DELETE':
        await env.R2_BUCKET.delete(key)
        return new Response('Deleted!', {
          headers: {
            'Access-Control-Allow-Origin': '*'
          }
        })
      case 'OPTIONS':
        return new Response(null, {
          headers: {
            'Access-Control-Allow-Origin': '*',
            'Access-Control-Allow-Methods':
              'PUT, PATCH, GET, DELETE, OPTIONS',
            'Access-Control-Allow-Headers': 'Content-Type, x-api-key'
          }
        })
      default:
        return new Response('Method Not Allowed', {
          status: 405,
          headers: {
            'Access-Control-Allow-Methods':
              'PUT, PATCH, GET, DELETE, OPTIONS',
            'Access-Control-Allow-Origin': '*'
          }
        })
    }
  }
}
export { worker_default as default }
-
Now click on the "Save and Deploy" button, you will see a URL on top of the page, copy it to somewhere like a notepad, we will need it later.
-
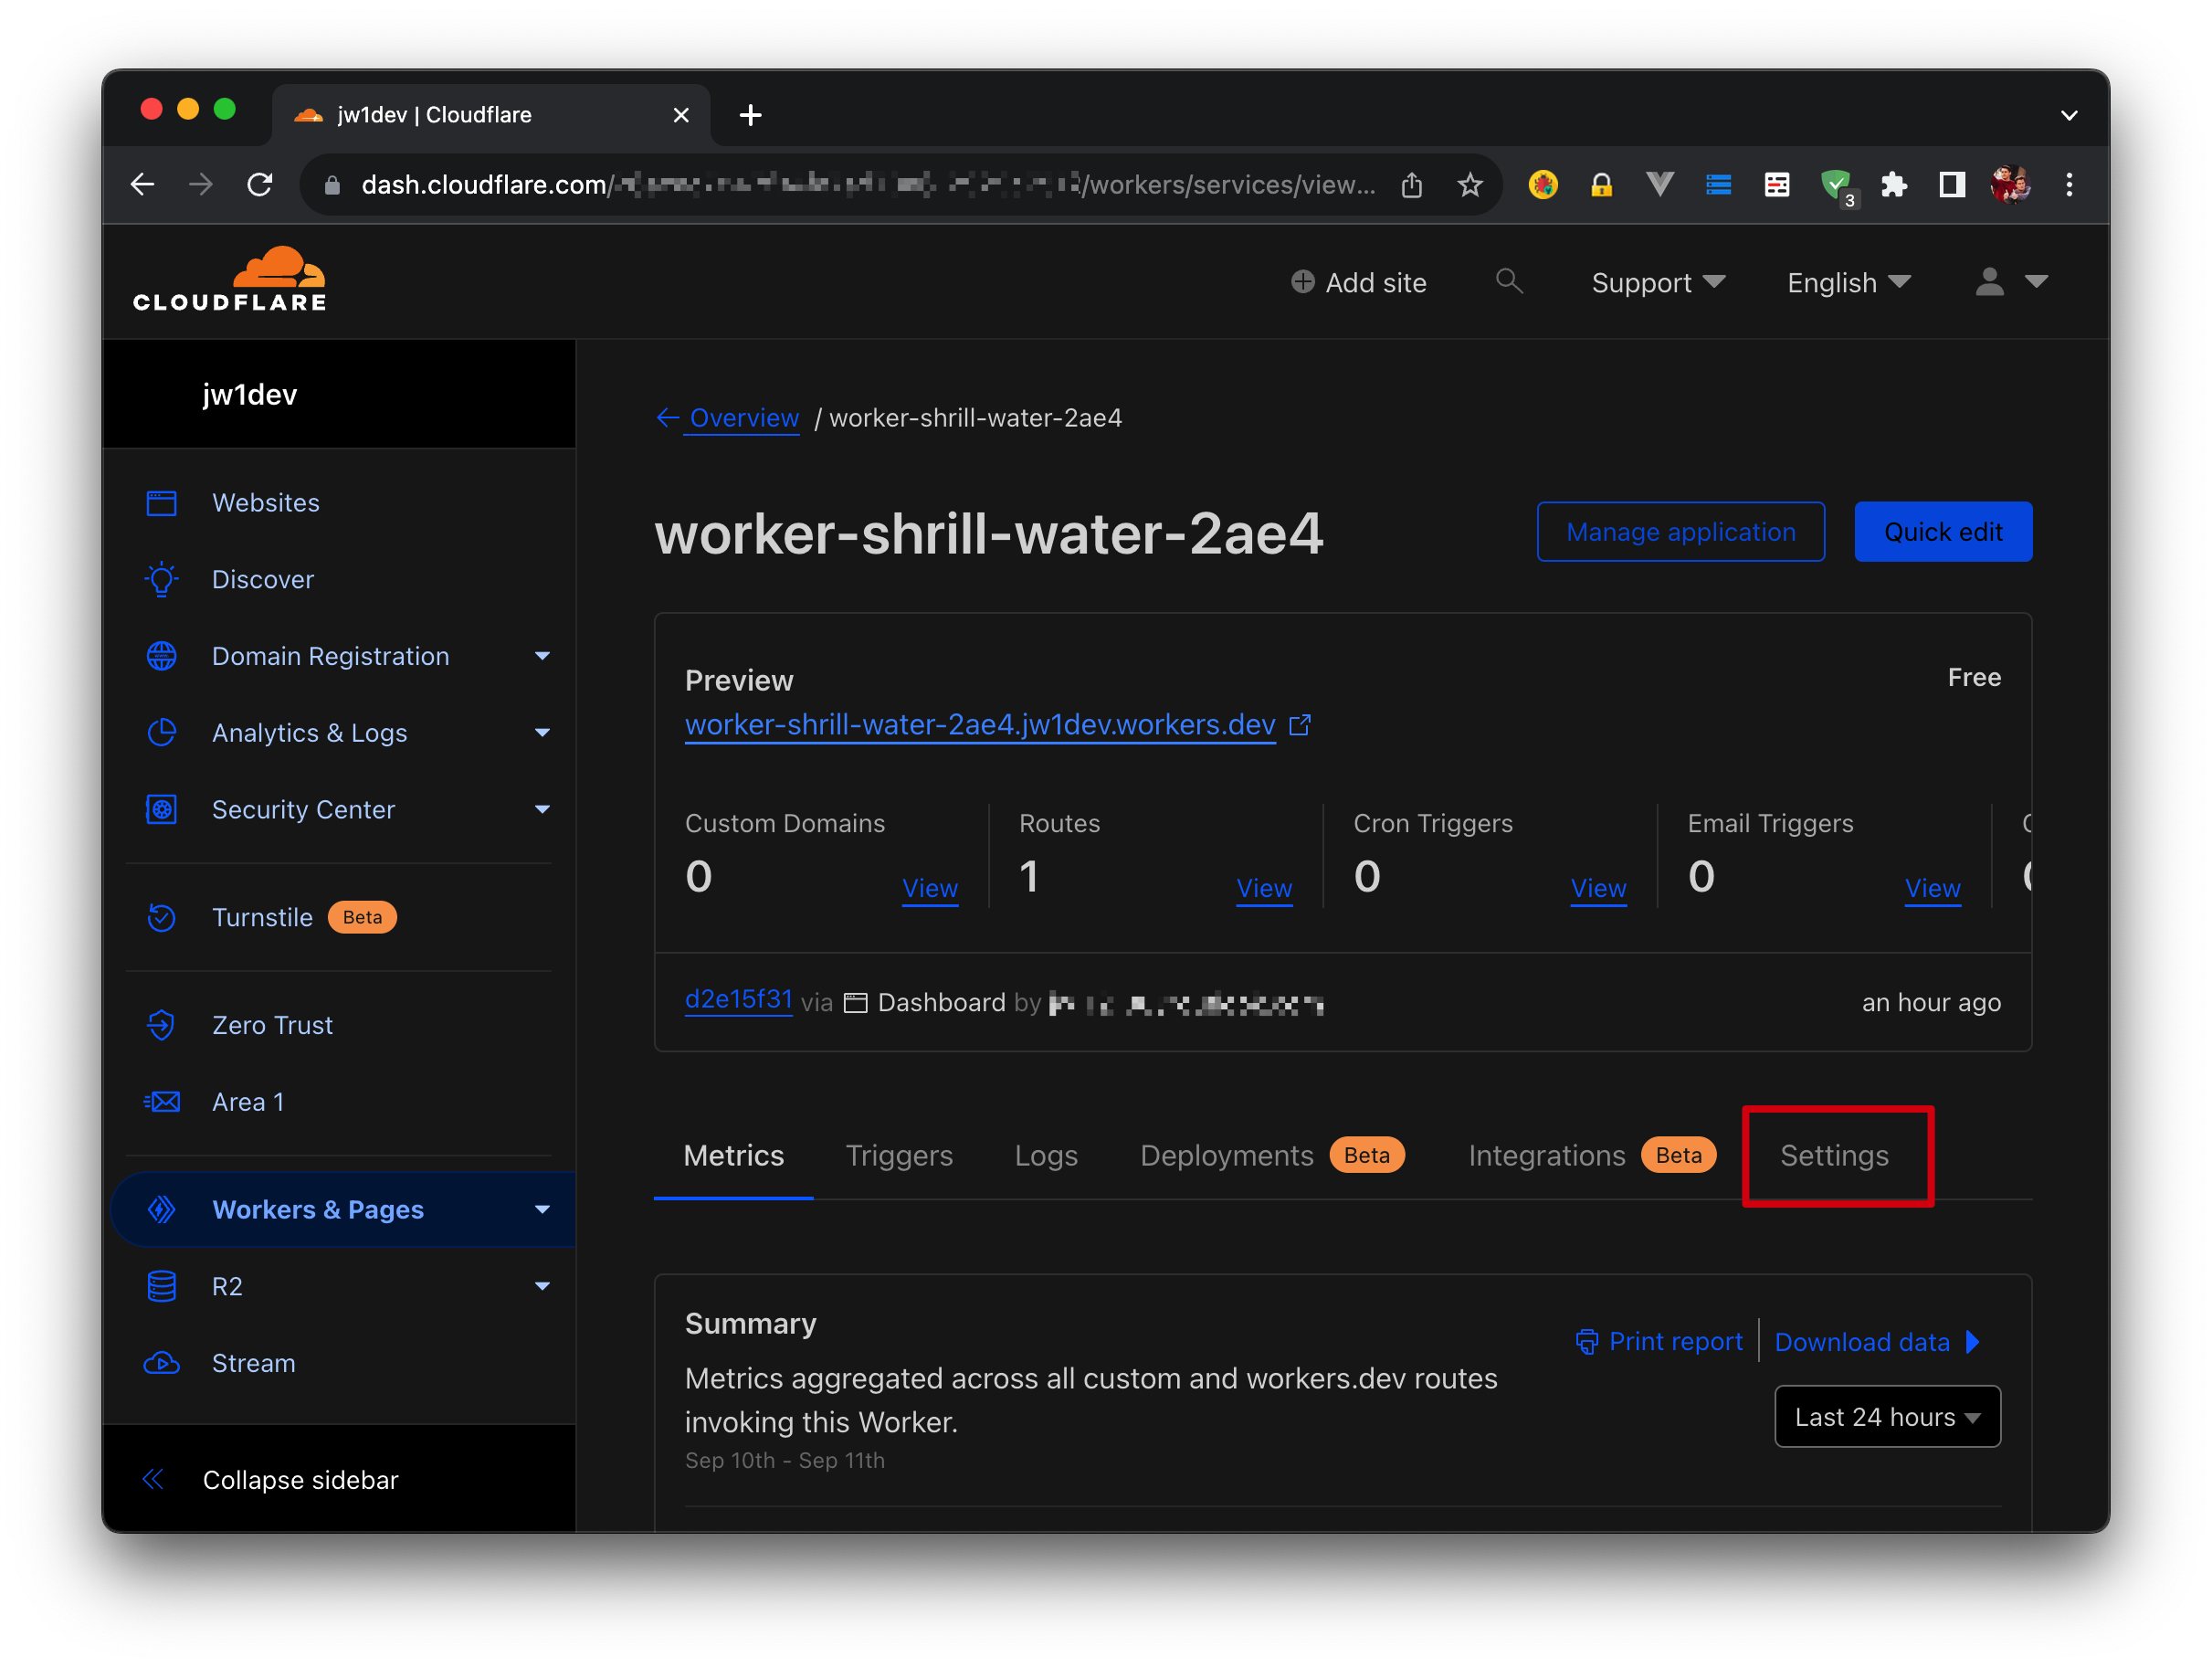
Go to the worker page, go to the "Settings" and then click the "Variable" on the left side.
-
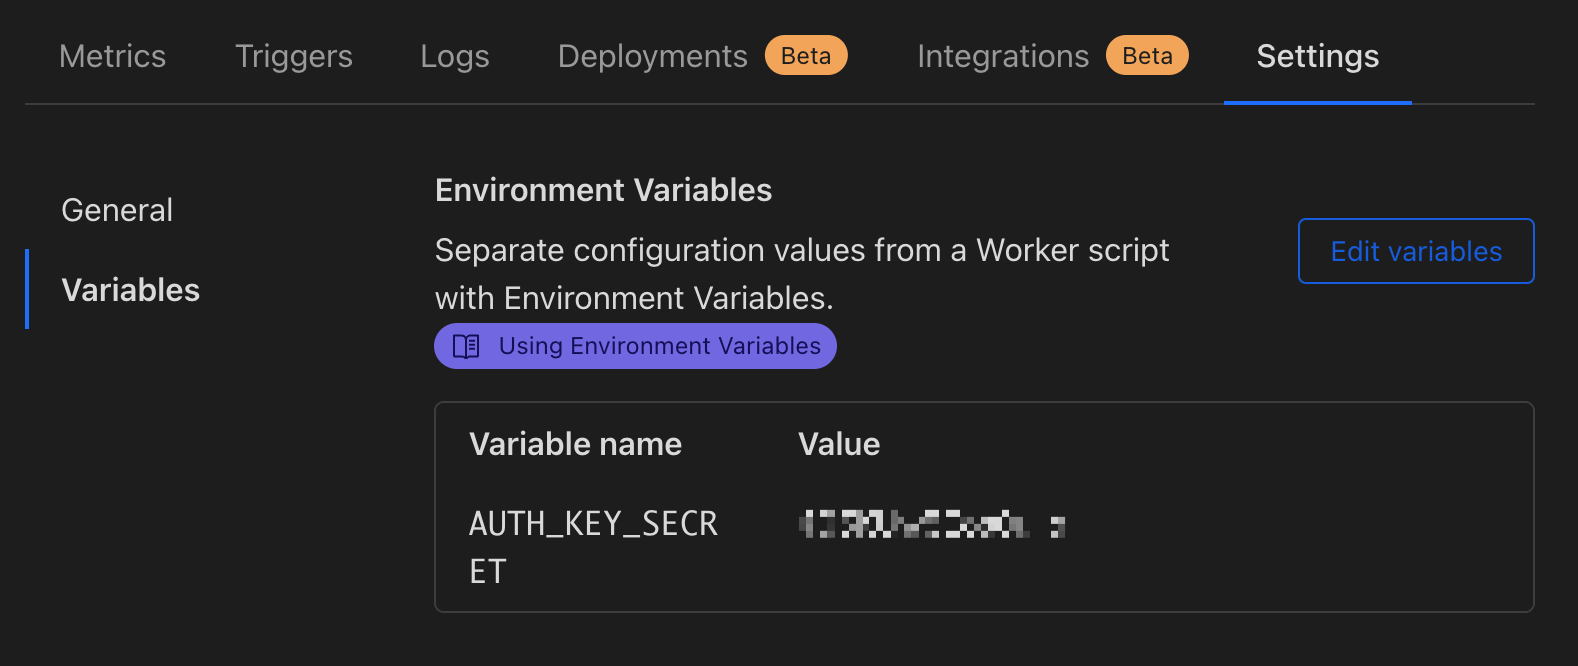
First we focus on the "Environment Variables" section, we need to add a key value pair for the Worker to read as a configuration. Click on the "Add variable" button, and then enter the variable name as "AUTH_KEY_SECRET" and the value is a random string, you can generate one here, click "Save and deploy". Remember to save the value somewhere, we will need it later.
-
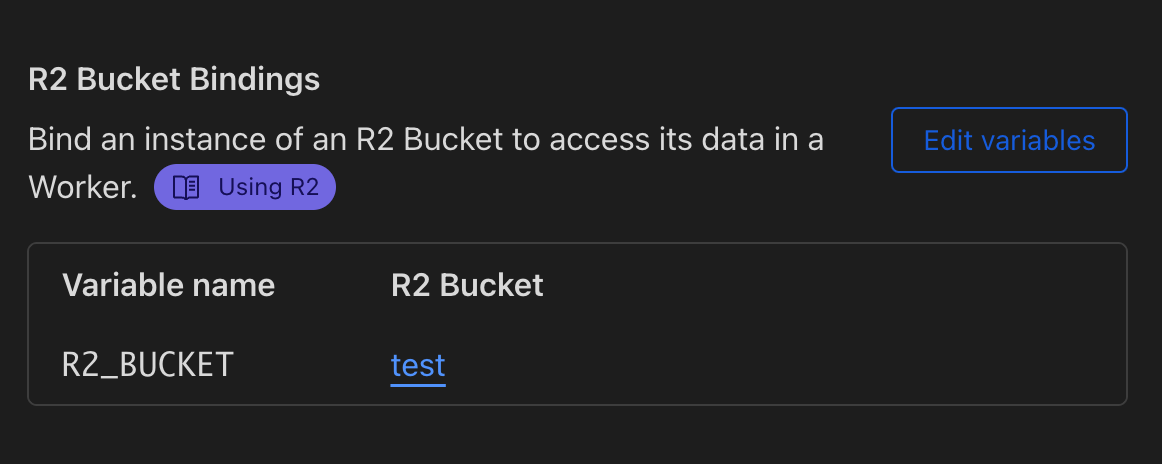
Now we scroll down to the "R2 Bucket Bindings" section, click on the "Add binding" button, and then enter the variable name as "R2_BUCKET" and the value is the name of the bucket you created earlier, click "Save and deploy".
If you go to the Worker URL now, you will see a "Object Not Found" message, that means the worker is working as expected.
Now we have set up the worker, we can now set up the uploader.
Phew, we've come a long way, now we are going to set up the uploader, which is the web interface for the R2 bucket.
Remember the Worker URL and the random string we saved earlier? We will need them now.
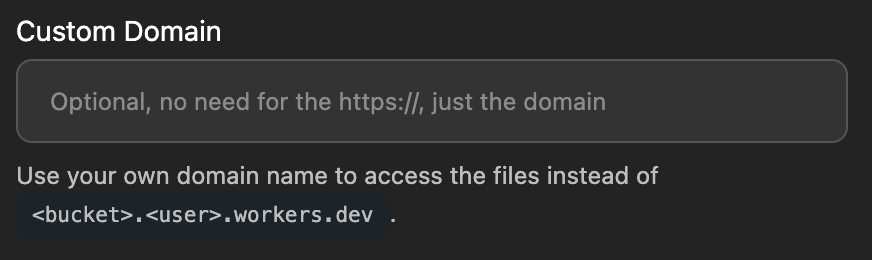
In R2 Uploader, we call the Worker URL as the "Endpoint" and the random string as the "API Key". Enter the Endpoint and the API key, ignore the custom domain for now and click "Save to LocalStorage".
Now you can upload and manage your files in the R2 bucket!
🎉
R2 Uploader does not store your Endpoints or API keys in the cloud, it is stored in your browser's LocalStorage, which means it is only accessible by you. All the traffic goes through the Worker and the R2 bucket you just created.
Note: We use showDirectoryPicker API to make the folder upload possible, if the Choose Folder button doesn't show up, it simply means that your browser does not support this API. (showDirectoryPicker on MDN)
At default, the Worker will allow all the GET requests to go through, which means anyone can access your file if they know the URL.
If you want to make your bucket private, you can do so by adding a new variable in the Worker settings.
- Go to the worker page, go to the "Settings" and then click the "Variable" on the left side.
- Click on the "Edit variable" and "Add variable" button, then enter the variable name as "PRIVATE_BUCKET" and the value is "true", click "Save and deploy".
This will make the Worker to check the x-api-key header for every request, and only allow the request with the correct API key to go through.
If you want the bucket to be public again, just delete the variable.
By default, the Worker URL should be working right away, unless you want the url to be a little bit clean or, you live in China (or maybe some other country). Unfortunately, the domain name workers.dev is blocked in China, so we need to set up a custom domain.
Workers and R2 both supports custom domain, and we just need one of them to make the R2 work in China.
For Workers:
- Go to Cloudflare Dashboard.
- On the left panel, there is a section called "Workers & Pages". Click on it.
- Go to your Worker, click on the "Triggers", you'll see a custom domain section, click on the "Add Custom Domain" button. Input the domain name and you're done!
- Remember to replace the Endpoint in the R2 Uploader with the custom domain.
For R2:
-
Go to Cloudflare Dashboard.
-
On the left panel, there is a section called "R2". Click on it.
-
Go to your bucket, click on the "Settings", find "Custom Domains" section, and then click on the "Connect Domain" button. Input the domain name just like you did in the Workers, and you're done!
-
Remember to update the Custom Domain in the R2 Uploader with the R2 custom domain.
Attention! This time, instead of changing the Endpoint field in the R2 Uploader, we change the Custom Domain field with the R2 custom domain.
This sounds a little bit complicated, let me break it down for you:
- Setting up a custom domain for Workers is the simplest way to work with R2 Uploader
Hidden features 😜
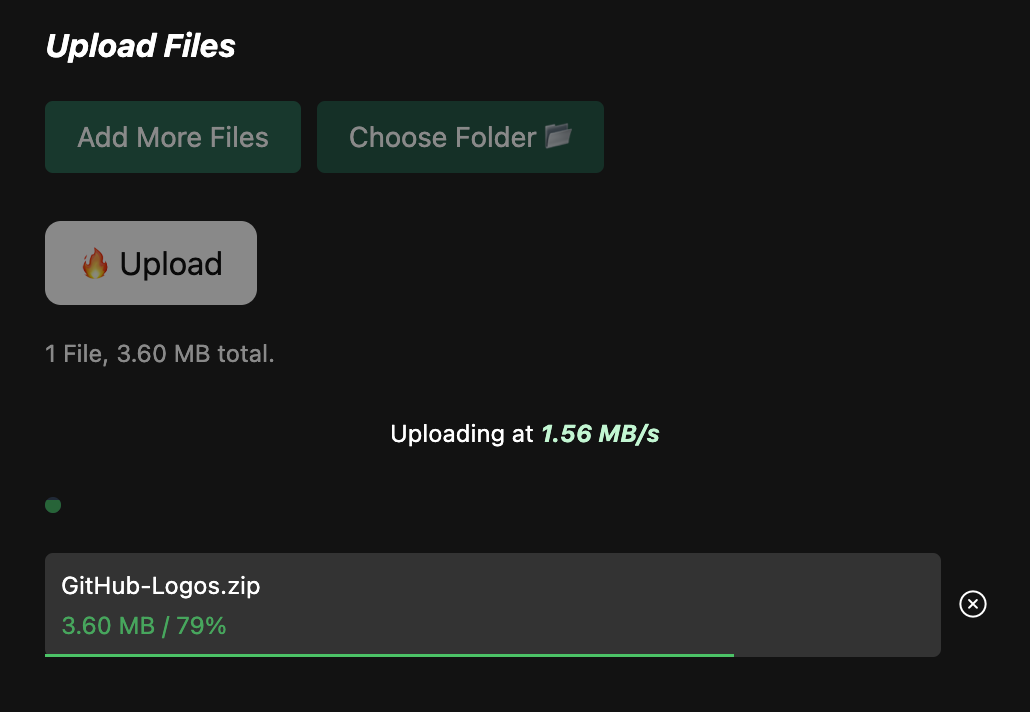
- You can copy a file from your system and then paste it into the uploader, it will automatically queue the file and ready to be uploaded.
- To edit the name of queued files, just click on the file name.
- Rename the file like
folder/file.txtwill upload thefile.txtto the folder, you'll get a folder structure in your bucket.
Ok now, I think we've covered everything, if you have any questions, feel free to create a new issue under this repo.