This is now continuing development at: ESP32_HEG (Biofeedback meets IoT!). Much of this code is out of date until I come back to a fully generalized solution, so I recommend using HEG.h as your template in my HEG_Esp32 repo. Thanks!
Link includes a modded HEGstudio that you can use with the serial output, however you may need to edit the name of your device's serial port registry name (not the COM#, but the name key given in your registry (e.g. "Silabser" for the ESP32)) in the HEGstudio python 2 source and rebuild with pyInstaller.
Build time: 1-2 hours.
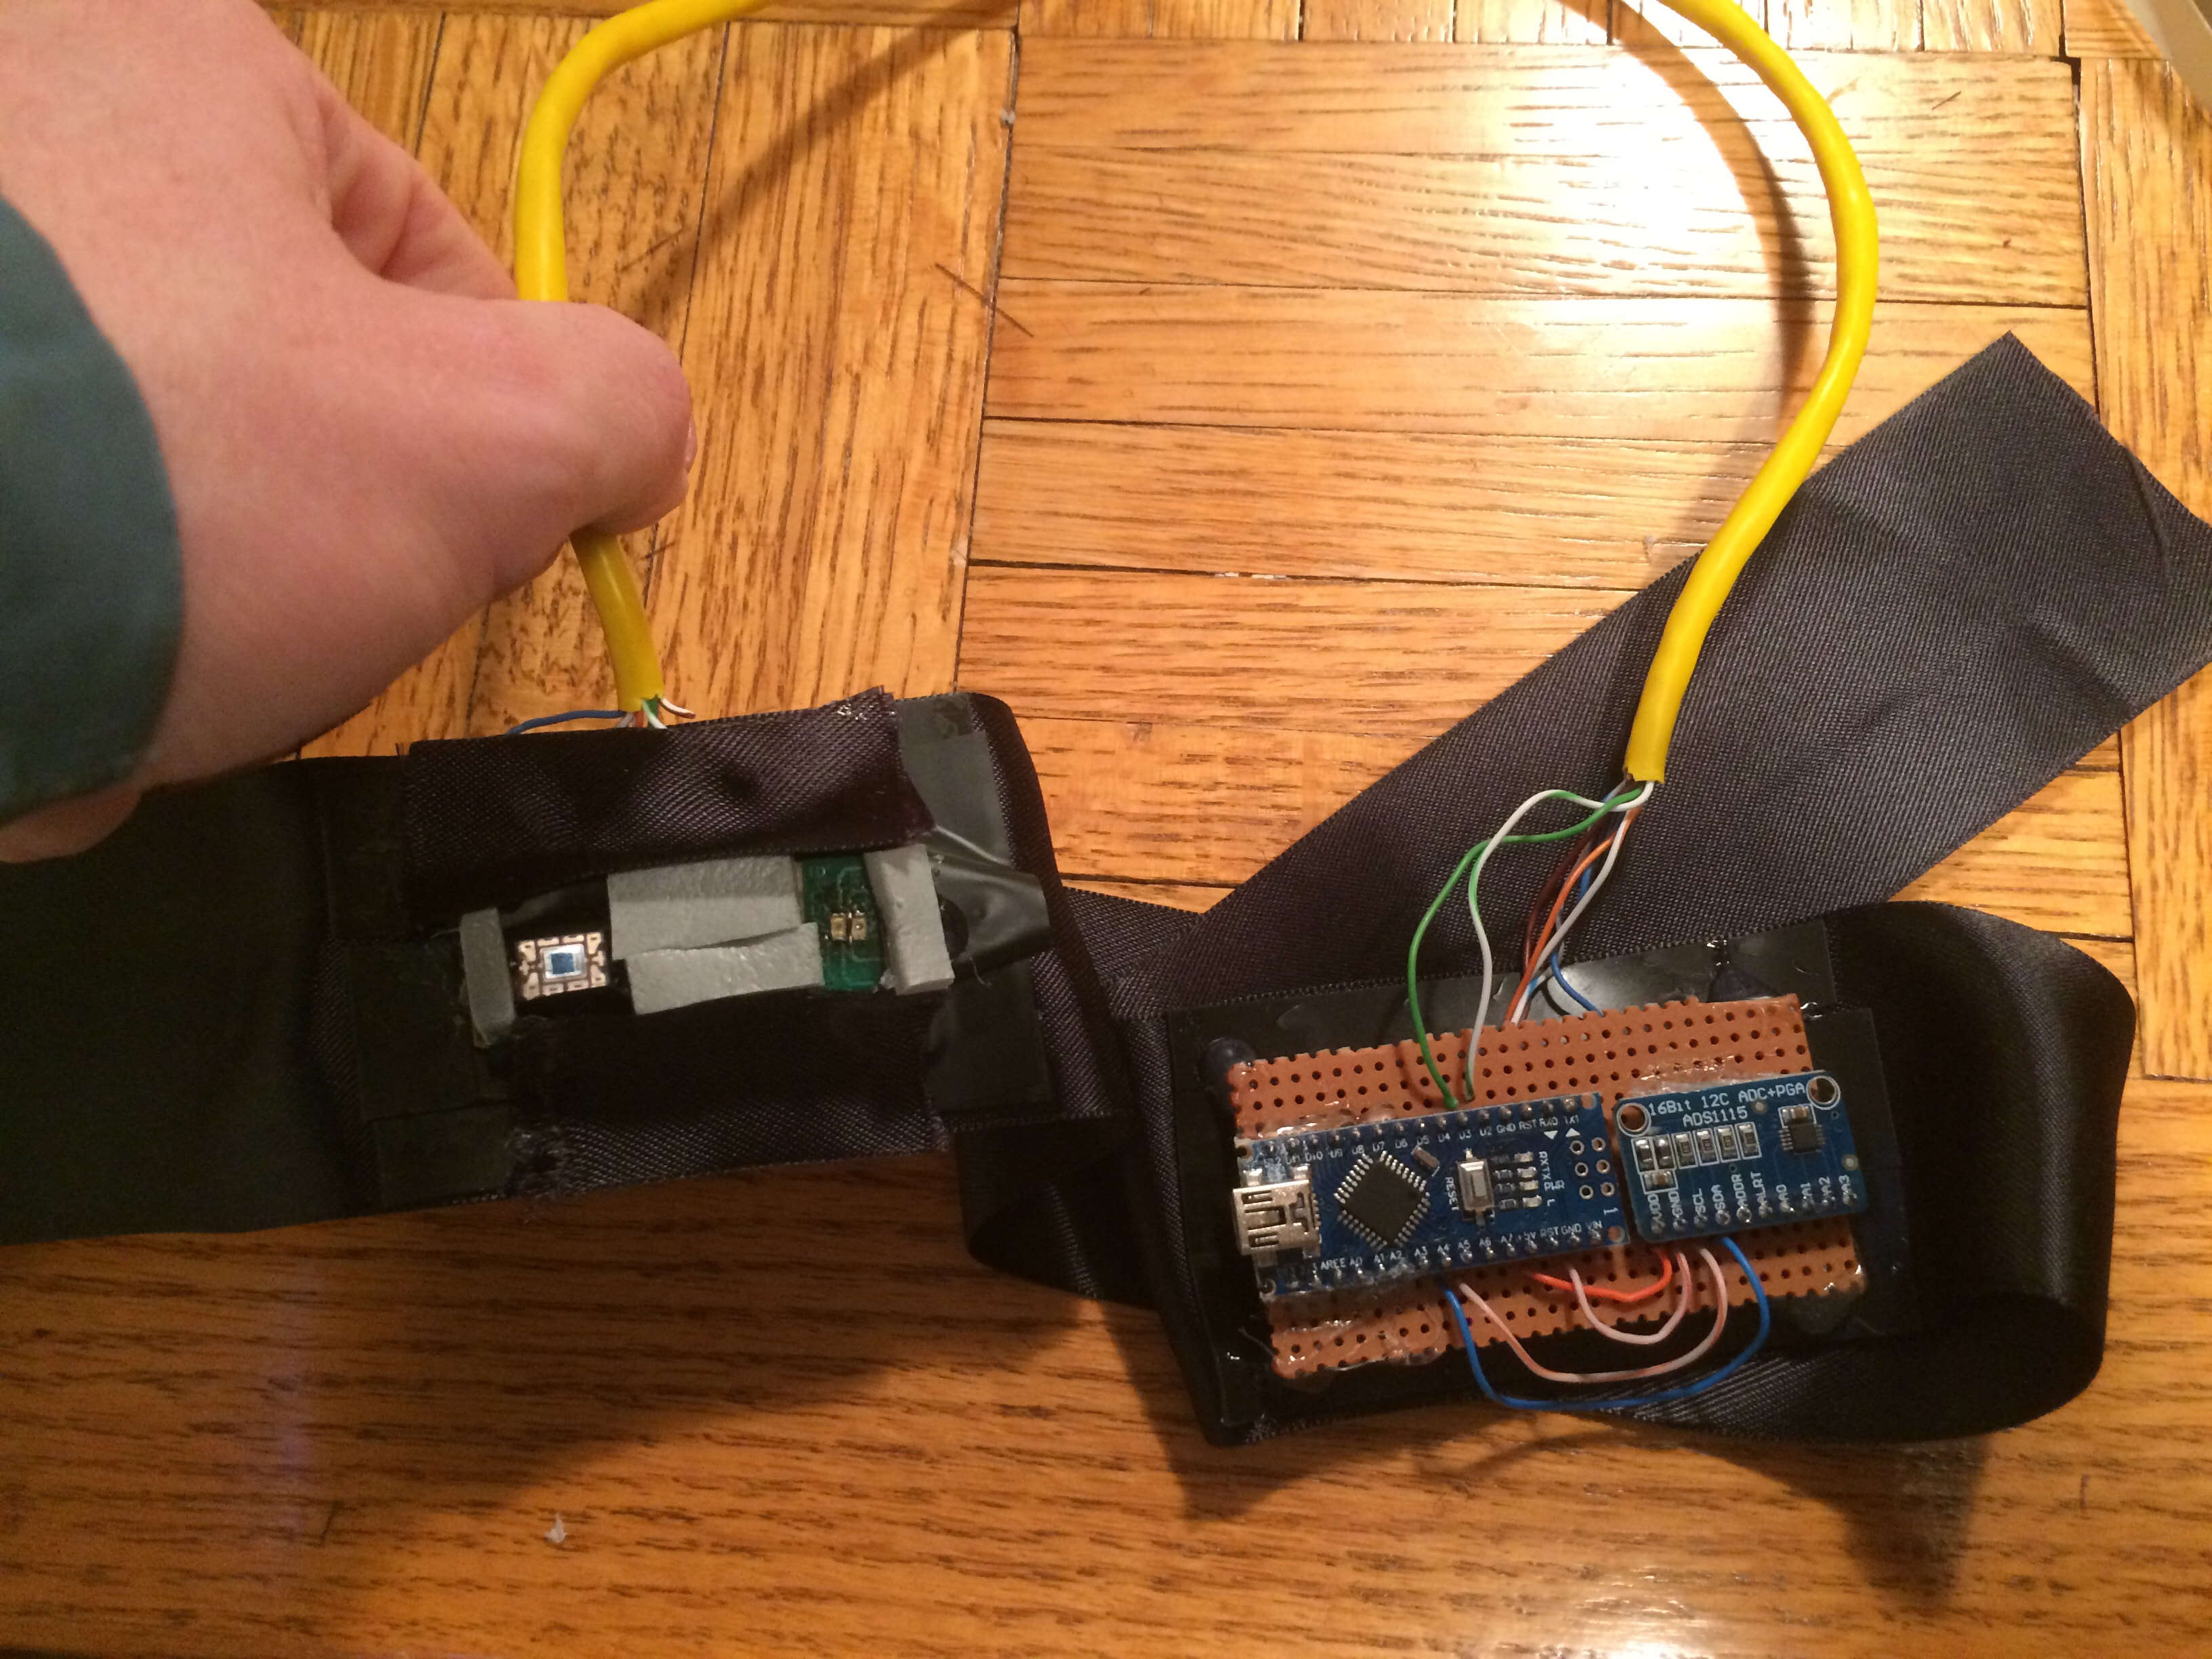
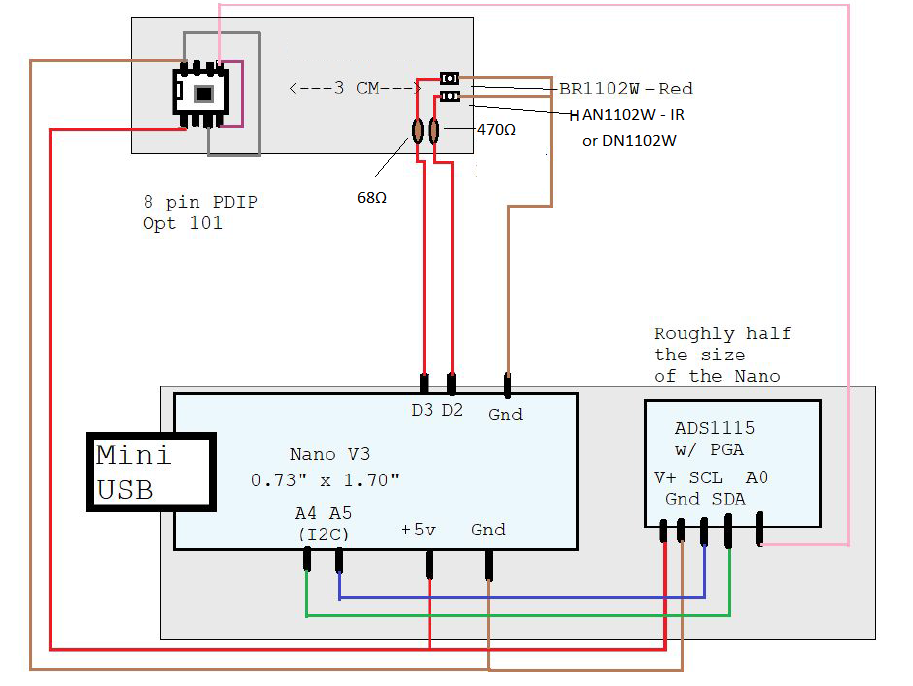
Uses an Arduino Nano V3, an Adafruit ADS1115, an OPT101, a BR1102W and AN1102W Red and IR LEDs respectively. (~$20)
- You'll have to find a headband or something to hold it on your head, and a way to mount & secure the wiring. I used some cheap perfboard I could break into smaller pieces.
- You'll need a soldering kit.
- The LEDs are surface mounts and require something like this. They each need a 220 Ohm resistor on the power input.
- Nano V3 uses a generic USB Mini wire to connect to the computer.
- Detailed build + materials instructions incoming when I have a final design. Without borrowing the tools, this project costs about $50 dollars altogether.
Now with a Slack channel: Slack
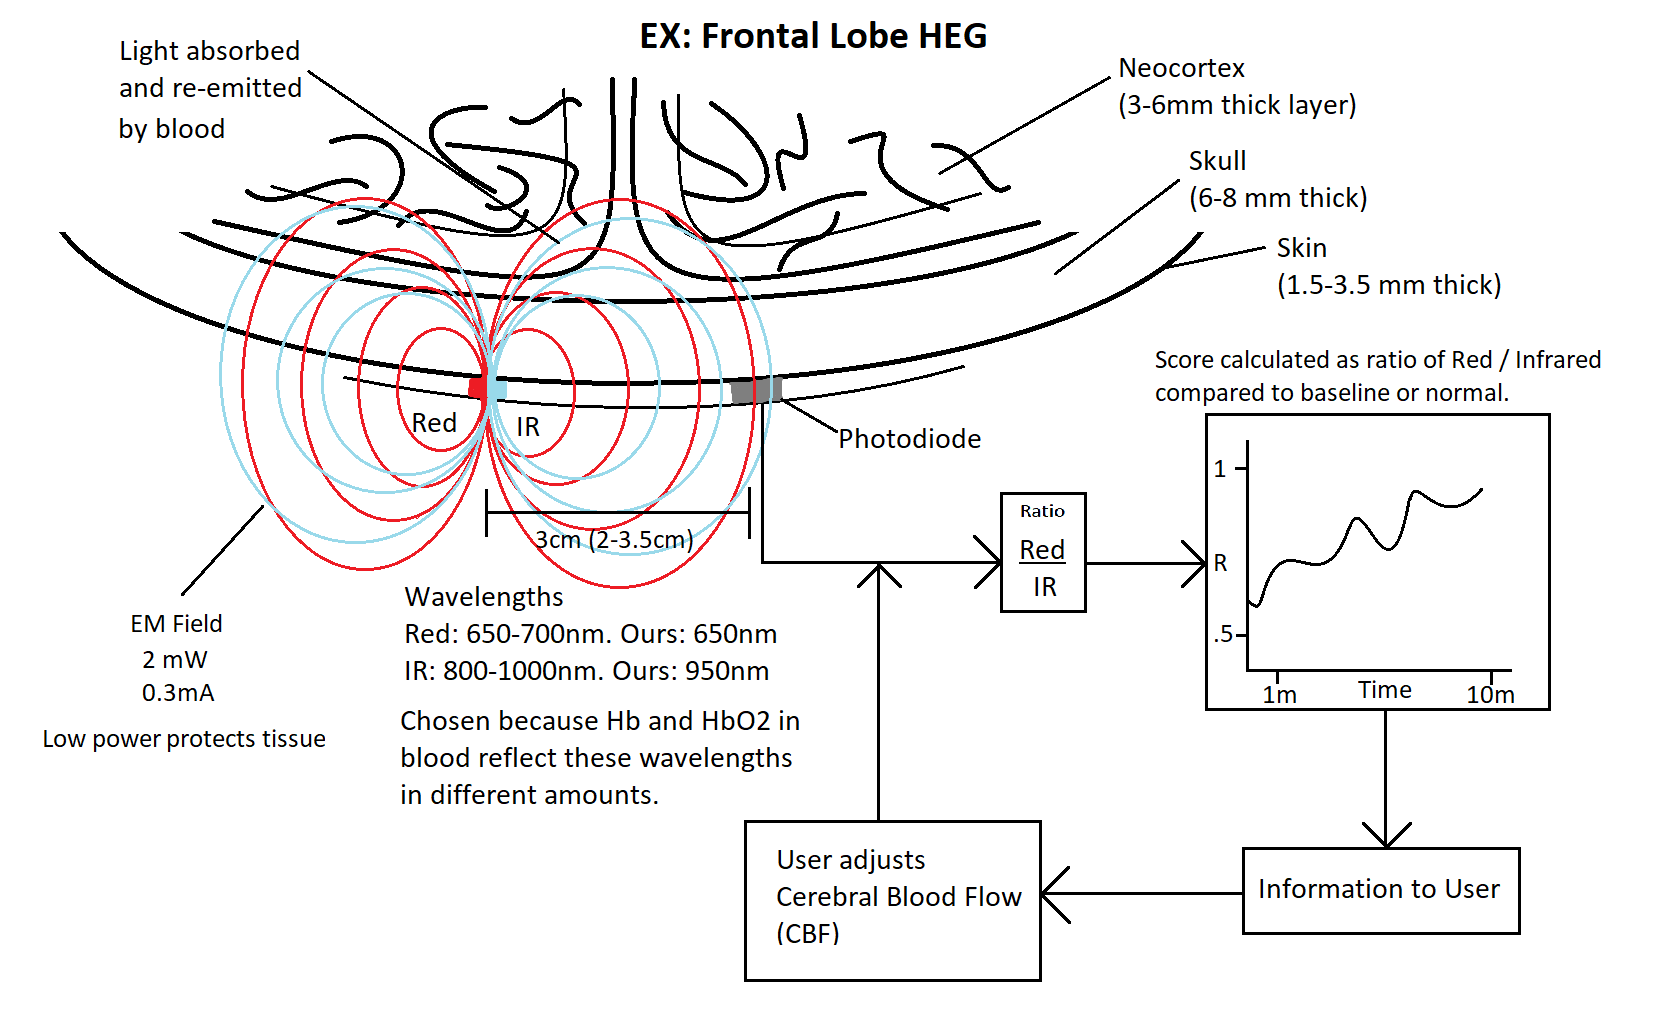
Hemoencephalography is a method that allows you to measure and influence control over the bloodflow in your brain. It's just like any other pulse oximetry method, but allows for a type of physical brain exercise. HEG devices typically cost hundreds or thousands on the market, so this is a much better solution for people wanting to get their feet wet with biofeedback and do a cool DIY project to understand the extremely straightforward science better. HEG biofeedback was originally developed as a safe and non-invasive method to treat ADD in the late 90s, later expanding to treating disorders like PTSD and Depression due to common stress symptoms like Hypofrontality being measurable with this tool.
It is implicated for much more, but there's not a whole lot of data (which this 20 dollar version could solve). HEG biofeedback is informally called "brain pushups" for how it enables one to literally work out their brain to enable better bloodflow and oxygenation, therefore cognitive functioning and self-control. It only takes 5-10 minutes in the first session to gain control of bloodflow in the targeted area. I don't recommend doing more than 10 minutes at a time with this thing. Be wary of fatigue or headaches the first few times when you start gaining control of your bloodflow. View the RecommendedReading.txt for some resources to educate yourself more deeply on this subject.
INSTRUCTIONS AFTER ASSEMBLY:
-
To install the Nano, install the Arduino IDE and the USB drivers. Otherwise install this driver for your OS with your Nano plugged in: https://github.com/HobbyComponents/CH340-Drivers
-
Open the Arduino IDE, make sure the Nano is selected in the Board tab, as well as the correct Port. Include the ADS1X15 library under Sketch > Include Library > Add .ZIP Library.
-
Upload the HEG_Arduino.ino sketch to the Nano with the Arduino IDE or with the correct libraries in your preferred IDE (e.g. Visual Studio). Use the IDE's serial monitor to view the output, unless you prefer a 3rd party one or want to write your own program (stay tuned for mine).
-
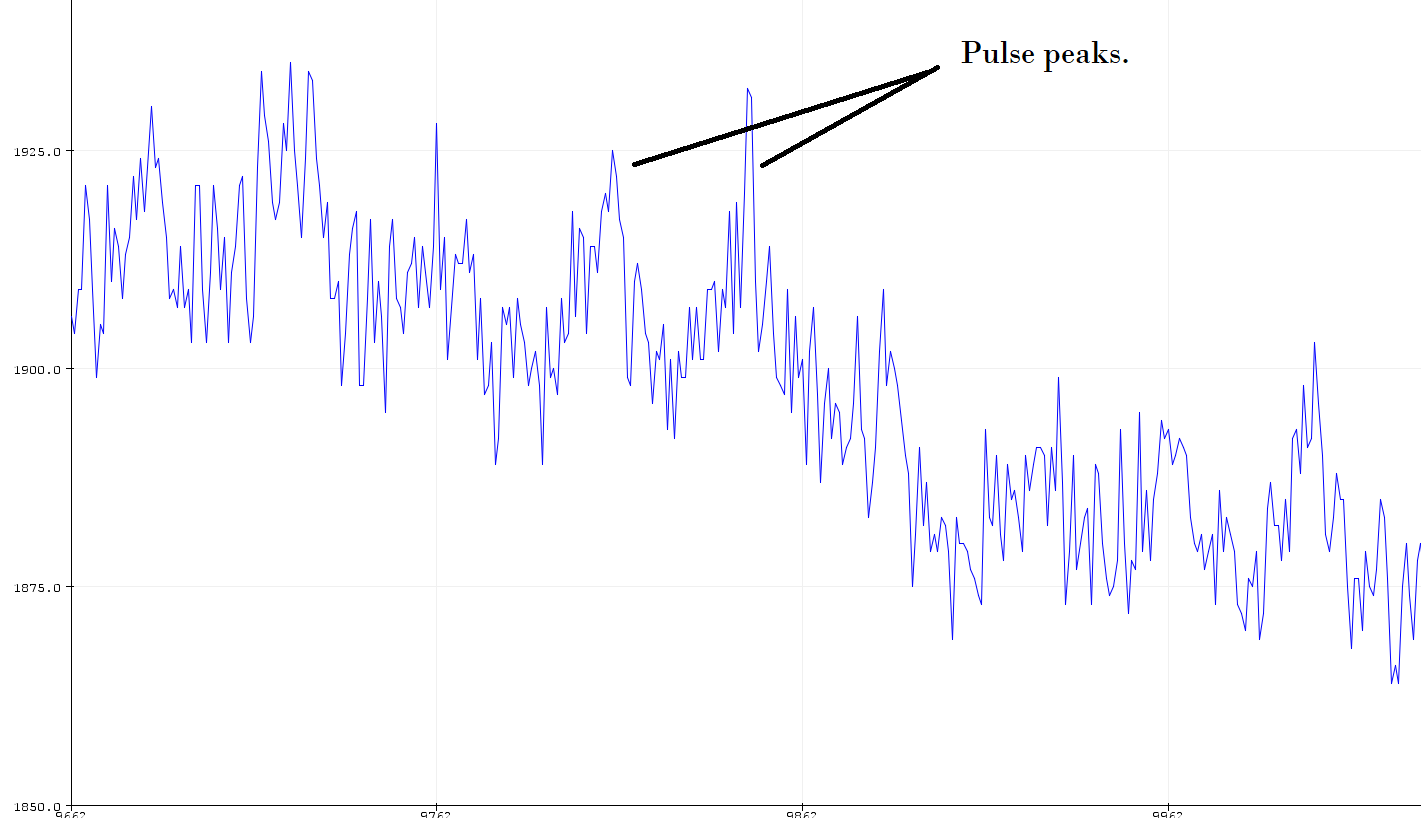
See in HEG_Graph.png, the higher square peak is the IR, the lower one is the Red light. That's what you should expect to see from the sensor in the serial plotter. Make sure the sensor is properly insulated from all light other than the direction of your forehead. It will absorb light through the back, for instance.
-
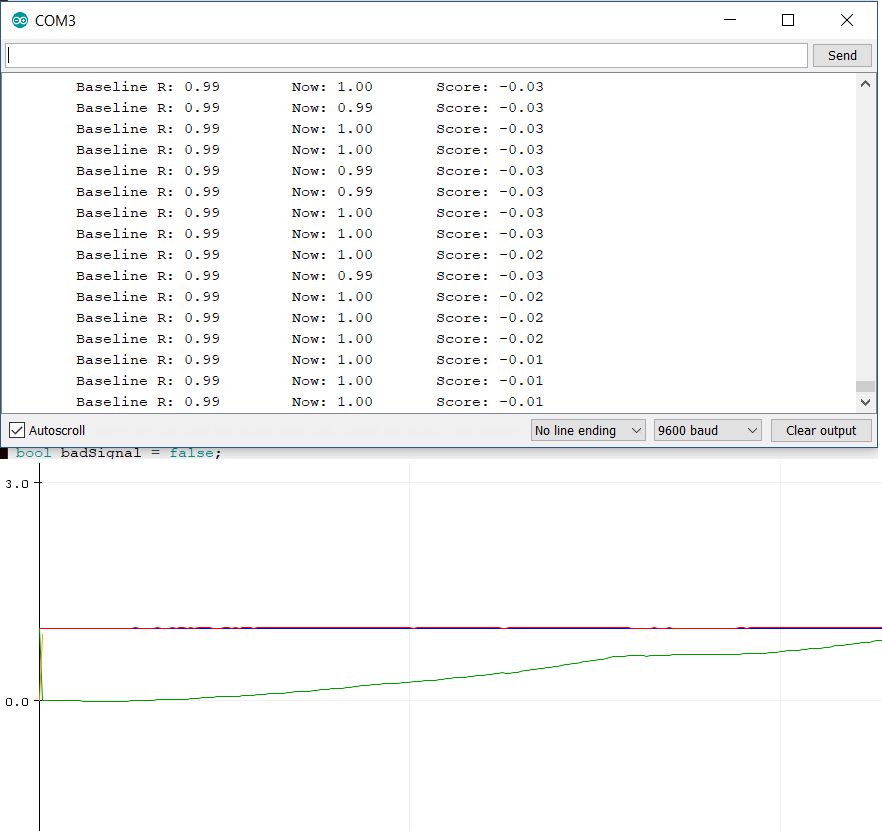
Set DEBUG = false to get the baseline, ratio, and score printing and see that in the console once you have verified the signal is good, then re-upload the program to view the basic ratio and scoring system on the serial reader. Play around with the sample rates in the sketch.
- The official recommended LED FPS is 17 (1/17 sec) in the patent. The biofeedback institute uses 100FPS. Default set to 20 (10 per LED per sec).
- Sample at whatever your maximum ADC rate is.
- Ratio is calculated by averaging multiple samples collected for the individual LEDs, then dividing the Red avg with the IR avg.
- Score is summed from ratio minus baseline for each successful reading.
- Baseline resets when you get a bad signal (if the sensor is absorbing too much external light) so you can play around with that in case the scoring isn't looking right.
- This is as basic and bare-bones an implementation as possible.
This is a near-Infrared setup for bloodflow, where a higher Red/IR light ratio equates to higher oxygenation. To read passive IR for metabolic information, just unplug the Red LED. Brain metabolism is 90% correlated with bloodflow, and bloodflow is easier to understand, so I recommend keeping the Red LED.
For the scoring system, all that matters is your ability to consciously raise the ratio - correlated with increasing oxygenated blood concentration - especially after it falls some, regardless of the final score. And wiggling your forehead to mess with the sensor doesn't count. I found the score increased the most when I was curious and relaxed at the same time. You can pair the scoring system with a stimulus (like a video playing forward or backward depending on increasing or decreasing score) to assist with this. I'll have some demos for that available soon.
For more info, to assist with open-source development as a coder or tester, or if you want me to make you your own HEG, email me at: brewster.joshua1@gmail.com. To be clear, I'm an enthusiast and student, not a health professional. I'm not making claims with this thing, I just reverse-engineered and updated the hardware (with assistance from Eric Nichols, KL7AJ and Travis Priest), so use it at your own risk.