The custom checkout app is a React app responsible for overwriting vtex native Checkout v6 editing and deploying files through the admin's interface.
This project allows you to customize the native VTEX checkout, generating the files that you can later replace from the administration console of your VTEX store. https://{accountName}.myvtex.com/admin/portal/#/sites/default/code.
Through a proxy software you can map the local files with which you can see the changes you make in development mode before updating your store's checkout. [Checkout UI Custom app, Checkout Customizer]
From the scope of the VTEX checkout you have access to the following objects:
Important: To use the vtexjs global variable from TypeScript files, it is recommended to declare this variable inside the component, to avoid linter errors.
declare let vtexjs: any;vtexjs.checkout.getOrderForm().then((orderForm) => {});const item = {
id: 1001,
quantity: 1,
seller: '1',
};
vtexjs.checkout.addToCart([item], null, 1).then((orderForm) => {});vtexjs.checkout.setCustomData({});vtexjs.checkout.removeItems([{ index, quantity: 0 }]);vtexjs.checkout.removeAllItems(orderForm.items).then((orderForm) => {});vtexjs.checkout.sendAttachment('KEY_NAME', {});This page consumes the data of the request through a queryParam called og to display it in the default template, to directly access the data you can do it by reading the global variable:
dataLayerHowever, you can also consult the data of the order from the following official vtex endpoint Get Order
From the browser console you can type $ or Jquery and for underscore _ and you will be able to see the instances of the respective libraries.
- JQuery
- Underscore
| Path | Description |
|---|---|
/#/cart |
Shows the information of the products found in the orderForm. |
/#/email |
Is only shown when the orderForm does not have an active session, so it requests the email to check if the user already exists. |
/#/profile |
Request user information in case of being a user who is not yet registered. |
/#/shipping |
Request location information to determine logistics. |
/#/payment |
Allows you to select payment and billing methods. |
/orderPlaced/?og=### |
This route shows the information corresponding to the purchase with their respective codes for order tracking. Important: The vtexjs variable is not available in this path. |
In the project directory, you can run:
Builds the app for production to the dist folder.
It correctly bundles React in production mode and optimizes the build for the best performance.
Command available with :dev, :qa, and :prod
npm run buildIt works in the same way as build but additionally while you are modifying, It generating new files for the dist folder.
Command available with :dev, :qa, and :prod
npm run startThis runs the tests contained in the __test__ folder.
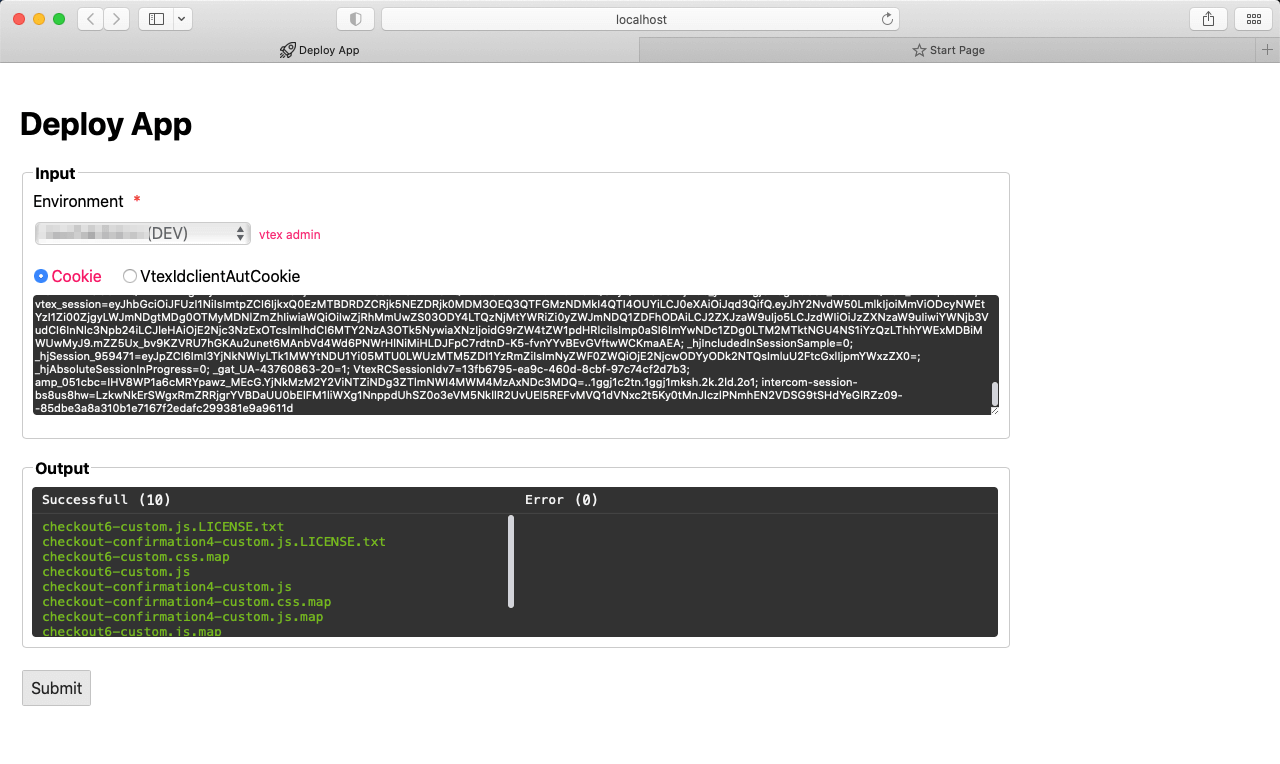
npm run testInitializes a local server on port 9000, it can be accessed as follows http://localhost:9000/. From here you can deploy your code. You just need to copy the vtex admin cookie header and paste it into the "Cookie" field.
Command available with :dev, :qa, and :prod
npm run deployappInside the "environments" folder you can find the configuration files .dev.env, .qa.env, .prod.env, there you can add your environment variables.
With the previous commands and the command :dev, :qa, and :prod for instance:
npm run start:devIf you don't set environment, dev is taken by default value
src/
.
├── HOC
│   └── ProviderContext
│       └── index.tsx
├── __test__
│   ├── SampleToast.test.tsx
│   └── __snapshots__
│       └── SampleToast.test.tsx.snap
├── axiosInstance.ts
├── components
│   ├── App
│   │   └── index.tsx
│   ├── Cart
│   │   ├── index.tsx
│   │   └── styles.scss
│   ├── CartLinks
│   │   ├── index.tsx
│   │   └── styles.scss
│   ├── CartMoreOptions
│   │   ├── index.tsx
│   │   └── styles.scss
│   ├── CartTemplate
│   │   ├── index.tsx
│   │   └── styles.scss
│   ├── ClientProfileData
│   │   ├── ClientForm
│   │   │   ├── index.tsx
│   │   │   └── styles.scss
│   │   ├── index.tsx
│   │   └── styles.scss
│   ├── ConfirmationPage
│   │   ├── index.tsx
│   │   └── styles.scss
│   ├── Footer
│   │   ├── index.tsx
│   │   └── styles.scss
│   ├── Header
│   │   ├── index.tsx
│   │   └── styles.scss
│   ├── HtmlTooltip
│   │   └── index.tsx
│   ├── Layout
│   │   ├── Layout.module.scss
│   │   └── index.tsx
│   ├── PaymentData
│   │   ├── index.tsx
│   │   └── styles.scss
│   ├── Preloader
│   │   ├── Preloader.module.scss
│   │   └── index.tsx
│   ├── SampleDialog
│   │   ├── SampleDialog.module.scss
│   │   └── index.tsx
│   ├── SampleLogo
│   │   ├── SampleLogo.module.scss
│   │   └── index.tsx
│   ├── SampleToast
│   │   ├── SampleToast.module.scss
│   │   └── index.tsx
│   ├── ShippingData
│   │   ├── index.tsx
│   │   └── styles.scss
│   ├── StyledDialog
│   │   ├── StyledDialogTitle
│   │   │   ├── index.tsx
│   │   │   └── styles.scss
│   │   └── index.tsx
│   └── Totalizers
│       ├── index.tsx
│       └── styles.scss
├── constants.ts
├── country
│   └── COL.ts
├── environment.ts
├── helpers.tsx
├── index.tsx
├── redux
│   ├── UI
│   │   ├── action.ts
│   │   ├── actionTypes.ts
│   │   ├── reducer.ts
│   │   └── selectors.ts
│   ├── reducer.ts
│   └── store.ts
├── styles
│   ├── _classes.scss
│   ├── _fonts.scss
│   ├── _mixins.scss
│   ├── _variables.scss
│   └── index.scss
├── theme.ts
└── types
    └── orderForm.d.ts
The same js and css files should be assigned to the content of the confirmation page files:
- checkout-confirmation-footer
- checkout-confirmation-header
dist/
.
├── checkout-confirmation4-custom.css
├── checkout-confirmation4-custom.css.map
├── checkout-confirmation4-custom.js
├── checkout-confirmation4-custom.js.LICENSE.txt
├── checkout-confirmation4-custom.js.map
├── checkout6-custom.css
├── checkout6-custom.css.map
├── checkout6-custom.js
├── checkout6-custom.js.LICENSE.txt
├── checkout6-custom.js.map
└── index.htmlTo explain how this checkout application works, the following components with which you can expand the rest of the sections and functionalities of the "Custom checkout app" application.
│   ├── ClientProfileData
│   │   ├── ClientForm
│   │   │   ├── index.tsx
│   │   │   └── styles.scss
│   │   ├── index.tsx
│   │   └── styles.scss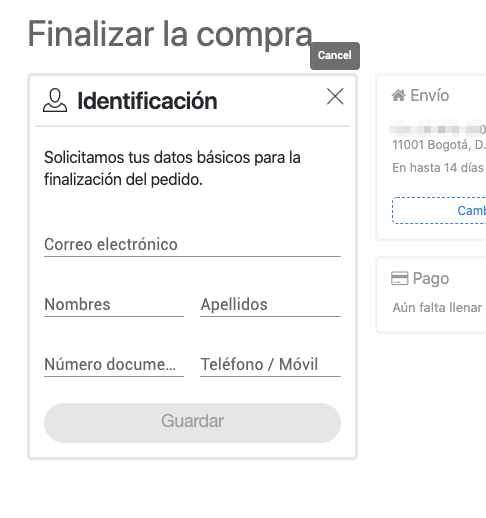

│   ├── SampleToast
│   │   ├── SampleToast.module.scss
│   │   └── index.tsx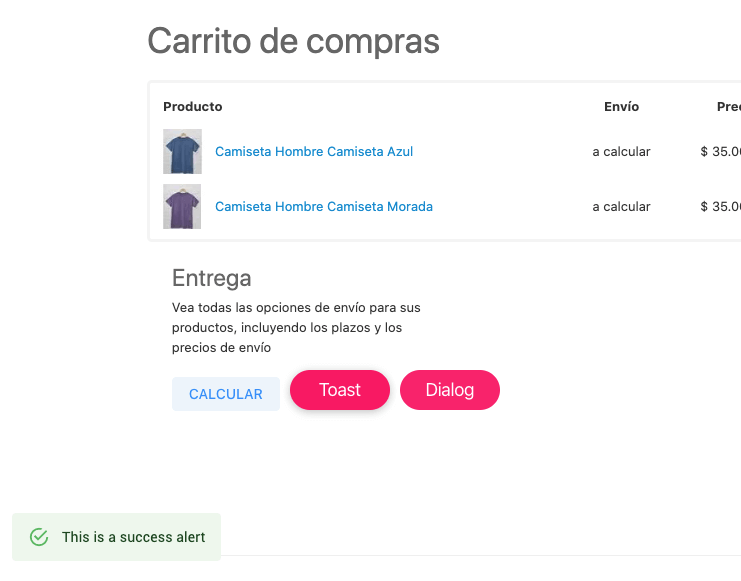
│   ├── StyledDialog
│   │   ├── StyledDialogTitle
│   │   │   ├── index.tsx
│   │   │   └── styles.scss
│   │   └── index.tsx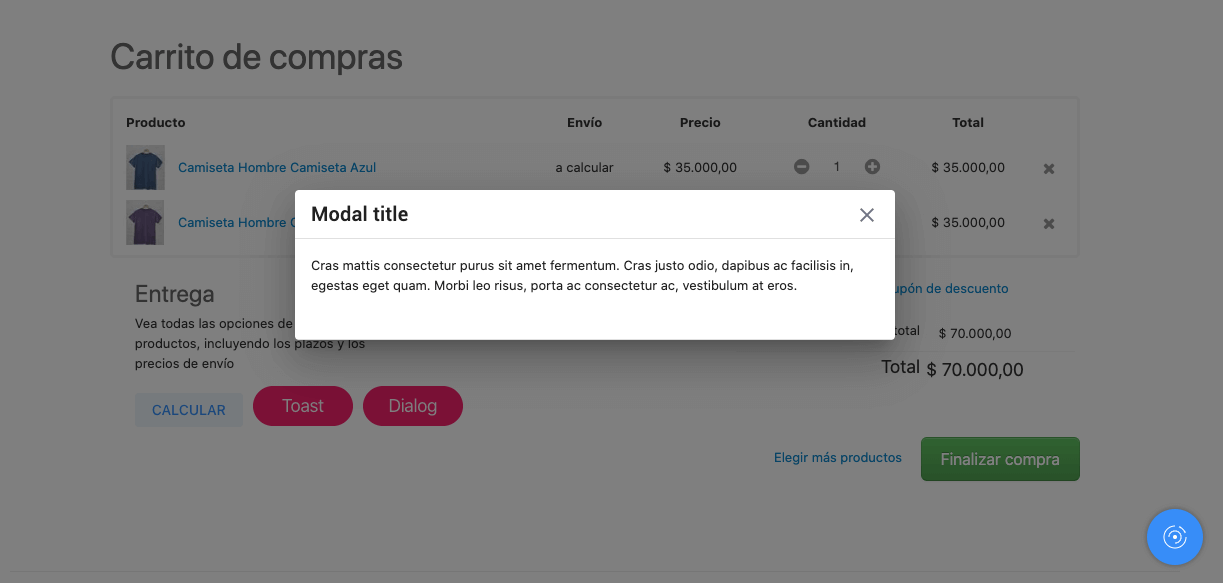
│   ├── SampleLogo
│   │   ├── SampleLogo.module.scss
│   │   └── index.tsx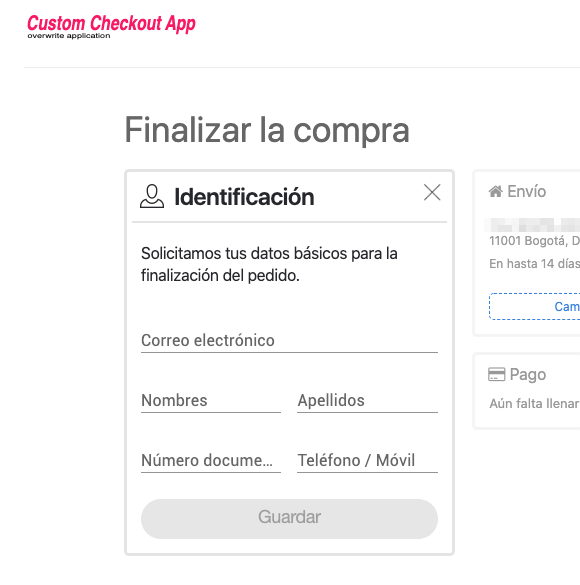
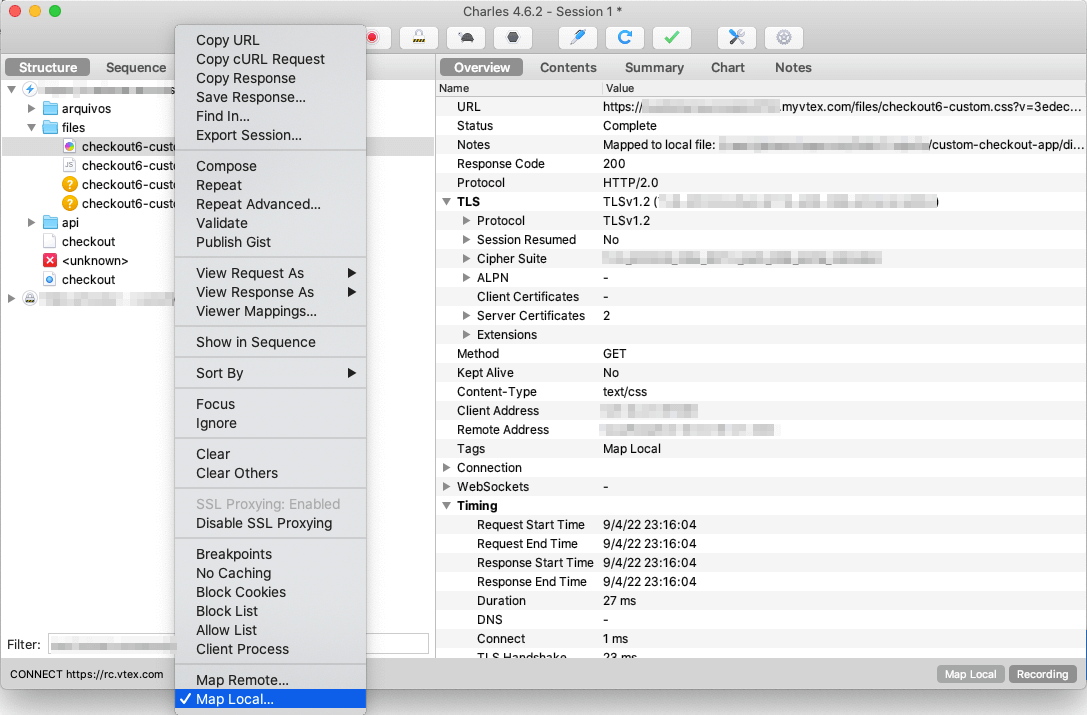
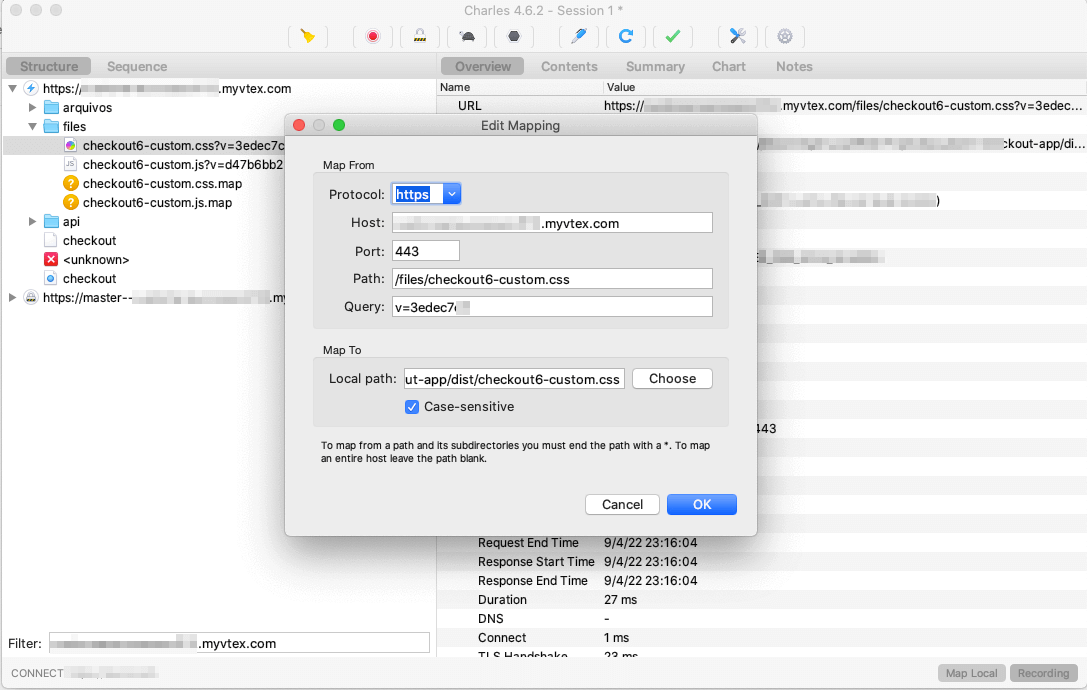
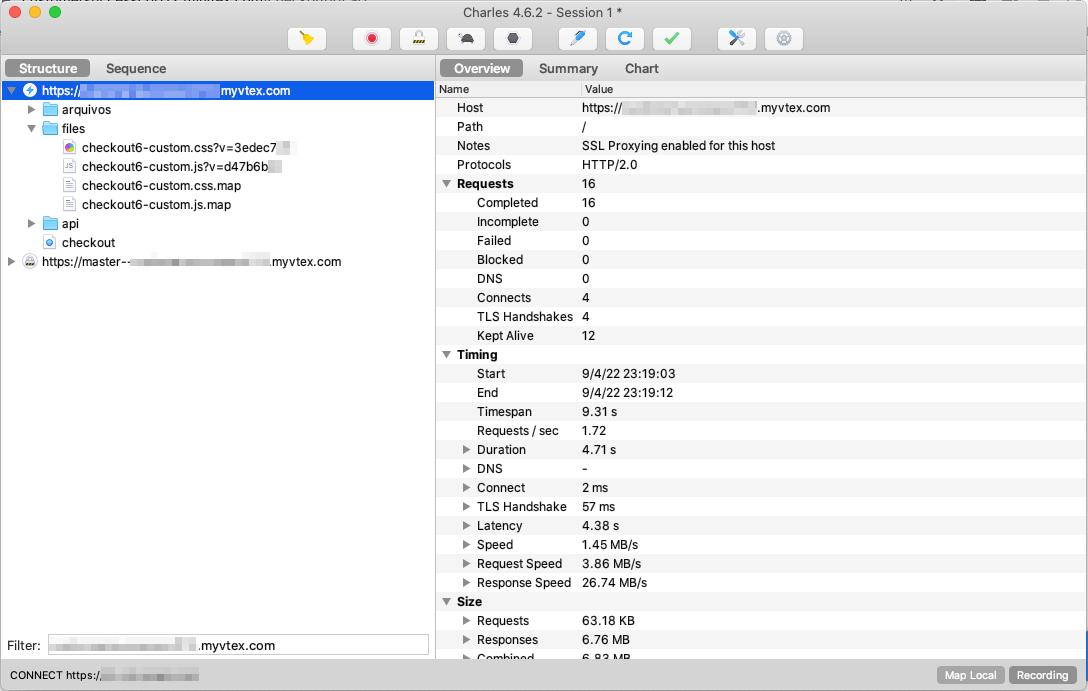
To debug local changes you can use charles proxy as an option, below I show an example to map local files from charles proxy application.
As a help we leave you a general configuration guide of the application, keep in mind that it can change depending on the version you have of the application and also the operating system Charles proxy settings
Before you run the Deploy App you must ensure updated environment file with you own trade policy in the property
REACT_APP_ENVIRONMENTS_URL: [{"name": "myvtex","value": "https://{accountName}.myvtex.com/admin/portal/#/sites/{devName}/code"}]Other important aspect is that this application needs a Vtex admin cookie as input, to choose an environment and click the "Submit" button.
There're multiple ways to get the cookie value, but only we'll mention two of them:
-
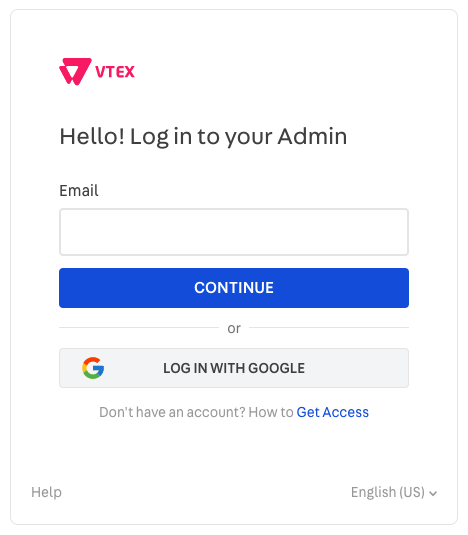
Login to Vtex
-
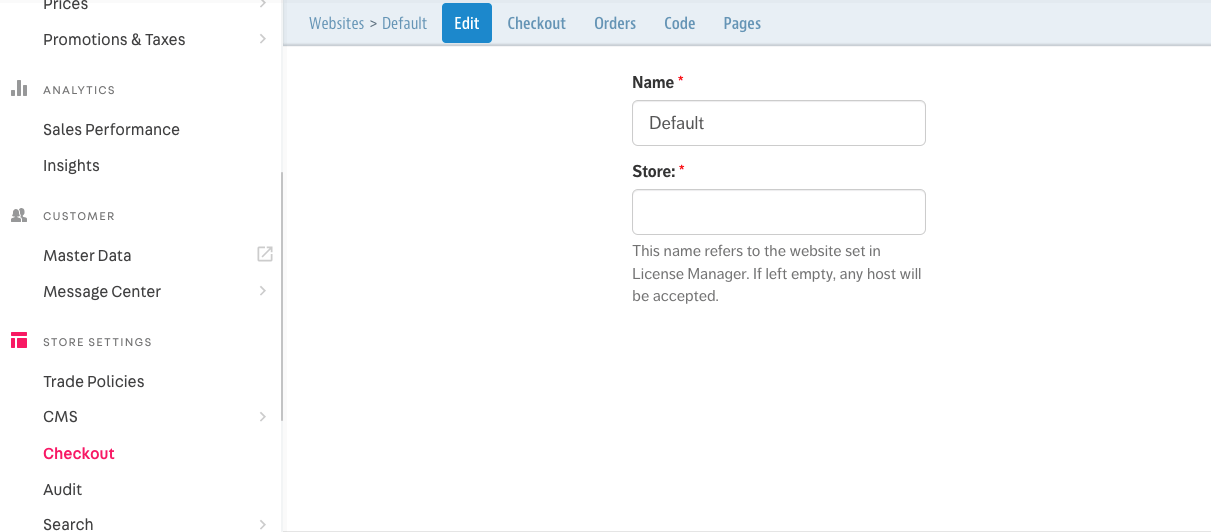
In the side menu look for the
STORE SETTINGSand click on the optionCheckoutand then click on the engine icon -
On the next view, you should click
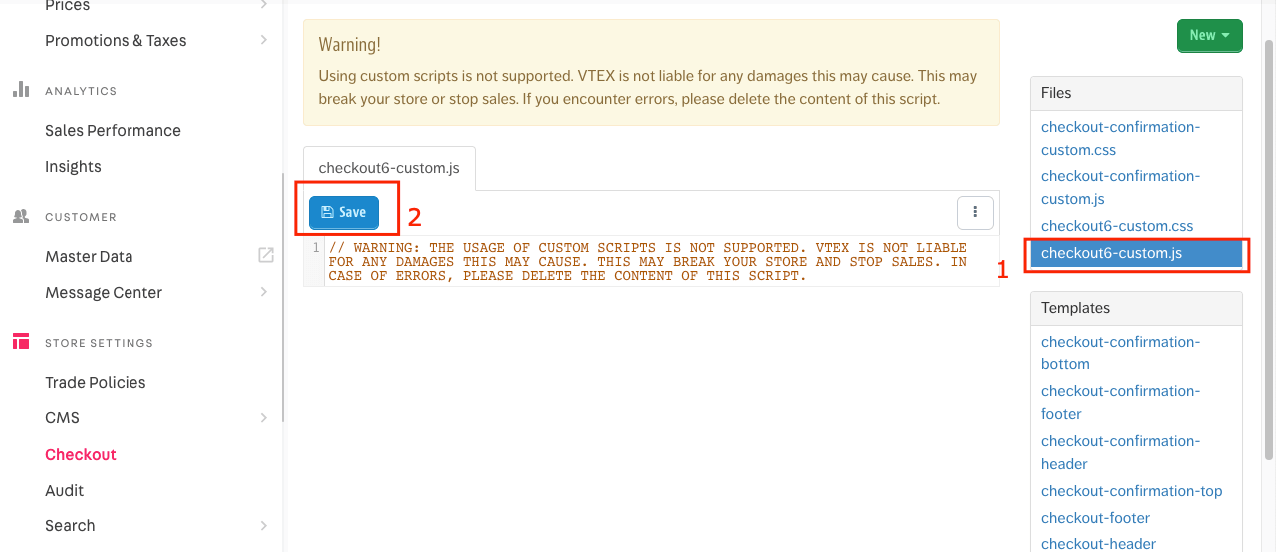
Code -
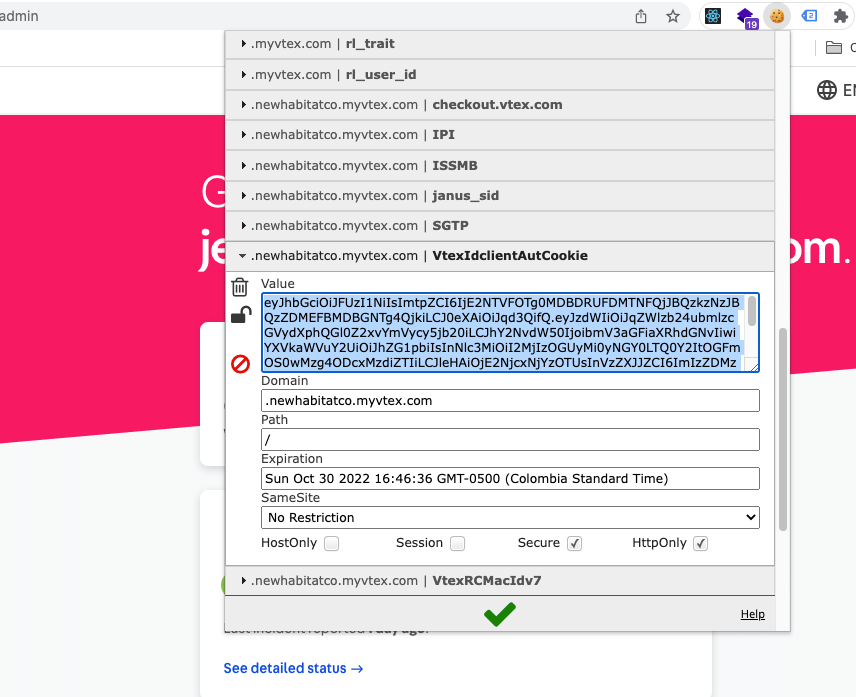
In this section you need to edit some file to get the cookie from the request as shown in the following image

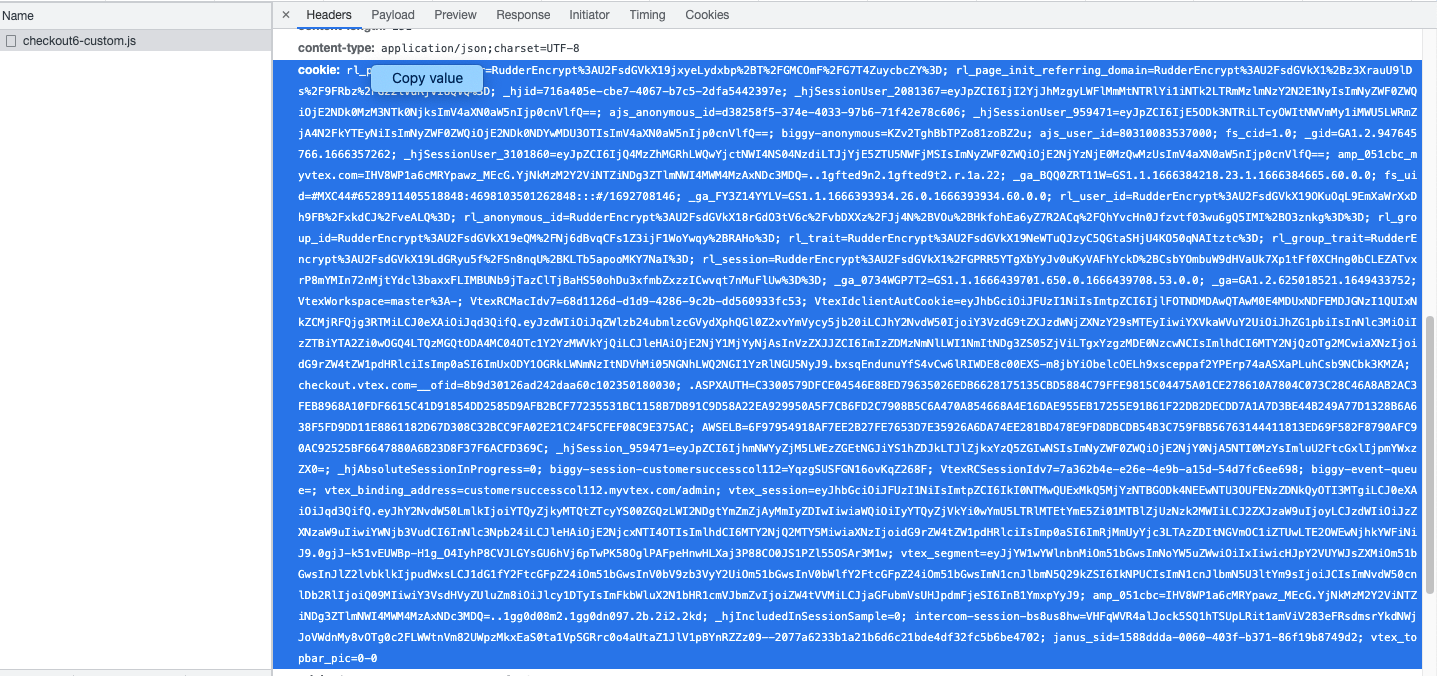
If you use Google Chrome or Opera as a main browser, you could install an extension like a EditThisCookie.
-
Open extension once you've had logged into de Vtex administrator and copy value:
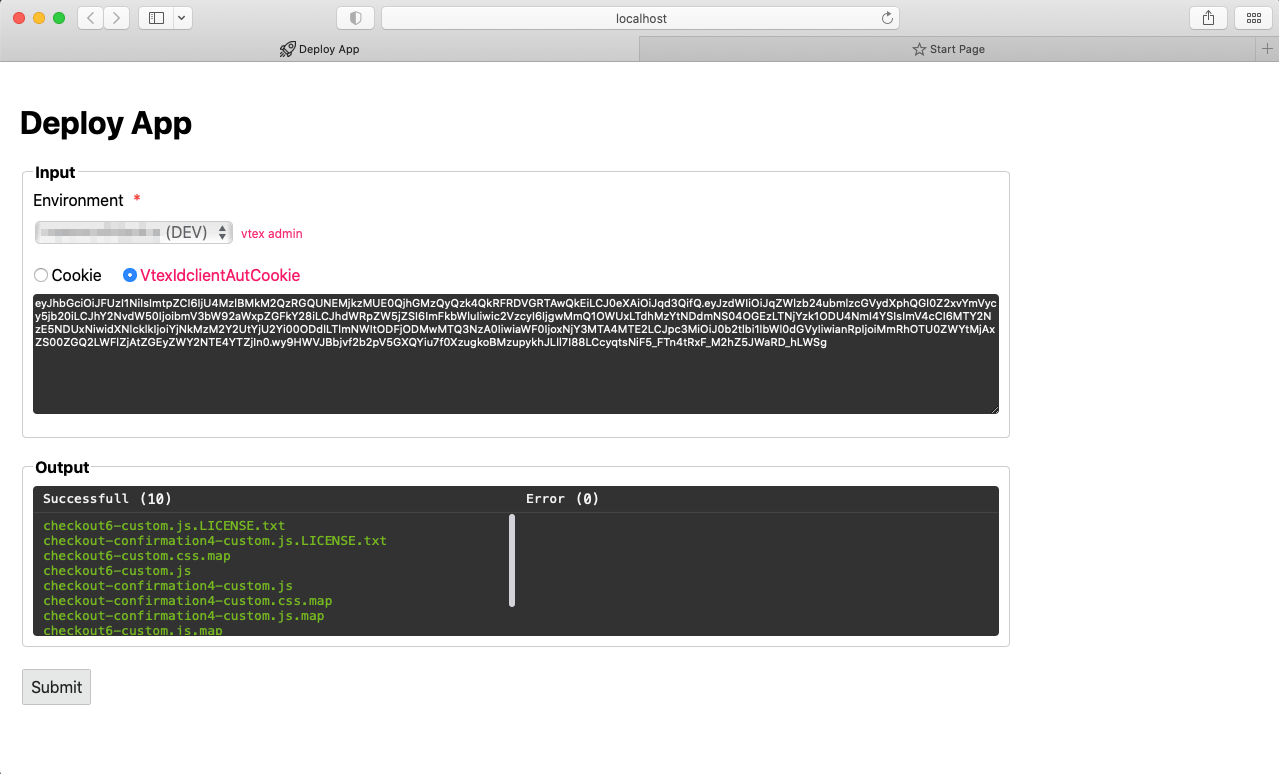
IMPORTANT limit of size each file: 3Mb
- React
- Webpack
- Sass
- Babel
- Axios
- Material UI
- Notistack
- Charles Proxy
- Checkout Vtex
- OrderForm Custom Data
- Update orderForm configuration
- Add client profile
- CMS - Creating and editing a page template
- Checkout customization guide
- Customizing the Checkout Confirmation pages
- Jeison Nisperuza - jnisperuza - jnisperuza.github.io