A lesson set on objects, how they are modeled within apps in JavaScript and Node.js
Create a new Cloud9 workspace for Node.js
- From your Cloud9 Dashboard, find in the upper left corner and click the green button, "Create New Workspace".
- Select "Clone From URL".
- In the "Source URL" form input, copy and paste in the following URL: https://github.com/jfraboni/javascript-thinking-in-objects.git
- In the environment selection box, select "Node.js".
- Finally, click the green button "Create".
- When the Cloud9 workspace is finished spooling-up, click the green button, "Start Editing".
- One last thing, we have some node packages to install, so when the IDE workspace appears, select the terminal in the bottom pane, and enter the command: npm install

After executing the node package manager installation command, you'll see a bunch of installation notes fly by on the command-line while our required code libraries are installed. Once this processes finishes, you're in business...
Alrighty then, when it comes to building apps, programs or systems, you want to start thinking in terms of the objects that make up those apps or systems, and how they interact with each other.
When you think in terms of objects, you're thinking in terms of Object Oriented Programming (OOP), and in OOP, the words datatype and object are synonomus, in the sense of asking: with what type of object are we dealing?
When we model the datatype or objects that make up an app, we can think of modeling objects the same way we would with real objects in the real world, that is, what the objects are made of, and what they can do.
Before we can create an object of a particular type, we must design the object, that is, define its properties and behaviours. We can compare this to the process of designing a car or anything that we manufacture: First we need a blueprint or a schematic, then we need some kind of constructor or factory that creates the objects from our blueprint.
In most computer languages that support OOP, we have some sort of constructor mechanism, normally a function that we define, and when invoked, initializes and returns an instance of our custom type of object.
Get use to the term instance, you'll be using it often when discussing your work, and it generally refers to an object of a particular type that is now in existence. A blueprint or a Class are abstract, they refer to the concept of a type of object, whereas an instance is the object.
To invoke a constructor of a Class, most languages use the keyword new, as in var myCar = new Car("red");. In this example, we've created an instance of a car, passing in the String "red" to its constructor function, presumably the color of the car, and we've assigned the new instance of the Car to a variable named myCar`.
In fact, although there's little reason to do so, all built-in or primitive objects in JavaScript, like Numbers and Strings, can be built using their constructors:
var num = new Number(1);
console.log(num.valueOf()); // prints: 1
var str = new String("OMG, I'm a String");
console.log(str.valueOf()); // prints: OMG, I'm a String
Static languages, like Java, include a Class Object, an actual type of object, more formally allowing us to define a type of object, grouping together the properties and behaviours that define a type of object. JavaScript, not so much.
####And the Winner Is... Factories
In JavaScript, there's several means of constructing custom objects, like using constructor functions and the new keyword, and adding methods to an object definition via the constructor Function prototype, and each has a slew of techniques for making this behave the way we want.
For the sake of universality, usability and simplicity, we're going to recommend, loosely, the use of the factory pattern to create objects.
Have a read of George Mauer's article on this and new.
A factory is simply a function that we define, that when invoked, initializes and returns an instance of our custom type of object. There's many benefits to using factories over constructors and prototypes in JavaScript, namely, we can encapsulate state, and we can avoid the ambiguity of the this keyword. Don't worry too much about these concepts for now, they will make sense to you as get your hands in the clay; for now, factories are your friends!
In this project, we're gonna build out a little contacts app that reads and writes our contact information to and from the filesystem.
In doing so, we'll also touch on modularization, facilitating better oranization of our app, addressing a seperation of concerns. The concept is we divide our app into separate objects or modules, each module responsible for one thing and one thing only, the same way a car is made up of... you get the point.
To begin, we'll model a person object, because that is the datatype our contacts app will manage. Many apps, including Facebook, model users in this way. In fact, to illustrate, open a new tab in your browser, login to Facebook, click on your own profile to open your profile page, then, in the browser's url address bar, replace the www in https://www.facebook.com/john.fraboni with graph as in:
https://graph.facebook.com/john.fraboni
Press enter, and... voilà (that's Québécois for "there you have it!"):
{
	"id": "123456789",
	"first_name": "John",
	"gender": "male",
	"last_name": "Fraboni",
	"link": "https://www.facebook.com/john.fraboni",
	"locale": "en_US",
	"name": "John Fraboni",
	"username": "john.fraboni"
}
Here you are, represented in JavaScript Object Notation (JSON), that is, you modeled as data.
Get use the the term model; it's another word you'll use a lot to describe the thing with which your app is dealing. "What's the model?", is essentially asking, "What's our data?".
One of the design patterns used frequently to cleanly organize sections of an application is called Model View Controller (MVC):
The model is the tier of the app that manages data, its access and storage, the view is the part of the app responsible for displaying the model, our data, to the user, and the controller handles user input from the view and manipulates data in order to present it to the user or prepare it for persistence, that is, storage on a filesystem.
Our contacts app will model people as objects, and we'll even serialize them to JSON to persit the data on the filesystem. We'll create a separate module, called model.js to act as the model tier of our simple app.
TODO 1 : Open the model.js file, and create a factory function that initializes a person type of Object. The Person type of Object will hold all of the properties and behaviours that represent a person:
'use-strict';

// TODO 1 : create the makePerson factory //
function makePerson(firstName, lastName, email, telephone, gender, birthDate, birthPlace) {
    var _person = {
        firstName:  firstName,
        lastName:   lastName,
        email:      email,
        telephone:  telephone,
        gender:     gender,
        birthDate:  birthDate,
        birthPlace: birthPlace,

        name:       function() { return _person.firstName + ' ' + _person.lastName; }
    };
    return _person;
};
The makePerson() function takes several parameters, firstName, lastName, etc, that we assign to the properties of the same name of the newly created _person object. We also define a method, a function called name that concatenates and returns the firstName and lastName Strings of the _person object; essentially a convenience behaviour of the model, so that every time we want to display the full name of the person, we don't have to repetitively, manually concatenate these two values.
Note the use of the underscore that prefixes the word person: _person. This is a convention used often to mark properties as private, that is, not intended to be visible or used outside of the scope of the current object. As George mentioned in his post, referenced above:
I like an underscore prefix to indicate "this is what I'm building here"
Dig this: The _person object is simply an associative array! That's right, just a container of key/value pairs that will treat as a person, essentially because it http://haacked.com/archive/2014/01/04/duck-typing/acts like one, for our purposes anyway.
TODO 2 : Alrighty, because we're building a little Node.js command-line utility, let's expose our person model factory as a module. In the Node.js environment, modules are objects that encapsulate their concerns, that is, hide their inner workings from outside clients, and expose an API through an exports object on the module object. So, in order for us to access our person factory, we need to export it:
// TODO 2 : expose the makePerson factory //
module.exports.makePerson = makePerson;
Creating a Node.js module is fairly straight forward: You need only require any other required modules, then export any API. To use your module, you use the require directive from within another module, and we'll do this shortly in our app.js file. When we do so, Node will take care of all the wiring for us, making our module's API available for usage.
TODO 3 : While we're at it, let's set up a deserialize method, a function that knows how to read a plain JavaScript object containing person data, resusatated from JSON. This method will pass the person data loaded from the filesystem to our factory method, creating a person object complete with its methods.
This deserialize method will allow other objects to use our person datatype without having to know too much about how to create it. This is called decoupling, and it's a very important concept of code organization and OOP.
// TODO 3 : create the makePersonFromJSON method and expose it //
module.exports.makePersonFromJSON = function (data) {
    return makePerson(data.firstName, data.lastName, data.email, data.telephone, data.gender, data.birthDate, data.birthPlace);
}
Ok, we're done with the model module: Let's make some people!
TODO 4 : Open up the app.js file, and require the model module:
// TODO 4 : require the model module //
const
    model = require('./model');
Cool, we've now imported the model module into our app, we can begin to use our person custom datatype! There's a more to learn about Node.js modules, there definitions and importations, but that's the basics!
TODO 5
Let's test out our person factory:
var me = model.makePerson("Jill", "Williams", "jill@gmail.com", "555-555-5555", "Female", "03/07/1987", "Yucaipa, California, United States");
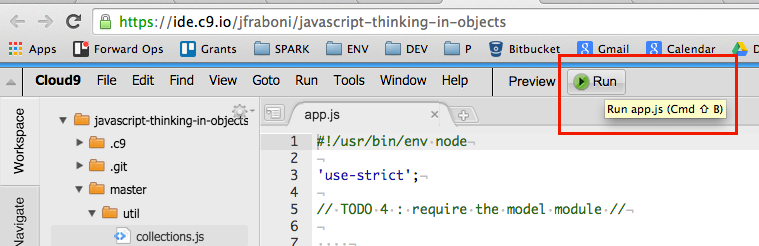
console.log(me);Run the App! : In Cloud9, with the app.js file selected, from the menu bar, click the green run button, like so:
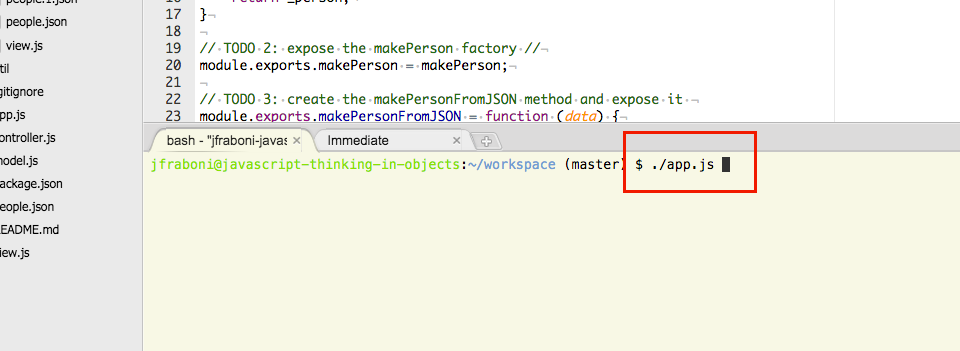
Or, from the Bash prompt, select the terminal view so it has the focus, and type ./app.js, like so:
Fantastic, you should the following output in your terminal:
$ ./app.js
debugger listening on port 15454
{ firstName: 'Jill',
  lastName: 'Williams',
  email: 'jill@gmail.com',
  telephone: '555-555-5555',
  gender: 'Female',
  birthDate: '03/07/1987',
  birthPlace: 'Yucaipa, California, United States',
  name: [Function] }
Magic! Using the factory method of our person model module, we created a person object. Triple A!
Note how all of the code for the creation of our person model is encapsulated in the model module, leaving our main app.js file nice and clean! This also means we can re-use the model module and its code anywhere we want! This is a powerful feature of modularity.
TODO 6 :
Now, we need to manage a list of people, our contacts, so, let's lean on a list utility to help us in this regard. And while we're at it, as a nice feature, we want to be able to save our data whenever and for any reason our app quits, so let's wire-in our list's synchronous save method to an exit utility. To use these utilities, we first need to require them.
At the top of the app.js file, add another require statement to import the collections and exit utilities, so that now the require statements look exactly like this:
// TODO 4 : require the model module //
const
    model = require('./model'),

    // TODO 6 : require the collections and exit utility modules //
    collections = require('./util/collections'),
    exit = require("./util/exit");
You can see here that these modules are located in a directory called util, so the path to import the collections module is './util/collections'.
Before we use these modules, let's open up the collections module to add some new functionality to the list object definition:
TODO 7 : Open up the collections.js file, add a saveSync method to the list object definition:
// TODO 7 : add the saveSync method //
saveSync: function () {
    fs.writeFileSync(_list.filepath, freezer.serialize(_list.filepath, _list.values));
    console.log('List.saveSync: saved synchronously');
}
This function will write to the file system and our app will wait while it does so. Most times this won't be desirable, because we don't want to block our app and wait while another process is in progress when we can just as easily pass off the work to another thread, and listen for an event. In some cases, though, it is desirable, like when your app is dying and you need to autosave!
TODO 8 : Great, go back to the app.js file, and let's make use of the modules we've imported in TODO 6:
// TODO 8 : create a list object that will manage a collection of people //
var people = collections.makeList('people.json', model.makePersonFromJSON);
Here we create a list called people.
Our collections model exposes a list object that, on top of basic Array functionality, provides an implementation for serializing, saving, synchronously, saving asynchronously, and loading our data.
To use it, the makeList factory method takes a String, the name of the file we want to load from and save to, and a deserialize method - a Function to resuscitate our data from its serialized form, which, given the file extension of .json, will be JSON.
Isn't that interesting? We're passing a Function as if it's an object! This is a very powerful feature of some languages: In JavaScript, a Function is a first class object, meaning you can assign it to a variable or constant, and pass it around to other objects in your app because it is an object too!
TODO 9 : Now add our me person to the people list:
// TODO 9 : add the me person object to the people list //
people.add(me);
Ok, now, let's use our exit utility. In Node.js, we can listen for exit events: these are events that signal that the app is about to shut down for some reason, either by intention or by accident. We encapsulated handling these events in this simple exit utility, and we can configure this utility to do certain clean up actions on shutting down the app.
In this case, we wanna save our people list to the file system, so, we'll wire up our exit utility to the list's saveSync method:
// TODO 10 configure the exit utility to fire the list's saveSync method //
exit.init({
    exit: {actions: [people.saveSync.bind(people)]},
    sigint: {actions: [people.saveSync.bind(people), process.exit]}
});
You can read more about Node's exit signals here.
Ok, when we now run the app, the program will exit immediately because we're not asking it to wait for anything. However, before it does, because we've added a person to our list, and our exit utility is wired up to the saveSync method of the list, our person data will be saved into a file called person.json.
Let's try it out!
Run the App!
debugger listening on port 15454
{ firstName: 'Jill',
  lastName: 'Williams',
  email: 'jill@gmail.com',
  telephone: '555-555-5555',
  gender: 'Female',
  birthDate: '03/07/1987',
  birthPlace: 'Yucaipa, California, United States',
  name: [Function] }
Module exit initialized with exit, sigint, uncaughtException
List.saveSync: saved synchronously
Eureka! You'll see that our exit utility logged the message "Module exit initialized with exit, sigint, uncaughtException" and that the list, on shutting down, logged List.saveSync: saved synchronously. If you look on the file system, you'll find a new file named people.json.
You did that!
IMPORTANT BEFORE WE MOVE ON, let's remove some code from a few steps in the app.js file:
- delete the code from TODO 5: Were we created the
meperson. - delete the code from TODO 9: Were we added the
meperson to thepeoplelist.
Those steps were to merely illustrate using our person model and our people list - and leaving them in while duplicate our me person every time we run the app, and we don't want this to happen!
Ok, the view in an MVC app is merely responsible for displaying our data, and usually provides some means of interacting with our data.
For the sake of reusability, we want to separate the rendering of the data from any decisions from interacting with that data. In short, the view just displays stuff, and doesn't care what happens when the user interacts with it. Our controller will respond to user input, and in doing so, the same view could behave differently if pair with a different controller. Cool, eh?
Let's make a very flexible menu that will take a String of menu options to show the user, then dispatch an event with the user's selection.
TODO 11 : Open up the view.js file, and define our menu:
    // TODO 11 : Create the menu object returned by the makeMenu factory //
    var _menu = {
        show: function() {
            prmpt.start();
            prmpt.get(menuProperties, function (err, result) {
                if (err) { return onErr(err); }
                _menu.emit('userInput', result.input);
            });
        }
    };
    deepExtend(_menu, new EventEmitter());
    return _menu

    // END TODO 11 //
Also in our view, we've already defined a simple factory called makeTable, allowing us to quickly create a table object displays tabular data on the command-line. This little view module could be used for a variety of apps! That's a hint, y'all!
Before we test out our views, let's do some more coding to get the controller into place.
Ok, so, in our little app, again, just to demonstrate separation of concerns, we're going to make us of another module to take care of the logic of loading up our data, preparing that data to show it to our user, and finally responding to user input.
Open up the controller.js file.
Our app should allow us to at least show our list of contacts, add new contacts, and save our list of contacts - and by saving our contacts, we should be able to load them again at runtime! These are called requirements - the things we need our app to do!
All of the logic to power these requirements, and make our dreams come true, is going to reside in our controller. Typically speaking, in an MVC app, the controller takes care of preparing data to be displayed to user, that is, formatting our data appropriately for the view, and responding to events off the view, that is, user input.
The controller is the object in the MVC pattern that knows the most about the other two tiers, the view and the model. The view and the model don't know anything about each other or even the controller, and this will make more sense once you begin to code within this patterned convention. For now, consider the controller to be the object in charge of making it all happen - and the other two objects, well, they're essentially dumb. But, you know, nice and all, just, dumb.
// TODO 12 : create the onUserInput event listener //
function onUserInput(input) {
    switch(input) {
        case "1":
            _contacts.table.show(prepareValues(_contacts.people.values));
            _contacts.menu.show();
            break;
        case "2":
            _contacts.add();
            break;
        case "q":
            console.log('Bye bye: shutting down...');
            process.exit(0);
            break;
    }
}

// TODO 13 : on the menu object, listen for the userInput event //
menu.on('userInput', onUserInput);

// TODO : 14 on the people object, listen for the loaded event //
people.once('loaded', function () {
    menu.show();
});

// TODO 15 : call the load method on the people object //
people.load();
TODO 16 : Great, let's wire all this together in our app.js file:
At the top of the of the app.js file, first replace the semicolon from the end of the require statements with a comma so we can add some more modules in the list. Then, require the view, prompt and controller modules so your whole require statement looks like this:
// TODO 4 : require the model module //
const
    model = require('./model'),

    // TODO 6 : require the collections and exit utility modules //
    collections = require('./util/collections'),
    exit = require("./util/exit"),

    // TODO 16 : require the view, prompt, and controller modules //
    view = require('./view'),
    prmpt = require("prompt"),
    controller = require('./controller');
Now let's wire together our model and view with the controller:
// TODO 17 : initialize the controller, passing in the required model and views //
controller.makeContacts(people,
                        view.makeMenu('Please select: (1) Show, (2) Add, (q) Quit',
                                       /^[1-9q]$/),
                        prmpt,
                        view.makeTable(['No.',
                                        'Name',
                                        'Email',
                                        'Telephone',
                                        'Gender',
                                        'D.O.B.',
                                        'Birth Place']));
Run the App! Awesome, let's fire up our app one last time:
debugger listening on port 15454
Module exit initialized with exit, sigint, uncaughtException
prompt: Please select: (1) Show, (2) Add, (q) Quit:
Nice, we have an app! Try out the menu, show your contacts or add a new one. Notice when you shut down that any new contacts are saved in the people.json file!