-
Notifications
You must be signed in to change notification settings - Fork 8
3) Interactive Delineation
Interactive delineation supports the creation of final cadastral boundaries. The interactive delineation is implemented in the open source geographic information system QGIS as BoundaryDelineation plugin. The plugin contains different functionalities to delineate parcels from imagery (Table 1, Figure 1).

Table 1: Delineation functionalities of BoundaryDelineation QGIS plugin.

Figure 1: Interactive delineation functionalities: (a) connect lines surrounding a click, or (b) a selection of lines. (c) Close endpoints of selected lines to a polygon. (d) Connect lines along least-cost-path.
- image segmentation lines (
.shp)- with boundary likelihood as attribute (optional)
- RGB orthoimage raster (
.tif)
- final cadastral boundary lines (
.shp)
- Install
QGIS3, which is a free and open source GIS on your computer by downloading the QGIS installer- instructions on how to install the software are provided on the QGIS website
- Install
BoundaryDelineationplugin from theQGIS Plugin Manager- instructions on how to install the a plugin are provided on the QGIS website and in the Get help section of this wiki
- the plugin's source can be downloaded from the QGIS plugin repository

To load input data to be used during the interactive delineation.
- image segmentation lines (
.shp)- with boundary likelihood as attribute (optional)
- RGB orthoimage raster (
.tif)
- final cadastral boundary lines (
.shp)
-
Raster base map: load RGB orthoimage raster (.tif)- select file from drop-down list if it is already opened in QGIS or load file by clicking on
...
- select file from drop-down list if it is already opened in QGIS or load file by clicking on
-
Segments layer: load image segmentation lines (.shp)- select file from drop-down list if it is already opened in QGIS or load file by clicking on
... - simplify the input lines to remove zig-zagging along pixels by setting a desired simplification tolerance
- simplification tolerance is a value in meters by which the line is simplified based on douglas-peuker (example: if the value is 1m, the simplified lines are straight for at least 1m before changing direction)
- simplification tolerance should align with local (cadastral accuracy) requirements and the resolution of the input image (see tooltip in plugin for example values)

- select file from drop-down list if it is already opened in QGIS or load file by clicking on
-
Output: save output final cadastral boundary lines (.shp)- leave empty to create temporary layer (which can be saved later) or define path to save final cadastral boundary layer by clicking on
...
- leave empty to create temporary layer (which can be saved later) or define path to save final cadastral boundary layer by clicking on
-
Its4land Proejct: load input data saved on the its4land platform- Load test data by clicking
Connect|Ensoka|Ensoka|Load as segments layer
- Load test data by clicking
-
Add length attribute: enable to add a length attribute to thesegments layer, which can be used for least-cost-path calculation of theVerticesfunctionality inStepII
-
Process: simplifiesSegments layerintoSimplified Segments( lines) based on simplification tolerance and createsVertices(points) at intersections of lines inSegments layer
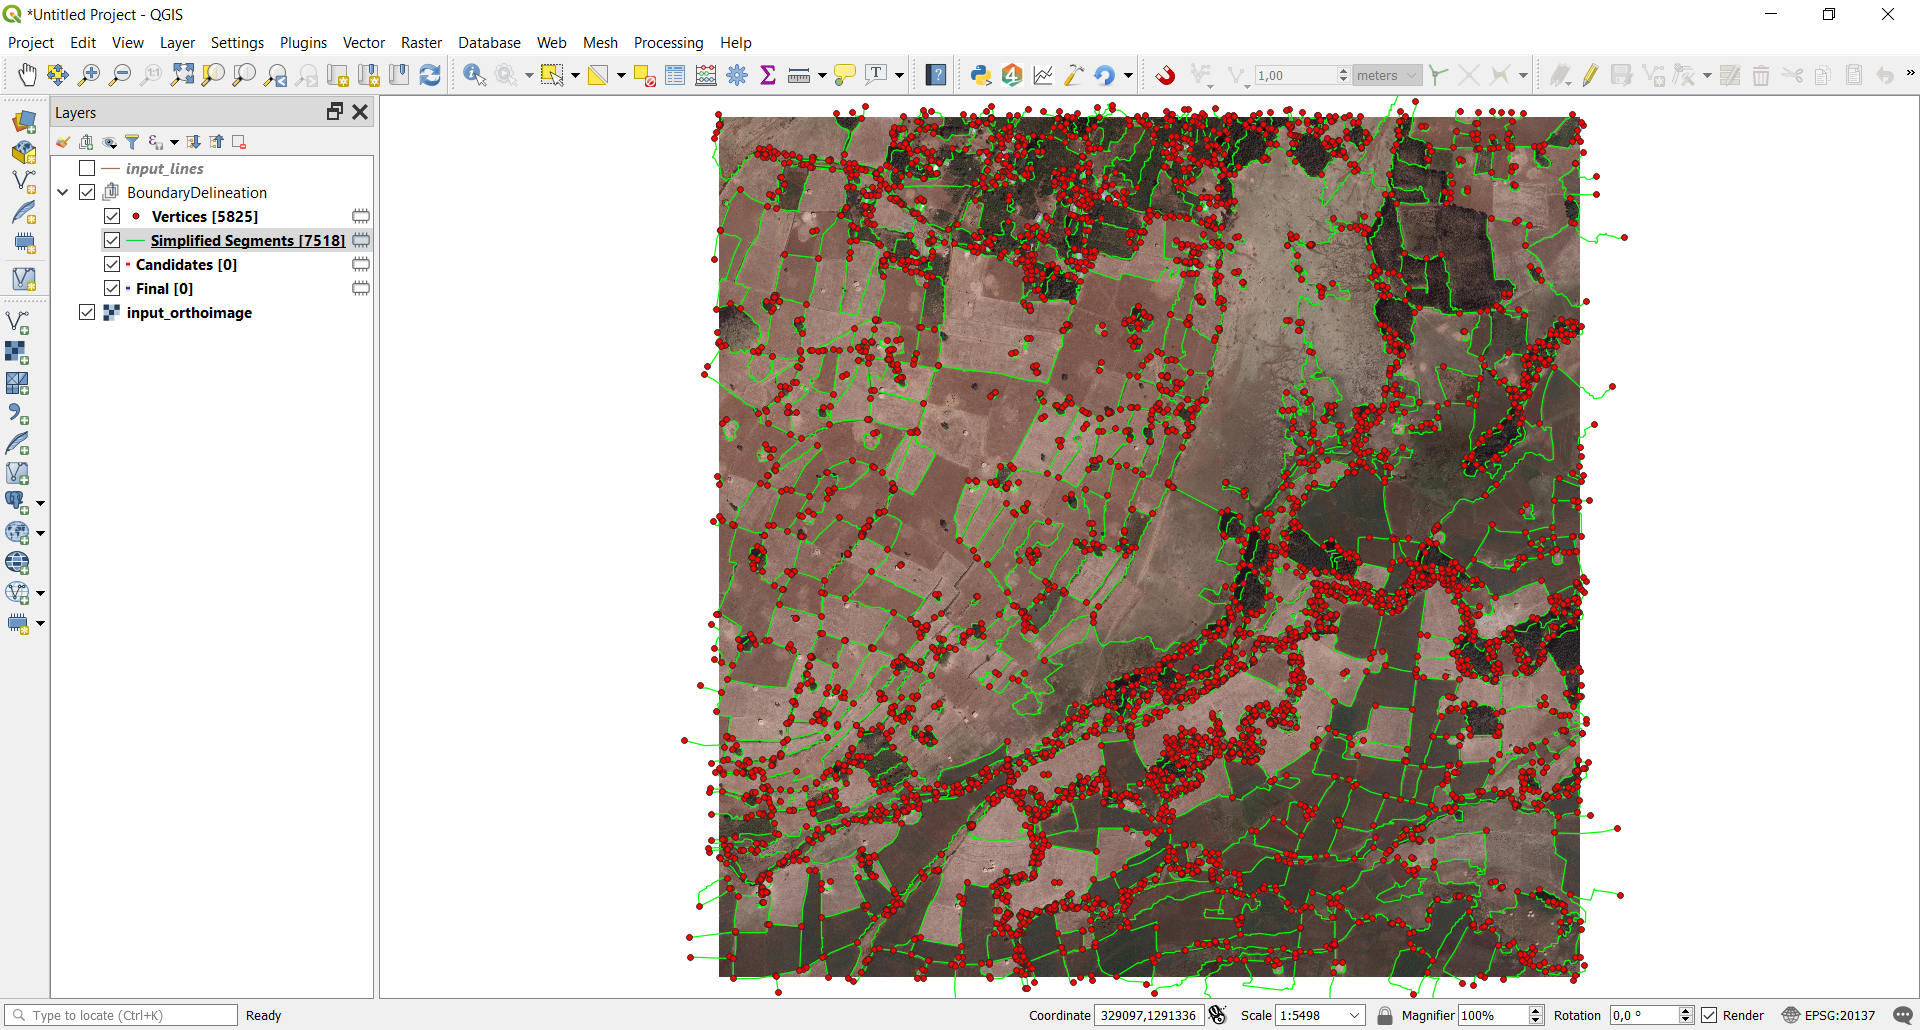
You now have all required layers displayed in the layer panel:
-
Simplified Segments: simplified lines loaded asSegments layer(.shp) -
Vertices: points at intersections ofSimplified Segments(.shp) -
Candidates: boundary lines that you are currently delineating (.shp) -
Final: boundary lines that you would like to save (.shp) - RGB orthoimage raster (
.tif) you loaded asRaster base map - image segmentation lines (
.shp) you loaded asSegments layer
To interactively delineate final cadastral boundaries.
- simplified image segmentation lines (
.shp) - vertices at intersections of image segmentation lines (
.shp)
- final cadastral boundary lines (
.shp) - final cadastral boundary polygons (
.shp) (optional)
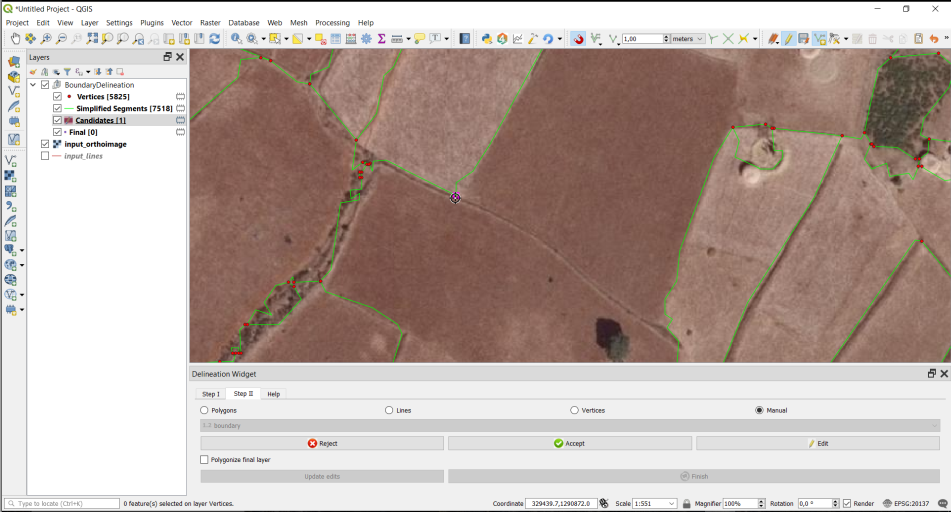
The plugin offers four functionalities to delineate boundaries (Table 1).
Note:
- Select multiple lines or points by holding
Shift - Unselect selected features by holding
Ctrl
-
Polygons
- What: Connect lines surrounding a click or selection of lines
- How: Click inside polygon or select lines around which to create a polygon
-
Shortcut:
Ctrl + Alt + 1

-
Lines
-
What: Connect endpoints of selected lines to a polygon regardless of
Simplified Segments - How: Select lines for which endpoints should be closed to a polygon
-
Shortcut:
Ctrl + Alt + 2
-
What: Connect endpoints of selected lines to a polygon regardless of
-
Vertices
- What: Connect vertices along least-cost-path based on a selected attribute, e.g., boundary likelihood or line length
- How: Select vertices to be connected along least-cost-path based attribute selected in drop-down menu (selected vertices appear yellow)
-
Shortcut:
Ctrl + Alt + 3
-
Manual
- What: Manual delineation with the option to snap to input lines and vertices
- How: Connect manual clicks (enable snapping to snap your manual lines to existing layers)
-
Shortcut:
Ctrl + Alt + 4
After creating a Candidates boundary with one of the functionalities, chosen one of the following options:
-
Reject: Reject feature in candidates layer. Deletes feature and restarts delineation. -
Accept: Accept feature in candidates layer. Moves feature to final layer and restarts delineation.-
Note: if
Update editsis enabled before clickingAccept,Simplified Segmentswill be updated according to edits you made inCandidates(e.g.Manualedits)
-
Note: if
-
Edit: Edit feature inCandidateslayer. EnablesToggle Editing.-
Toggle Editingenables all QGIS editing functionalites (e.g. add, move, delete vertices or lines)
-
To save the lines you added to Final, click:
-
Finish: Finish boundary delineation. RemovesCandidateslayer and displaysFinallayer only.-
Note: if
Polygonize final layeris enabled,Finallines will be transformed to polygons and displayed asFinal Polygons
-
Note: if
The help tab in the plugin provides links to:
- the project website and
- a YouToube manual showing how to install and use the plugin

- Most of the explanations in this wiki are provided in message boxes in QGIS and tooltips in the plugin
- tooltips are little text boxes that appear when you hover with the mouse over a plugin button.
- The plugin's source can be downloaded from the QGIS plugin repository
