A Git integration for Blender.
Blendit brings Version Control to Blender.
Version Control helps you track different versions of your project. Working on a project overtime you may want to keep track of which changes were made, by whom, and when those changes were made.
Version control has been standard practice in software development to keep track of changes mode to source code for years now. However, when it comes to working with files other than textual files you usually out of luck.
While Git and other Version Control Systems (VCS) can track .blend (binary) files it does not make much sense as they are designed for textual files.
That said, according to Sybren on Blender Stack Exchange, Blender Institute uses Subversion.
At the Blender Institute / Blender Animation Studio we use Subversion for our projects. It works fine for blend files, but you have to make sure they are not compressed. Compression can cause the entire file to be different when only a single byte changed, whereas in the uncompressed blend file only that one byte will differ. As a result, binary diffs will be much smaller, and your repository will be faster to work with.
Instead of tracking the .blend (binary) files itself, Blendit tracks the changes you make to the .blend file in real time. It does so by keeping track of the python commands, from the Blender API, used to make changes.
Each time you open a Blendit project, it regenerates the .blend files. This means you can delete the .blend file and still retain the project.
This way we only track a textual (.py) file as Git was intended to be used.
In theory the size of the entire project should be lower than using any other VSC.
-
Download Blendit
.zipfile from here. -
Install Blendit Application Template.
-
Blendit Application templates can be selected from the splash screen or
File ▸ Newsubmenu.
Note: The first time you open Blendit it will take a some time to load.
For Windows: Run Blender as administrator the first time you open Blendit.
-
Create a new Project from the splash screen or
File ▸ New Projectsubmenu.
-
Select a location to save the project and type the name of the project in the bottom.

-
Provide your username and email, on the right, to keep track of who made what changes.
Note: If you have use Git and have a global git config file, theses details are auto-filled.
-
Open a Project from the splash screen or
File ▸ Open Projectsubmenu.
-
Locate the project you want to open.

Note: The username and email details shown are of the previous commiter - if that isn't you do change it.
-
Commits are process of saving snapshots of your project.
-
Create a new Commit from the Blendit panel in the Properties area, under Active Tools and Workspace settings tab.

-
Each Commit requires an accompanying Commit Message describing the commit
-
You can go back time by reverting to a Commit from the past.
-
Revert to a Commit by first selecting it from the list of Commits under the Branch subpanel and clicking
Revert to Commitbutton
-
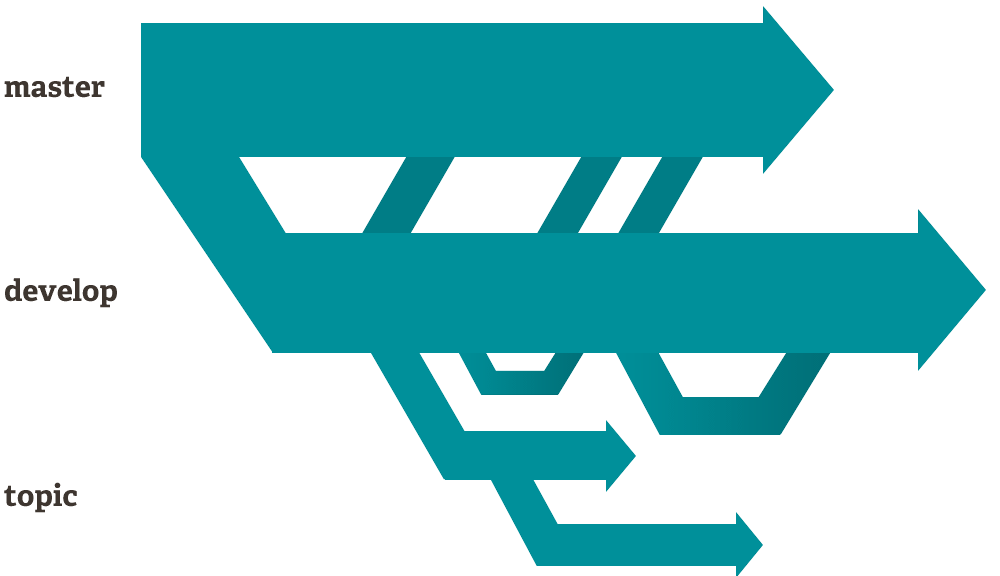
Branches are the forks in the road, so to speak.
-
Create a new Branch by clicking
+button next to the Branches dropdown in the Branches subpanel.
-
Change to that Branch by selecting it from the Branches list dropdown.

Here is an extract from the About Git website. While this is written targeting Software Development, most of these points are applicable to creative workflows too.
- Frictionless Context Switching. Create a branch to try out an idea, commit a few times, switch back to where you branched from, apply a patch, switch back to where you are experimenting, and merge it in.
- Role-Based Codelines. Have a branch that always contains only what goes to production, another that you merge work into for testing, and several smaller ones for day to day work.
- Feature Based Workflow. Create new branches for each new feature you're working on so you can seamlessly switch back and forth between them, then delete each branch when that feature gets merged into your main line.
- Disposable Experimentation. Create a branch to experiment in, realize it's not going to work, and just delete it - abandoning the work—with nobody else ever seeing it (even if you've pushed other branches in the meantime).

- All assets like materials, textures, etc. should be stored within the
/assetsfolder within the project. - Note: Changes made to the
/assetsfolder is not tracked by Blendit.
- Blendit uses pygit2 for Git Plumbing.
- pygit2 is installed automatically using pip when you first open Blendit.
- Therefore Blendit requires an internet connection when you open it for the first time.
Like Blender and Git, Blendit is also licensed under the GNU General Public License.
See Full License.
Splash screen image was made following CG Geek's tutorial.


