We'll be using JSFiddle to give an introduction to HyperText Markup Language, Cascading Style Sheets, and JavaScript.
To begin with, you should know that a webpage looks like this:
<!DOCTYPE html>
<html>
<head>
<style>
[CSS goes here]
</style>
</head>
<body>
[HTML goes here]
<script>
[JavaScript goes here]
</script>
</body>
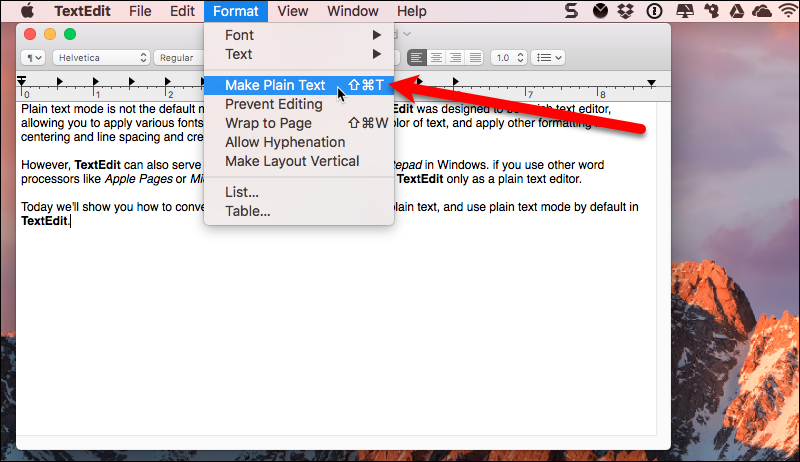
</html>This is the basic template for an HTML page. If you take this template, paste it into Notepad, and save it, you'll get a web page. (The template should go in Discord.) (By the way, if you're using MacOS, you'll want to use TextEdit instead of Notepad, but make sure to put it in plain text mode before saving.) But this new web page is not that interesting and it's kind of incorrect, because it just says things like "CSS goes here" where actual CSS should go. Our job today is basically to come up with some code that will replace those "goes here" labels, and to do that, we're actually going to use an online tool like JSFiddle, to have our code and the result all in one window and to make stuff easy to share, like I mentioned.
To start, go to JSFiddle: https://jsfiddle.net/. You should see four boxes on the page, with the labels HTML, CSS, and JavaScript, and "Result." This layout allows you to write code in the first three boxes and see the result in the other one all at the same time without having to have multiple windows open or anything. When we write stuff in the first three boxes, we're going to need to click "Run" or press Control-S and then the result will show up by where it says "Result." By the way, you can click minimize on the thing that says "Console." (Update, 2023: it looks like the console is minimized by default now?) And one more thing: I would go into the "Settings" and uncheck the two settings that start with "Auto", because otherwise you'll be dealing with some autofill/autocomplete stuff that I think is more trouble than it's worth unless you're really used to it.
Okay: now we're set up, we can type code into these boxes, we just need to know what, in fact, we're typing, and where.
HTML, CSS, and JavaScript are the programming languages that web browsers understand. For this reason, they are very important. There are a lot of tools that you can use to design web pages without directly writing in these languages yourself, but those tools will all need to produce HTML, CSS, and JavaScript at some point, because a browser needs to see those before it can render a real live web page. They are the fundamental building blocks of the World Wide Web. Of these, HTML is the oldest and most fundamentalest; it is what you use to put stuff on your page. Web pages need stuff, so that's the first box we're going to write in.
So, HTML is a fundamentalest building block of the web, and the fundamental building blocks of HTML are called "tags." The first kind of tag is called a start tag, and it looks like this; there is a tag name (which is in this case just the letter "p") enclosed in angle brackets, which are what those greater than/less than signs are called when they are being used to enclose things.
<p>
Does anyone want to guess what the next kind of tag is called, the one that we're going to use after the start tag? It is an end tag. It is the same thing except that there's a forward slash in front of the tag name.
<p></p>And, wait! I almost forgot. There's one more thing you probably want to have with your start tags and end tags. That thing is called "content":
<p>Hello, World!</p>So there you have it. This is called an HTML element: there's a start tag, content, end tag, and the content shows up in the results square (for you too, right 🥺? You just have to hit "run").
To show how other tag names work, let's try another example. Instead of "p", we'll try "h1":
<h1>Pet Turtles Like Music</h1>h1 stands for heading 1. It is the most powerful of all of the headings. There's a whole set of them, ranging form h1 all the way to h12. Let's try h2:
<h1>Pet Turtles Like Music</h1>
<h2>They Flip Their Legs In Waltz Tempo</h2>
And let's go the rest of the way to reproducing this newspaper headline from 1932 by adding an image. Image tags are a little different: they can be what is called self-closing. In other words, you only have to write one thing that serves as both a start and an end tag; this holds for basically all tags that don't have text content, which is a few of them. The basic format is like this:
<img />But we need to add some extra information to this HTML element to tell it what image to load and display. For this, we need an HTML attribute. An attribute looks a little like a string variable in other programming languages; it has a name:
<img src />And a value:
<img src="https://hacksu.com/turtles.jpg" />(Paste URL into Discord chat.) So attributes follow this format, name="value", and the name that you use for an attribute determines the effect it will have and what the value will be used for. In this case, the name "src" stands for source and means an image will be loaded from the URL given in the attribute's value. There's another useful attribute that we can use here, "width":
<img src="https://hacksu.com/turtles.jpg" width="300" />This will set the image's width to 300 pixels wide. Um, you don't have to type all this exactly, but is everyone who wants to try out writing this HTML caught up?
Because next, I'm going to introduce something iconic and kind of weird: the anchor tag.
<a>Click me!</a>Well. You probably all know that that's not what it usually looks like. To manifest its true form, we need to add another attribute. When there's a start tag and an end tag, the attribute will always go in the start tag:
<a href="https://crouton.net/">Click me!</a>So yeah. An anchor tag with an href attribute will create a link to another web page so you can go there if you click it. Except, wait, ours is kind of weird right now, because the new page will open inside the little JSFiddle box. Try this:
<a href="https://drawing.garden" target="_blank">Click me!</a>So yeah, two new ones: The "href" attribute gives the information "what page should this link link to" and the "target" attribute gives the information "this page should be opened in a new tab." We need that second thing when using JSFiddle because we don't want the page we're linking to to be trapped in the box, but it's also useful whenever you want a link to open a new tab so the viewer doesn't lose their place on the last page or whatever.
And you might, at this point, feel a little like you're looking at a bunch of gibberish, and that is basically correct. The thing about these web languages is that there's a bunch of stuff in them that made sense to someone at some point and now we're stuck with it because changing it would mean breaking compatability with a whole universe of old websites. This attribute name, "href," stands for "hypertext reference" because at some point someone thought that term would become a thing, and then, that term did not become a thing. However, we're stuck with it; it's used in the very first web page; and thus we just have to learn it. Same with the "_blank" value for "target"; the underscore is there because of history and if you leave it out weird stuff might start happening. It all looks a little strange but we must simply learn it and declare victory and move on.
We've now learned approximately enough HTML to create the very first website. It looks like this, it's from 1991, and it just had text. No turtle pics. But everybody's got to start somewhere.
Now that we have the basics down, we can probably go through some more types of tags pretty quickly. Here's something that won't work: let's take some ASCII art and put it in a <p> tag:
<p>
        __I__
   .-'"  .  "'-.
 .'  / . ' . \  '.
/_.-..-..-..-..-._\ .---------------------------------.
         #  _,,_   ( I hear it might rain people today )
         #/`    `\ /'---------------------------------'
         / / 6 6\ \
         \/\  Y /\/       /\-/\
         #/ `'U` \       /a a  \               _
       , (  \   | \     =\ Y  =/-~~~~~~-,_____/ )
       |\|\_/#  \_/       '^--'          ______/
       \/'.  \  /'\         \           /
        \    /=\  /         ||  |---'\  \
   jgs  /____)/____)       (_(__|   ((__|
</p>
The thing with HTML is that you're supposed to be allowed to put spaces wherever you want so that you can format your code properly. If you have many spaces, they get collapsed down to one space, and if you have multiple lines, they get treated as one, because normally when you write text like they did back in the day, normally you want text to flow and be wrapped at the edge of your browser and spaces are just used as indents in code. To change this, we can just use the HTML <pre> tag instead of <p>. Believe it or not, "pre" stands for "preserve whitespace."
<pre>
        __I__
   .-'"  .  "'-.
 .'  / . ' . \  '.
/_.-..-..-..-..-._\ .---------------------------------.
         #  _,,_   ( I hear it might rain people today )
         #/`    `\ /'---------------------------------'
         / / 6 6\ \
         \/\  Y /\/       /\-/\
         #/ `'U` \       /a a  \               _
       , (  \   | \     =\ Y  =/-~~~~~~-,_____/ )
       |\|\_/#  \_/       '^--'          ______/
       \/'.  \  /'\         \           /
        \    /=\  /         ||  |---'\  \
   jgs  /____)/____)       (_(__|   ((__|
</pre>
Now we have some respectable art. Outside of <pre> tags, you can still have newlines, you just have to use the <br /> tag:
If we want an actual line break that will show up for real in the content, one thing that we can do use the <br /> tag:
<p>
  You say goodbye <br />
  and I say hello
</p>
<br /> stands for line break and, kind of like <img />, it is a self-closing tag, meaning that you only need one instead of having a start and an end tag.
Watch this, you can put HTML elements inside HTML elements:
<p>meow <em>meow</em> <strong>meow</strong>/p>Back in the day, they used to use tags just called "b" and "i" for a similar effect but those tags are old and everyone who used them has died by now, and if you invoke them, you will have an encounter with ghosts.
"details" tags are interactive:
<details>🤠</details>You can add "summary" tags inside them to change the initially visible text:
<details>
  <summary>Click here if you want to say howdy</summary>
  🤠
</details>
So, that was a lot of tags. Let's look over the chaos we have created.
The <details> tag is interesting because it's the first interactive one we've used. Even something as simple as this can be used to interesting effect if you get into it. Check out this poem, "soft corruptor"; if you view the source of the page, you'll see that it's entirely made out of details and summary tags.
Okay, so all of the tags we've looked at so far have some kind of specific purpose, indicated by their name. But there's one more tag we're going to look at that's extremely popular because it has no real specific purpose. This tag is called <div>, which stands for content division, and it's basically the clear plastic tupperware of tags: you just put stuff in it. The idea is that you use it to divide content into sections, usually so that you can impose some kind of layout. For example, we can use them to group some elements into columns:
<div>
  <h2>To-Do List - Yesterday</h2>
  <p>Walk dog</p>
  <p>Solve world hunger</p>
  <p>Do laundry</p>
  <p>Be less sad</p>
</div>
<div>
  <h2>To-Do List - Today</h2>
  <p>Walk dog</p>
  <p>Solve world hunger</p>
  <p>Actually do laundry</p>
  <p>Be less sad</p>
</div>
So that's great. But these "columns" are just above and below each other, so the divs don't make much difference. To see what I mean, we're going to have to shake up the top-to-bottom normal page layout and place these columns side-by-side. The first step to doing that is to isolate them from the rest of the content by making a div that will contain these two existing divs. Initially, we used divs to put elements that should be in the same column in a group together; now, we're going to place our columns in a div that exists to contain the elements that we want to be in a row together. I'm going to give this overarching div an id attribute with the value "row-container".
<div id="row-container">
<div>
  <h2>To-Do List - Yesterday</h2>
  ...
</div>
<div>
  <h2>To-Do List - Today</h2>
  ...
</div>
</div>
Now, brace yourselves, because we're going to need to attempt to use CSS to alter the page layout for the next step. Click over to the CSS box in JSFiddle (finally, right?) and type this:
#row-container {
  display: flex;
}
Let's break this code down. The first thing we typed is a CSS selector, which specifies what elements we're altering. There are a lot of different ways to select elements in CSS, but if you use the pound sign/hashtag symbol, you can select elements according to their ID attribute, like this. We will then write declarations that apply to the selected things. Those are expressed within the curly braces that immediately follow. There, we have one single declaration: display: flex;. A declaration consists of a property, in this case "display", and a value, in this case "flex".
There are many, many properties in CSS, each with their own set of possible values, but this property, the display property, is very important; basically, it sets the layout mode that will be applied to elements that we're selecting. This is kind of like the anchoring mode that you can set for images in Microsoft Word, to control whether text goes around them or above and below them. When you set the layout mode of a div to "flex", its becomes a row or column (by default a row) in which you can control the alignment and spacing of elements in a fine-grained way.
Our div columns are still kind of ugly because they're smashed together. Let's fix that with a few more CSS properties.
#row-container {
  display: flex;
  width: 100%;
  justify-content: space-evenly;
  text-align: center;
  font-family: sans-serif;
}
These properties are relatively straightforward. The second one stretches our row to take the whole width of the page. The third spaces out the elements in the row evenly; without that, they'll default to sitting at the beginning of the row, no matter how wide it is. Finally, I want to center the text inside the columns and change the font because I think that looks better.
Now we're experienced with CSS rules. This is most of what you do with CSS; you put a selector to indicate which elements you're doing stuff to, and then you say what stuff you want to do to them, like changing the text alignment. I should probably give everyone a second to catch up with these layout rules that we're using.
And now that we're experienced with rules, let's try using some different selectors. Remember, those are the things in front of the curly braces that determine which elements we're controlling. In our columns, which are created by these divs, we have h2 elements for our list headers and p elements for our items. Let's try selecting just the p elements that are inside the columns. We can do this by just putting #row-container p as our selector: when you separate two selectors with a space, you first take all the elements that are inside the one indicated by the first selector, and then narrow it down to the elements that match the second selector. (Tag names work as selectors all by themselves.)
#row-container p {
  color: purple;
  cursor: pointer;
}
Notice that the other paragraphs that we have up above haven't changed; only the ones inside divs did. (We could select all the paragraphs everywhere by just using "p" as a selector, but I want to let them rest.) One more really fun selector is the "hover" one, which only applies to elements when your mouse is over them.
#row-container:hover {
  background-color: paleturquoise;
}
There are a lot of different named colors in CSS, so try random stuff there, knock yourself out.

So yeah. CSS is used both to lay the page out and to change the visual style and appearance of things in it. Using the display property changes elements' layout modes, so for example, you can use display: flex; to create rows (or columns) and change how elements are aligned and spaced out inside them; and there are a bunch of words involved that you sadly just have to memorize. And that's probably enough CSS for one lifetime.
JavaScript is completely different from either of the two previous languages. It is an honest-to-god real programming language in which you write sequences of commands that are executed in order and make decisions based on logic and stuff. One thing I should probably clarify: there is a programming language that is just called "Java"; it was very popular in the 90s and 2000s and was even used to make little interactive programs on web pages called Java applets; when JavaScript was created, it was named after Java with the promise that it could integrate with Java programs, then that never really happened, and today Java and JavaScript are two languages with absolutely no relationship between them. Oh well.
JavaScript has functions. The most basic one that we can test out is called alert:
alert("hello");It also has variables. In JavaScript, the modern recommended practice is to create variables with the keyword "const". You never have to specify the type of a variable when you create it, like, you don't have to say whether it's a string or an int or a double or whatever, but you do have to specify whether you want to change it later. For some reason. Unless you do need to change a variable later, you should use the word "const" to create it.
const myName = "Mitch";
alert("hello " + myName);
That's pretty predictable, so instead of setting the name directly, let's use another function called "prompt":
const myName = prompt("what is ur name?");
alert("hello " + myName);
And finally, let's explore the true power of JavaScript, the reason that everyone uses it: it can modify the contents of a page. This is a little bit tricky because JavaScript can modify HTML, but it only does so after the HTML is loaded normally from code; by the time the JavaScript runs, the HTML has already been used to create the page, and changes to the page won't affect the original HTML. So, in other words, we aren't going to modify the code with JavaScript; just the page that it created; so don't look over at the HTML in the editor to see your changes. But:
const myName = prompt("what is ur name?");
alert("hello " + myName);
document.write(myName+" is here :D");
So yeah. That's a basic introduction to HTML, CSS, and JavaScript. No one has ever quite mastered any of them, so we're safe to leave off for now.
Note: Kent web public_html folder. Off-leash cursor park.
Other things that could be added: pre tag, input tag (after covering javascript? text input for adding item to to-do list?), class selectors, asterisk selector e.g. to set the font for everything