https://www.youtube.com/watch?v=CU-nNEY6Hfg&t=143s
-
BUILD: build image locally on your laptop: docker build -t . <DOCKER_HUB_USER>/py-red (then push the image to registry)
-
DEPLOY: run app locally on your laptop: docker-compose up -d
Note: launch 'docker-compose up -d' multiple times if 'docker-compose ps' does not show all containers up and running
-
DEPLOY: run app on K8s cluster: kubectl create -f
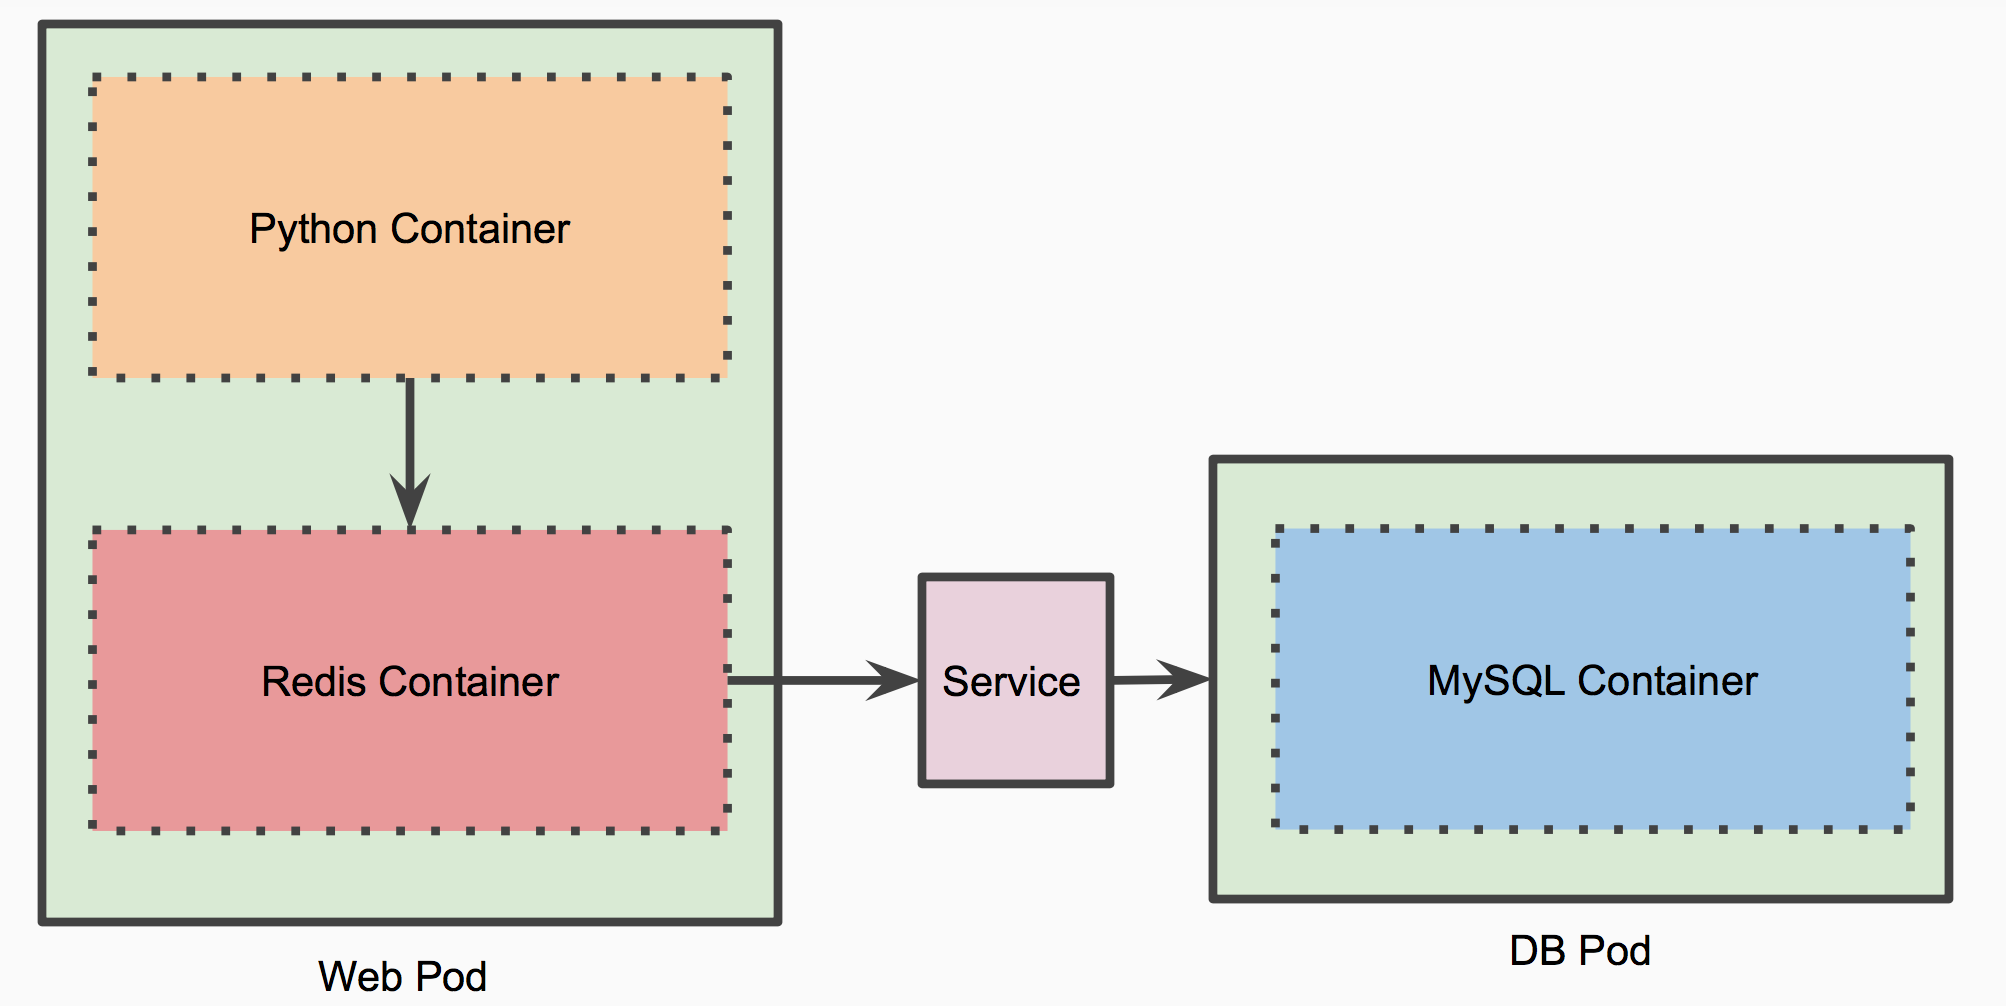
Simple tutorial to demonstrate the concept of packaging multiple containers into a single pod.
- Web Pod has a Python Flask container and a Redis container
- DB Pod has a MySQL container
- When data is retrieved through the Python REST API, it first checks within Redis cache before accessing MySQL
- Each time data is fetched from MySQL, it gets cached in the Redis container of the same Pod as the Python Flask container
- When the additional Web Pods are launched manually or through a Replica Set, co-located pairs of Python Flask and Redis containers are scheduled together
Make sure that you have access to a Kubernetes cluster.
Build a Docker image from existing Python source code and push it to Docker Hub. Replace DOCKER_HUB_USER with your Docker Hub username.
cd Build
docker build . -t <DOCKER_HUB_USER>/py-red
docker push <DOCKER_HUB_USER>/py-red
docker-compose up -d
curl localhost:5000/init
cd ../Deploy
kubectl create -f db-pod.yml
kubectl create -f db-svc.yml
kubectl create -f web-pod-1.yml
kubectl create -f web-svc.yml
kubectl get pods
kubectl get svc
Get the IP address of one of the Nodes and the NodePort for the web Service. Populate the variables with the appropriate values
kubectl get nodes
kubectl describe svc web

kubectl get nodes
export NODE_IP=<NODE_IP>
export NODE_PORT=<NODE_PORT>
curl http://$NODE_IP:$NODE_PORT/init
curl -i -H "Content-Type: application/json" -X POST -d '{"uid": "1", "user":"John Doe"}' http://$NODE_IP:$NODE_PORT/users/add
curl -i -H "Content-Type: application/json" -X POST -d '{"uid": "2", "user":"Jane Doe"}' http://$NODE_IP:$NODE_PORT/users/add
curl -i -H "Content-Type: application/json" -X POST -d '{"uid": "3", "user":"Bill Collins"}' http://$NODE_IP:$NODE_PORT/users/add
curl -i -H "Content-Type: application/json" -X POST -d '{"uid": "4", "user":"Mike Taylor"}' http://$NODE_IP:$NODE_PORT/users/add
curl http://$NODE_IP:$NODE_PORT/users/1
The second time you access the data, it appends '(c)' indicating that it is pulled from the Redis cache
curl http://$NODE_IP:$NODE_PORT/users/1
kubectl create -f web-rc.yml
curl http://$NODE_IP:$NODE_PORT/users/1