| Author | Dave Glover, Microsoft Australia |
|---|---|
| Platform | Raspberry Pi, Raspbian Buster, Kernel 4.19 |
| Date | Updated May 2020 |
| Acknowledgments | Inspired by Alex Ellis' work with his Raspberry Pi Zero Docker Cluster |
| Skill Level | This guide assumes you have some Raspberry Pi and networking experience. |
Building a Kubernetes Intelligent Edge cluster on Raspberry Pi is a great learning experience, a stepping stone to building robust Intelligent Edge solutions, and an awesome way to impress your friends. Skills you develop on the edge can be used in the cloud with Azure Kubernetes Service.
You can download a free copy of the Kubernetes: Up and Running, Second Edition book. It is an excellent introduction to Kubernetes and it will accelerate your understanding of Kubernetes.

Published: 8/22/2019
Improve the agility, reliability, and efficiency of your distributed systems by using Kubernetes. Get the practical Kubernetes deployment skills you need in this O’Reilly e-book. You’ll learn how to:
-
Develop and deploy real-world applications.
-
Create and run a simple cluster.
-
Integrate storage into containerized microservices.
-
Use Kubernetes concepts and specialized objects like DaemonSet jobs, ConfigMaps, and secrets.
Learn how to use tools and APIs to automate scalable distributed systems for online services, machine learning applications, or even a cluster of Raspberry Pi computers.
The Kubernetes cluster is built with Raspberry Pi 4 nodes and is very capable. It has been tested with Python and C# Azure Functions, Azure Custom Vision Machine Learning models, and NGINX Web Server.
This project forms the basis for a four-part Intelligence on the Edge series. The followup topics will include:
-
Build, debug, and deploy Python and C# Azure Functions to a Raspberry Pi Kubernetes Cluster, and learn how to access hardware from a Kubernetes managed container.
-
Developing, deploying and managing Intelligence on the Edge with Azure IoT Edge on Kubernetes.
-
Getting started with the dapr.io, an event-driven, portable runtime for building microservices on cloud and edge.
The Kubernetes Master and Node installations are fully scripted, and along with Kubernetes itself, the following services are installed and configured:
- Flannel Container Network Interface (CNI) Plugin.
- MetalLb LoadBalancer. MetalLB is a load-balancer implementation for bare metal Kubernetes clusters, using standard routing protocols.
- Kubernetes Dashboard.
- Kubernetes Persistent Volumes Storage on NFS.
- NFS Server.
- NGINX Web Server.
The following list assumes a Kubernetes cluster built with a minimum of three Raspberry Pis.
| Items | |
|---|---|
1 x Raspberry Pi for Kubernetes Master.
2 x Raspberry Pis for Kubernetes Nodes
|
 |
3 x SD Cards, one for each Raspberry Pi in the cluster.
|
 |
| 3 x Power supplies, one for each Raspberry Pi. |  |
| 1 x Network Switch Dlink DGS-1005A or similar |  |
| 3 x Ethernet Patch Cables (I used 25cm patch cables to reduce clutter.) | 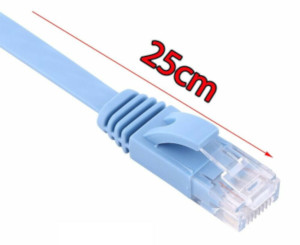 |
| Optional: If you using a Raspberry Pi 4 then recommend active cooling: Pimoroni FanSHIM | 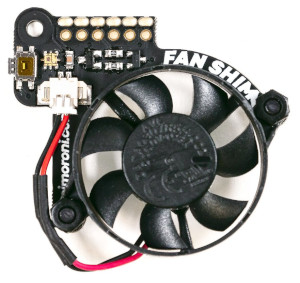 |
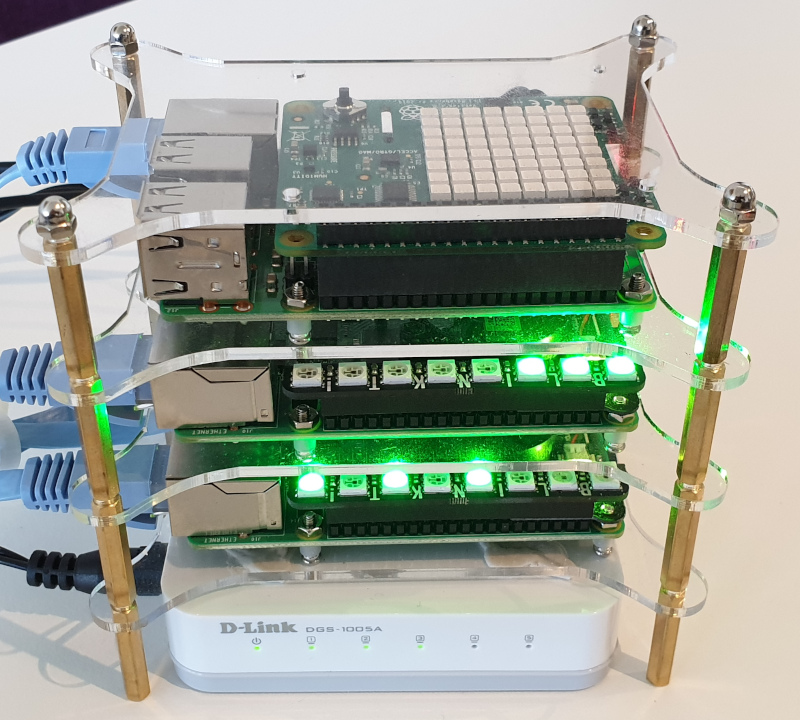
| Optional: 1 x Raspberry Pi Rack or similar |  |
| Optional: 2 x Pimoroni Blinkt RGB Led Strips. The BlinkT LED Strip can be a great way to visualize pod activity. | 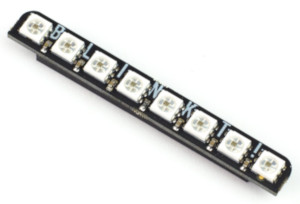 |
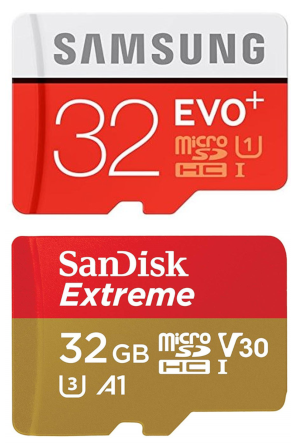
| Optional: 2 x USB3 Flash Drivers for Kubernetes Nodes, or similar. I would recommend the Samsung USB 3.1 Flash Drive FIT Plus 128GB. See the 5 of the Fastest and Best USB 3.0 Flash Drives. Installation script sets up Raspberry Pi Boot from USB3. | 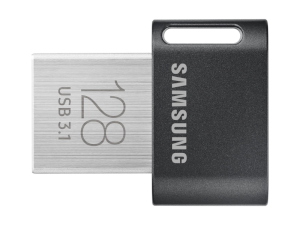 |
| Optional: 2 x USB3 SSDs for Kubernetes Nodes, or similar, ie something small. Installation script sets up Raspberry Pi Boot from USB3 SSD. Note, these are SSD Enclosures, you need the M.2 drives as well. | 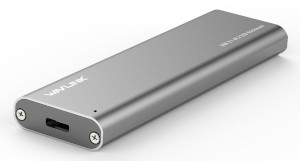 |
Build your Kubernetes cluster with Raspbian Buster Lite. Raspbian Lite is headless, takes less space, and leaves more resources available for your applications. You must enable SSH for each SD Card, and add a WiFi profile for the Kubernetes Master SD Card.
There are plenty of guides for flashing Raspbian Lite SD Cards. Here are a couple of useful references:
- Download Raspbian Buster Lite.
- Setting up a Raspberry Pi headless.
- If you've not set up a Raspberry Pi before then this is a great guide. "HEADLESS RASPBERRY PI 3 B+ SSH WIFI SETUP (MAC + WINDOWS)". The Instructions outlined for macOS will work on Linux.
-
Using balena Etcher, flash 3 x SD Cards with Raspbian Buster Lite. See the introduction to Installing operating system images.
-
On each SD Card create an empty file named ssh, this enables SSH login on the Raspberry Pi.
- Windows: From Powershell, open the drive labeled boot, most likely the d: drive, and type
echo $null > ssh; exit. From the Windows Command Prompt, open drive labeled boot, most like the d: drive, and typetype NUL > ssh & exit. - macOS and Linux: Open terminal from drive labeled boot, type
touch ssh && exit.
- Windows: From Powershell, open the drive labeled boot, most likely the d: drive, and type
-
On the Kubernetes Master SD Card, add a wpa_supplicant.conf file to the SD Card boot drive with your WiFi Routers WiFi settings.
ctrl_interface=DIR=/var/run/wpa_supplicant GROUP=netdev
update_config=1
country=AU

network={
    ssid="SSID"
    psk="WiFi Password"
}
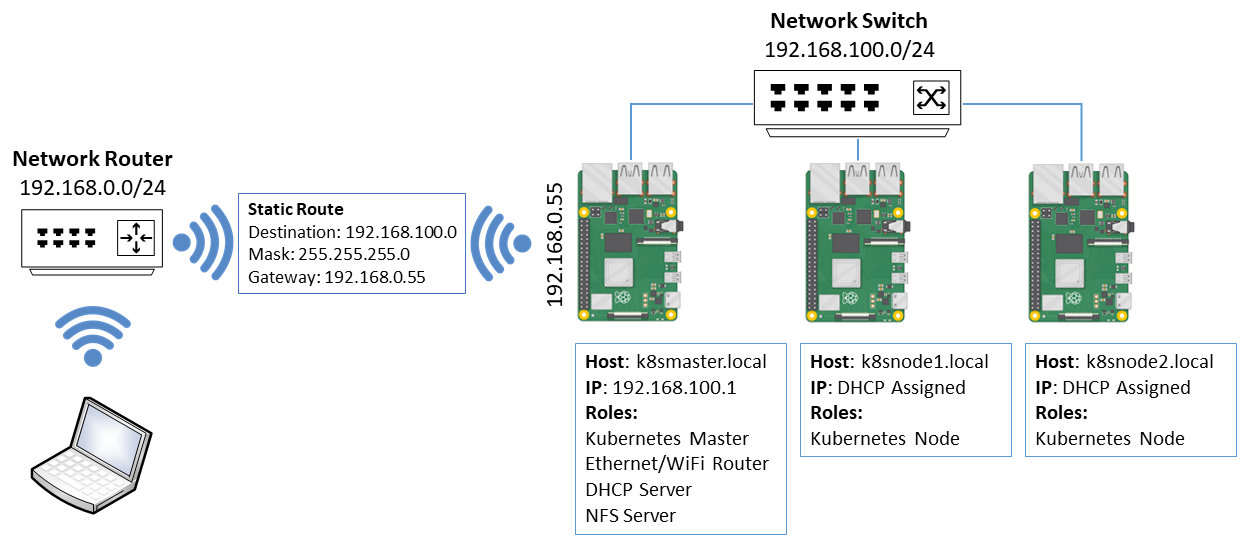
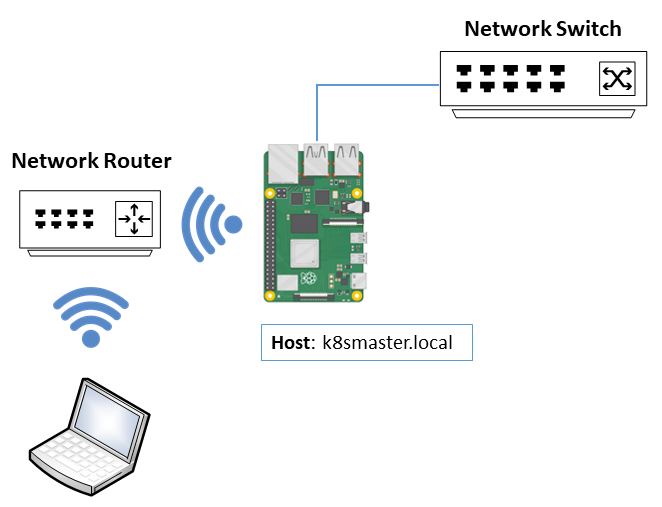
The Kubernetes Master is also responsible for:
- Allocating IP Addresses to the Kubernetes Nodes.
- Bridging network traffic between the external WiFi network and the internal cluster Ethernet network.
- NFS Services to support Kubernetes Persistent Storage.
The following naming conventions are enforced in the installation scripts:
- The Kubernetes Master will be named k8smaster.local
- The Kubernetes Nodes will be named k8snode1..n
Ensure the Raspberry Pi to be configured as a Kubernetes Master is:
- Connected by Ethernet to the Network Switch, and the Network Switch is power on.
- The WiFi Router is in range and powered on.
- If rebuilding the Kubernetes Master then disconnect existing Kubernetes Nodes from the Network Switch as they can interfere with Kubernetes Master initialization.
-
Open a new terminal window from a macOS, Linux, or Windows Bash (Linux Subsystem for Windows).
-
Run the following command from the SSH terminal you started in step 1.
Note, as at July 2020 for Raspberry Pi 3B and 3B+ CGroup support is not included in the kernel. CGroups is required for Kubernetes. The workaround is to enable the 64bit kernel. You will be prompted to enable the 64Bit kernel.
bash -c "$(curl https://raw.githubusercontent.com/gloveboxes/Raspberry-Pi-Kubernetes-Cluster/master/setup.sh)" -
Select Master set up.
-
Configure Installation Options
- Enable Boot from USB3 support
- Install Pimoroni Fan SHIM Support
-
The automated installation will start. Note, the entire automated Kubernetes Master installation process is driven from your desktop computer.
Ensure the k8smaster and all the Raspberry Pis that will be configured are powered on and connected to the Network Switch. The DHCP Server running on the k8smaster will allocate an IP Addresses to the Raspberry Pis to become the Kubernetes nodes.
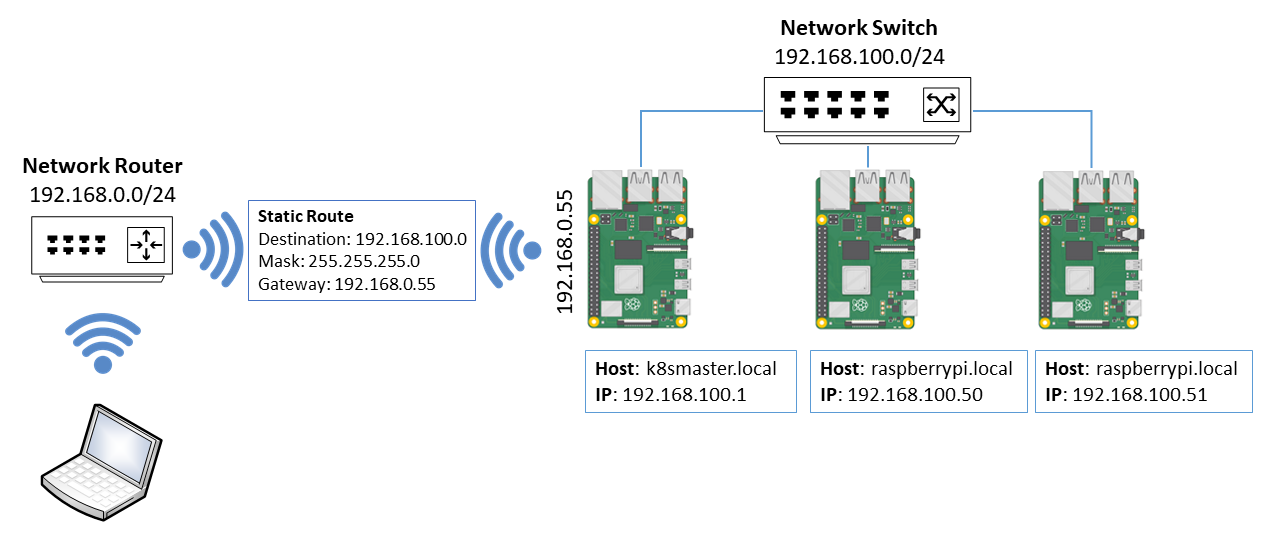
- From your desktop computer, start an SSH Session to the k8smaster
ssh pi@k8smaster.local
-
Run the following command from the SSH terminal you started in step 1.
Note, as at July 2020 for Raspberry Pi 3B and 3B+ CGroup support is not included in the kernel. CGroups is required for Kubernetes. The workaround is to enable the 64bit kernel. You will be prompted to enable the 64Bit kernel.
bash -c "$(curl https://raw.githubusercontent.com/gloveboxes/Raspberry-Pi-Kubernetes-Cluster/master/setup.sh)" -
Select Node set up.
-
Configure Installation Options
- Enable Boot from USB3 support
- Install Pimoroni Fan SHIM Support
A list of devices found will be displayed. The devices display are those that have been allocated an IP Address by the DHCP Server running on the Kubernetes Master. Note, Kubernetes Nodes will only be installed on devices named raspberrypi.
          HostName : IP Address
================================
       raspberrypi : 192.168.100.50
       raspberrypi : 192.168.100.51
Answer yes when all devices you wish to install Kubernetes on are displayed. The automated installation will now start.
- The Kubernetes Cluster runs isolated on the Network Switch and operates on subnet 192.168.100.0/24.
- A static route needs to be configured either on the Network Router or on your computer to define the entry point (gateway) into the Cluster subnet (192.168.100.0/24).
- The gateway IP Address is allocated by your Network Router to the Kubernetes Master WiFi adapter. In the above example, the Gateway address is 192.168.0.55.
Most Network Routers allow you to configure a static route. The following is an example configured on a Linksys Router.
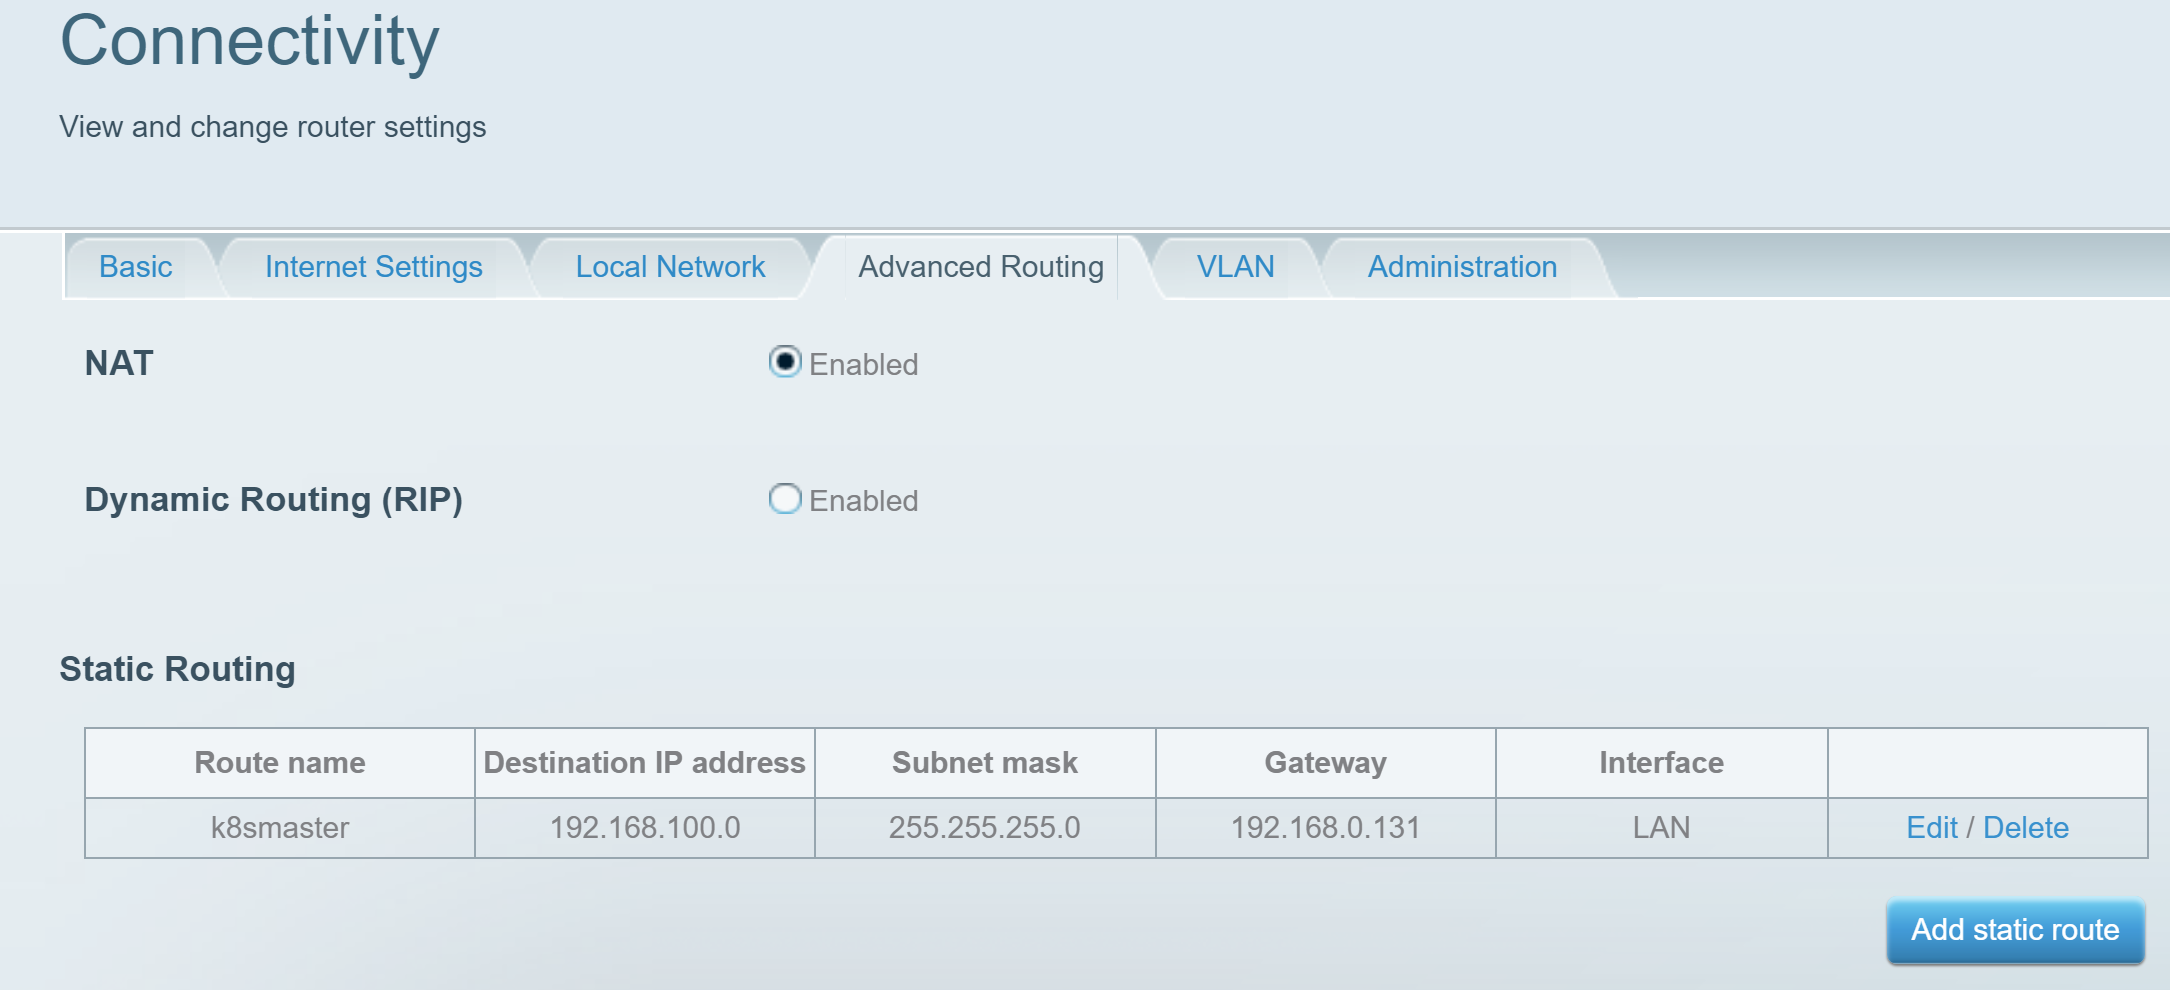
If you don't have access to configure the Network Router you can set a static route on your local computer.
From "Run as Administrator" Command Prompt
route add 192.168.100.0 mask 255.255.255.0 192.168.0.55NOT WORKING RESEARCH SOME MORE
route add -net 192.168.100.0 netmask 255.255.255.0 gw 192.168.0.55The Kubernetes master node network installation script sets the DNS servers used by the cluster to domain-name-servers 8.8.8.8, 8.8.4.4 in /etc/dhcp/dhcpd.conf.
On company or managed networks querying these DNS servers may be blocked. If the default DNS addresses are blocked then the Kubernetes worker node installation will fail.
Update the domain-name-servers in the /etc/dhcp/dhcpd.conf file to the IP addresses of your managed network DNS servers.
-
Open a terminal window on your desktop computer
-
Change directory to your home directory
- macOS, Linux, and Windows Powershell
cd ~/, Windows Command Promptcd %USERPROFILE%
- macOS, Linux, and Windows Powershell
-
Copy Kube Config from k8smaster.local
scp -r pi@k8smaster.local:~/.kube ./
From the Windows Command Prompt (or PowerShell), macOS, or Linux Terminal, run the following command:
Note, you will be prompted for the k8smaster.local password.
ssh pi@k8smaster.local ./get-dashboard-token.shOn your Linux, macOS, or Windows computer, start a command prompt/terminal and start the Kubernetes Proxy.
kubectl proxyClick the following link to open the Kubernetes Dashboard. Select Token authentication, paste in the token you created from Step 1 and connect.
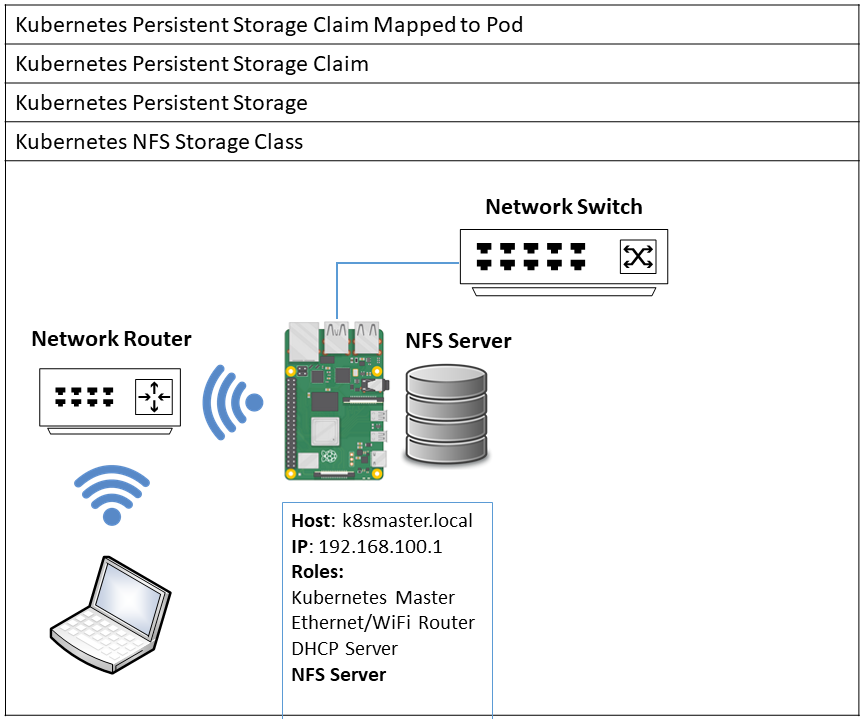
NFS Server installed on k8smaster.local
-
Installed and provisioned by Kubernetes Master installation script.
-
The following diagram describes how persistent storage is configured in the cluster.
dhcp-lease-listkubectl config get-contexts
kubectl config view
kubectl config current-context
kubectl config use-context pi3 or pi4sudo kubeadm reset && sudo systemctl daemon-reload && sudo systemctl restart kubelet.service-
Setting iptables to legacy mode on Raspbian Buster/Debian 10 for Kubernetes kube-proxy. Configured in installation scripts.
sudo update-alternatives --set iptables /usr/sbin/iptables-legacy > /dev/null
sudo update-alternatives --set ip6tables /usr/sbin/ip6tables-legacy > /dev/null
- Flannel CNI (Cluster Networking) installation.
- MetalLB LoadBalance installation.