This is a template project for Unity's AR Foundation system. It's ready to build and includes an AR placement indicator. This is a reticle that tracks the center of your screen in the AR world. So it snaps to surfaces such as tables, the floor, walls, etc. It can be used to spawn in objects, or any other feature you wish to include in your AR app.
Right now, there are two main AR SDK's available. ARCore for Android and ARKit for iOS. AR Foundation is an API which allows the developer to create AR apps for both platforms seamlessly. Developers don't need to create separate projects for Android and iOS, or have even more convoluted code. It's all packaged into one with AR Foundation.
So what can we do with AR Foundation?
- Detect surfaces
- Identify feature points in the world
- Track virtual objects in the real world
- Adjust the lighting in Unity based on a real world estimate
- Face, image and object tracking
- Unity documentation
Due to these advanced features, there are restrictions to which devices can actually run this.
- Supported Android devices (for ARCore)
- Supported iOS devices (for ARKit)
AR Session: runs and manages the current AR session.
AR Session Origin: defines the center of the AR session. Also includes a few other components that we need: AR Raycast Manager, AR Plane Manager.
AR Camera: renders the device camera and AR objects.
PlacementIndicator: AR reticle which snaps to the tracked surfaces.
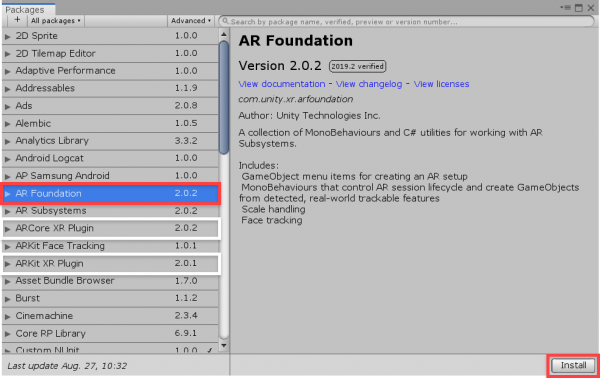
Let's now go over how we can setup the project from scratch. First, create a new Unity project. In the editor, open up the Package Manager window (Window > Package Manager). Here, we want to install:
- AR Foundation
- ARCore XR Plugin (if you're developing for Android)
- ARKit XR Plugin (if you're developing for iOS)
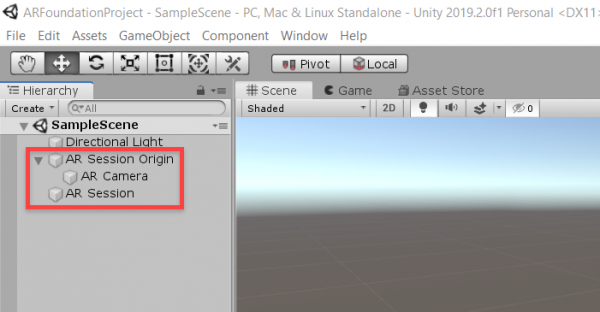
We can now close that window. Next, let's go over to the Hierarchy (a list of all the objects in our current scene) and delete the MainCamera object. This is because we're now going to add in 2 new objects (which includes an AR camera). Right click the Hierarchy and select:
- XR > AR Session Origin
- XR > AR Session
The AR Session Origin defines the center of the AR world. It also has an AR camera as a child which has the scripts needed to work in AR. Then we create the AR Session object. This basically runs the AR session and detects inputs.
Select the AR Session Origin object and look over in the Inspector. Click Add Component and add two components:
- AR Raycast Manager
- AR Plane Manager

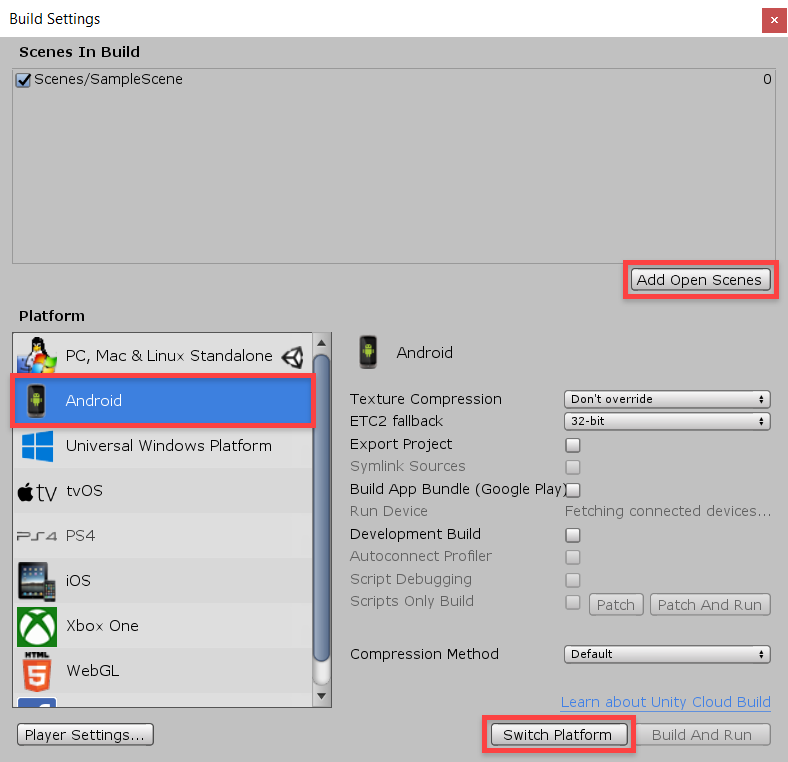
Before we continue, let's switch our platform over to whatever device we're building for. Open up the Build Settings window (File > Build Settings). First, let's click the Add Open Scenes button to add the current scene to the build list. The find your platform (Android or iOS) in the list. Select it and then click Switch Platform.
In the repo, we've got a PNG file called PlacementMarkerBase. Create a new Material called PlacementIndicator.
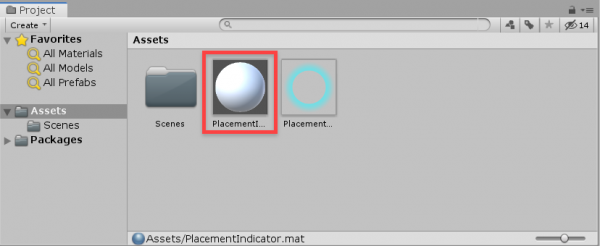
Let's now edit the material. Select it and in the Inspector, we can set the properties:
- Set the Shader to Unlit/Transparent
- Drag the PlacementIndicator.PNG into the texture field

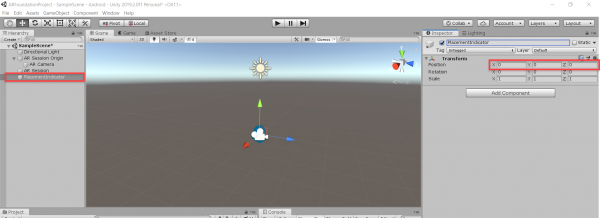
Now we can add the in-game object. In the Hierarchy, right click and select Create Empty. Rename this object to PlacementIndicator. If you select it, in the Inspector set the Position to 0, 0, 0.
Right click the object in the Hierarchy and select 3D Object > Plane. This will create a white plane object. Drag the material we just made onto it to apply. You might see that the object has a MeshCollider component attached to it. In the Inspector, right click on the collider's name and select Remove Component.
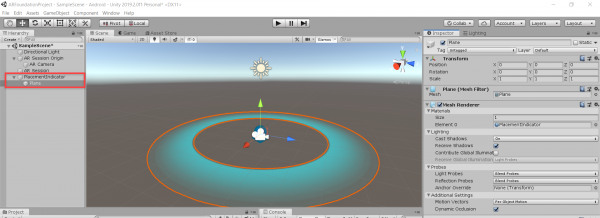
Right now, our placement indicator would be very large in AR. To make it more manageable and around 1x1 inch, select the Plane and set the Scale to 0.01, 0.01, 0.01.

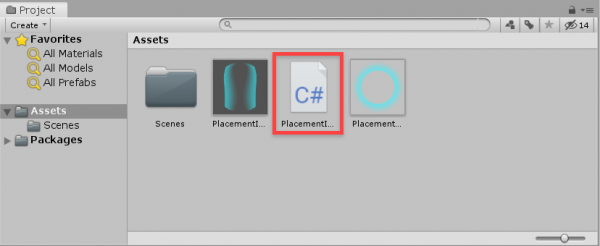
Next, let's create the script which will be the code controlling the placement indicator. In the Project panel, right click and select Create > C# Script. Call this PlacementIndicator.
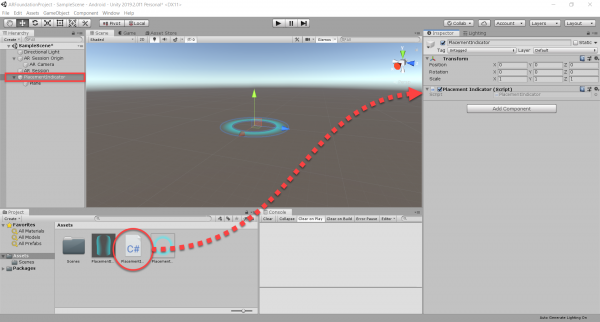
Let's attach the script to the object. Select the PlacementIndicator and drag the script into the Inspector. You should see the script component attached.
Double click on the script file to open it up in Visual Studio. You should have the default script template inside.
- The public class PlacementIndicator : MonoBehaviour code is where the contents of the script are contained
- The Start function gets called once when the object is initialized (at the start of the game)
- The Update function gets called every frame (e.g. 60 times a second if the app is running at 60 FPS)
Above the class, you should see three lines of code with using before it. These are external libraries we're using. We need to add two more libraries specifically for AR Foundation.
using UnityEngine.XR.ARFoundation;
using UnityEngine.XR.ARSubsystems;
Back down in our class, let's start by adding in some variables to keep track of.
private ARRaycastManager rayManager;
private GameObject visual;
Inside the Start function we can set the two variables and start off by hiding the placement indicator visual.
// get the components
rayManager = FindObjectOfType<ARRaycastManager>();
visual = transform.GetChild(0).gameObject;

// hide the placement indicator visual
visual.SetActive(false);
Then down in the Update function, we're going to be shooting a raycast from the center of our screen. A raycast is basically a line that can detect objects (think shooting a bullet). We give it an origin position and direction and it will then tell us what it hits. We're looking to hit an AR plane (automatically generated when it detects the world).
Let's start by creating a list to hold all of the AR planes we hit. Then we can cast the raycast.
// shoot a raycast from the center of the screen
List<ARRaycastHit> hits = new List<ARRaycastHit>();
rayManager.Raycast(new Vector2(Screen.width / 2, Screen.height / 2), hits, TrackableType.Planes);
Under that, let's check if we hit anything.
// if we hit an AR plane surface, update the position and rotation
if(hits.Count > 0)
{

}
Inside of the if statement, let's set the position and rotation of the placement indicator to be where the raycast hit it.
transform.position = hits[0].pose.position;
transform.position = hits[0].pose.rotation;
Let's also enable the visual if it's disabled.
// enable the visual if it's disabled
if(!visual.activeInHierarchy)
    visual.SetActive(true);
The script is now complete. We can return back to the editor now.
If you have an Android device and want to build your app to it, follow these steps. First, we need to enable Developer Options on your device.
- Open the Settings app and select the System button
- Scroll to the bottom and select About Phone
- Tab the Build Number 7 times
- Now there should be a Developer Options tab in the settings app
- Go into that and enable USB Debugging
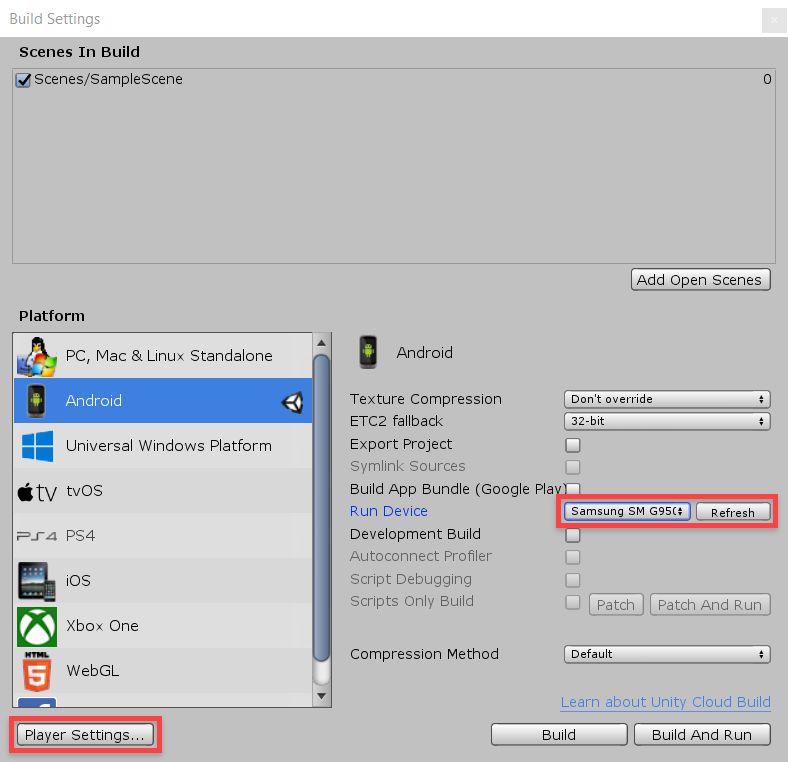
Back in Unity, let's open up the Build Settings window (File > Build Settings...). Click Refresh then find your plugged in device. After that, click Player Settings to open the Player Settings window.
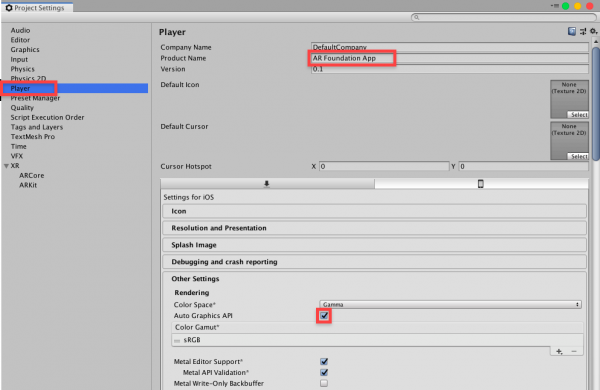
- Go to the Player screen
- The Product Name is what the app will be called on your device
- In the Other Settings tab...
- Enable Auto Graphics API
- Disable Multithread Rendering

Scroll down a bit and create a Package Name. This is a unique identifier for your app. The format is com.CompanyName.ProductName. This can really be whatever you want, just follow the structure.
Also set the Minimum API Level to Android 7.0 "Nougat" (API level 24).

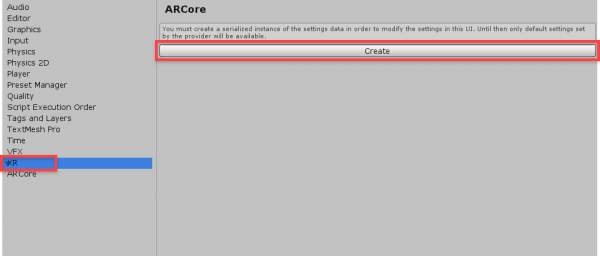
Now go to the XR tab and click the Create button to create a new AR Core setting asset. Save this in the Assets folder. Then the screen should change. Set Requirement to Optional.
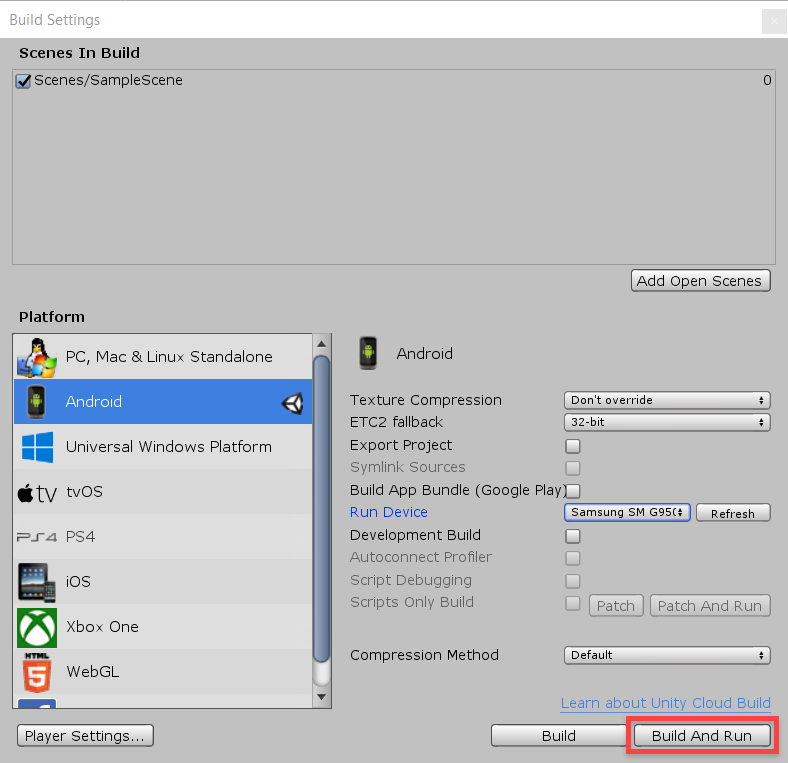
Let's go back to the Build Settings window and click Build and Run. You can save the .apk where ever you want as it's automatically going to install onto our device.
When the app launches, it should only take a second or so for the placement indicator to appear.
Building to iOS is similar to Android, yet it includes a few extra steps. First, we need to install an app called Xcode. You can download it from the App Store or Apple website.
Inside of Unity, we first need to change our build platform. Go to the Build Settings window (File > Build Settings...) Select the iOS platform and click Switch Platform.
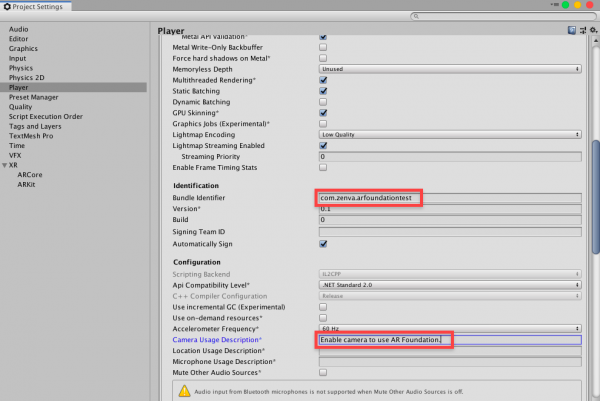
Then click on the Player Settings button to go to the Project Settings window. Here, make sure you're on the Player tab.
- Set the Product Name to what you want the app to be called on your device
- In Other Settings, make sure Auto Graphics API is enabled
Scroll down a bit more as we need to change a few more things.
- Set the Bundle Identifier to a unique identifier for your app. The format is normally com.CompanyName.ProductName
- Set the Camera Usage Description to what we want to use the camera for
- Set the Architecture to ARM64
Now click on the XR > ARKit tab to go to the ARKit screen. Here, we want to click Create and save the file to the Assets folder.
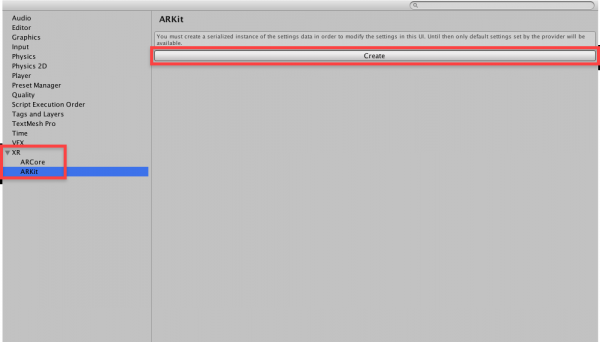
After that, the screen will change so set the Requirement to Optional.

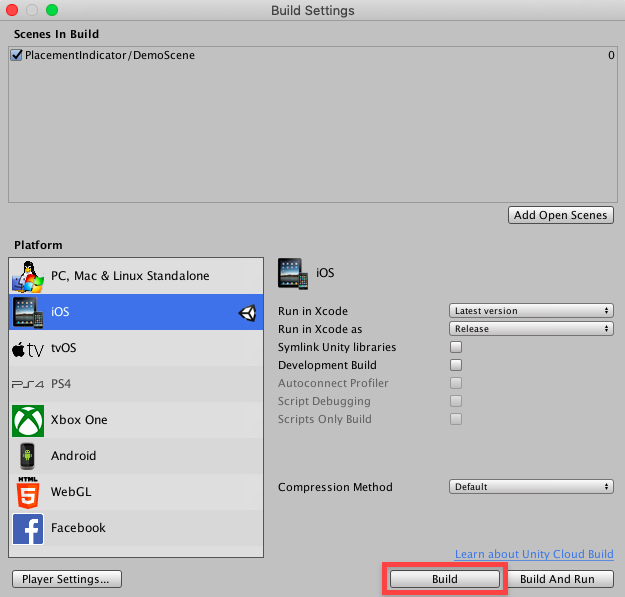
Now we can build our app. Go back to the Build Settings window (File > Build Settings...) and click Build. Save where ever you want.
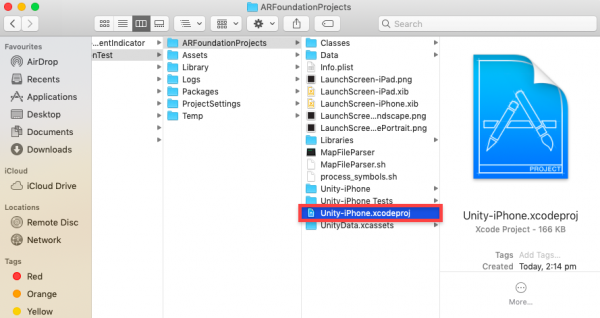
After the project has been built, let's go to that folder and double-click on the Unity-iPhone.xcodeproj file to open it up in Xcode.
Inside of Xcode is where we publish to our device. To open the project, click on Unity-iPhone in the top left.

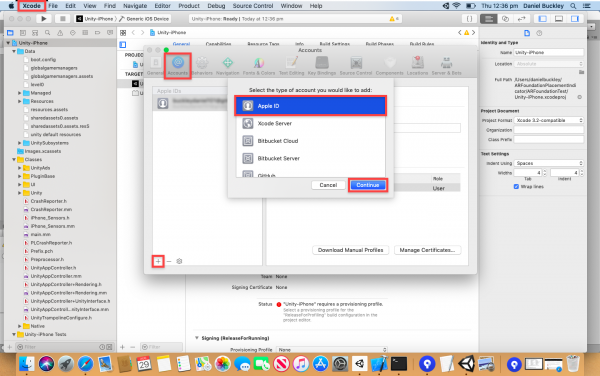
In order to build to a device, we need an account connected. Go to the Preferences window (Xcode > Preferences) and then click on the Accounts tab. Here, let's click on the ' + ' icon and select Apple ID. Login and then you should see your account pop-up in the list.
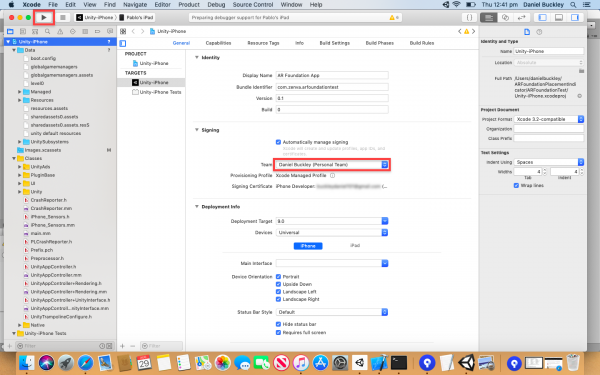
Back in the main Xcode window, let's enable Automatically manage signing.

Then, set your Team to your account. Now we're good to go, so make sure your device is connected and click the Play button to begin the build.
When the app launches, it should only take a second or two for the placement indicator to appear.