![]()
Fastest and easiest way to locate your campus faculty, staff and students while improving internal and external communication.
Report Bug
·
Request Feature

- Allow users find information quickly by offering multi-dimensional search by people, publications, courses and locations
- Integrate and display multiple content segments seamlessly
- Ensure brand consistency with an online catalog that matches your organization’s website
- Allow access to information from anywhere and any device
- Extensive taxonomy based classification system for people, publications, courses and location
- Extensive customization options for frontend and backend through plugin settings
- Extend your academic catalog with unlimited, searchable custom fields
- Integrate with external systems with advanced bulk import,export and sync functionality
- Employee Spotlight Starter Everything you need to display and manage staff profiles.
- Employee Directory Starter The most complete employee directory software to power up your business.
- WP Easy Contact Starter Complete contact management solution to start, develop and grow your customer relationships.
- Access Campus Directory from any device, any time
- Central point for all searches, easy answers and meaningful connections
- Let everyone find advisors, faculty advisees and support staff instantly
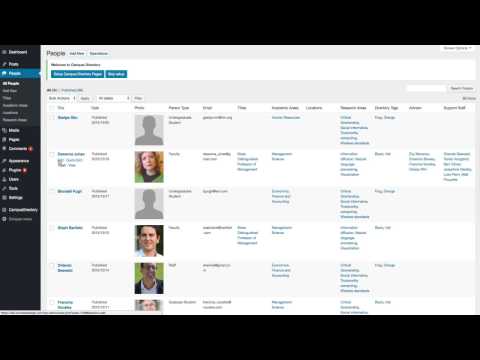
- Awesome looking faculty, staff and student profile pages
- Most features can be customized from the plugins settings
- Keep everyone posted on new courses, hires or publications and more - Premium feature (included both Pro and Ent. Enterprise has more features.)
- Categorize and group people, publications, courses and locations to make searches easy and useful - Premium feature (included both Pro and Ent)
- Expand what people can do in your directory with simple clicks - Premium feature (included both Pro and Ent)
- Everyone loves alphabetical searches on people; the search index can be on names, academic area or job titles - Premium feature (included both Pro and Ent)
- Awesome looking display options to showcase what your organization has to offer matching your institution brand - Premium feature (included both Pro and Ent)
- Make it easy to find classrooms, office locations or the residents of a certain location - Premium feature (Included in Ent only)
- Simple drag and drop to set the display order of people, publications, locations and courses - Premium feature (included both Pro and Ent)
- Make your custom fields searchable in all forms if needed - Premium feature (included both Pro and Ent)
- Create and display your organization specific fields on profile pages or forms - Premium feature (included both Pro and Ent)
- Instantly find faculty, staff, students on a simple click - Premium feature (included both Pro and Ent)
- Instant search and find academic publications to promote research and development - Premium feature (Included in Ent only)
- Beautiful Digital Course Catalog to reduce printing and associated maintenance costs - Premium feature (Included in Ent only)
- Display all or segments of directory to promote certain groups or associations - Premium feature (included both Pro and Ent. Enterprise has more features.)
- Let faculty, staff and students update their own profiles instantly without technical help - Premium feature (included both Pro and Ent)
- Let users download profile informations as vCard instantly - Add-on
- Sync your Campus Directory data from Enterprise Microsoft Active Directory or any LDAP servers - Add-on
- Bulk import academic people records as well as publications, locations and courses. - Add-on (included both Pro and Ent)
- Create custom reports and export to CSV/PDF from WordPress Dashboard. - Add-on (included both Pro and Ent)
To get a local copy up and running follow these simple example steps.
- Campus Directory Starter Demo Site
- Campus Directory Starter Documentation
- Campus Directory Professional Demo Site
- Campus Directory Professional Documentation
- Campus Directory Professional Changes
- Campus Directory Enterprise Demo Site
- Campus Directory Enterprise Documentation
- Campus Directory Enterprise Changes
- Click on Clone or Download button on this page. Click, and you can see a drop-down box having two options, click on Download ZIP.
- Login to your website and go to the Plugins section of your admin panel.
- Click the Add New button.
- Under Install Plugins, click the Upload link.
- Select the plugin zip file from your computer then click the Install Now button.
- You should see a message stating that the plugin was installed successfully.
- Click the Activate Plugin link.
The simplest way to install is to click on WordPress 'Plugins' page then 'Add' and type 'Campus Directory' in the search field.
- Login to your website and go to the Plugins section of your admin panel.
- Click the Add New button.
- Under Install Plugins, click the Upload link.
- Select the plugin zip file from your computer then click the Install Now button.
- You should see a message stating that the plugin was installed successfully.
- Click the Activate Plugin link.
- You should have access to the server where WordPress is installed. If you don't, see your system administrator.
- Copy the plugin zip file up to your server and unzip it somewhere on the file system.
- Copy the "campus-directory" folder into the /wp-content/plugins directory of your WordPress installation.
- Login to your website and go to the Plugins section of your admin panel.
- Look for "Campus Directory" and click Activate.
Contributions are what make the open source community such an amazing place to learn, inspire, and create. Any contributions you make are greatly appreciated.
- Fork the Project
- Create your Feature Branch (
git checkout -b feature/AmazingFeature) - Commit your Changes (
git commit -m 'Add some AmazingFeature') - Push to the Branch (
git push origin feature/AmazingFeature) - Open a Pull Request
Distributed under the GPLv2 or later License. See LICENSE for more information.
Campus Directory - WORDPRESS PLUGIN PAGE