For the last week or so, I've been trying to setup Steam Link on my Raspberry Pi 4 Model B devices. Along the way, I've ran into a few issues, some in which are documented in a separate GitHub repository I made here. Unfortunately, I found that information on the Internet related to setting up Steam Link on a Raspberry Pi is very scattered and scarce, especially when wanting to stream at 120 FPS/Hz, which is still fairly new to Steam Link. With that said, I also found that newer OS releases of the Raspberry Pi OS either have bad performance while running Steam Link or don't work at all. That is why we will be using a legacy version of Raspberry Pi OS called Buster Lite, which runs on 32-bit.
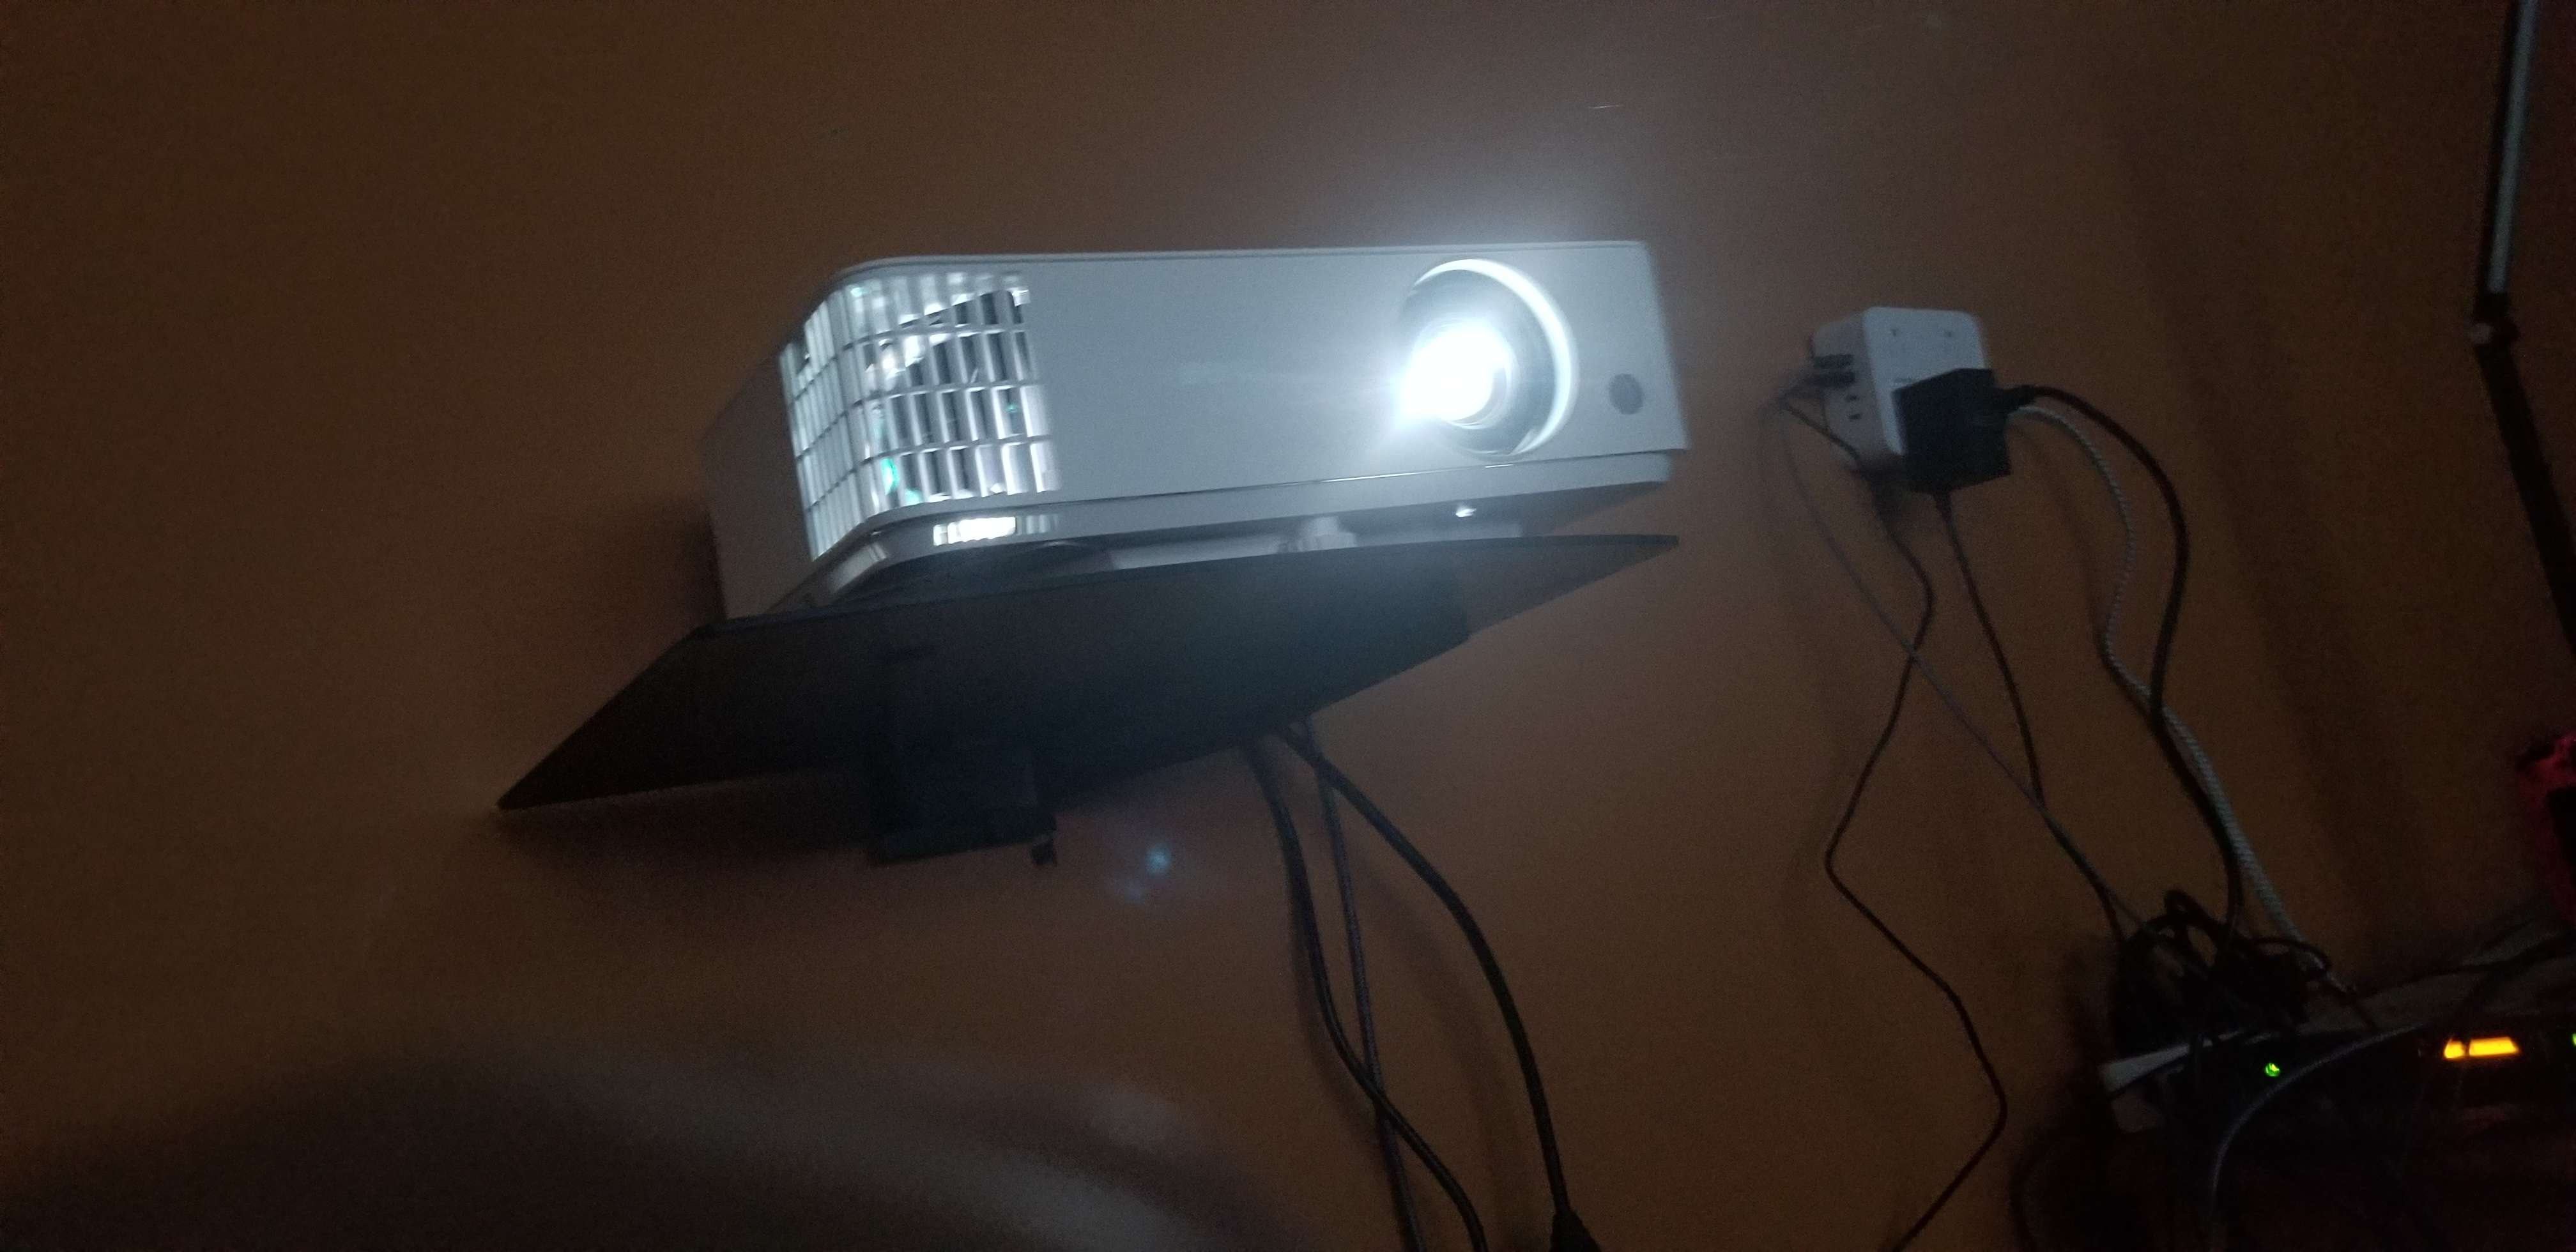
My main goal is to stream games from my gaming desktop to a new gaming projector I recently purchased called the BenQ TH685P using Steam Link on my Raspberry Pi. I wanted to stream at 1920x1080 @ 120Hz/FPS. While my goal was to stream at 120Hz, this guide should also work for refresh rates up to 144Hz with some small adjustments since that's the highest refresh rate Steam Link supports at this moment.
With that said, you may notice videos and screenshots of my Steam Link stream is actually only around ~804 or so pixels in height and not truly 1080P. This is just specific to my setup due to my computer monitor's aspect ratio. If you use a monitor with the standard 16:9 aspect ratio (e.g. 1920x1080) and stream via Steam Link, the game will be fully streamed at 1920x1080.
Disclaimer - I apologize for any pictures and videos with bad quality when taken from my phone. Unfortunately, I don't have any high-quality cameras or video recording devices.
I wanted to note in this video that the game sound cuts off at the end due to my headset turning off which in return disabled its audio devices and impacted audio from Steam Link.
I strongly recommend using a wired connection for both your computer you want to stream from and your Raspberry Pi device that will be running Steam Link. Even when your Raspberry Pi is right next to your router/wireless access point, using wireless will still likely result in hiccups every once and a while causing noticeable performance issues.
My gaming desktop has the following specs.
- Windows 11 (22H2)
- RTX 3090 TI
- AMD Ryzen 9 5900X (12c/24t)
- 64 GBs DDR4 RAM
- 2 x 2 TBs NVMe (Samsung 970 EVO and Samsung 980 PRO)
- 1 gbps on-board NIC (wired)
I have a BenQ TH685P projector that I want to stream games to using Steam Link. It supports running at 1080P@120Hz/FPS!
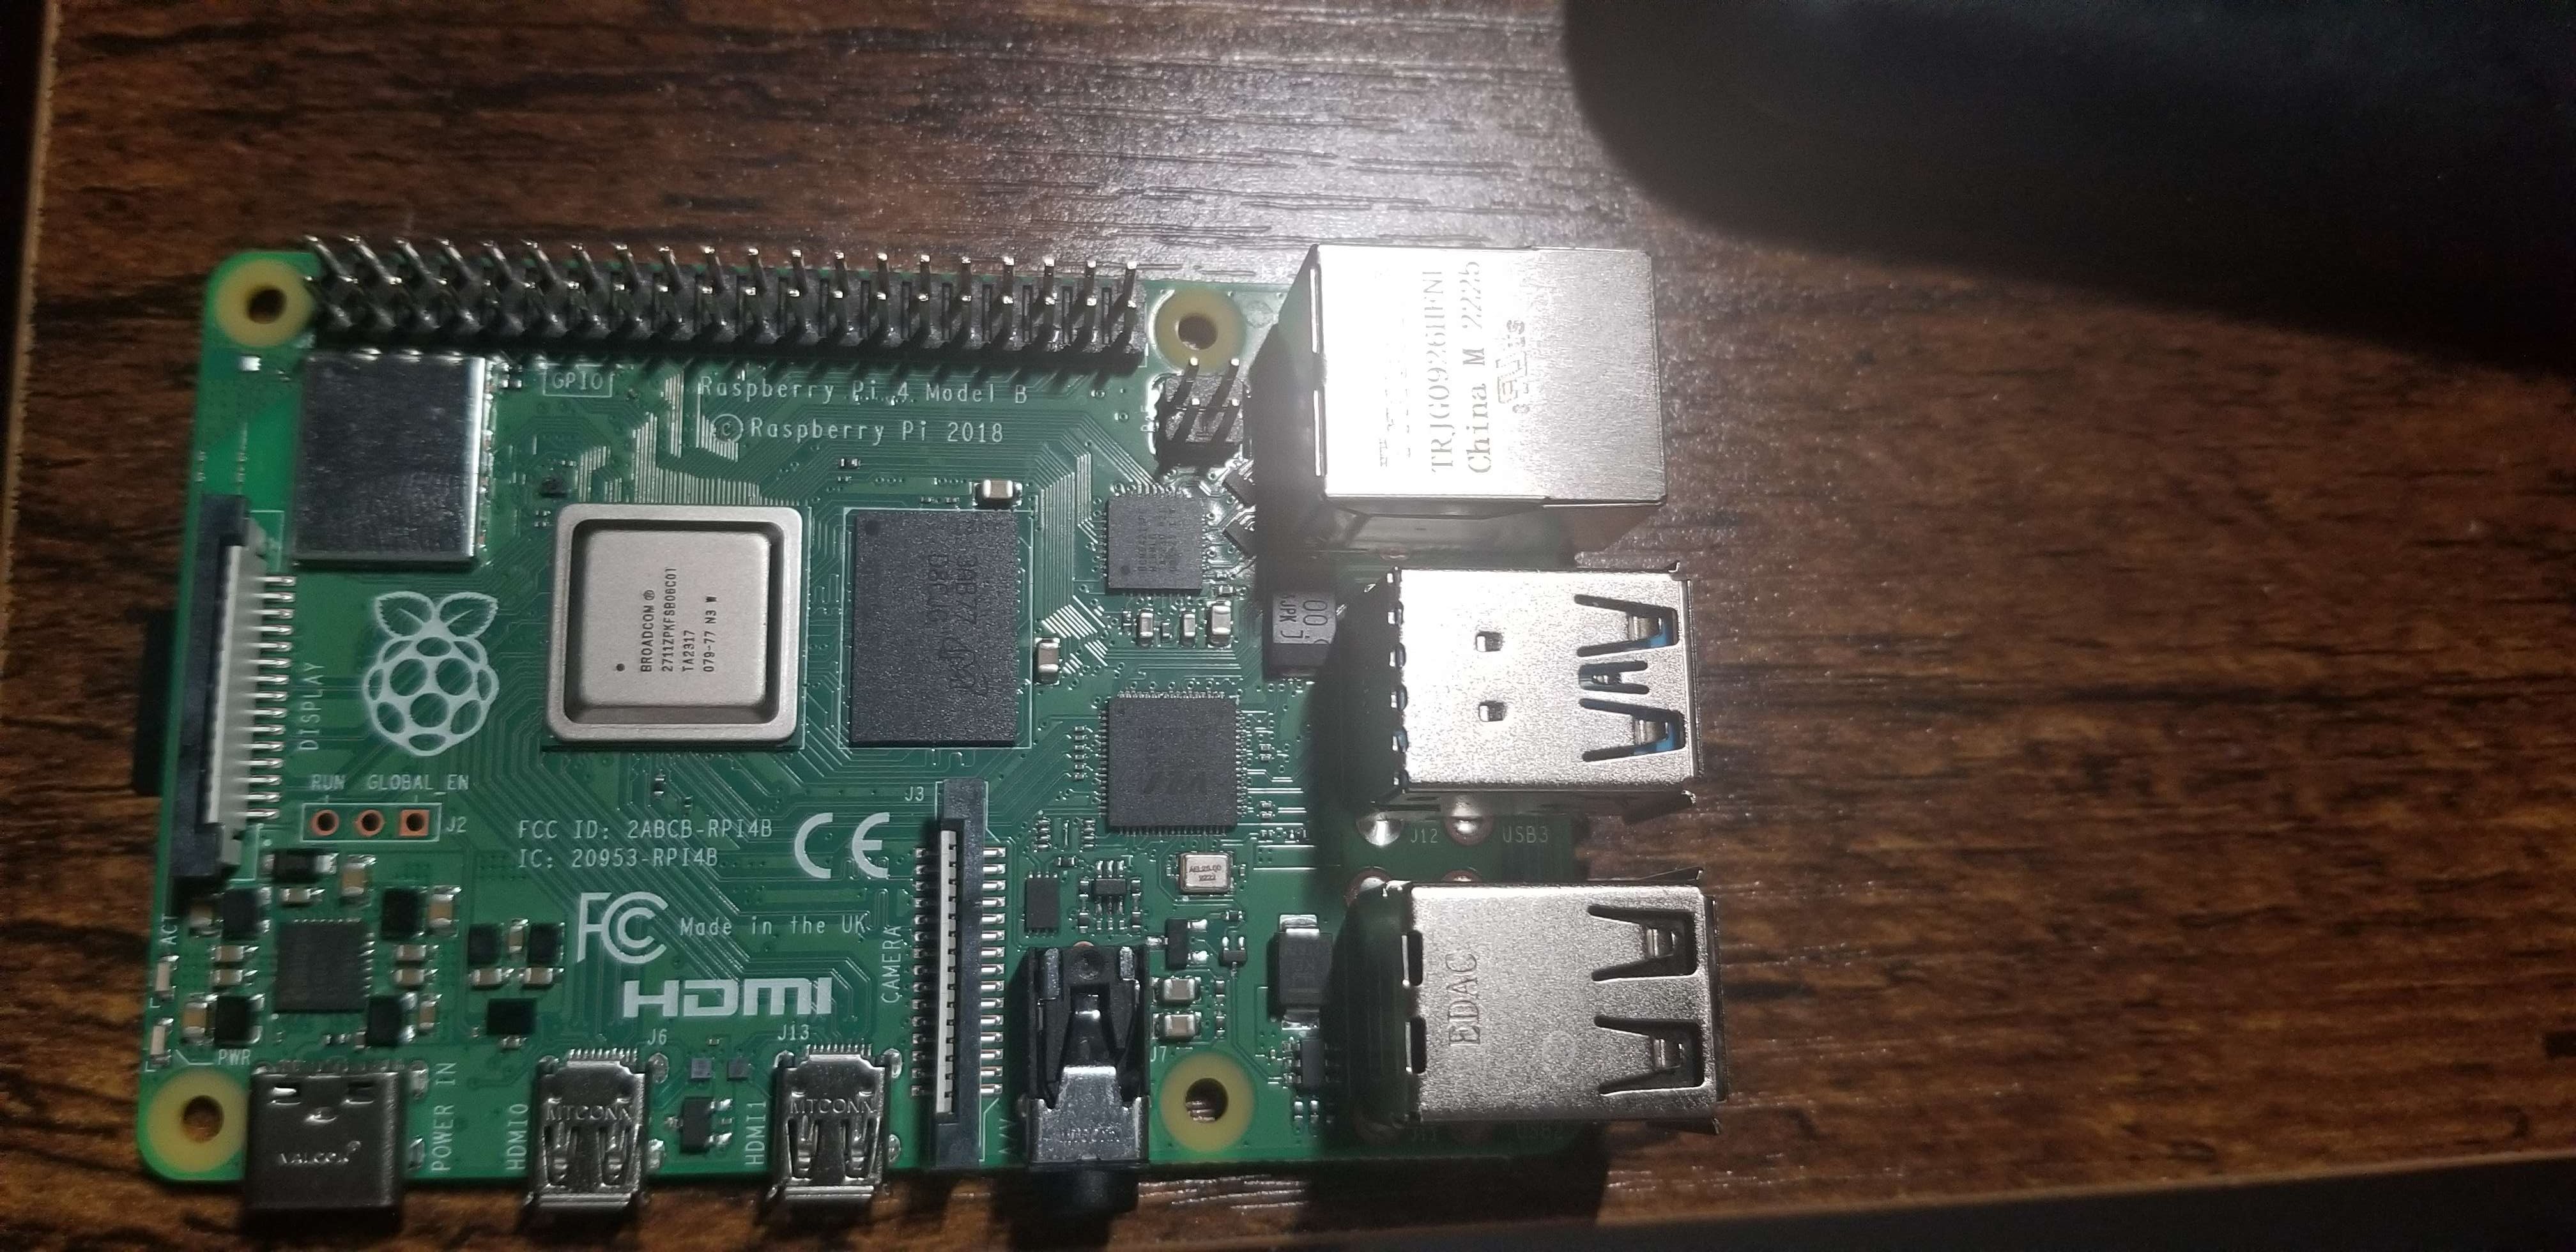
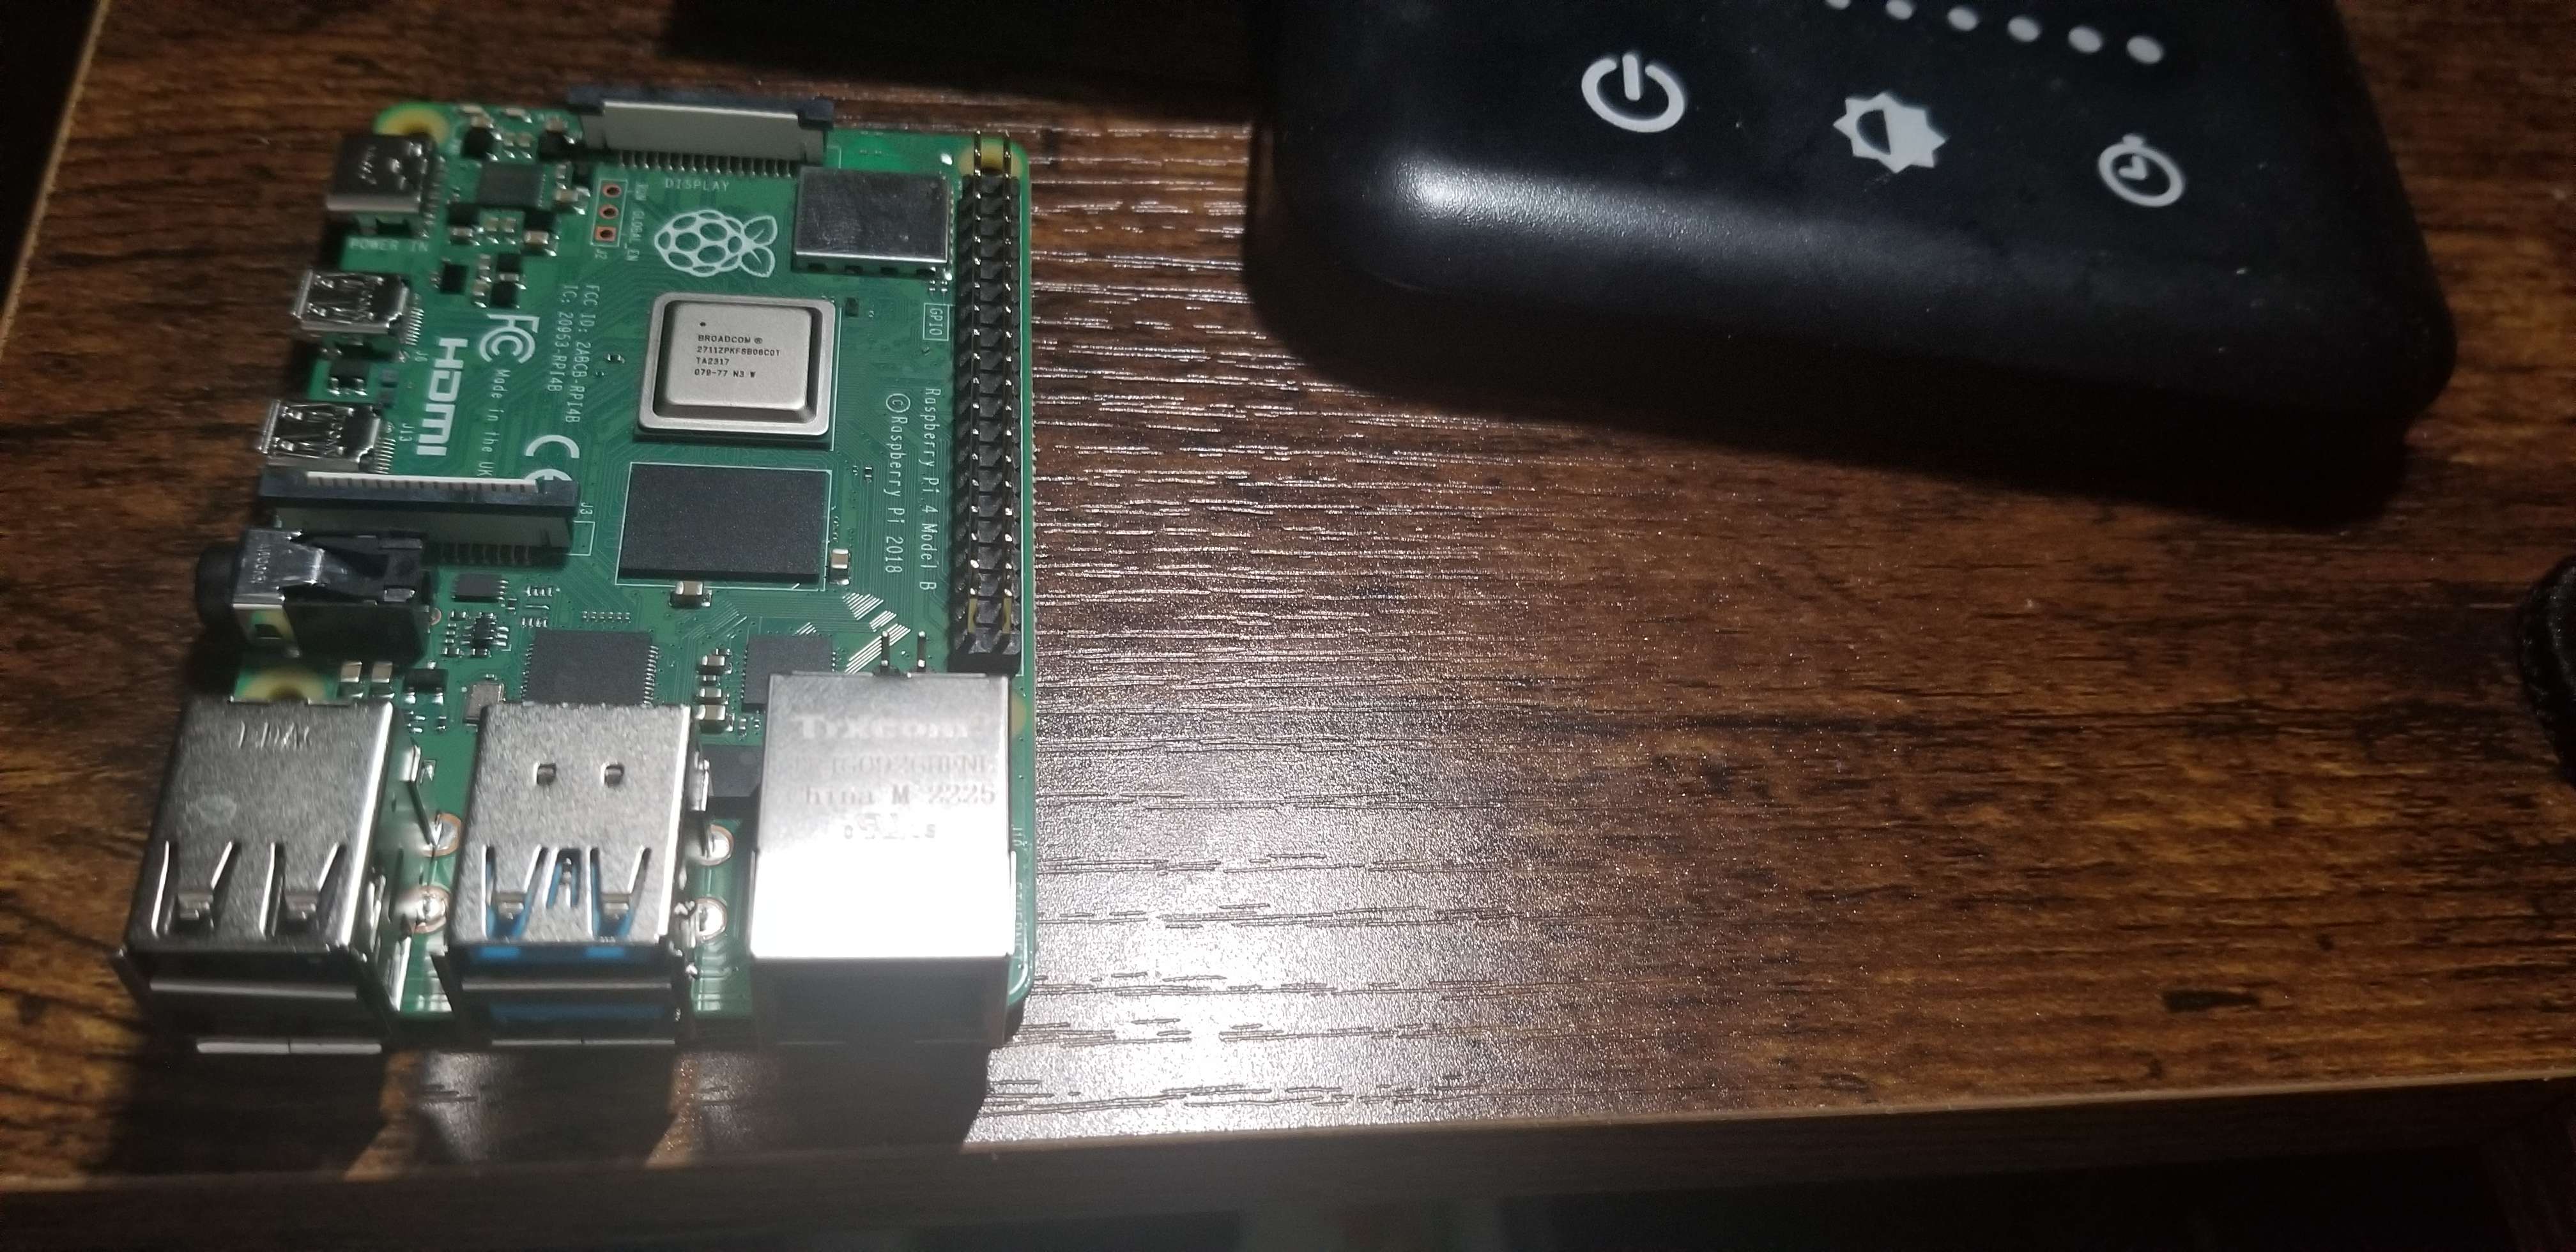
I'm setting up Steam Link on a Raspberry Pi 4 Model B device with 4 cores and 4 GBs of RAM.
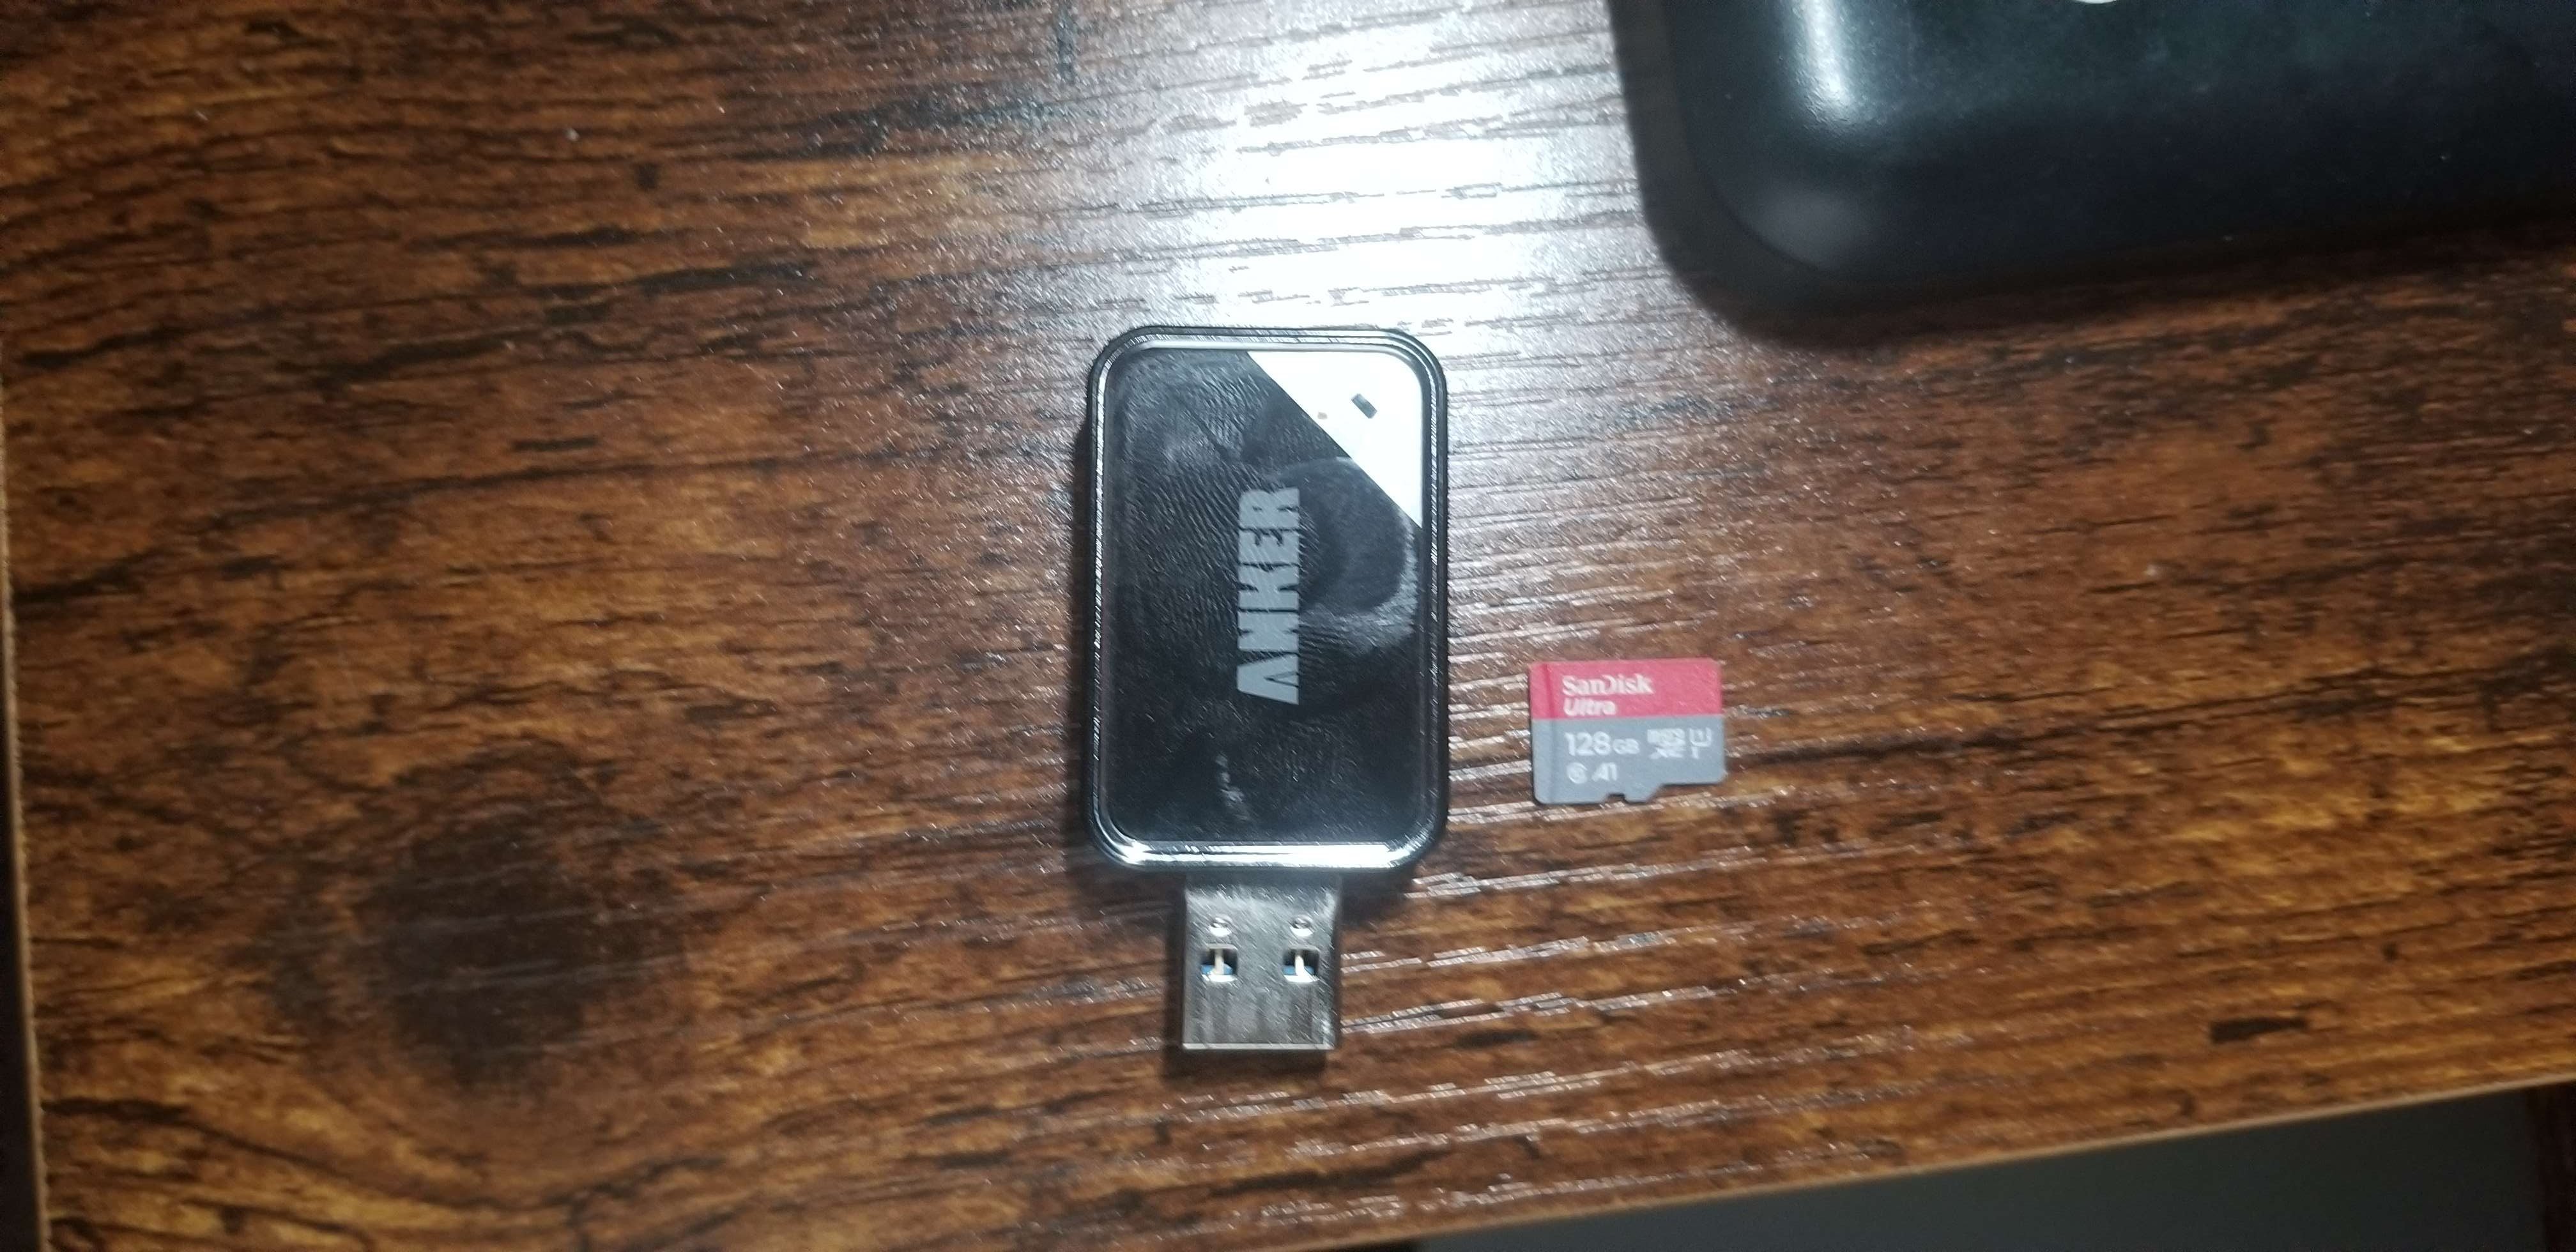
I am using a SanDisk 128 GBs MicroSD card with a USB flasher from Anker.
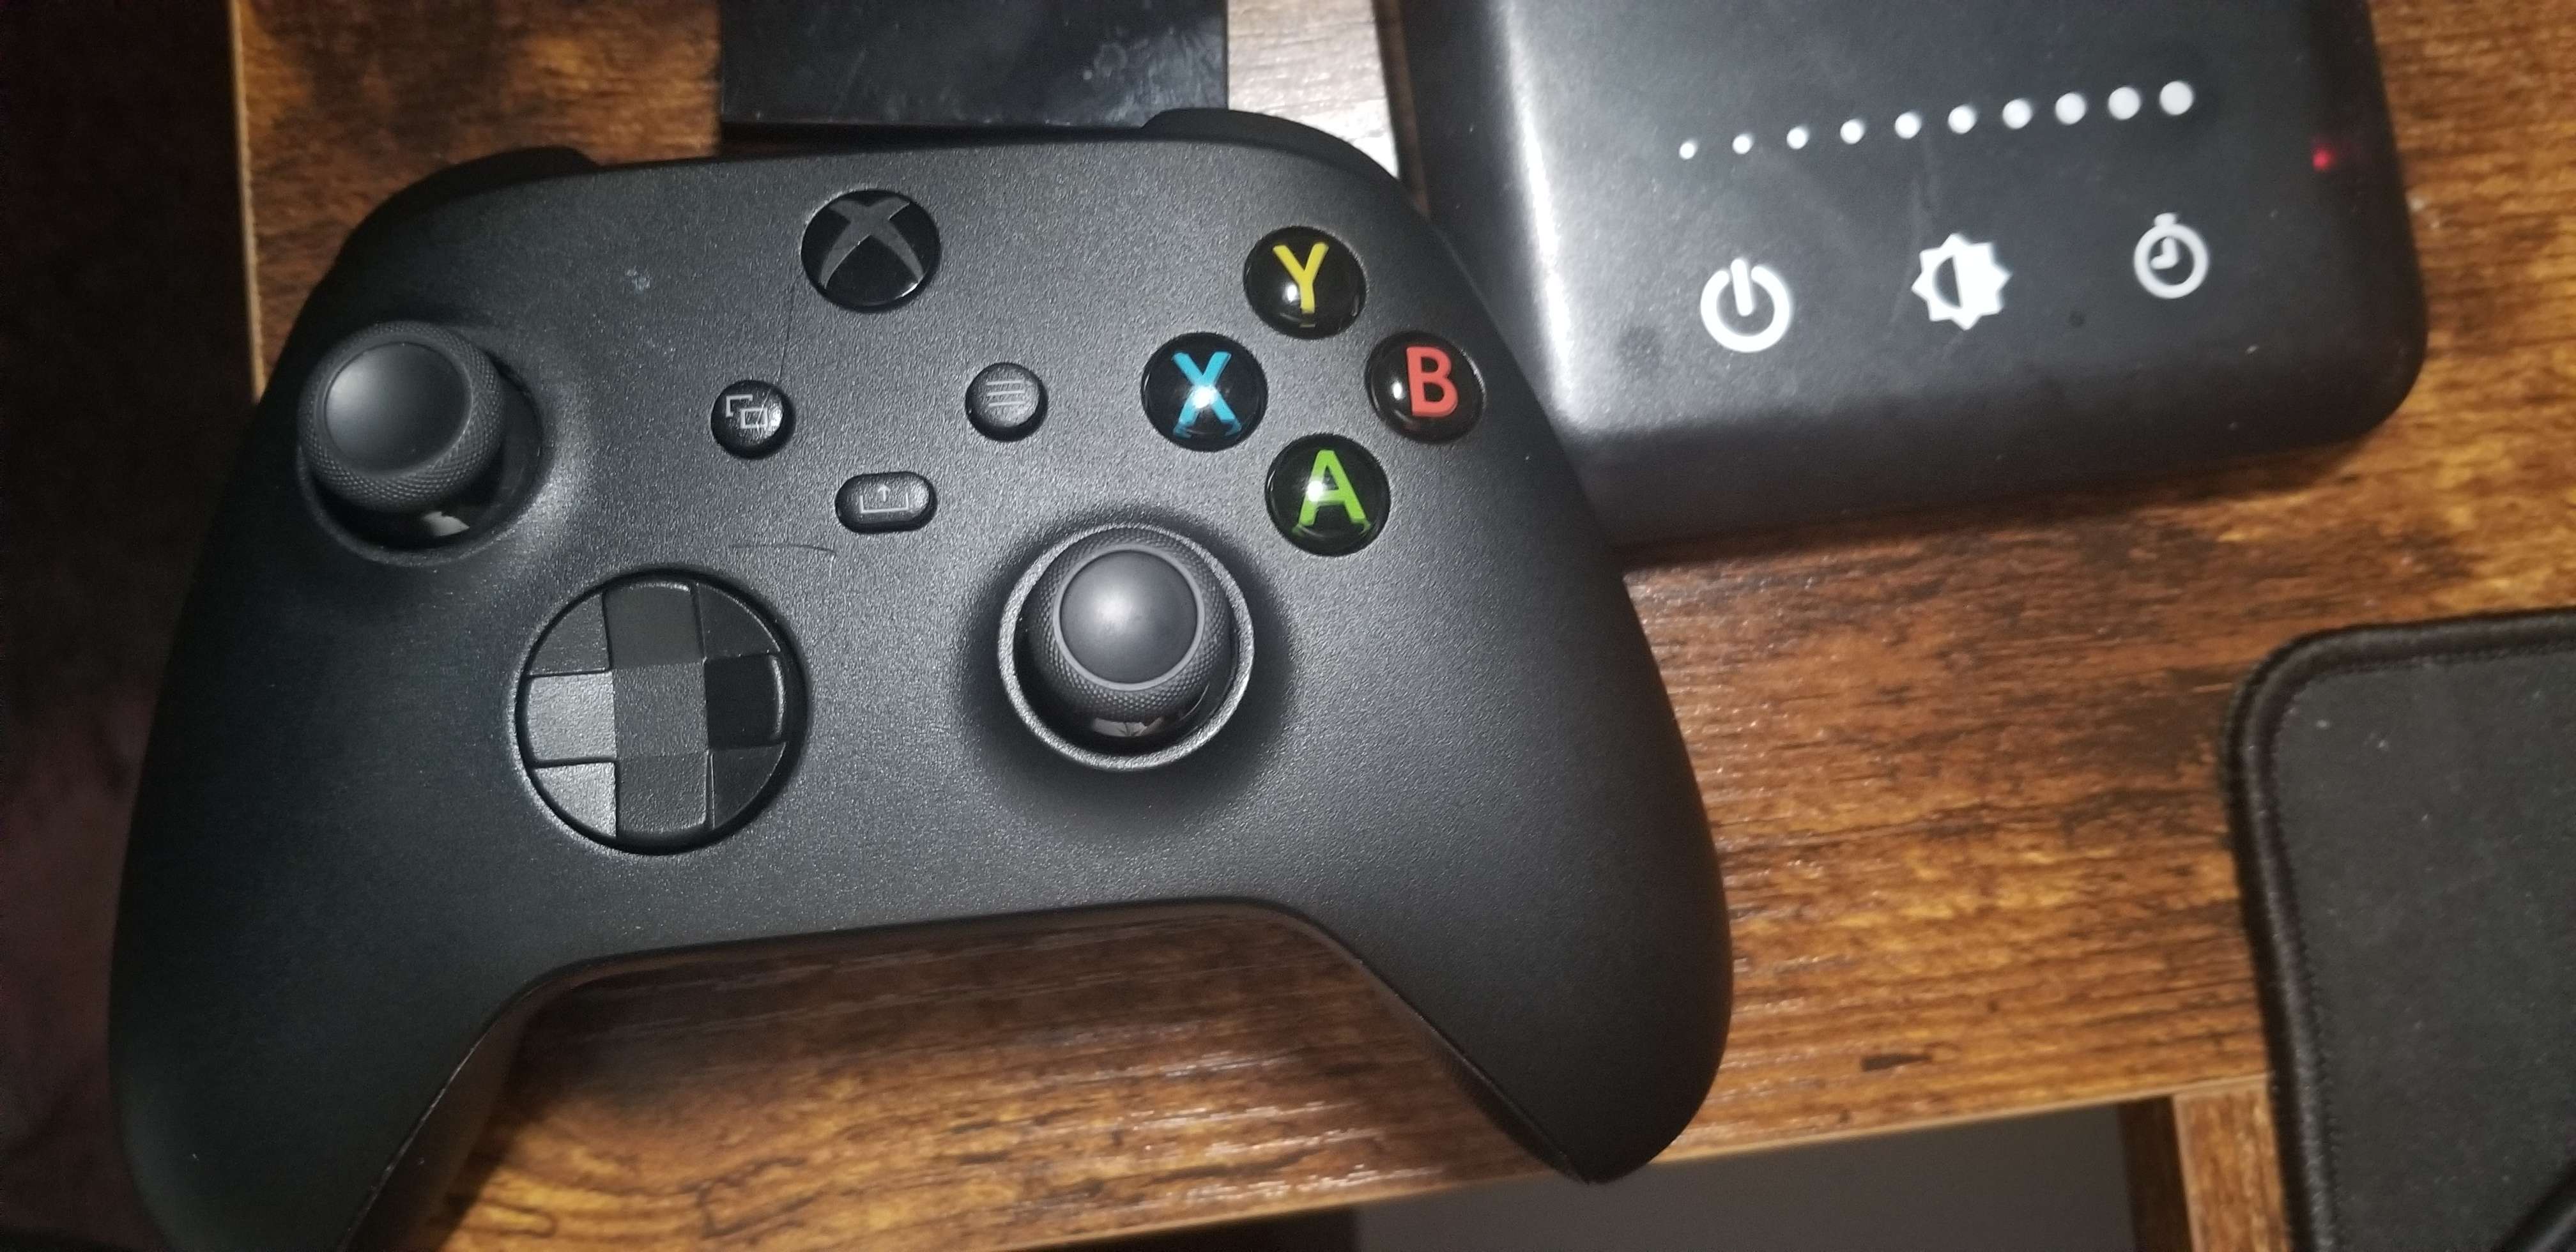
I am using an Xbox Core Wireless Controller (Carbon Black) with BlueTooth.
I use an Acer KC242Y monitor (1920x1080 @ 100Hz) with a KVM switch (between my Raspberry Pi and one of my home servers) when setting up Raspberry Pi devices since this allows me to use a keyboard/mouse easily. After setting up the Raspberry Pi, I then connect it to my projector since I wouldn't need a keyboard/mouse at that point due to using a controller.
As mentioned in the overview, we will be using Raspberry Pi OS Buster Lite in this guide. This is because from the experiments I've concluded, Steam Link on Bookworm has broken packages and Steam Link on Bullseye has noticeably bad performance (high display latency and frame loss).
Firstly, you'll want to download Raspberry Pi Imager from here. This program allows you to easily flash your MicroSD card with a new Raspberry Pi OS.
Next, you'll want to download the Raspberry Pi OS Buster Lite image file from here. A direct link to 2022-04-04-raspios-buster-armhf-lite.img.xz may be found here.
After downloading the file, you will need to extract the image file using a program such as 7-Zip that supports uncompressing .xz files.
Now, you'll want to open Raspberry Pi Imager and you should see something like below.
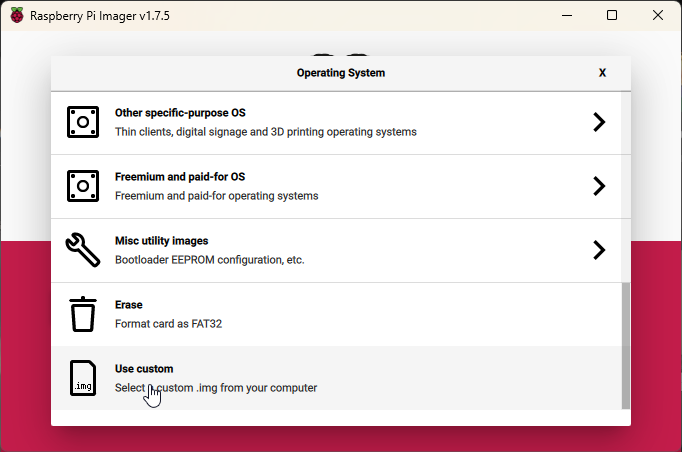
Click the "Choose OS" button under the "Operating System" text and this will open a new scrollable menu. Scroll down to the bottom of the menu and choose "Use custom".
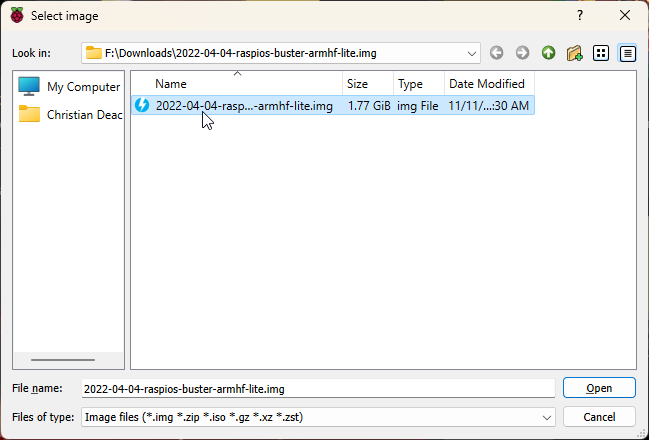
Now you'll want to select the Raspberry Pi OS Buster Lite image file you've extracted from earlier.
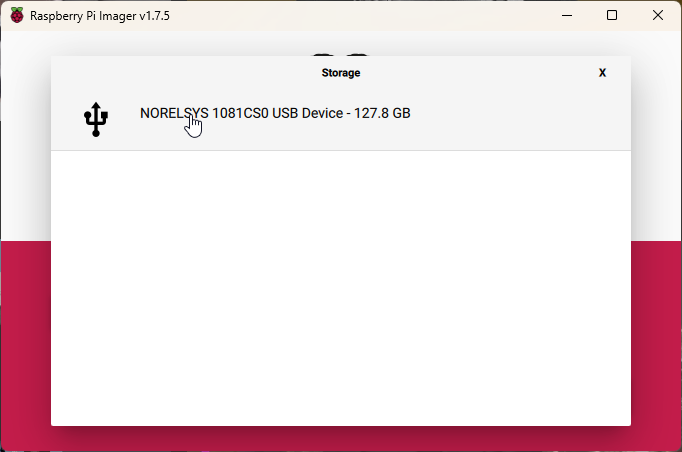
Afterwards, click the "Choose Storage" button under the "Storage" text. You will now select the MicroSD card you want to flash the OS to.
You should now be able to click the "Write" button to flash the image to the MicroSD card.
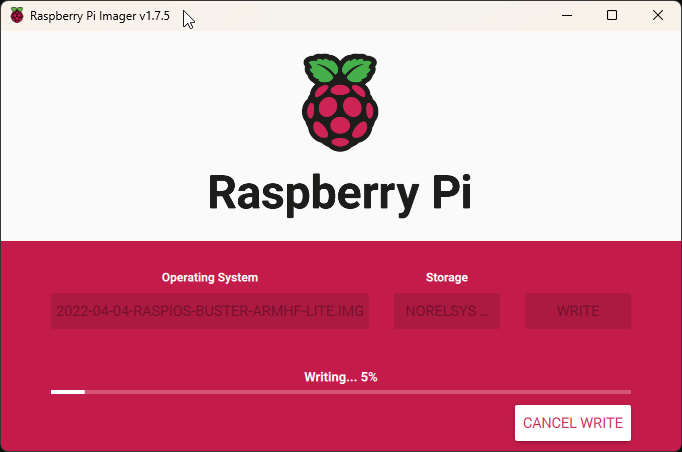
This will take a minute or two depending on the speed of your MicroSD card. A popup like below will show up once the image is written to the MicroSD card.
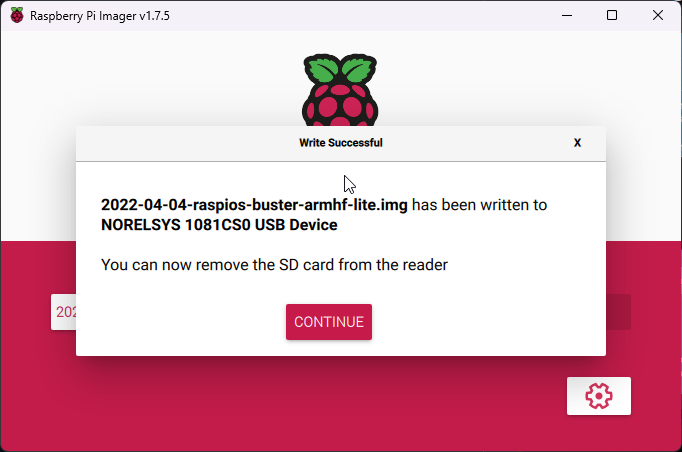
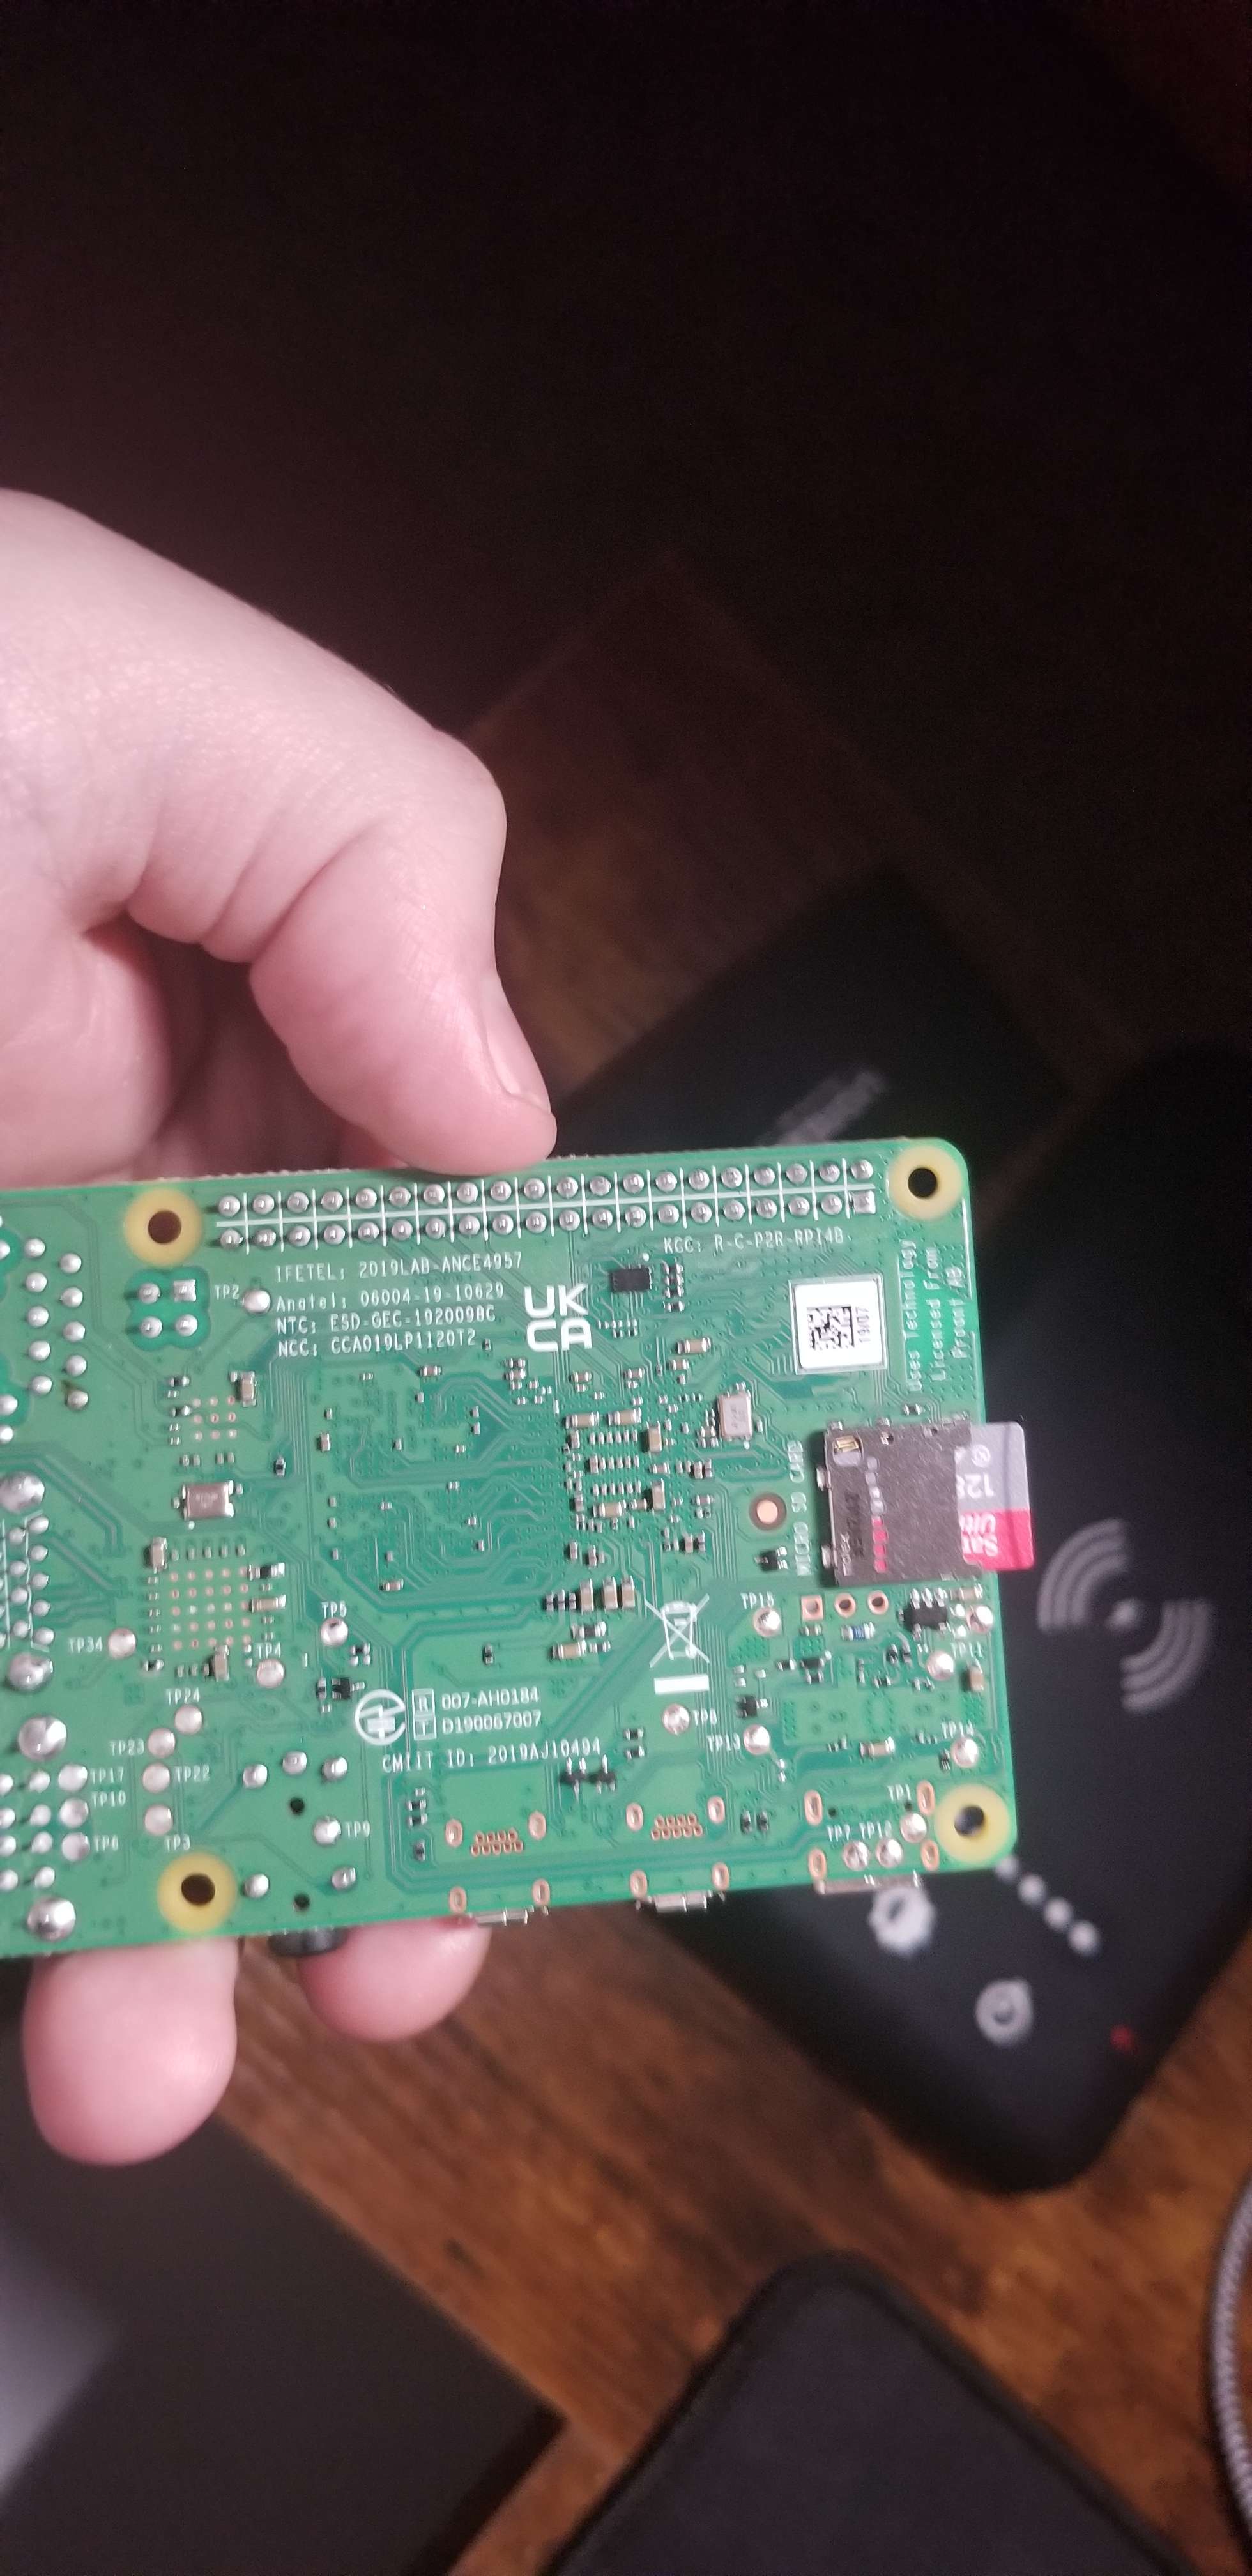
You may hit continue and take out your MicroSD card. You'll want to insert your MicroSD card into your Raspberry Pi like below.
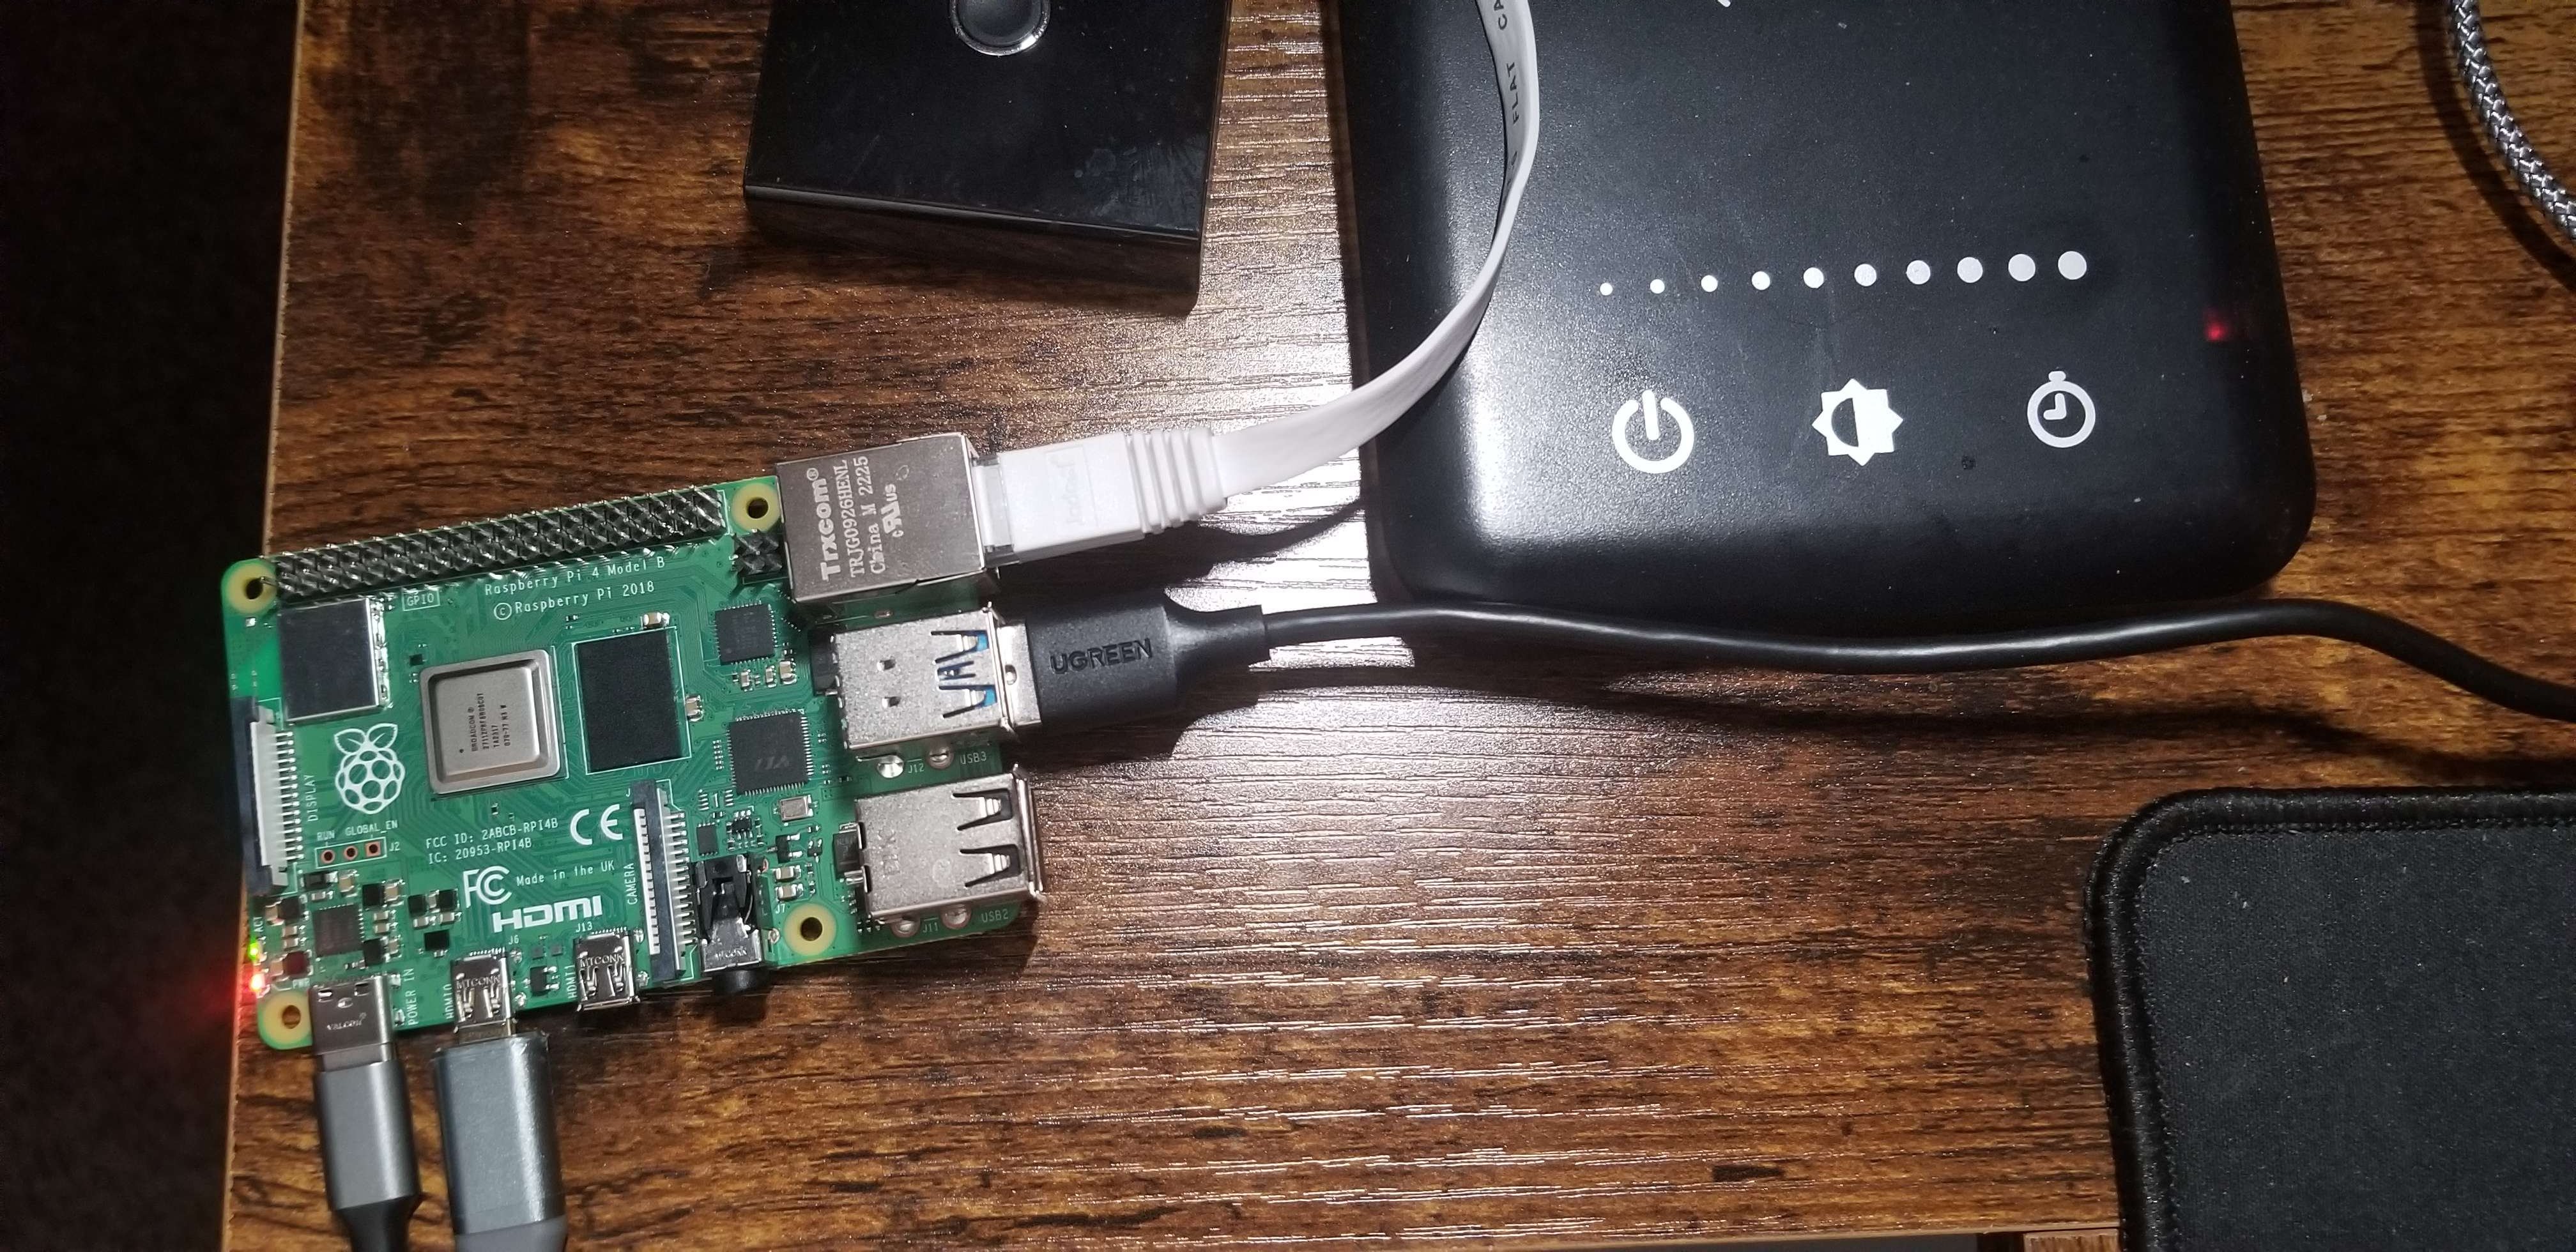
Next, you'll want to connect your Raspberry Pi to your monitor or projector. You will need a keyboard and mouse connected to the Raspberry Pi for the initial setup steps. We will be trying to use SSH as much as possible when the time comes. In this guide, I will be using my monitor for testing to setup the Raspberry Pi itself, but after it is setup, I will be plugging it into my projector.
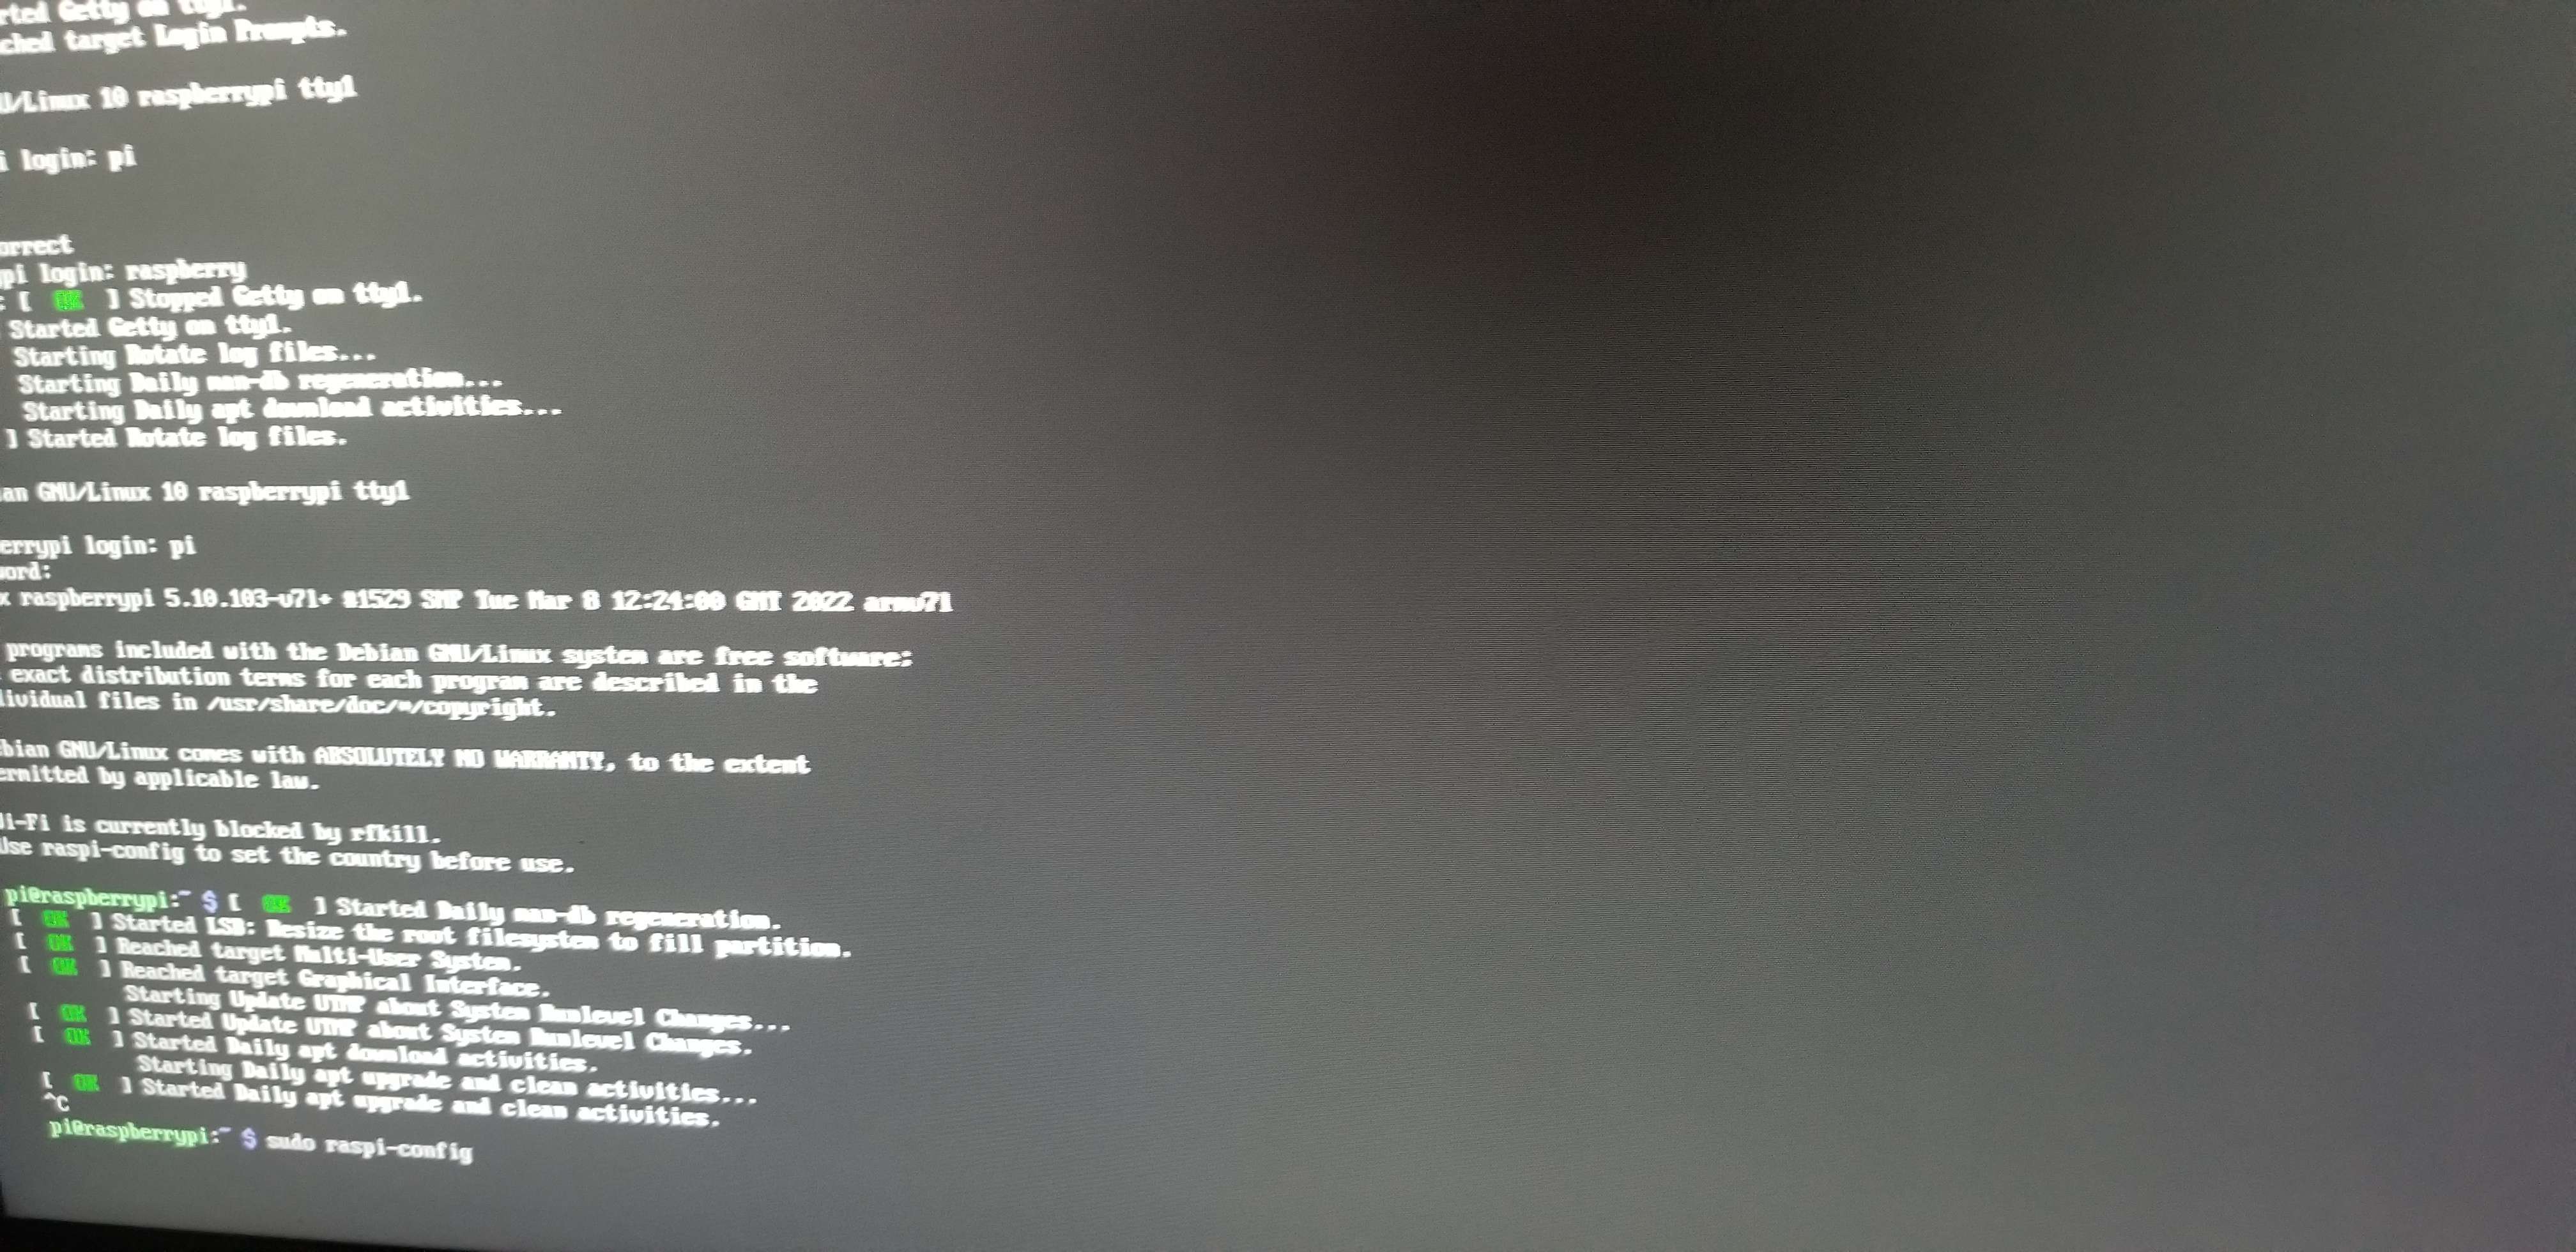
After booting your Raspberry Pi, you will need to login. The default username is pi and the default password is raspberry.
The first thing you'll want to do after logging in is enabling OpenSSH. OpenSSH will allow you to SSH to the Raspberry Pi device from your computer using a Linux terminal such as PuTTY or MobaXterm (what I personally use).
To enable OpenSSH, first you'll want to execute the sudo raspi-config command which will open a menu showing utilities and settings for the Raspberry Pi.
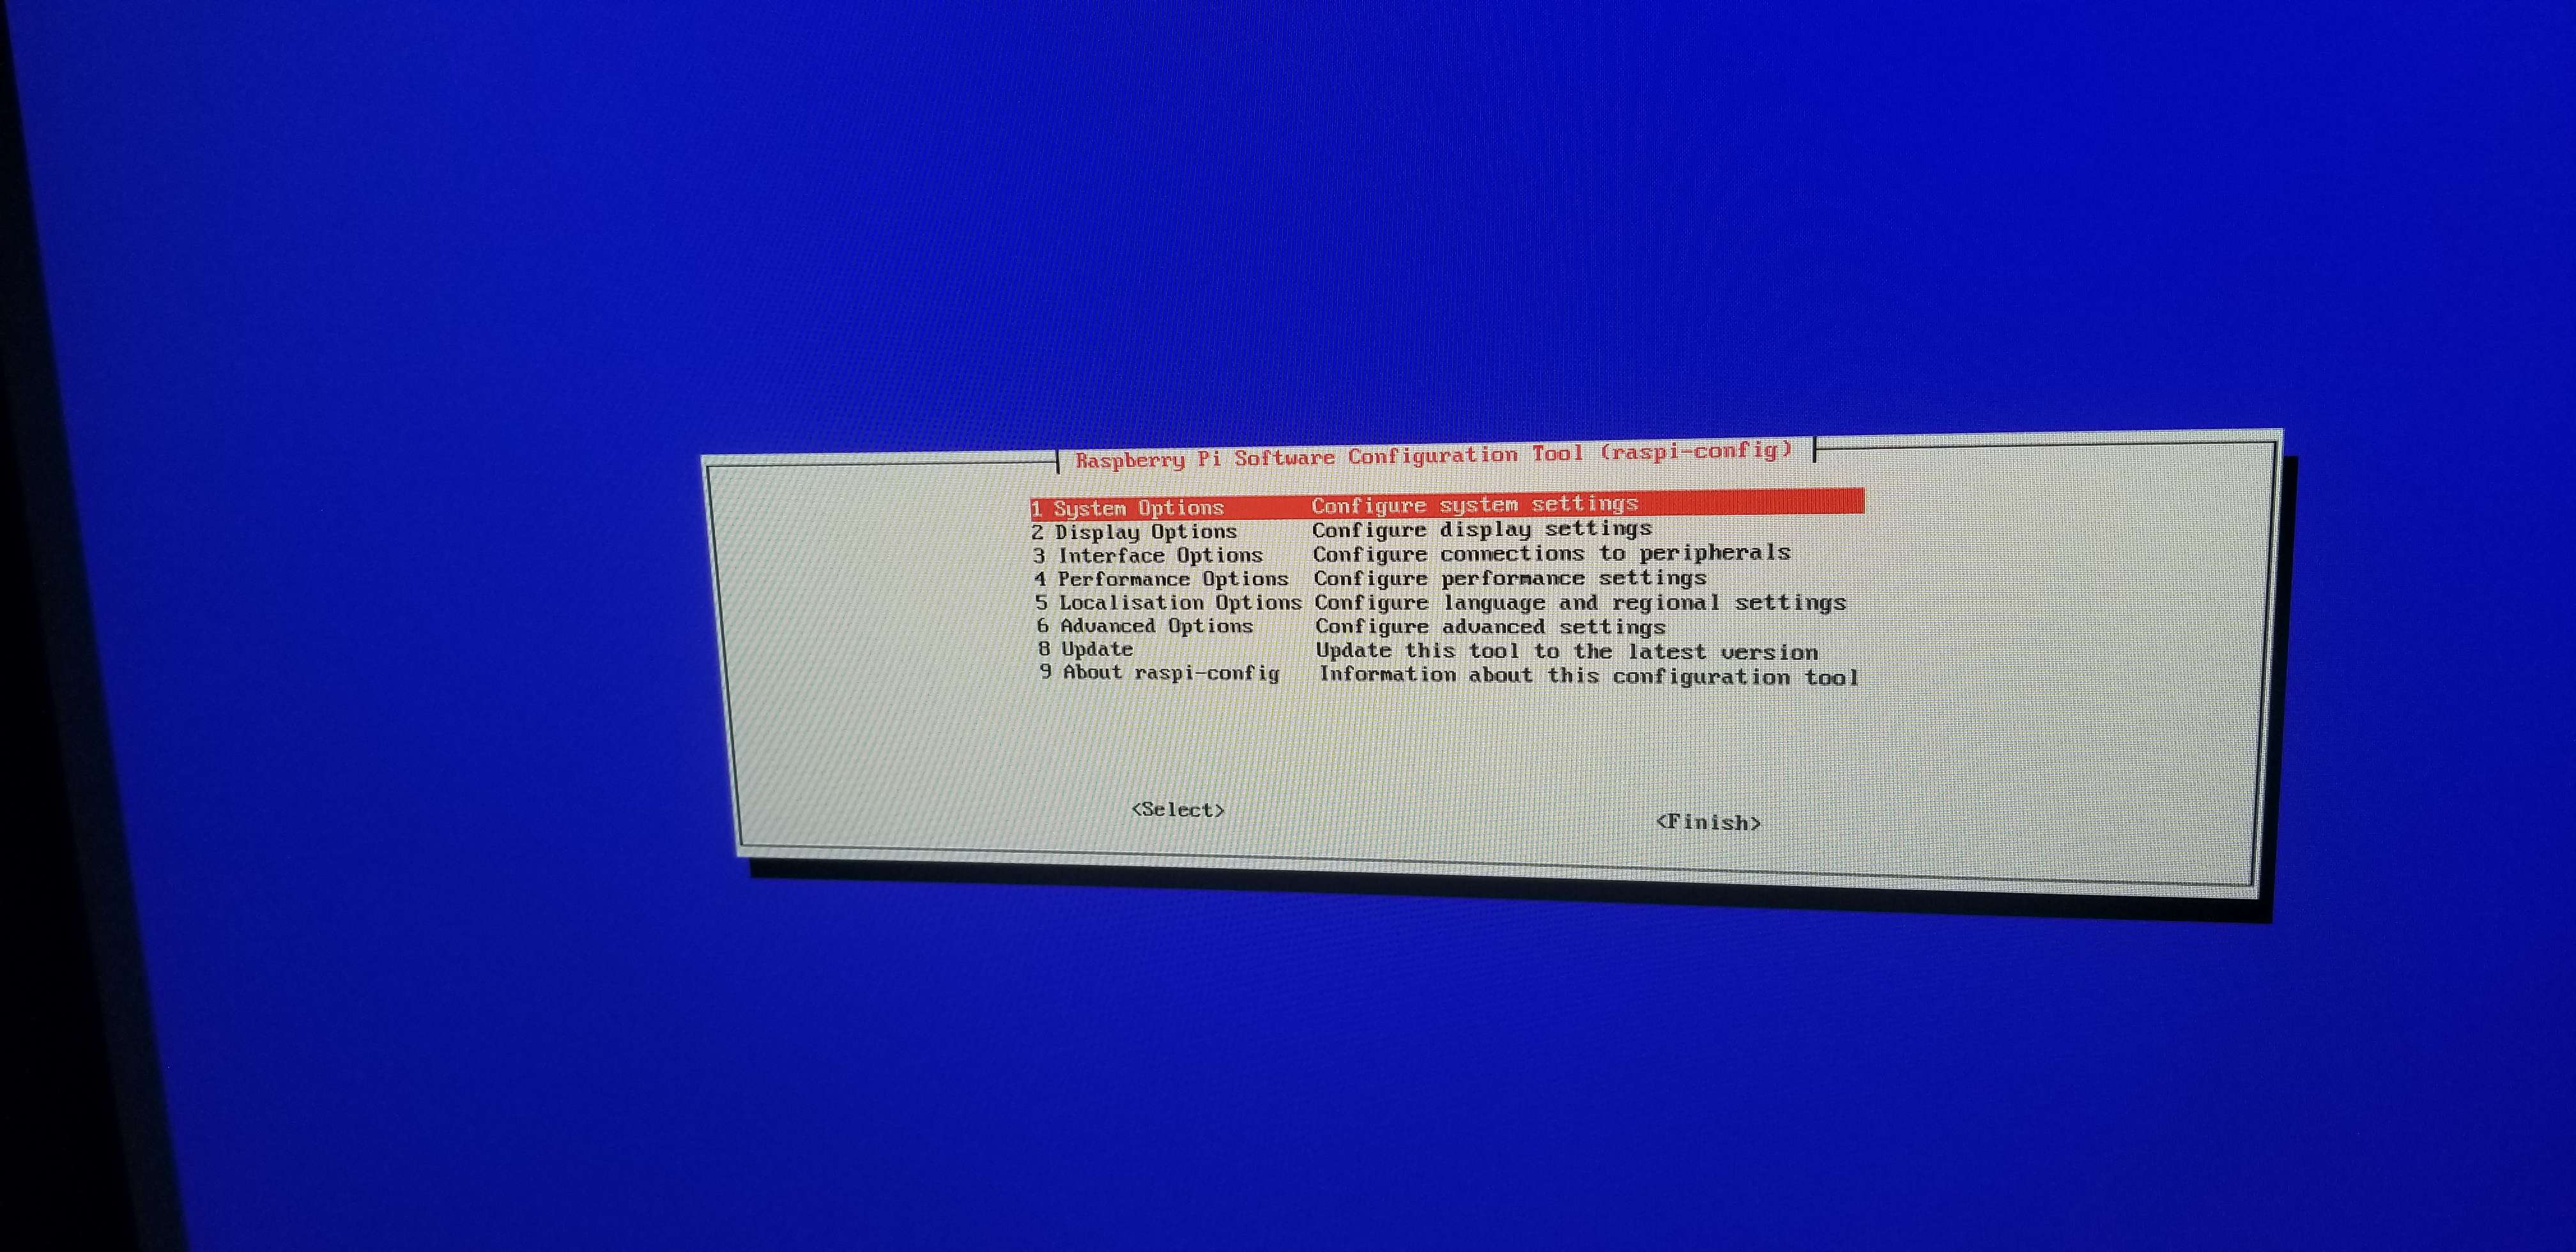
Next, use your arrow keys to go down to "Interface Options" and then hit enter to select. This will bring up a menu like the following.
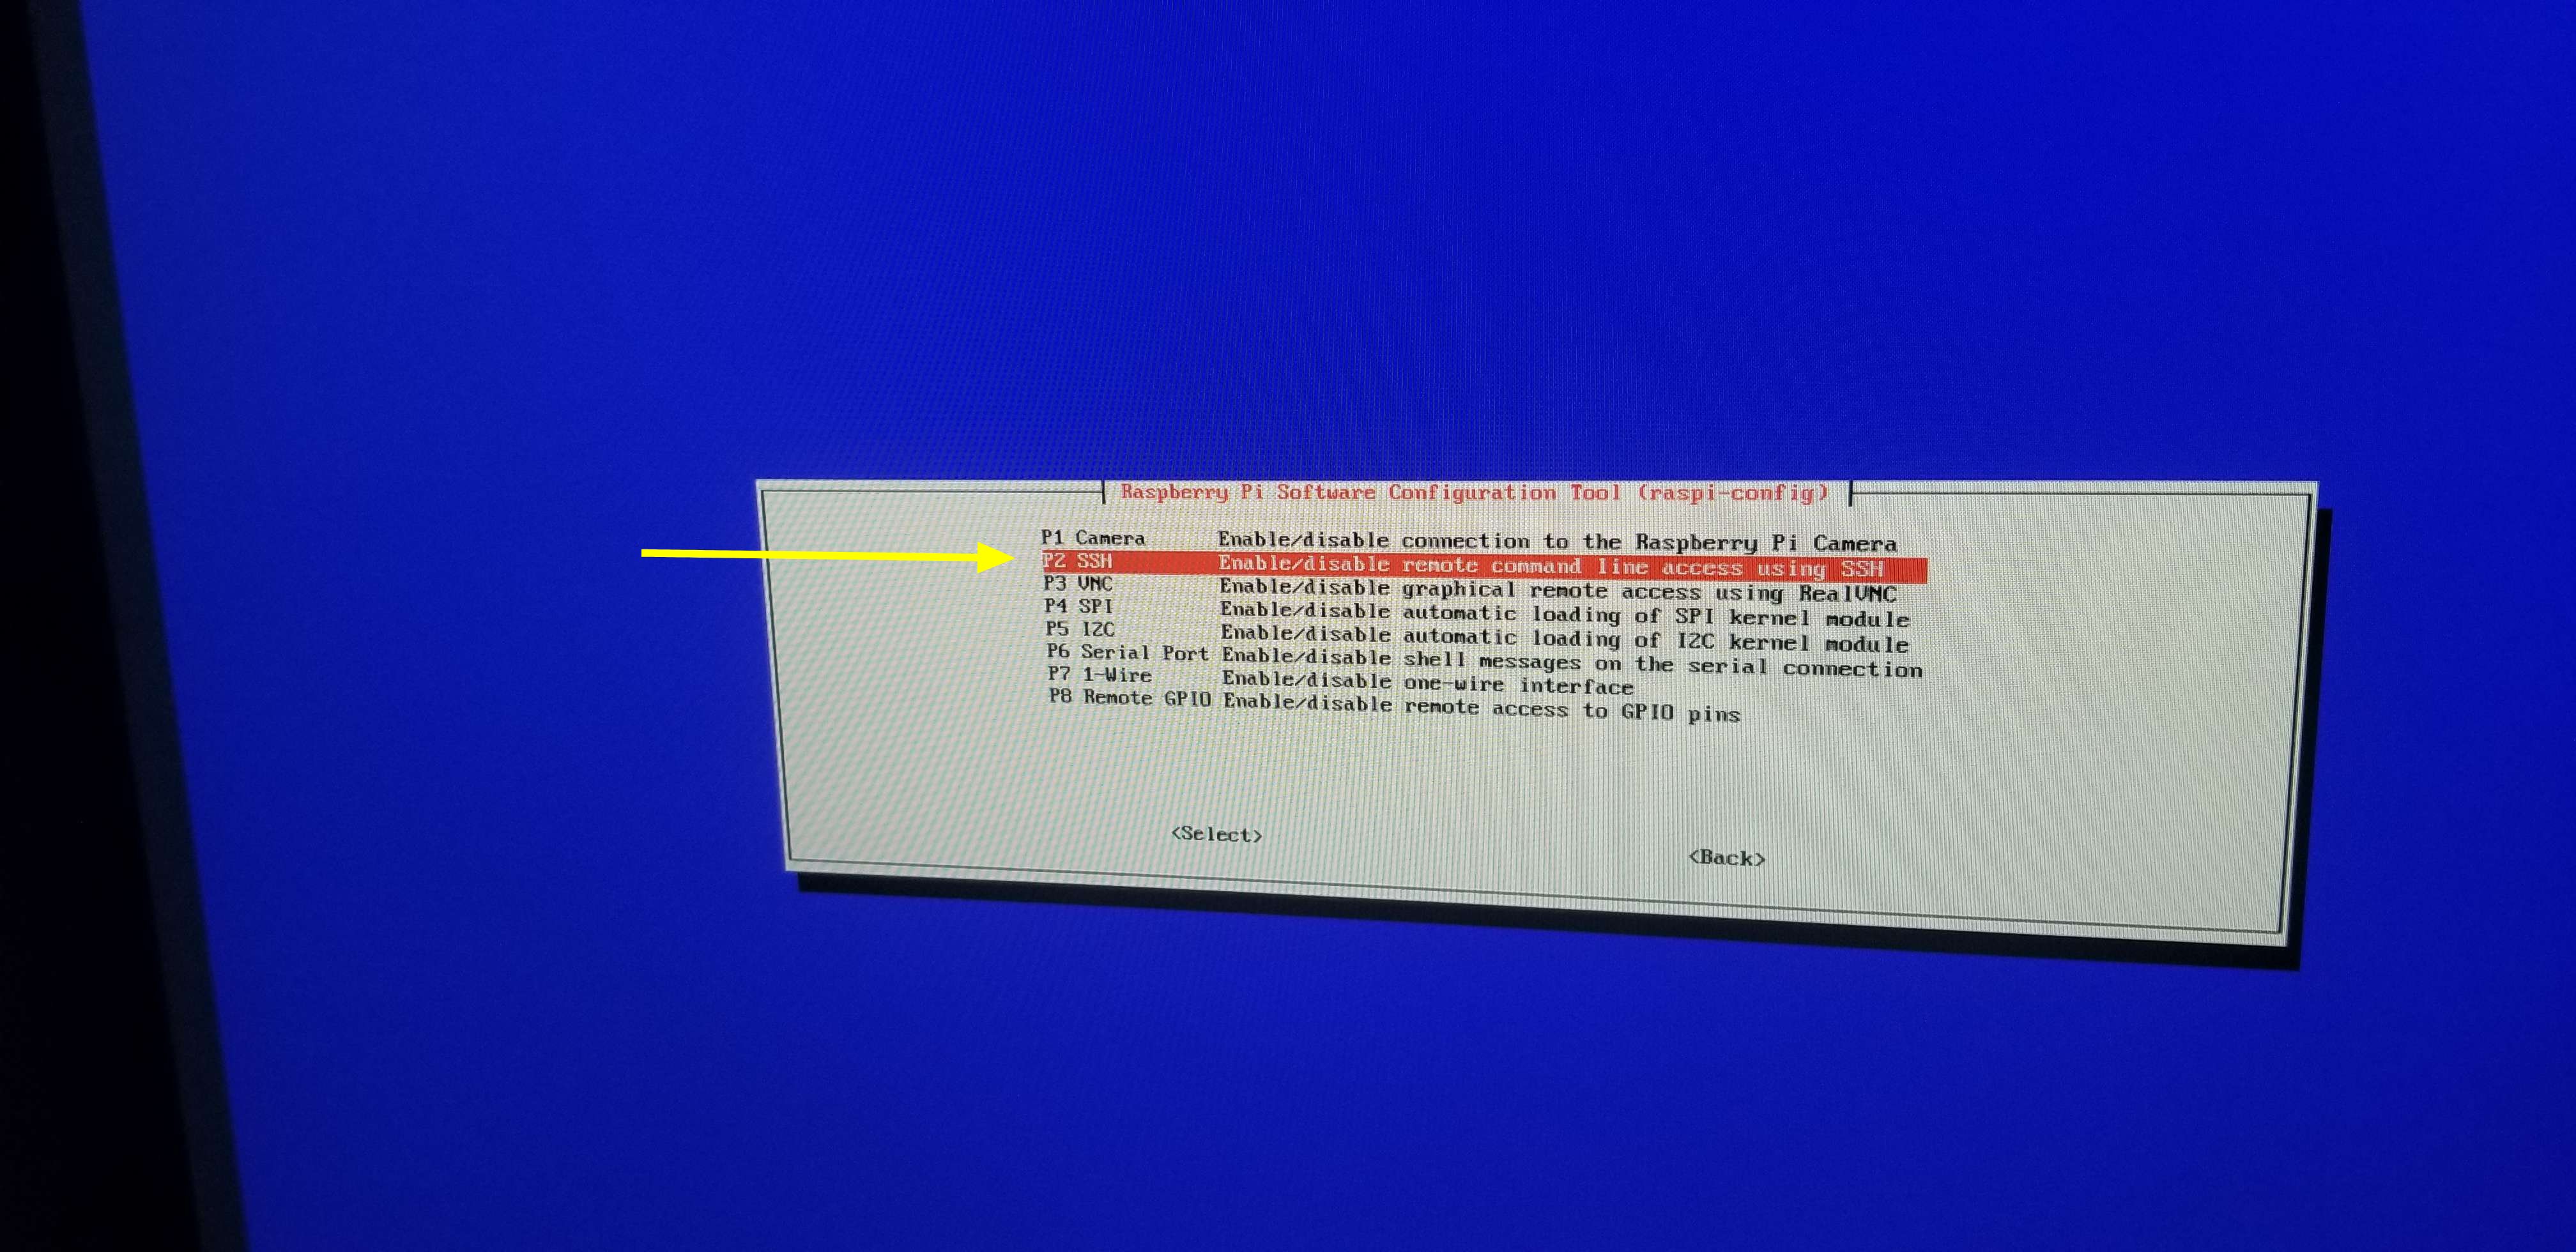
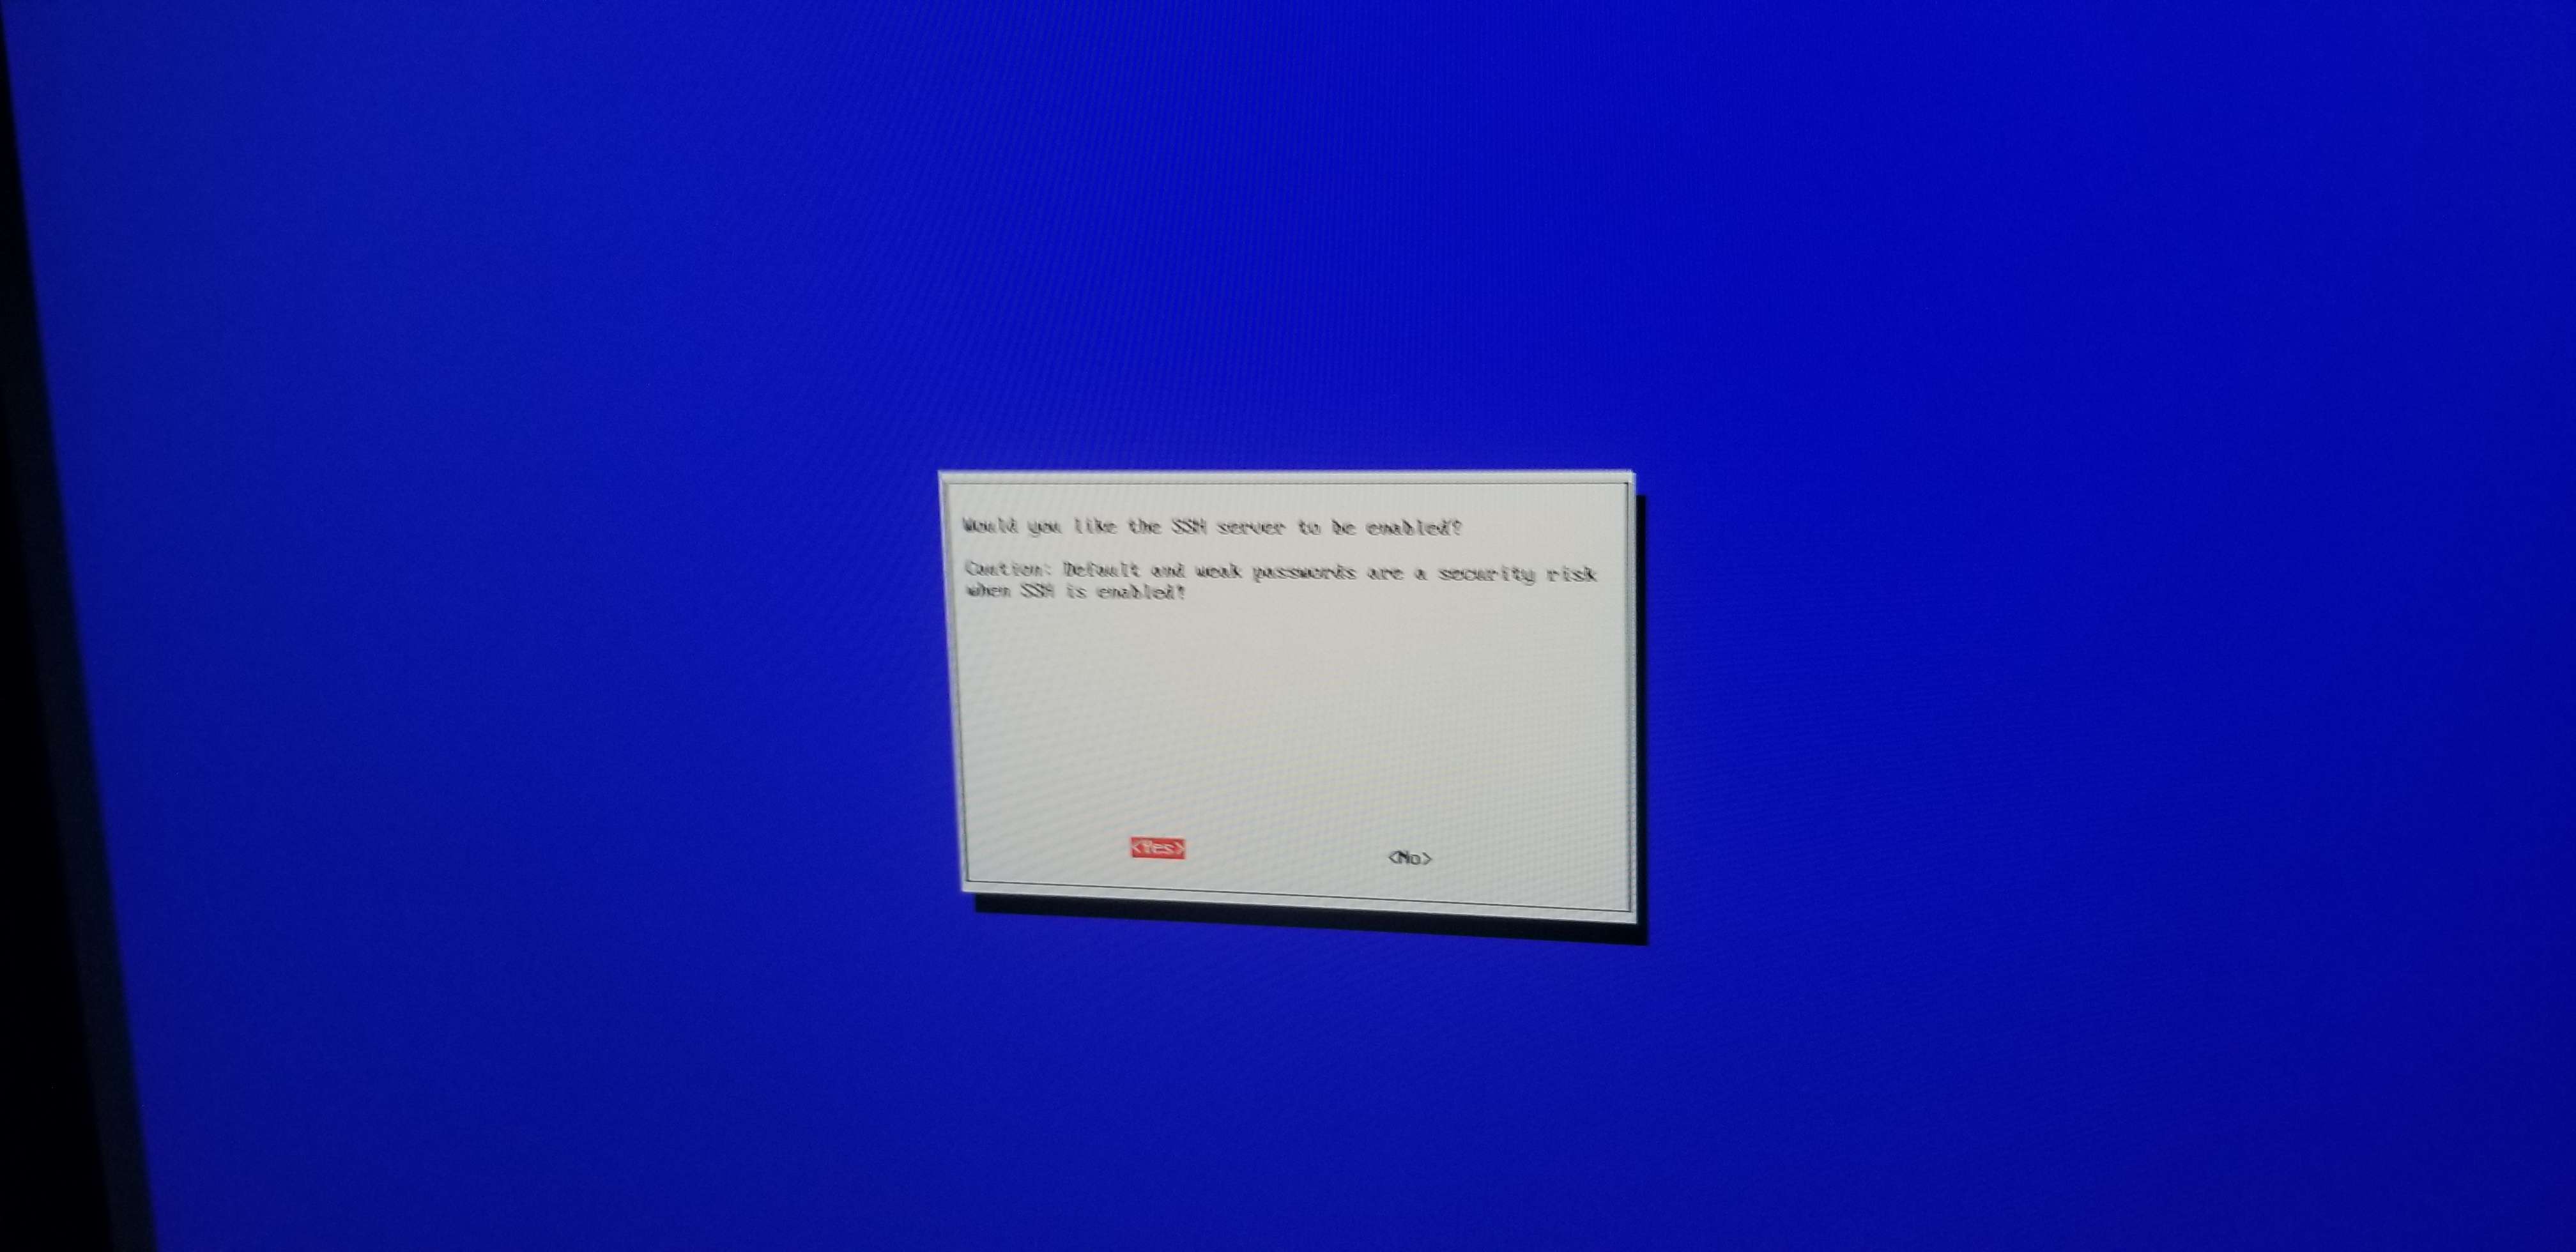
Now, use your arrow keys to go down to "P2 SSH" and then hit enter to select. This will prompt you to enable or disable SSH. Make sure to select yes and hit enter again.
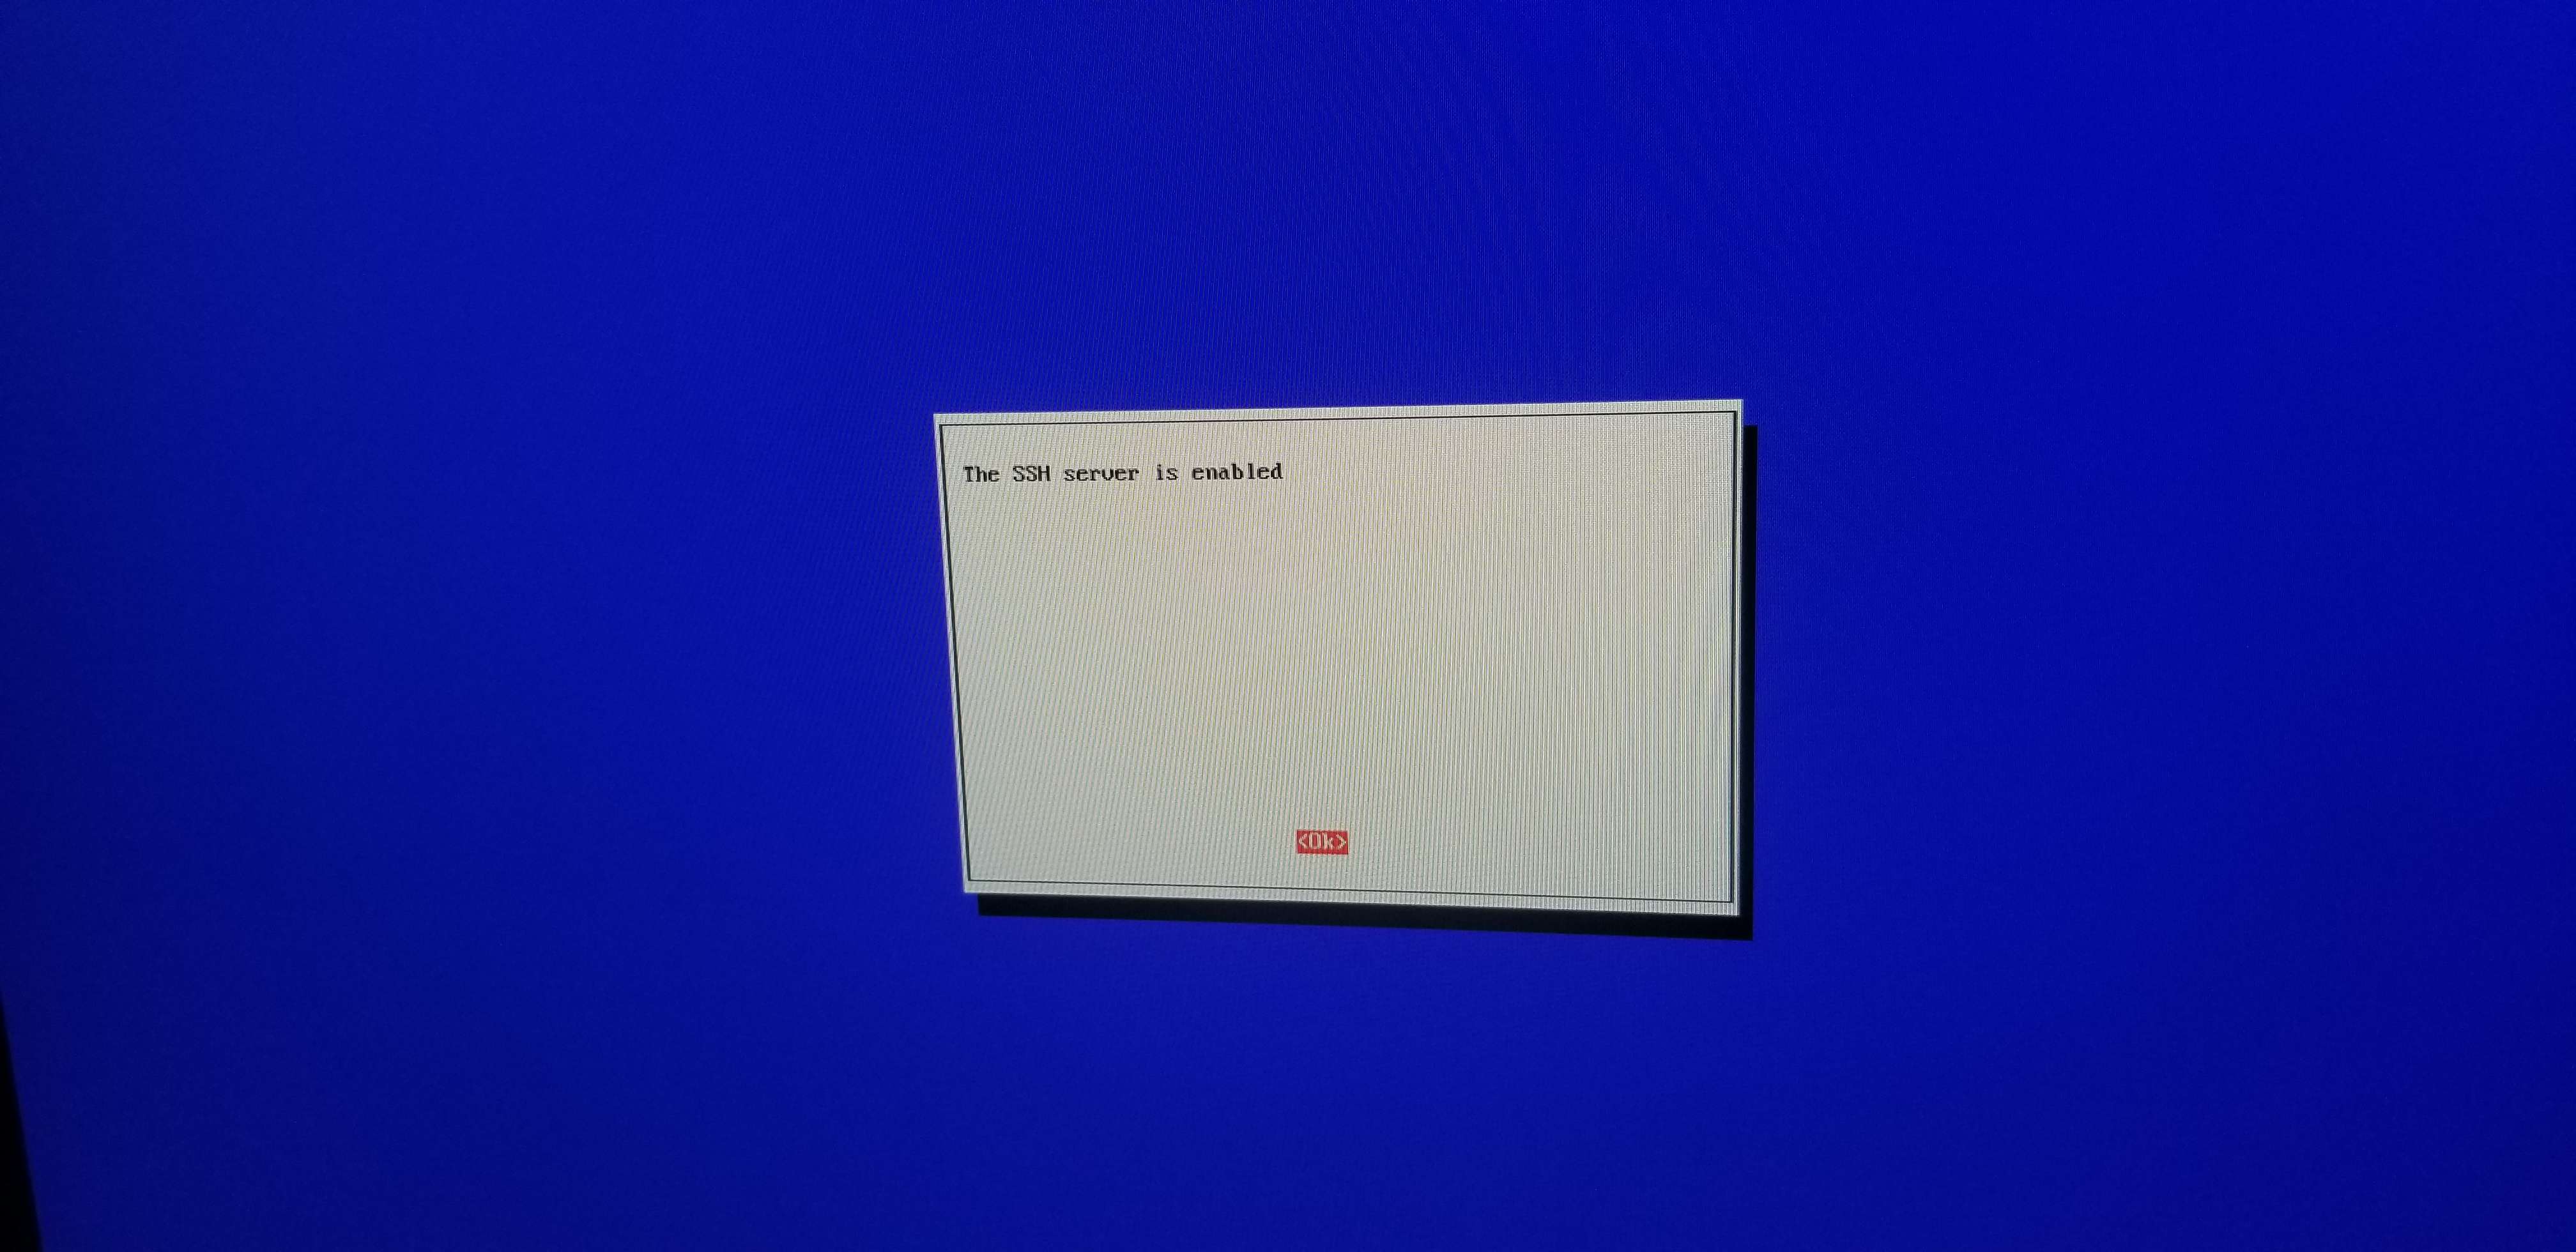
Once you've enabled SSH, it will show the following. Afterwards, you can hit enter to go back to the main menu.
Now you should be able to SSH to your Raspberry Pi assuming it belongs to the same network as your computer that you want to SSH from. While this isn't required, it will make troubleshooting issues easier, especially after you enable a systemd service that automatically restarts Steam Link each time it closes on the main TTY.
You can find the IP of your Raspberry Pi using the ip a or ifconfig commands.

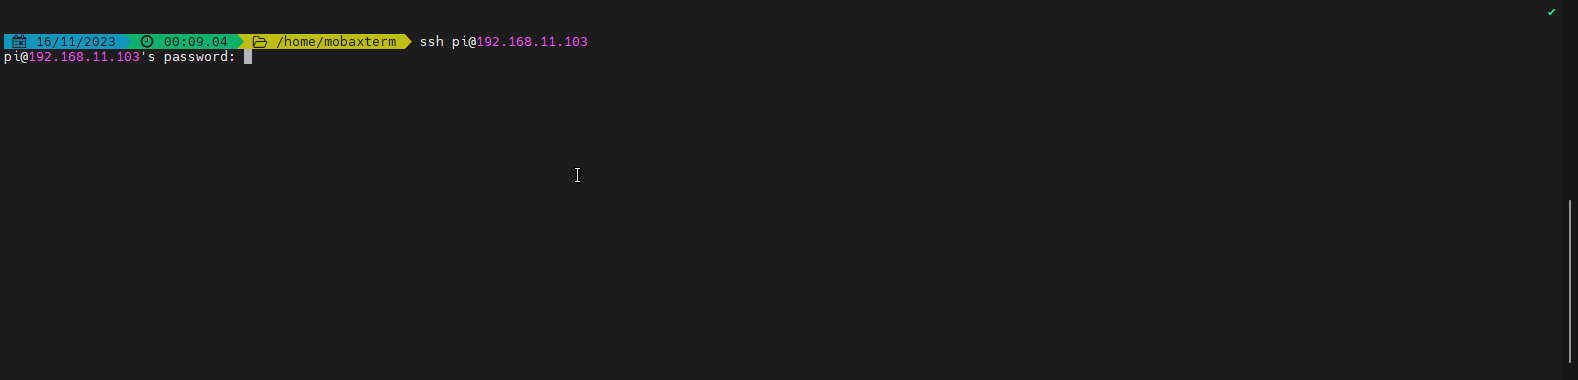
In this case, the IP of my Raspberry Pi device is 192.168.11.103 which I have running under its own VLAN. You can SSH to your Raspberry Pi using a Linux terminal with the following command.
ssh pi@192.168.11.103Obviously, you'll want to replace 192.168.11.103 with your Raspberry Pi's IP address.
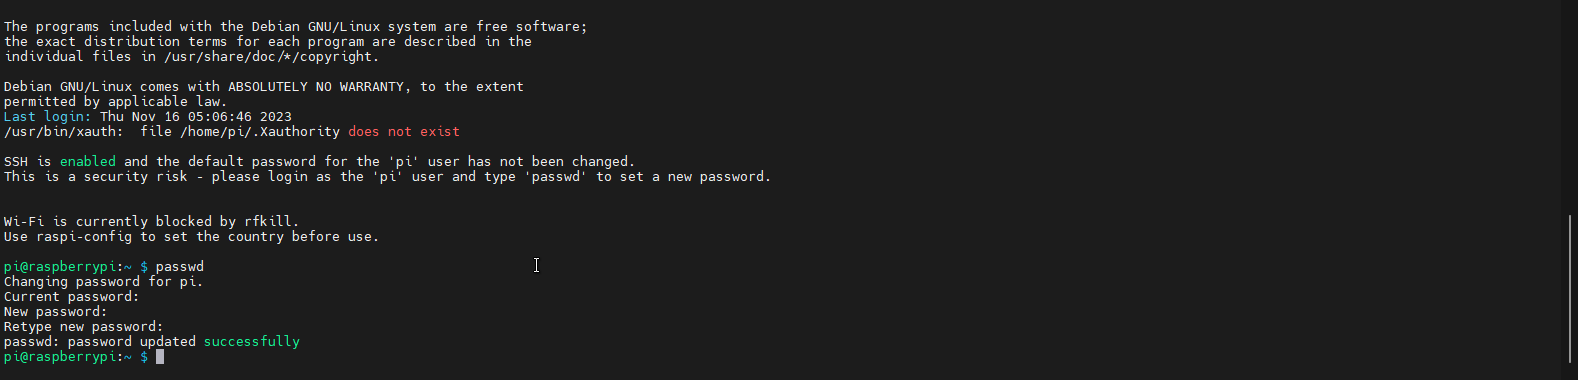
The first thing you'll want to do after logging in through SSH is to change your pi user's password. While it isn't required, if you expose OpenSSH on your Raspberry Pi to the Internet with raspberry as the password, you are potentially risking security of your devices depending on what your Raspberry Pi device has access to on your network. If you only have the Raspberry Pi device operating only within your LAN and can't be bothered to change the password, you can skip this step if you want to without much of a security risk.
You can change the user password by executing the passwd command, typing in the current user's password (raspberry), and then typing in your new password twice.
Next, you'll want to update/upgrade the current system using the following command.
sudo apt update && sudo apt upgrade -y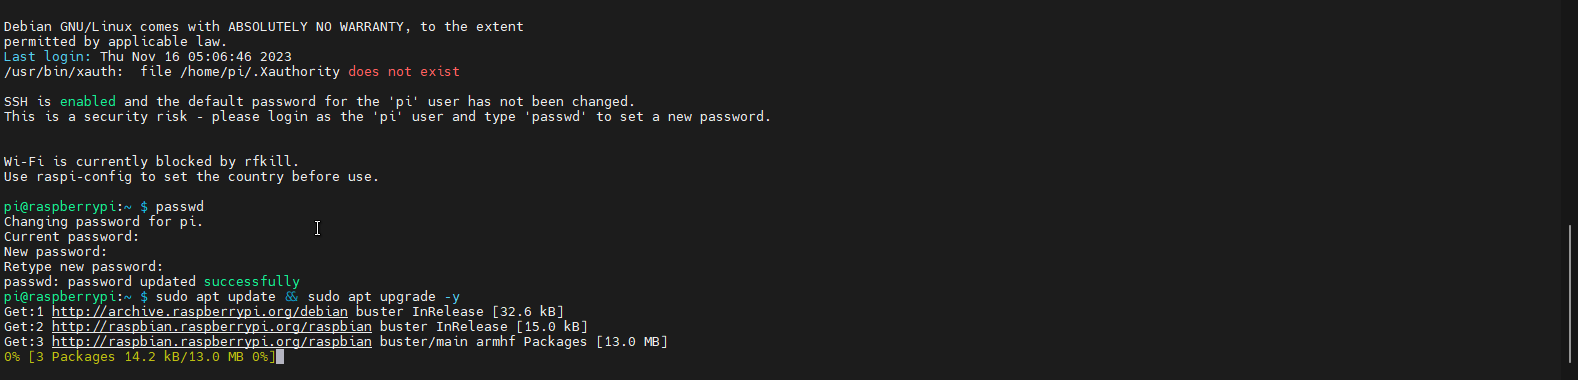
As of right now, when you boot your Raspberry Pi device, it will require you to login from the main TTY connected to your monitor or projector. This would become annoying when trying to use the Steam Link, so you'll want to set it so that it automatically logs into the user pi at the main TTY. To do this, execute the sudo raspi-config command and select "System Options".


Next, use your arrow keys to select the "Boot / Auto Login" option and hit enter.

You'll want to select the second option which is named "Console Autologin Text Console, automatically logged in as 'pi' user".
After hitting enter, it will bring you back to the main menu and you'll want to select "Finish".
By default, only 16 MBs of GPU memory are allocated to the Raspberry Pi OS. Steam Link recommends at least 128 MBs which should be more than enough. However, I allocate 256 MBs just to be safe since Steam Link is the only application with a GUI I have running anyways.
To allocate more memory, first execute the sudo raspi-config command to bring up the utilities menu and use your arrow keys to select "Performance Options". Afterwards, hit enter.
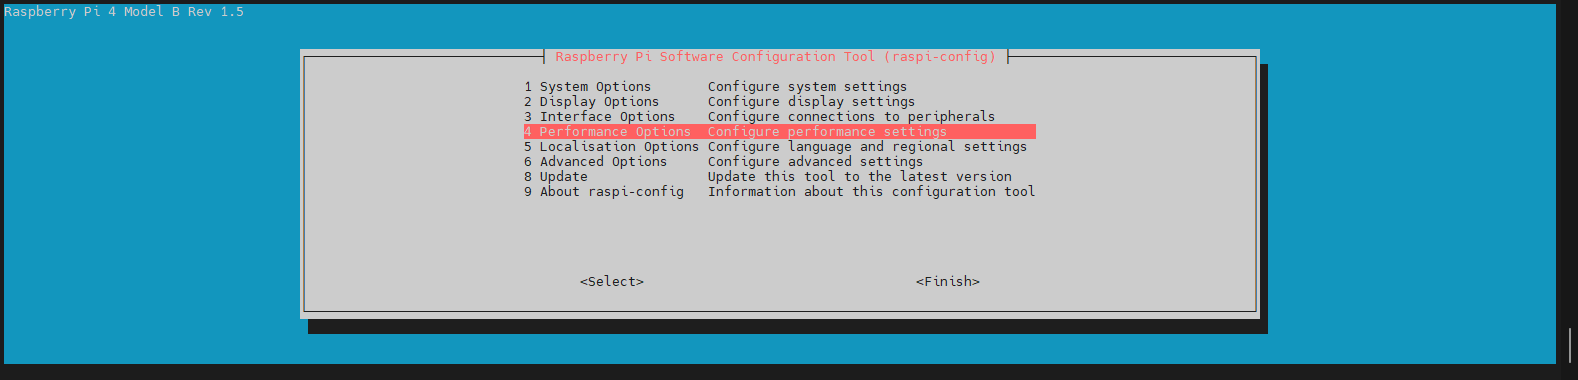
Next, use your arrow keys to select "GPU Memory" and hit enter.

You will now want to input 128 or 256 in the box shown below.

Afterwards, use your arrow keys to select "Ok" and hit enter to save.

While I don't believe I needed this for my setup since I'm streaming at 1080P@120Hz, I still recommend enabling the 4K 60Hz option just to be safe with your setup.
To enable this option, firstly, execute the sudo raspi-config command to bring up the utilities menu and use your arrow keys to select "Advanced Options". Afterwards, hit enter.
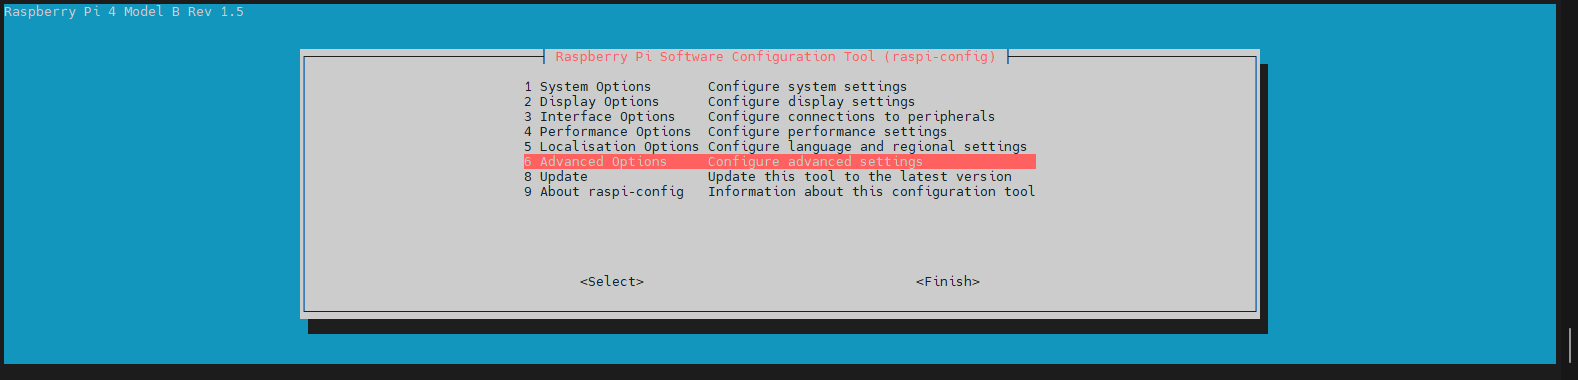
Next, use your arrow keys to select "HDMI / Composite" and hit enter.

Now hit enter on "Enable 4Kp60 HDMI".

You should receive a message stating the feature was enabled.

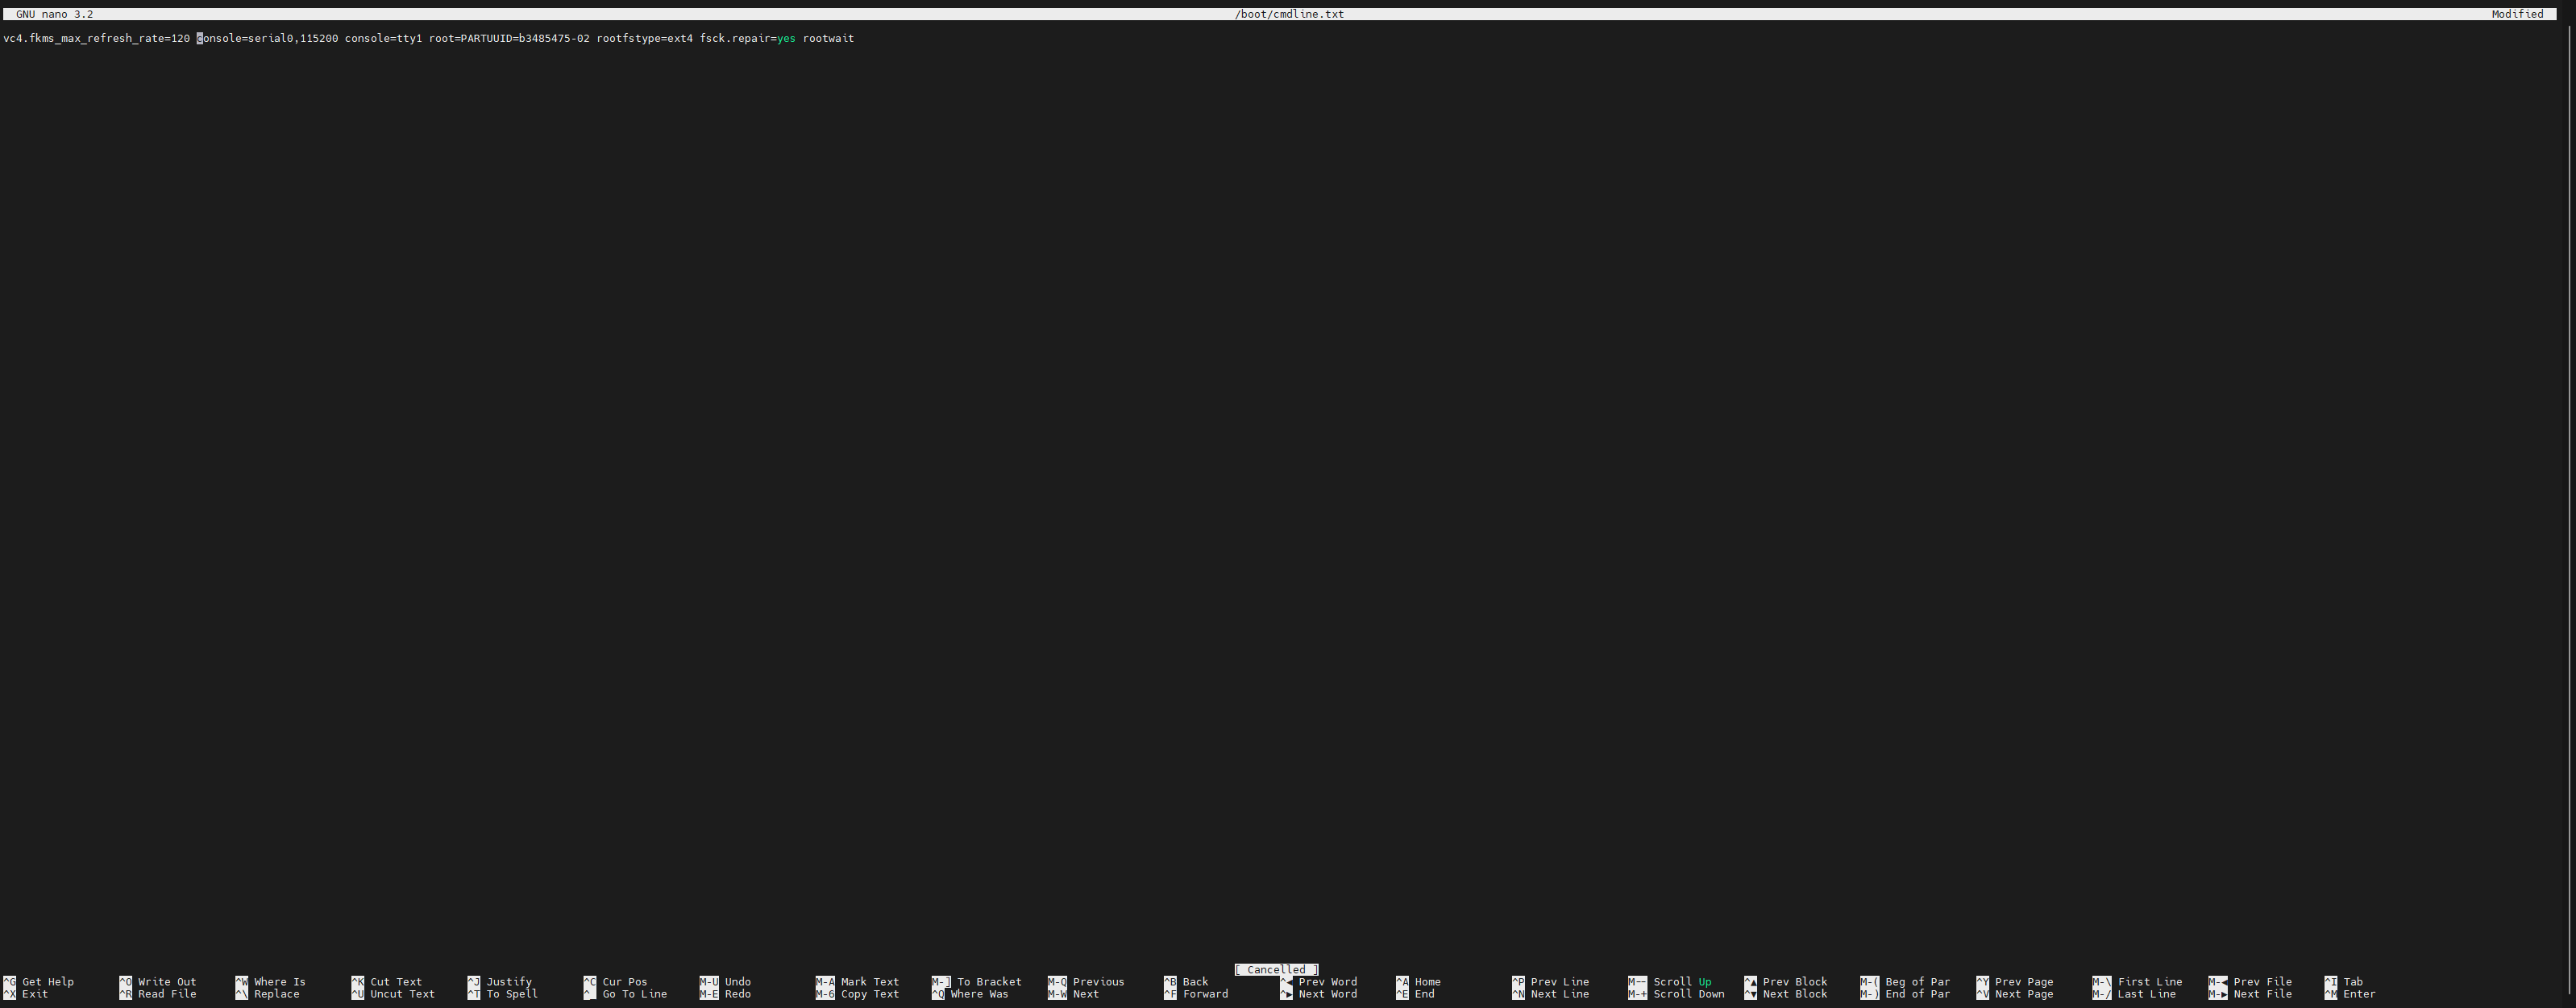
FKMS is the video driver the Raspberry Pi uses, but from what I've seen, has issues with running over 60FPS out of the box. Therefore, you need to edit a file located at /boot/cmdline.txt and prepend vc4.fkms_max_refresh_rate=<maxFPS>. In my case, since I'm streaming at 120Hz, I prepended vc4.fkms_max_refresh_rate=120 to the beginning of the only line.
To edit the file, you can use a text editor called Nano via the nano /boot/cmdline.txt command.

You should see something like this.
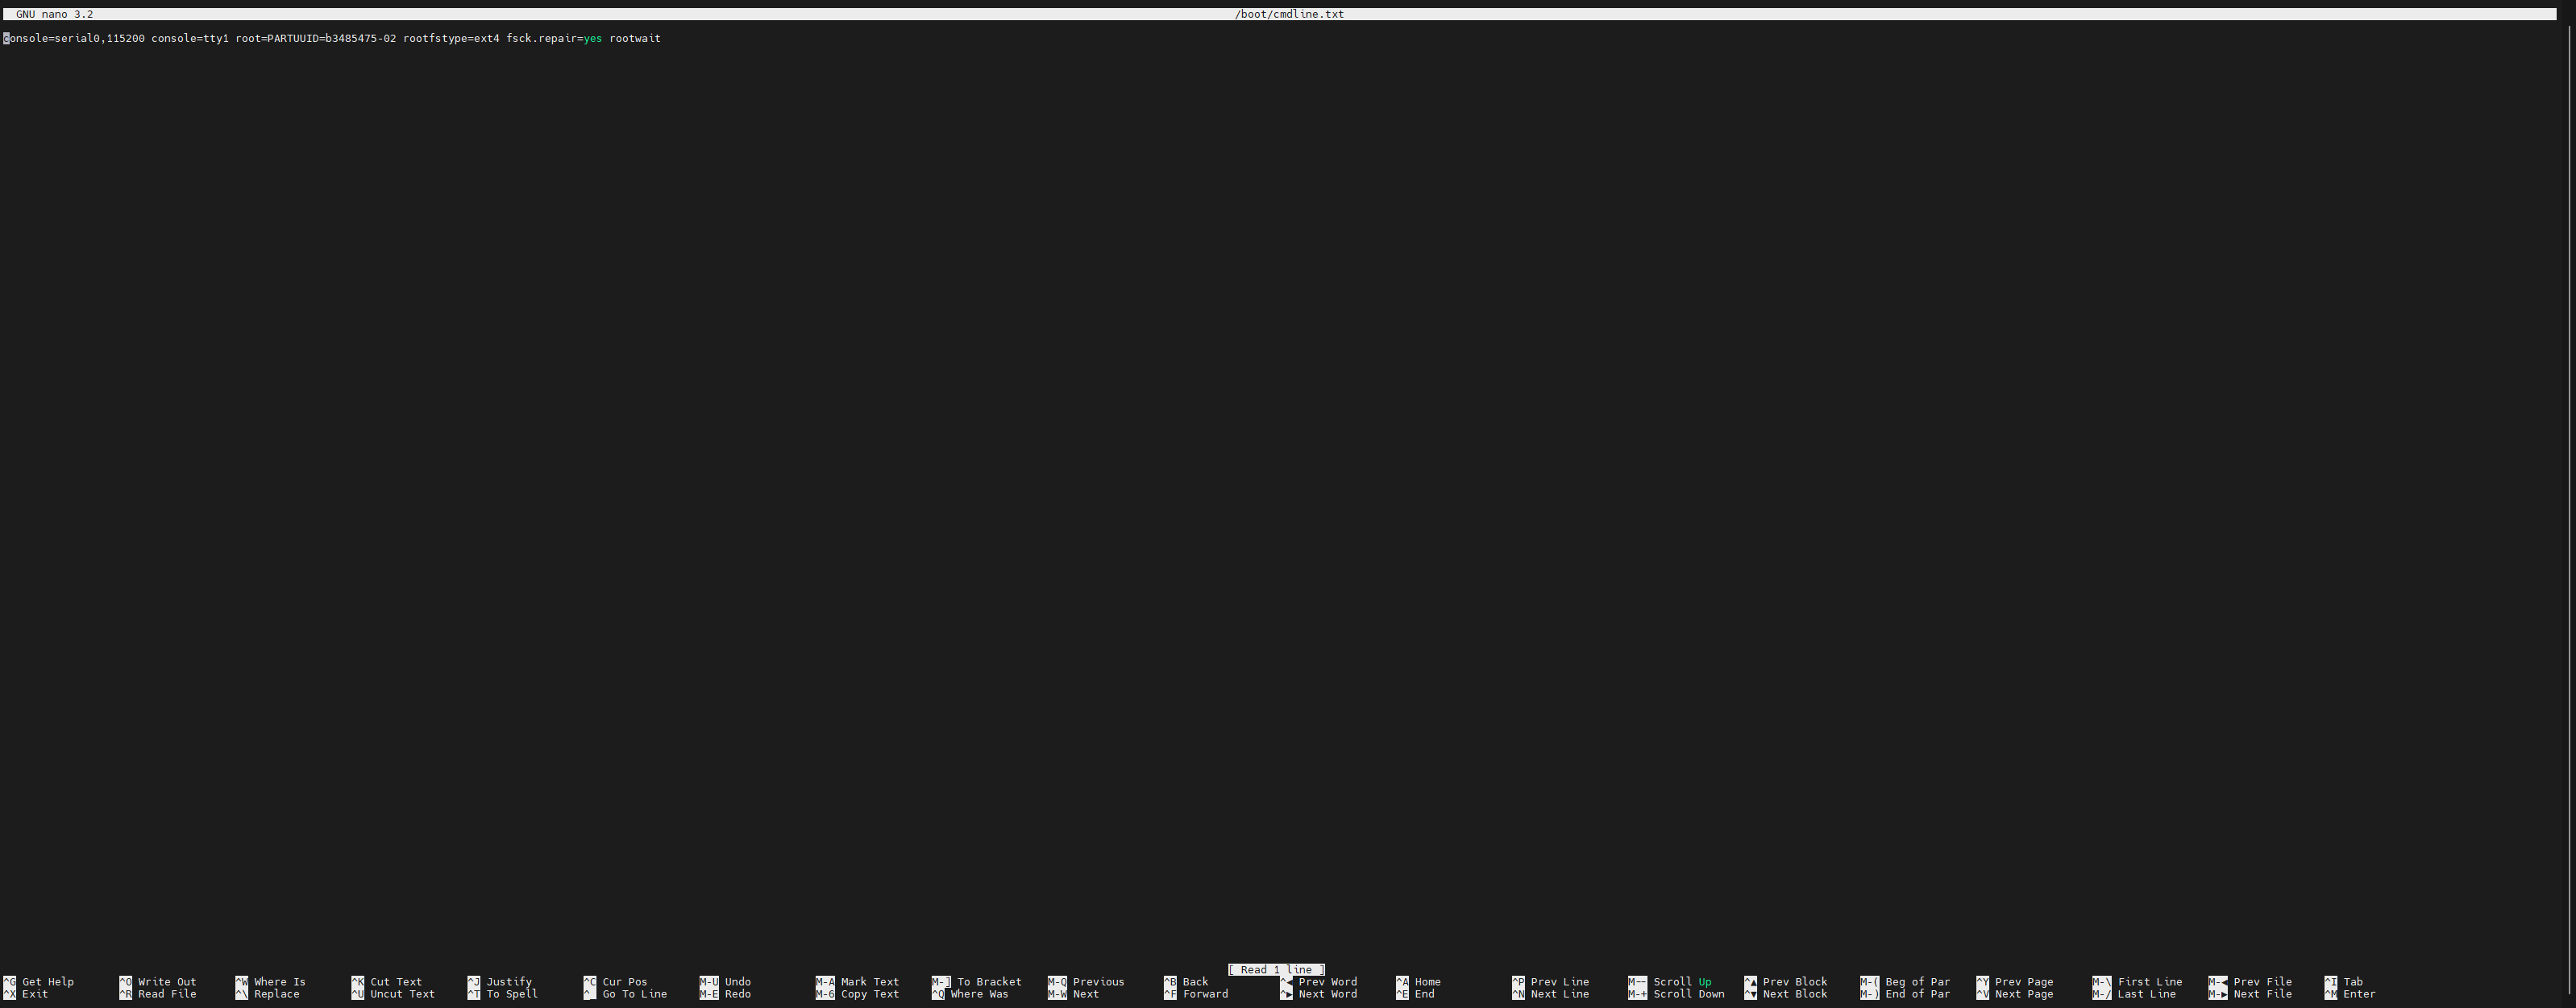
Now, prepend the value from above so that the single line looks something like below.
vc4.fkms_max_refresh_rate=120 console=serial0,115200 console=tty1 root=PARTUUID=b3485475-02 rootfstype=ext4 fsck.repair=yes rootwait
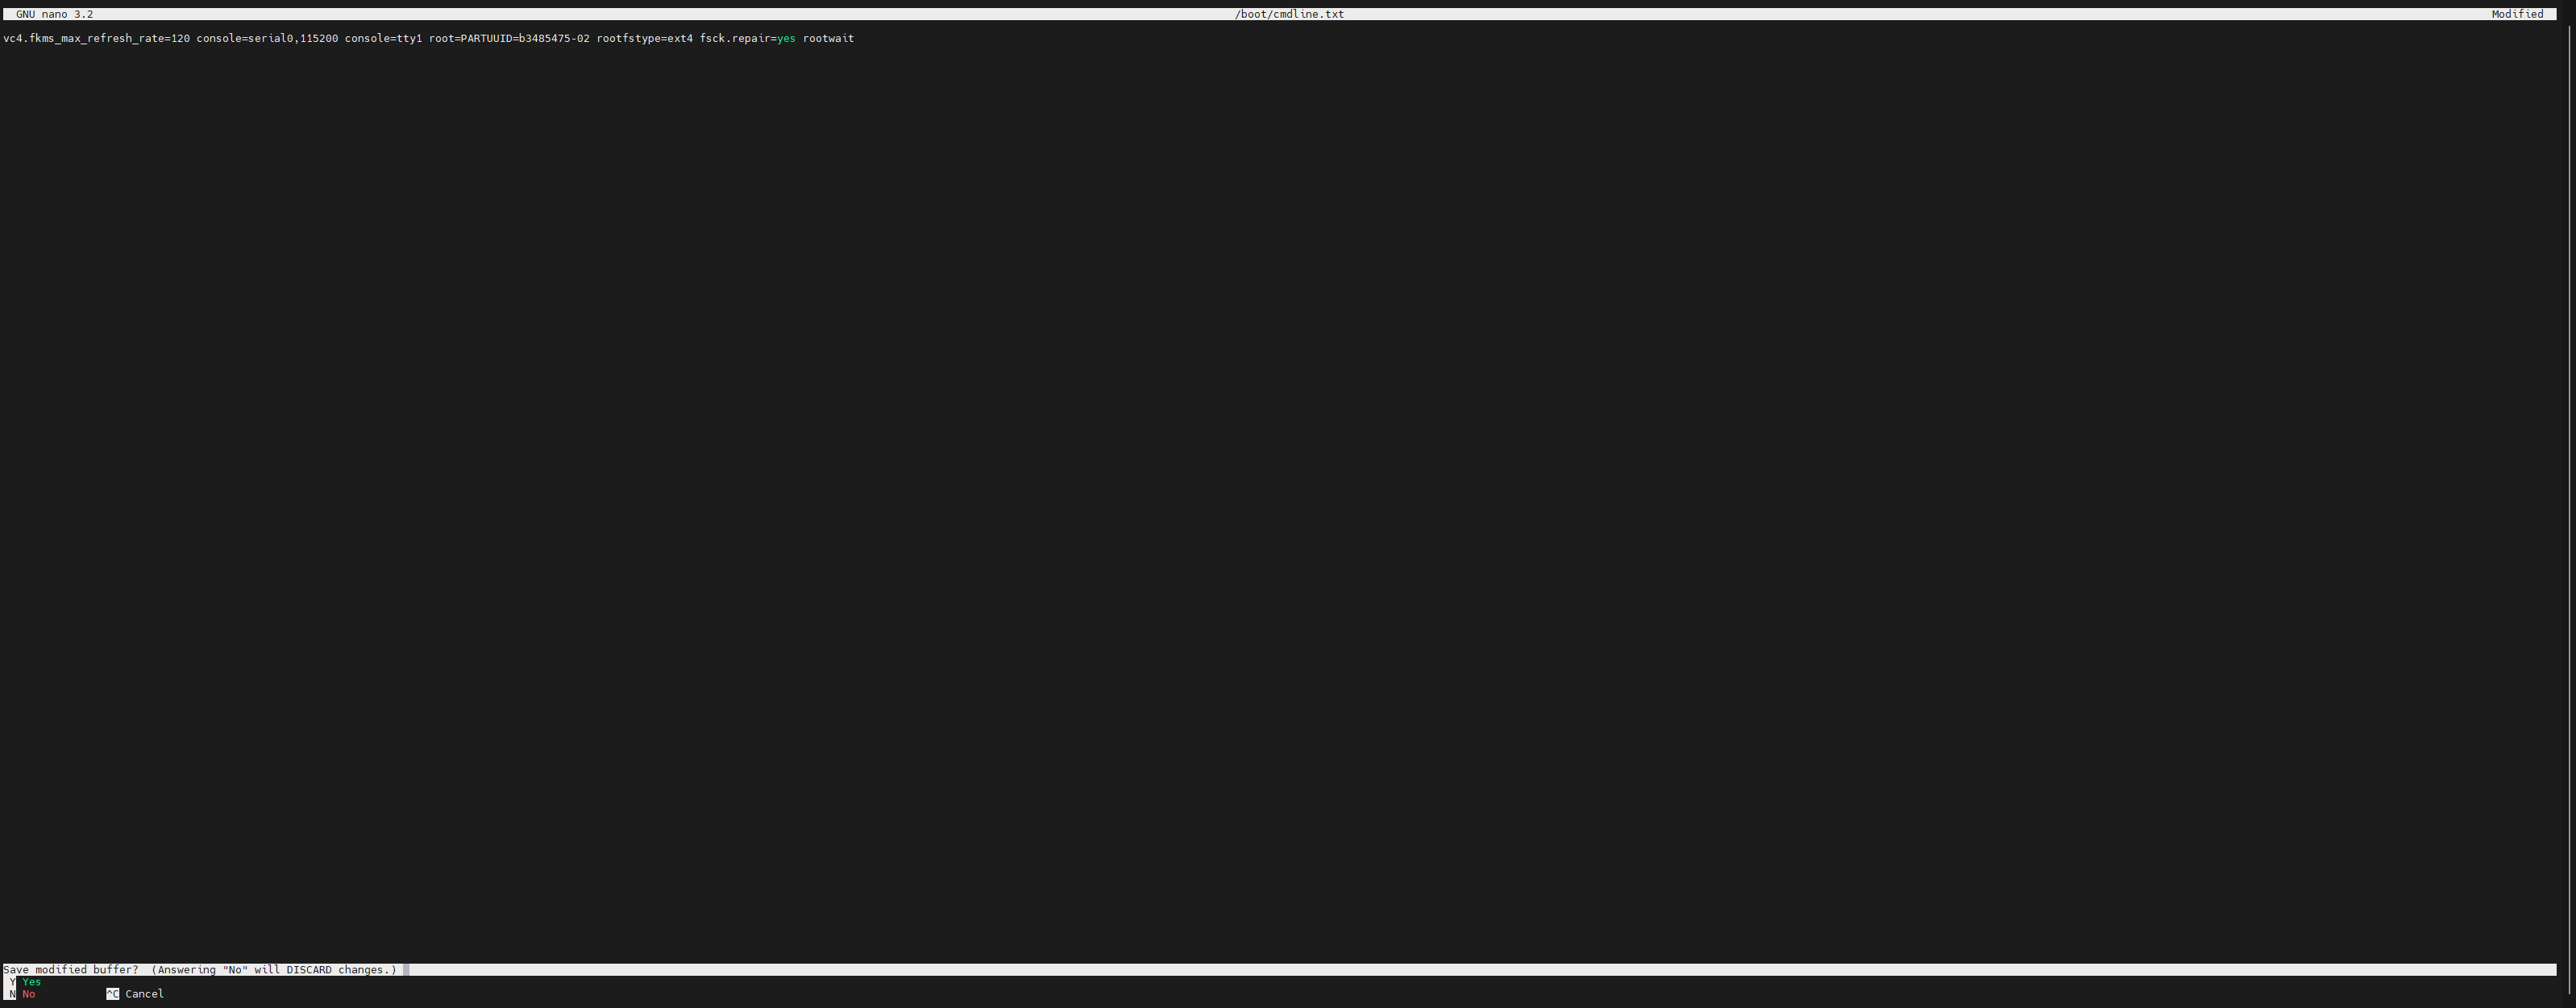
Afterwards, hit CTRL + X and then Y to save the file.
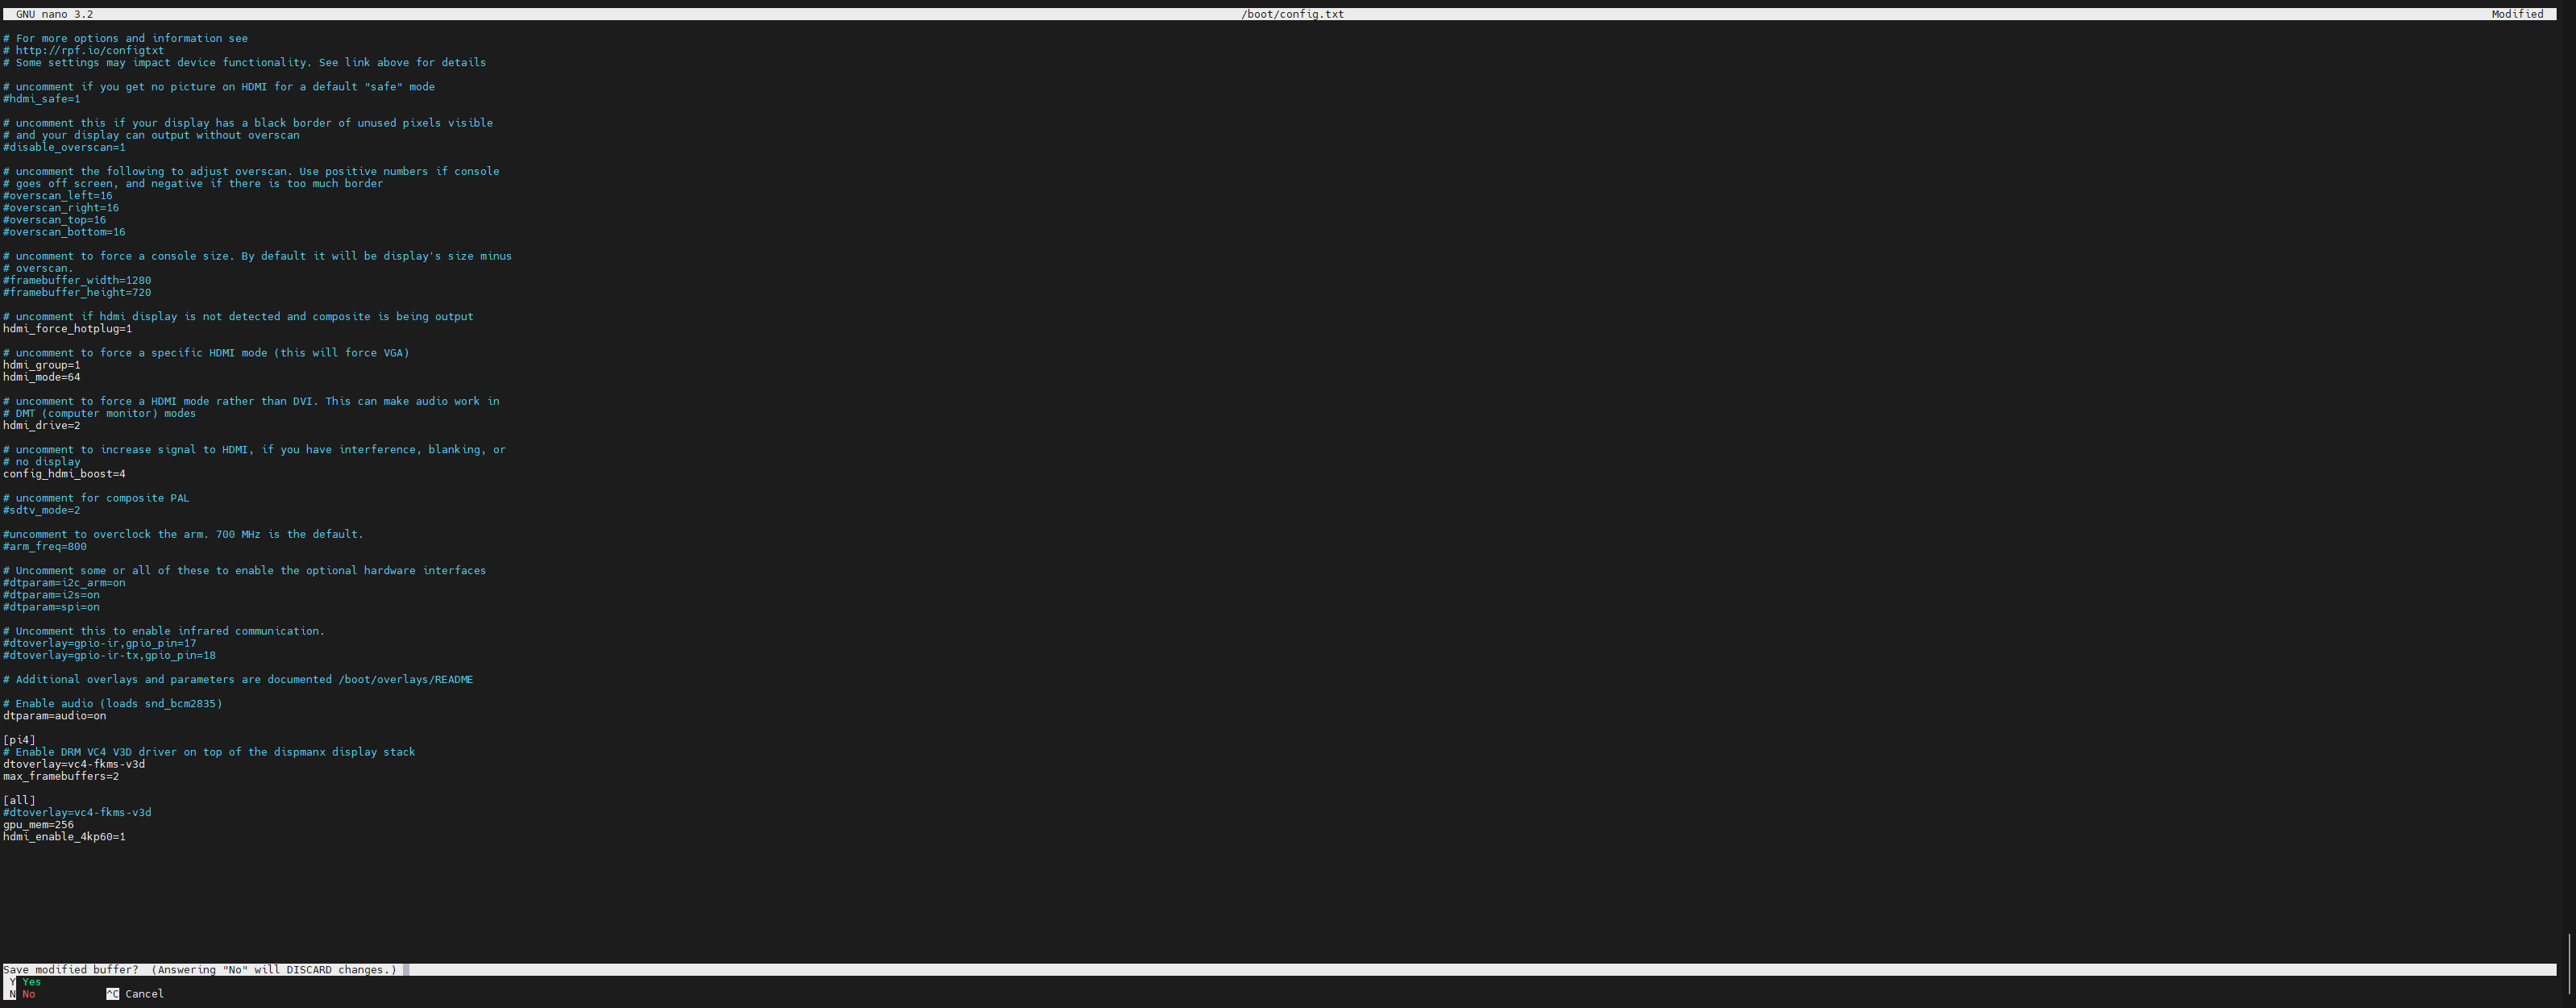
There are a few other HDMI-specific settings I've enabled manually by editing the /boot/config.txt file directly. You can edit the Raspberry Pi config file by using Nano via the nano /boot/config.txt command.
When editing this file, you'll want to uncomment the following lines by removing the # in-front.
# hdmi_force_hotplug=1
# hdmi_drive=2
# config_hdmi_boost=4hdmi_force_hotplug=1- To my understanding, this forces the Raspberry Pi to keep trying to detect for a video source from HDMI if not detected already. When this was disabled on my end, I would constantly need to restart my Raspberry Pi due to the video source not re-detecting. This happened a lot because Steam Link would result in the HDMI source going out and in when starting the application/streaming.hdmi_drive=2- This setting helps with HDMI audio. I don't know if it is really required, but it doesn't hurt having enabled.config_hdmi_boost=4- This setting boosts the HDMI signal. I had an issue where streaming at 120Hz to my projector resulted in my projector losing signal to the HDMI source immediately and I believe this setting corrected the issue.
Your config file should look something like this now.
# For more options and information see
# http://rpf.io/configtxt
# Some settings may impact device functionality. See link above for details

# uncomment if you get no picture on HDMI for a default "safe" mode
#hdmi_safe=1

# uncomment this if your display has a black border of unused pixels visible
# and your display can output without overscan
#disable_overscan=1

# uncomment the following to adjust overscan. Use positive numbers if console
# goes off screen, and negative if there is too much border
#overscan_left=16
#overscan_right=16
#overscan_top=16
#overscan_bottom=16

# uncomment to force a console size. By default it will be display's size minus
# overscan.
#framebuffer_width=1280
#framebuffer_height=720

# uncomment if hdmi display is not detected and composite is being output
hdmi_force_hotplug=1

# uncomment to force a specific HDMI mode (this will force VGA)
# hdmi_group=1
# hdmi_mode=63

# uncomment to force a HDMI mode rather than DVI. This can make audio work in
# DMT (computer monitor) modes
hdmi_drive=2

# uncomment to increase signal to HDMI, if you have interference, blanking, or
# no display
config_hdmi_boost=4

# uncomment for composite PAL
#sdtv_mode=2

#uncomment to overclock the arm. 700 MHz is the default.
#arm_freq=800

# Uncomment some or all of these to enable the optional hardware interfaces
#dtparam=i2c_arm=on
#dtparam=i2s=on
#dtparam=spi=on

# Uncomment this to enable infrared communication.
#dtoverlay=gpio-ir,gpio_pin=17
#dtoverlay=gpio-ir-tx,gpio_pin=18

# Additional overlays and parameters are documented /boot/overlays/README

# Enable audio (loads snd_bcm2835)
dtparam=audio=on

[pi4]
# Enable DRM VC4 V3D driver on top of the dispmanx display stack
dtoverlay=vc4-fkms-v3d
max_framebuffers=2

[all]
#dtoverlay=vc4-fkms-v3d
gpu_mem=256
hdmi_enable_4kp60=1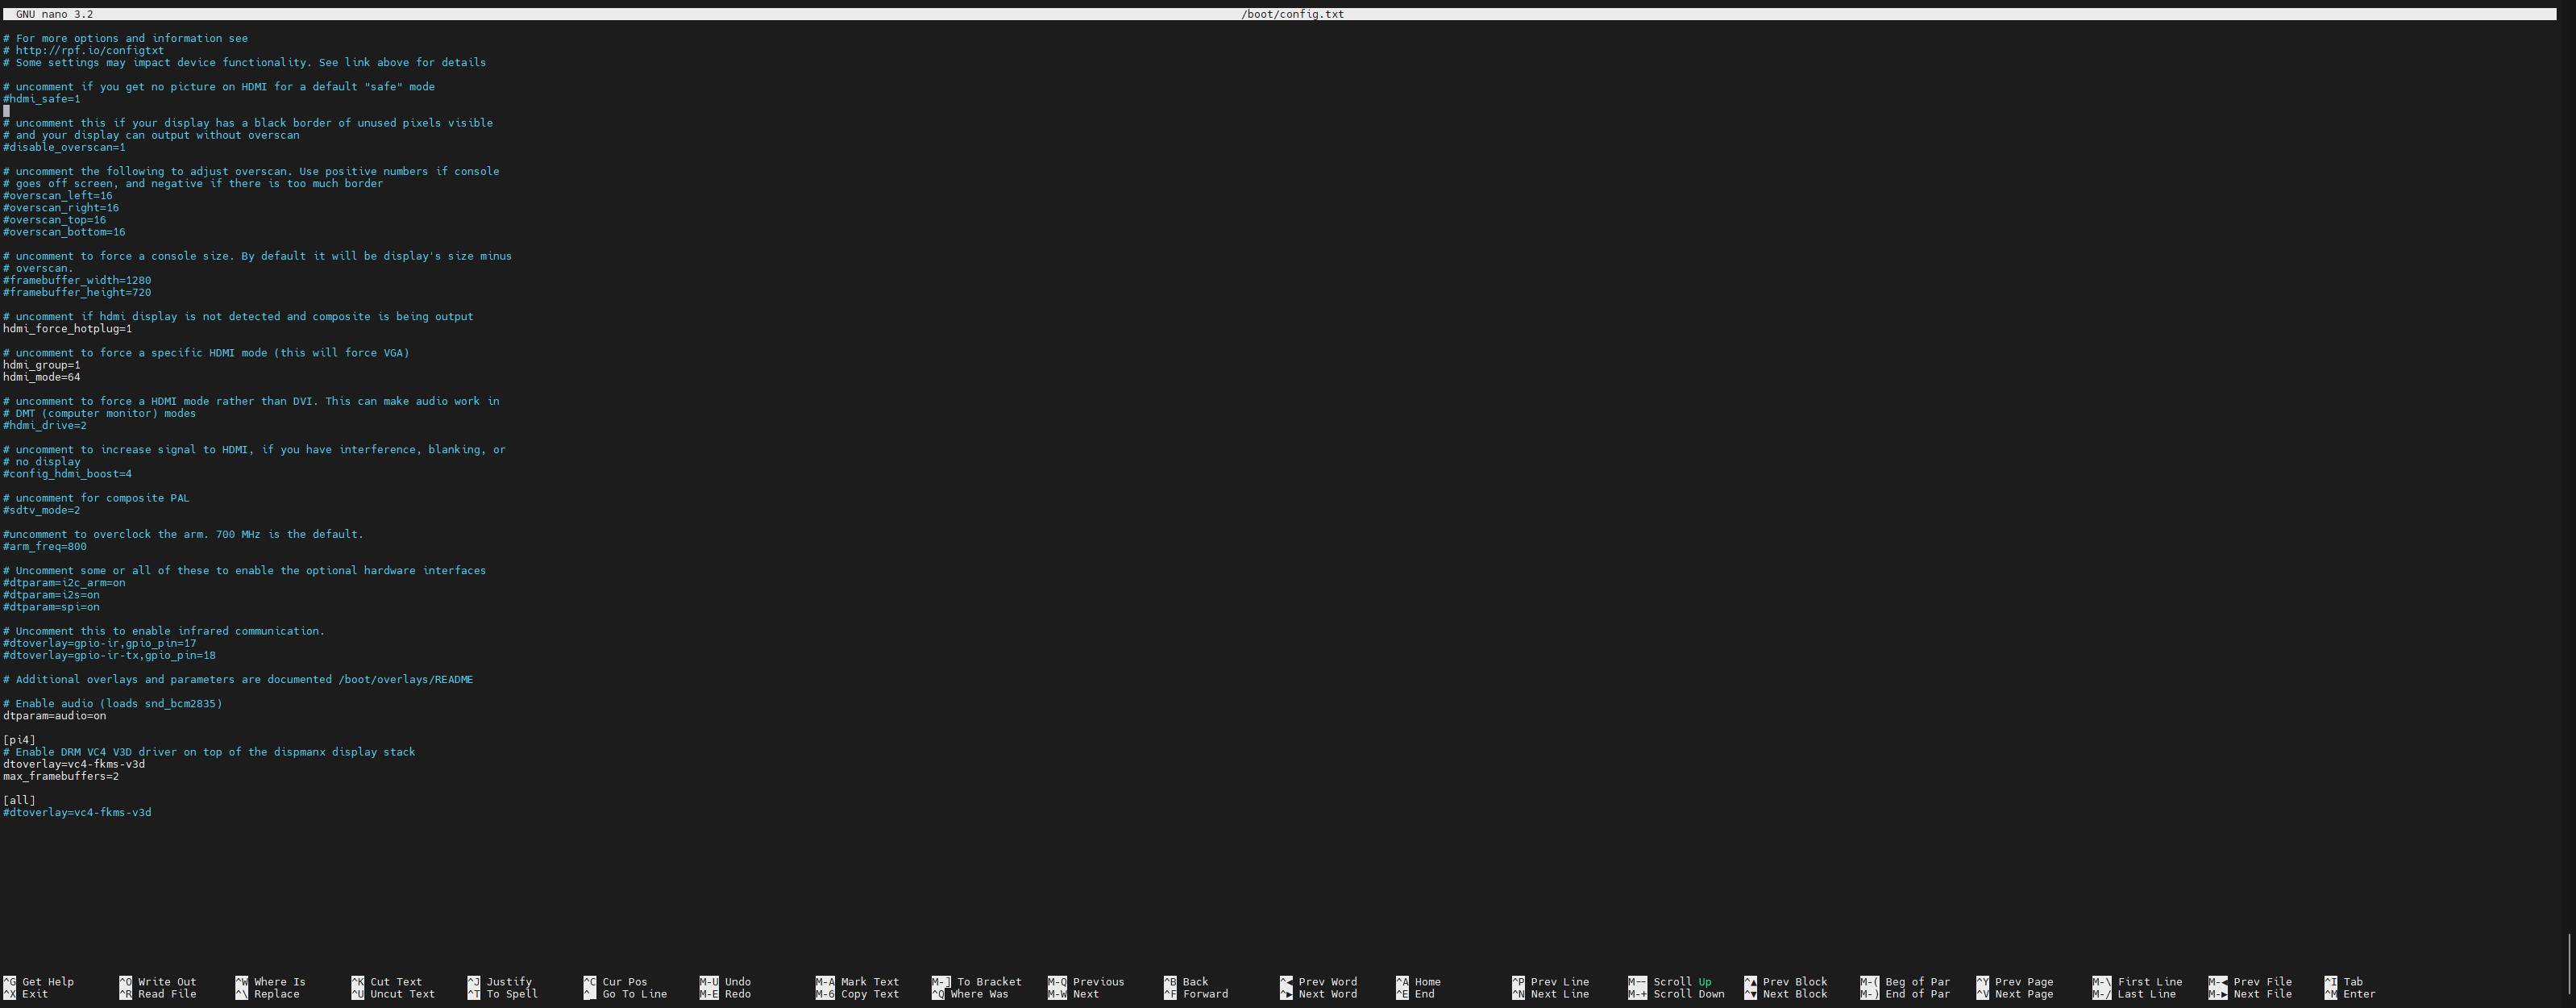
Afterwards, hit CTRL + X and then hit Y to save the file.
You will most likely need to perform this step every time you connect your Raspberry Pi to a new video output with different resolutions and refresh rates unless if the video output automatically detected the best resolution and refresh rate (it did not in my case; My projector thought 2160P@30Hz was acceptable for gaming in that case!).
To set the proper resolution and refresh rate, execute the sudo raspi-config command and use your arrow keys to select Display Options. Afterwards, hit enter.
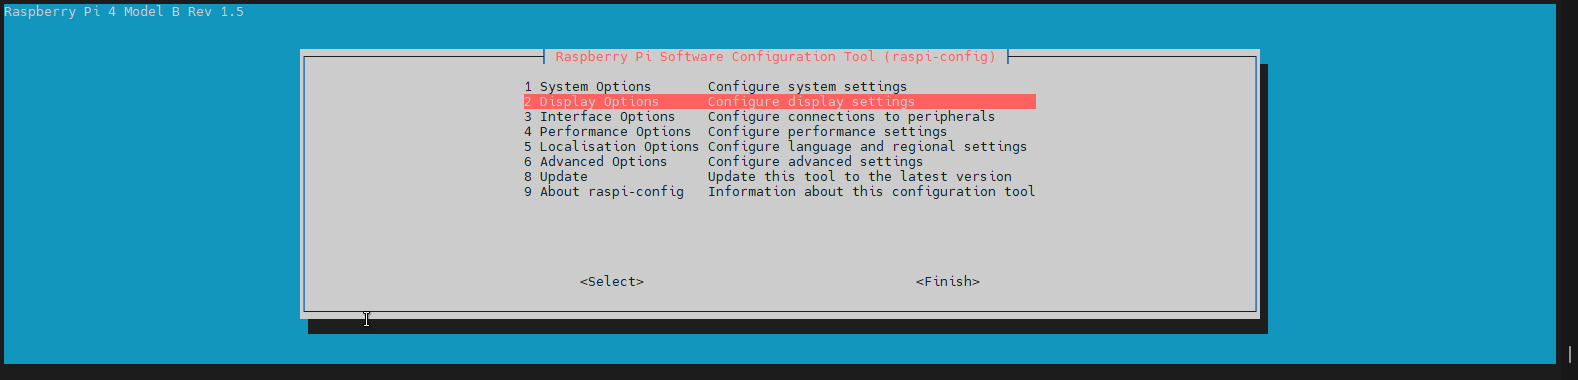

Next, select "Resolution" and hit enter.
You will want to find the best resolution and refresh rate for your video output in the menu.

Afterwards, select "Ok" and hit enter.

If you don't plan to use a controller, you may skip this step. I am using an Xbox Core Wireless Controller with BlueTooth.
Firstly, you will want to install a Linux driver for controllers called xpadneo.
You may execute the following commands to do so.
# Install Git and Raspberry Pi kernel headers
sudo apt install -y git dkms raspberrypi-kernel-headers

# Clone xpadneo via Git
git clone https://github.com/atar-axis/xpadneo.git

# Change to xpadneo/ directory
cd xpadneo

# Execute install script
sudo ./install.sh
If you want to uninstall the driver, you may use the following command.
sudo ./uninstall.shYou'll now want to pair the controller through BlueTooth, unless if you want to use a USB cable (if that's the case, you may skip this step).
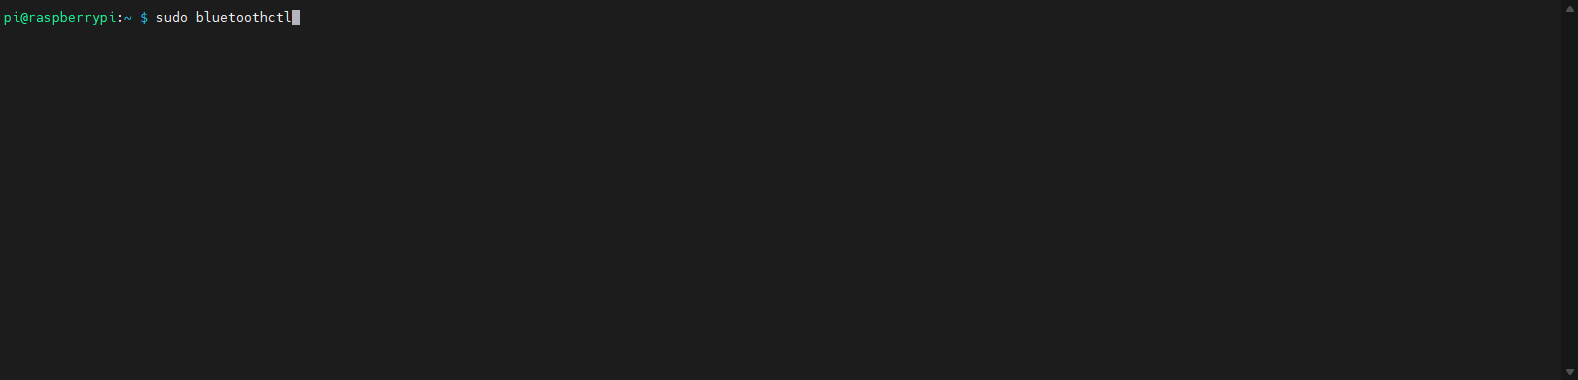
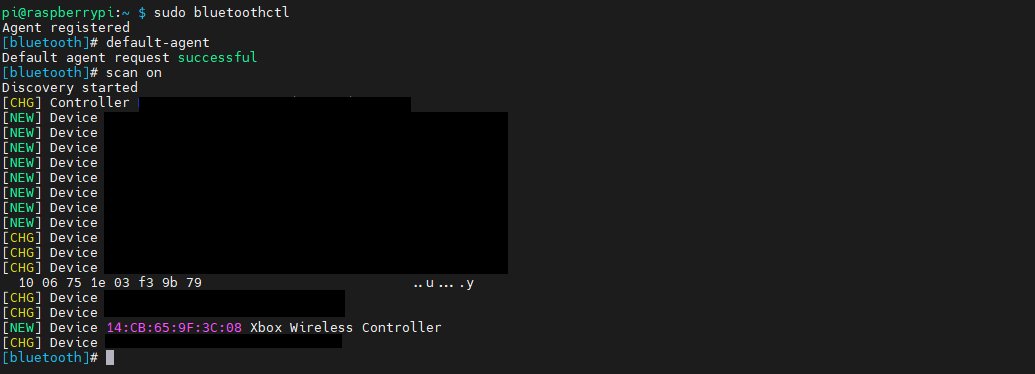
You can execute the sudo bluetoothctl command to jump into the BlueTooth CLI.
Next, you'll want to execute the following commands. Please keep in mind lines starting with # are just comments and to not execute them.
# Set default agent.
default-agent

# Start scanning for new devices
scan on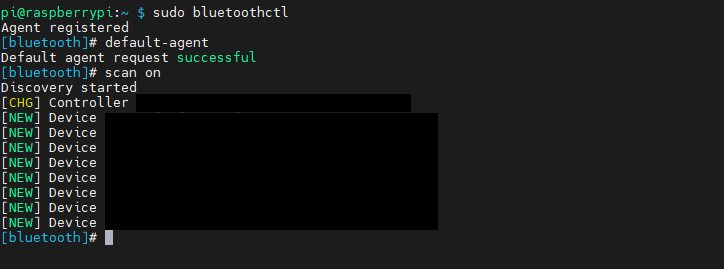
You will see a list of all BlueTooth devices near by. You will want to start pairing the controller at this time.

Once you see the controller show up, you will then want to copy the MAC address which looks like xx:xx:xx:xx:xx:xx where each x is a random letter or number.
You will now want to use the following command to attempt to connect to the controller.
connect <mac address>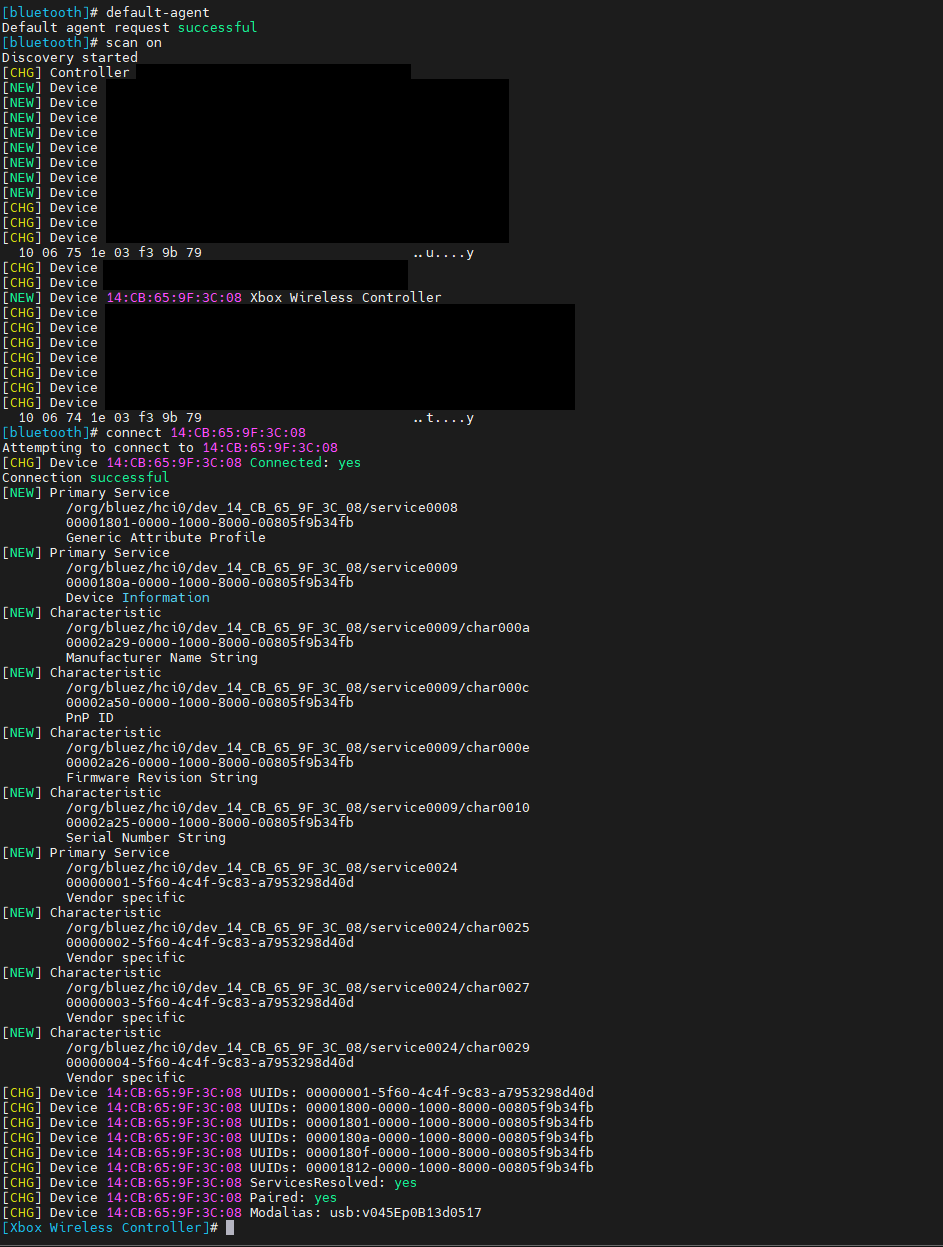
Assuming the connection and pairing succeeds (controller light stops blinking and is steady along with vibrations indicating connection), you will then want to trust the device so that once it is disconnected, it will be able to reconnect automatically in the future without needing to repair.
trust <mac address>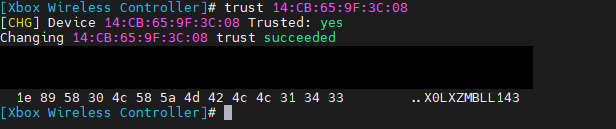
There you have it! You should be able to use your controller in the next steps.
You can now install Steam Link by using the following command.
sudo apt install -y steamlink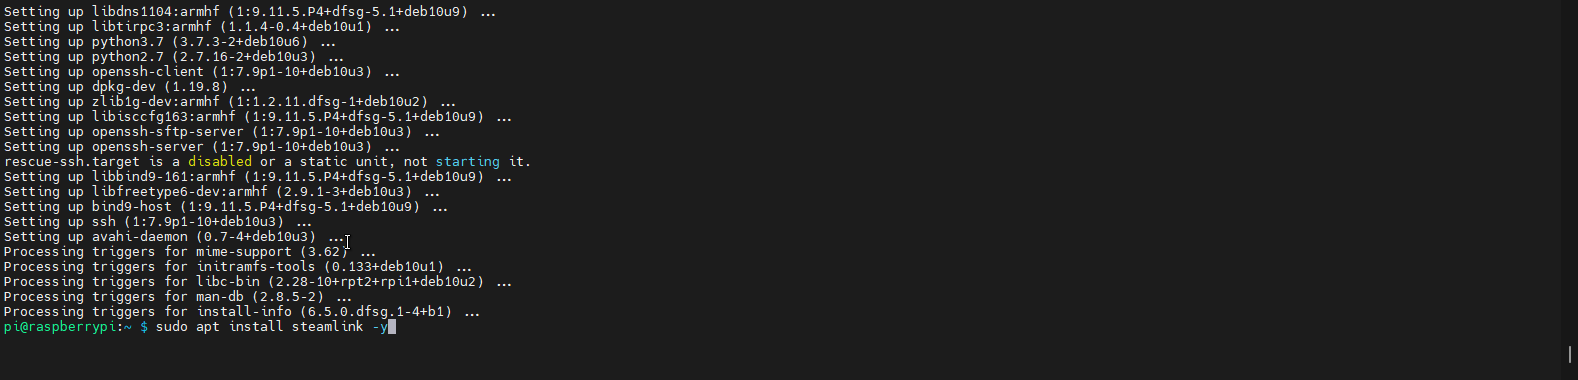
You will now have to go back to your keyboard/mouse connected to your Raspberry Pi and execute the steamlink command for the first time. This will install the rest of the dependencies and such. You will need to hit enter a few times and type Y at some point when installing the new packages.
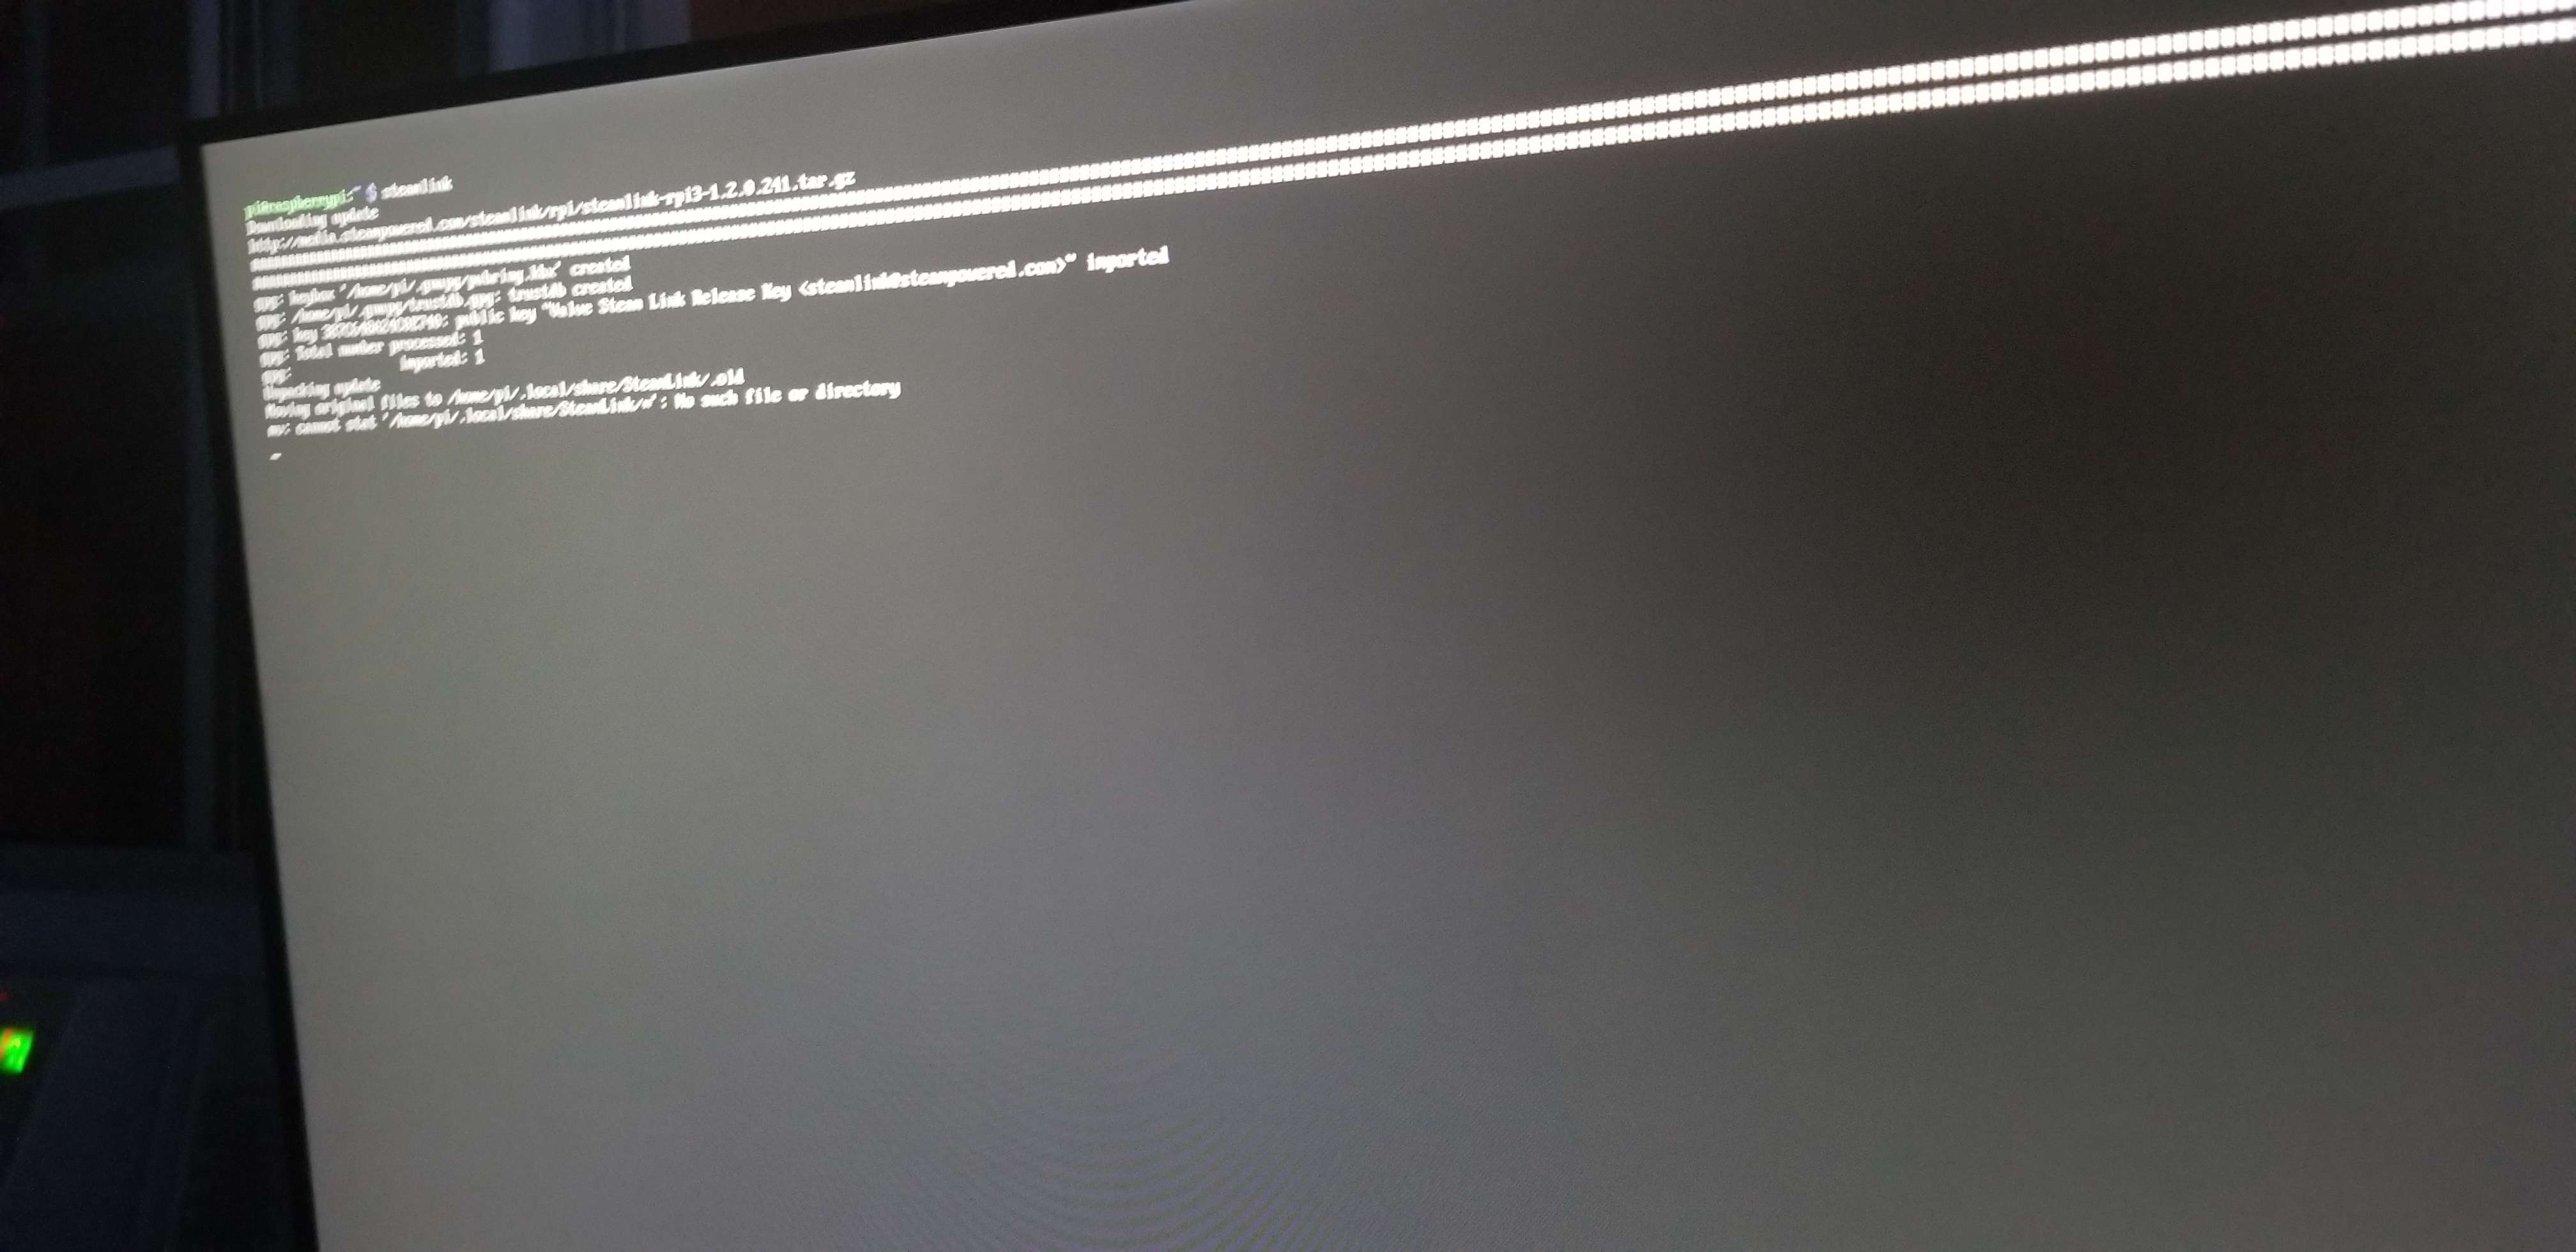
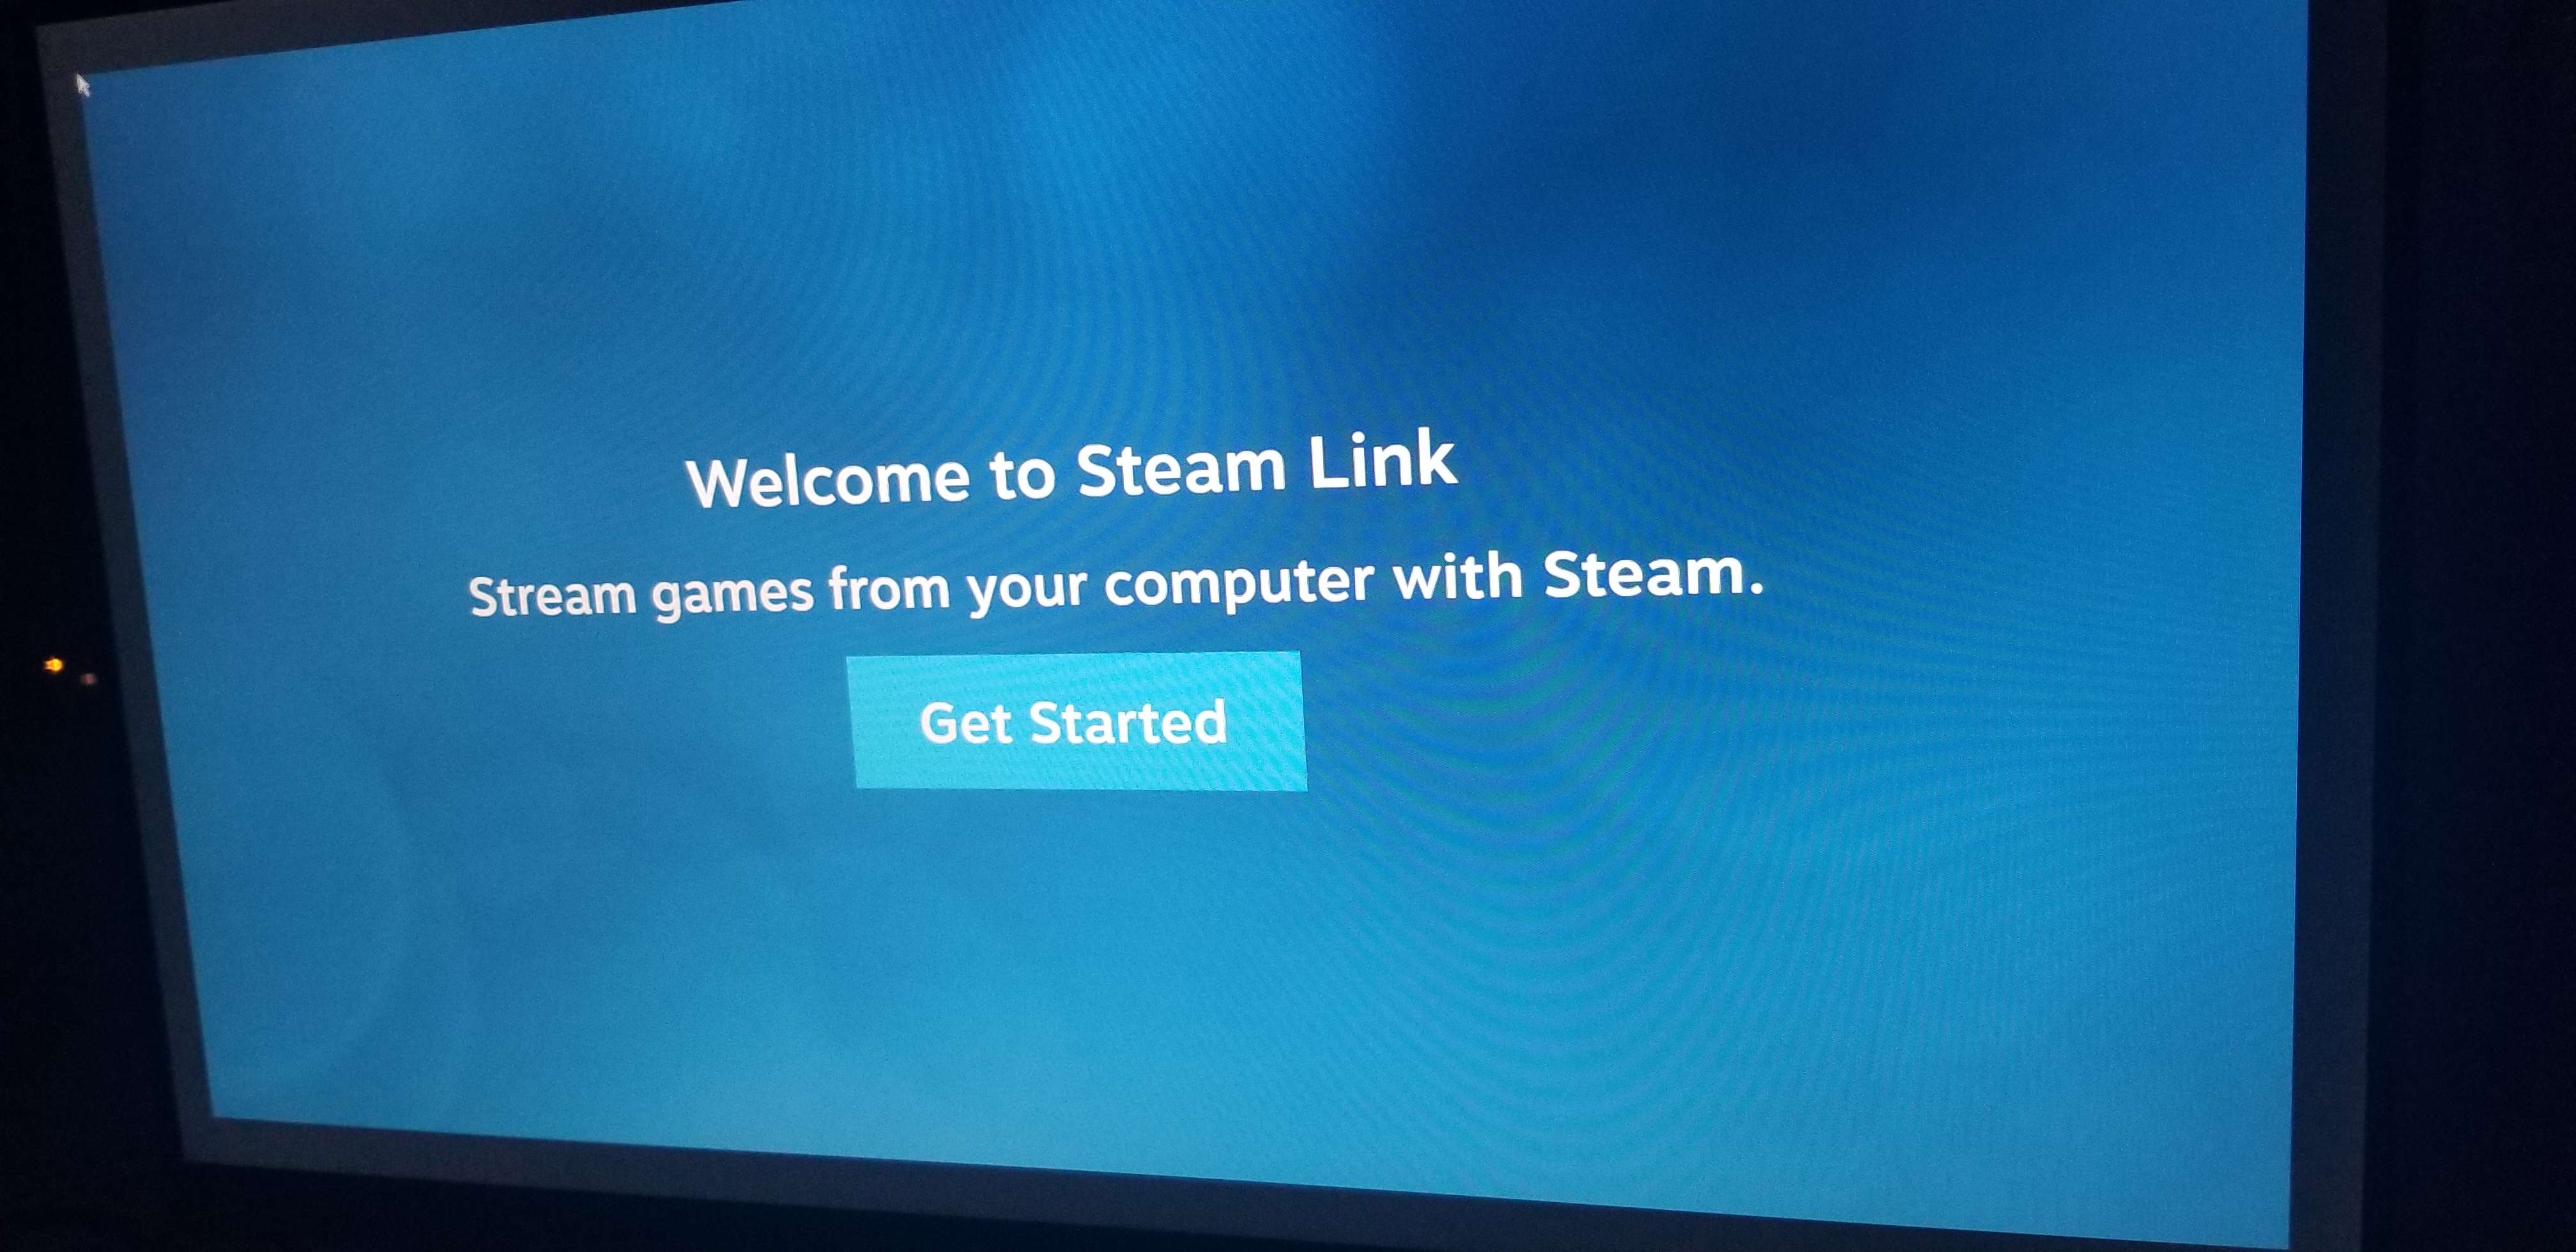
Once the packages are installed, Steam Link should start with a welcome message!
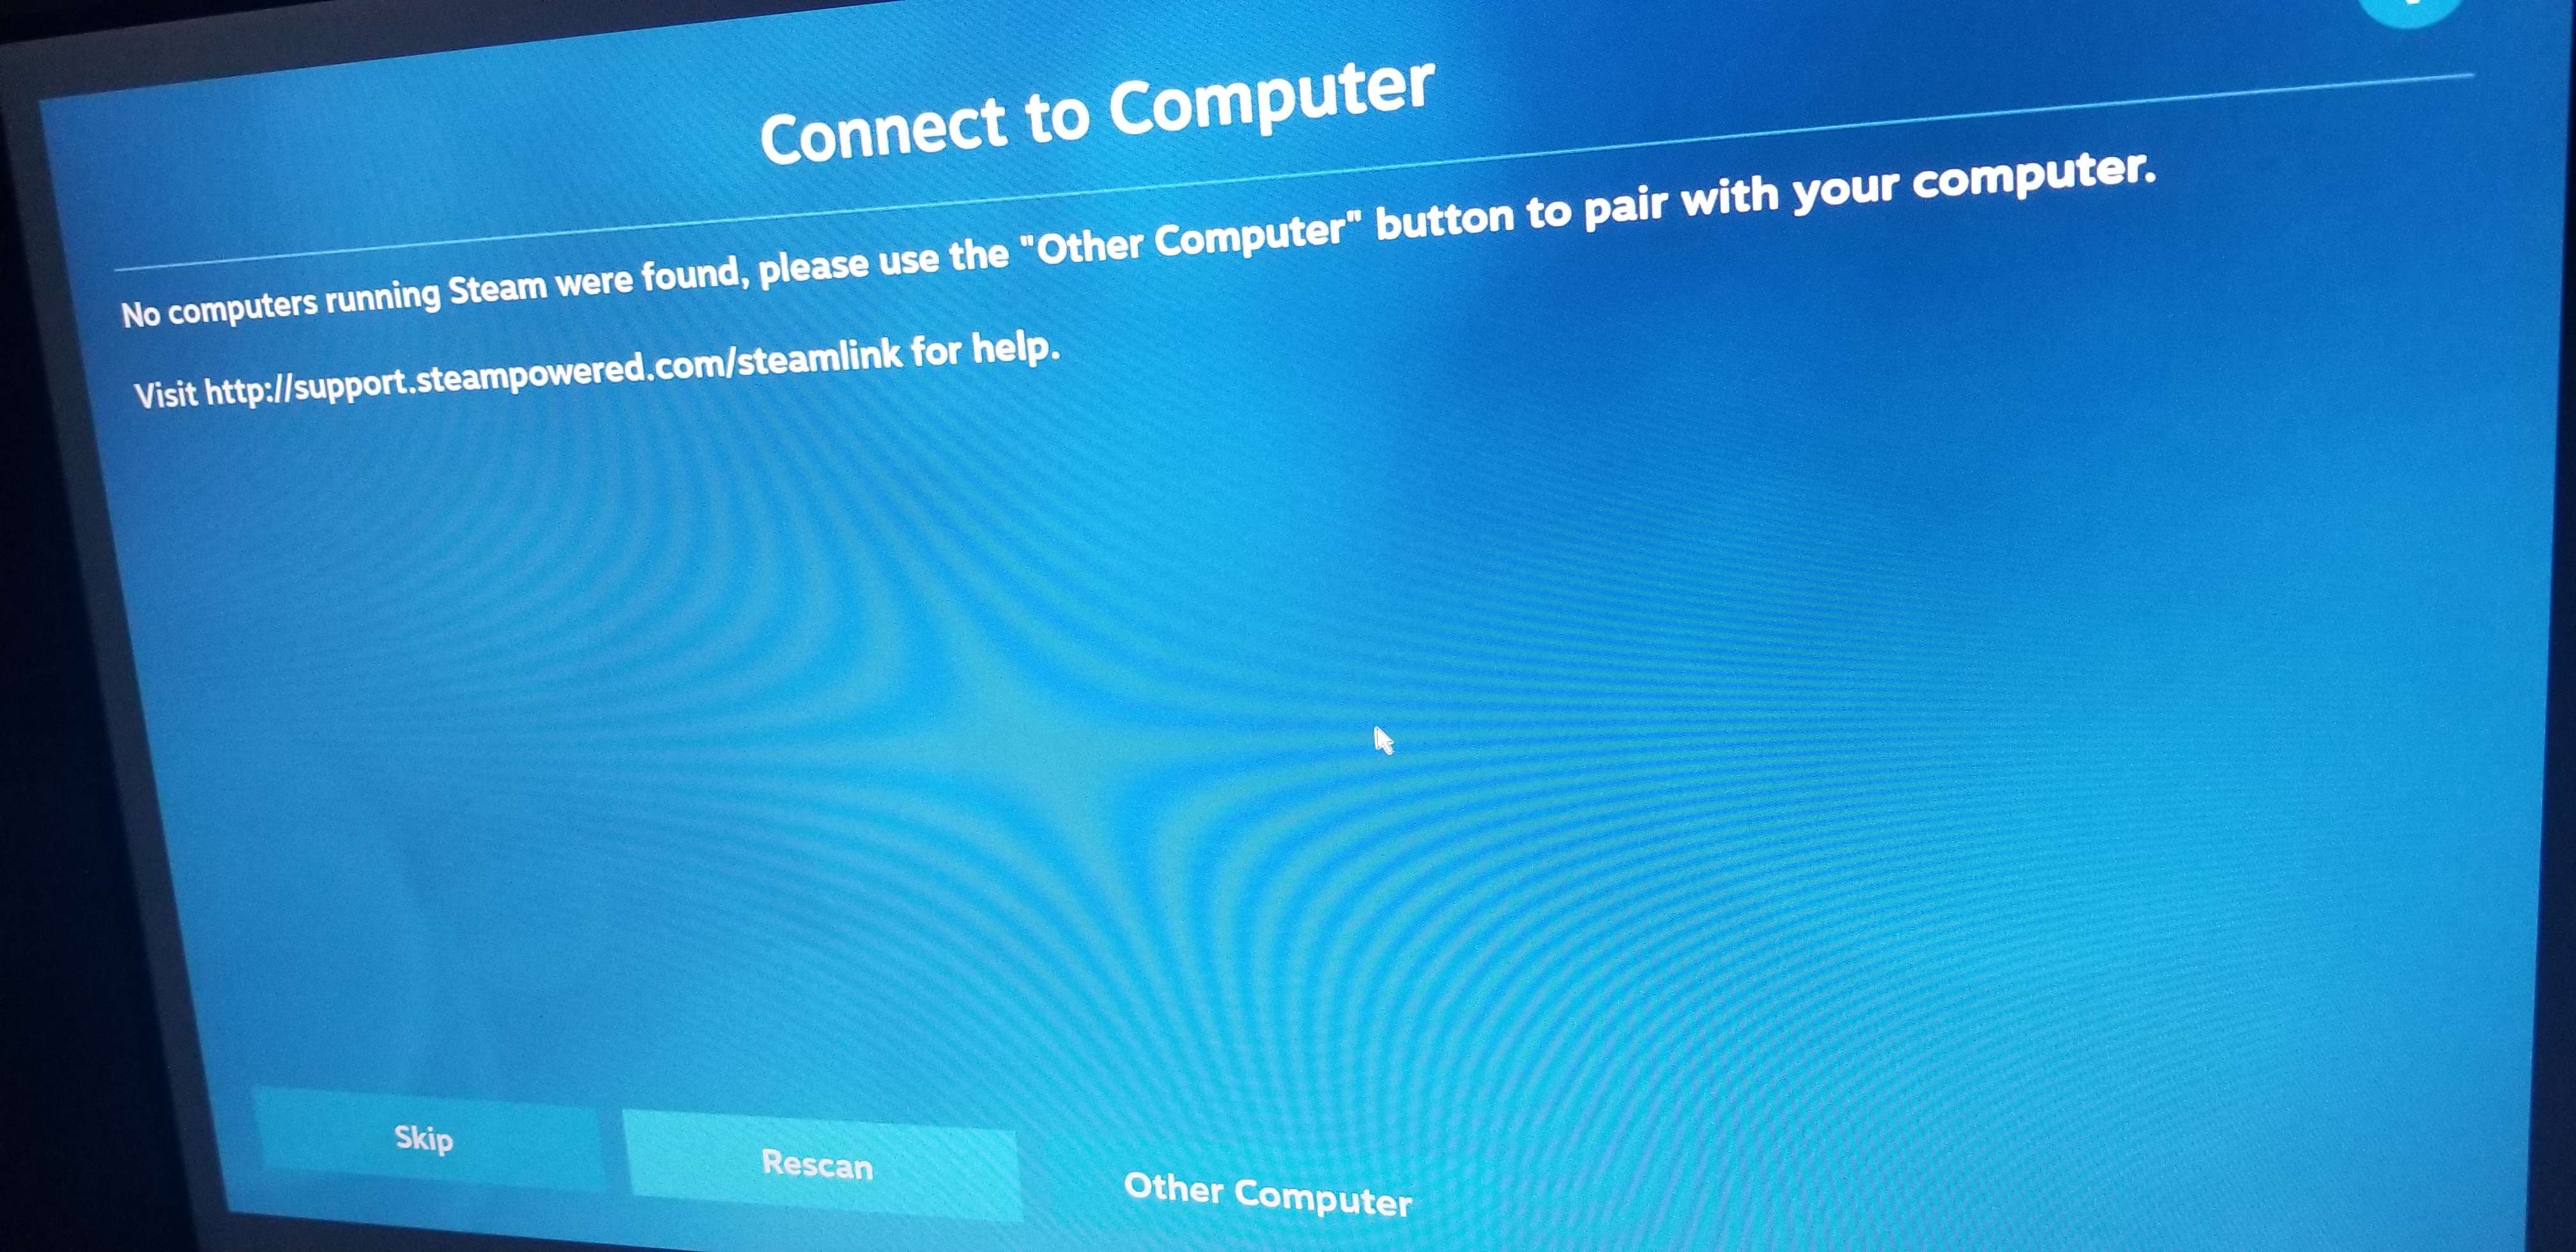
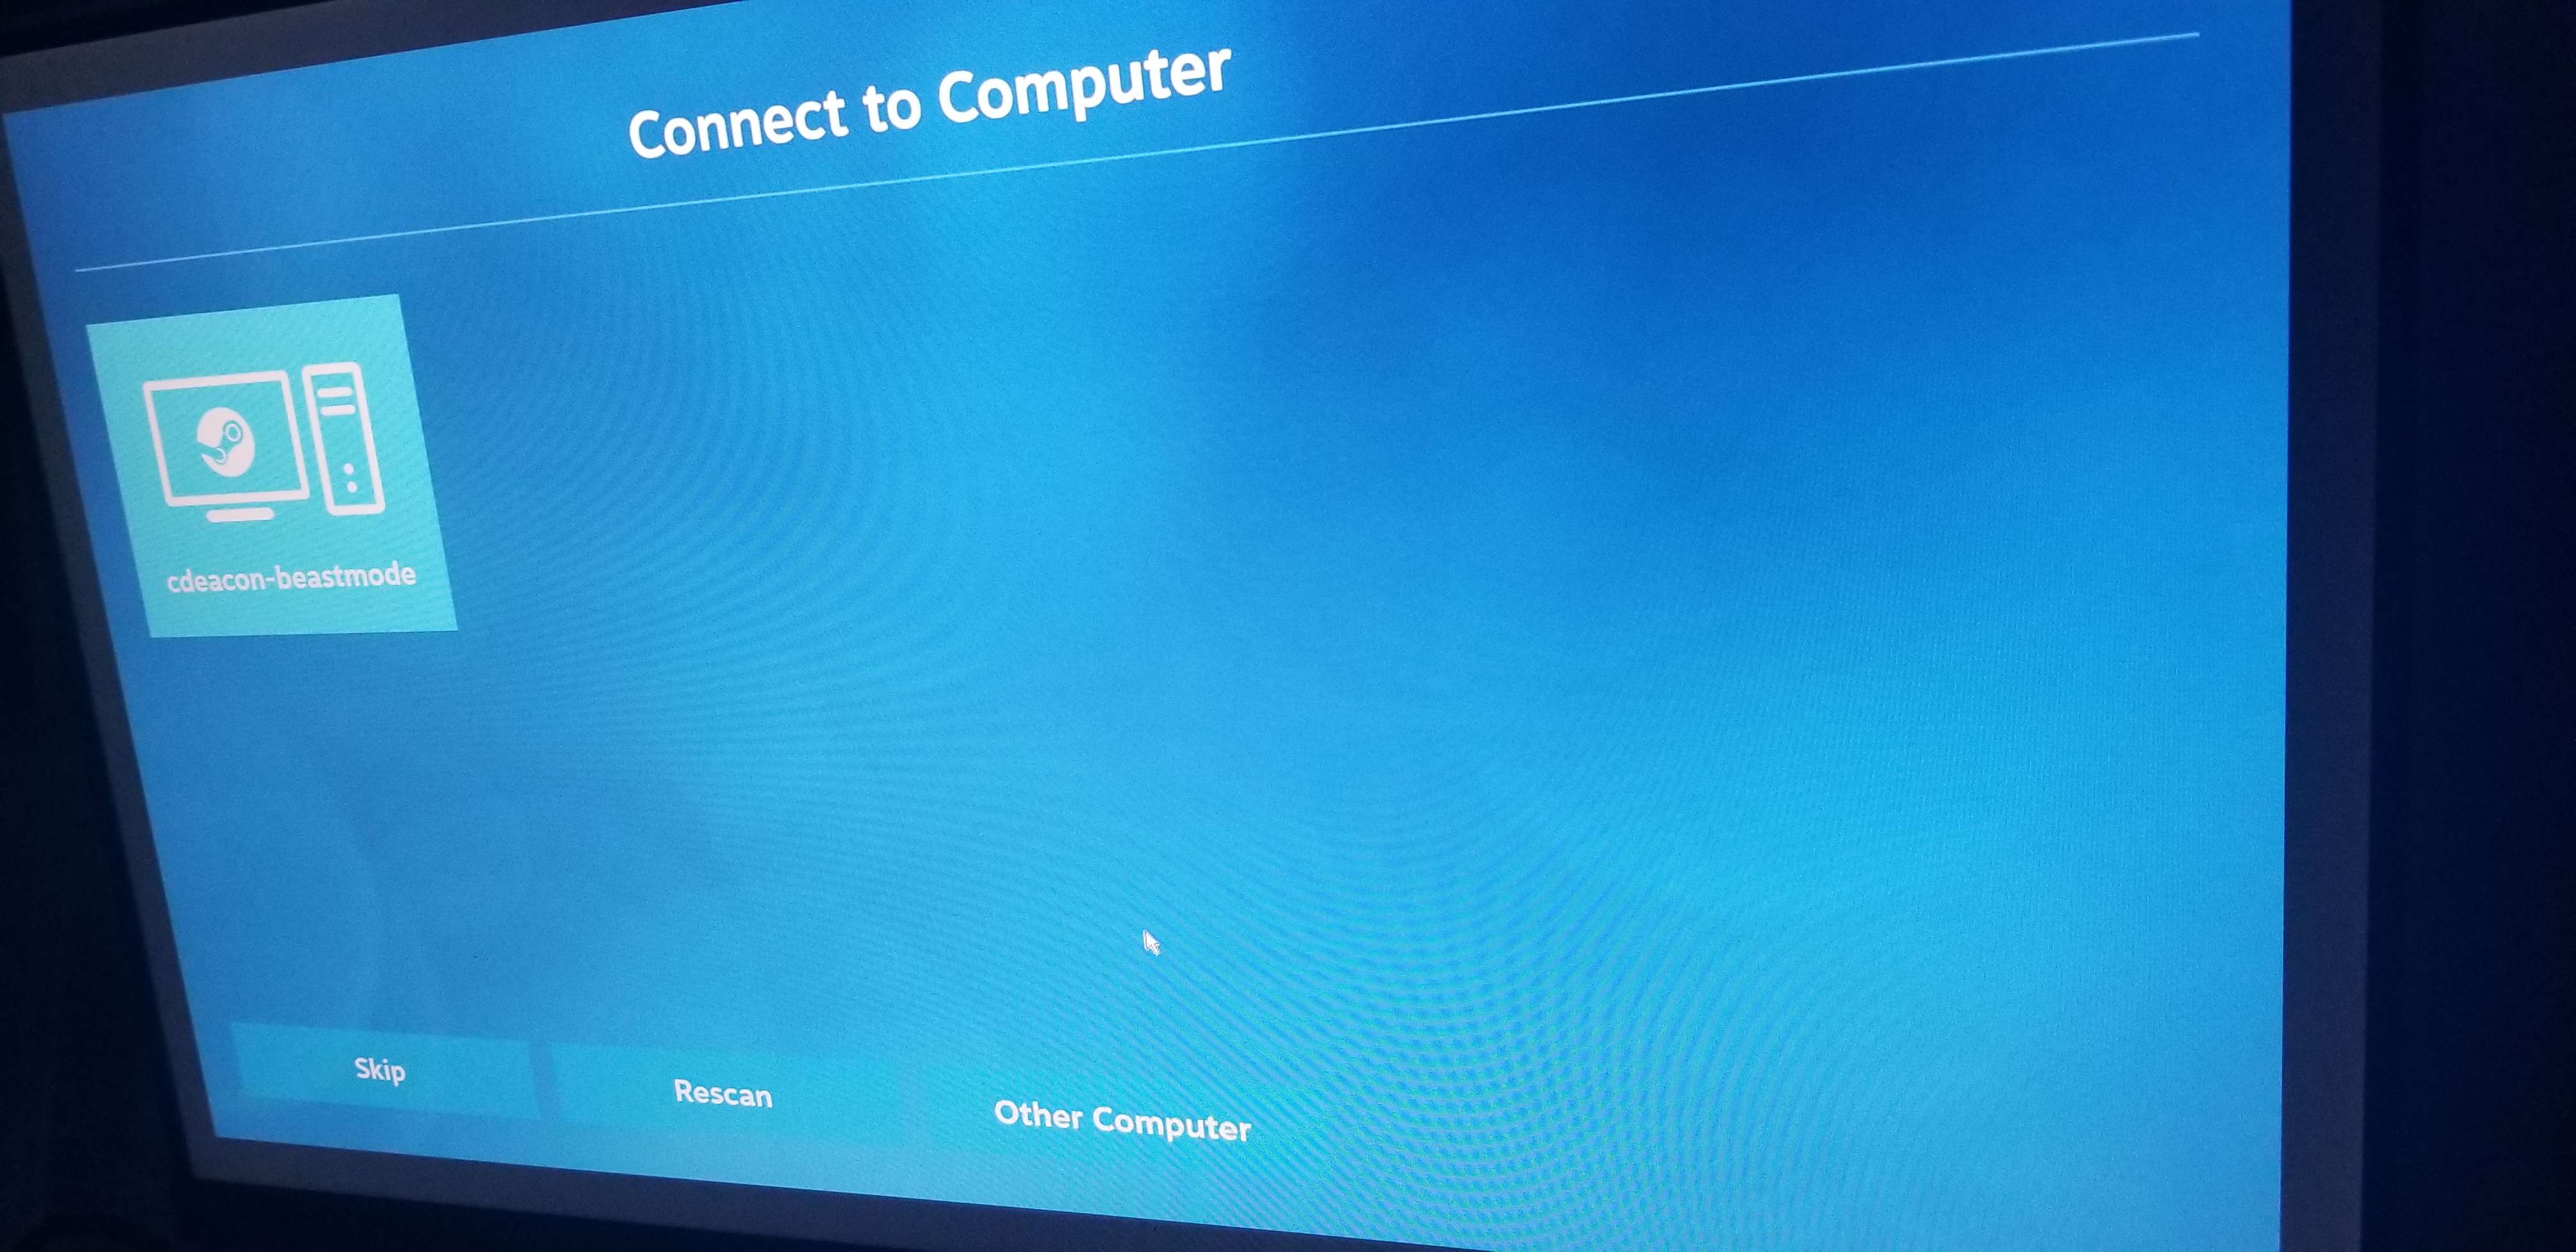
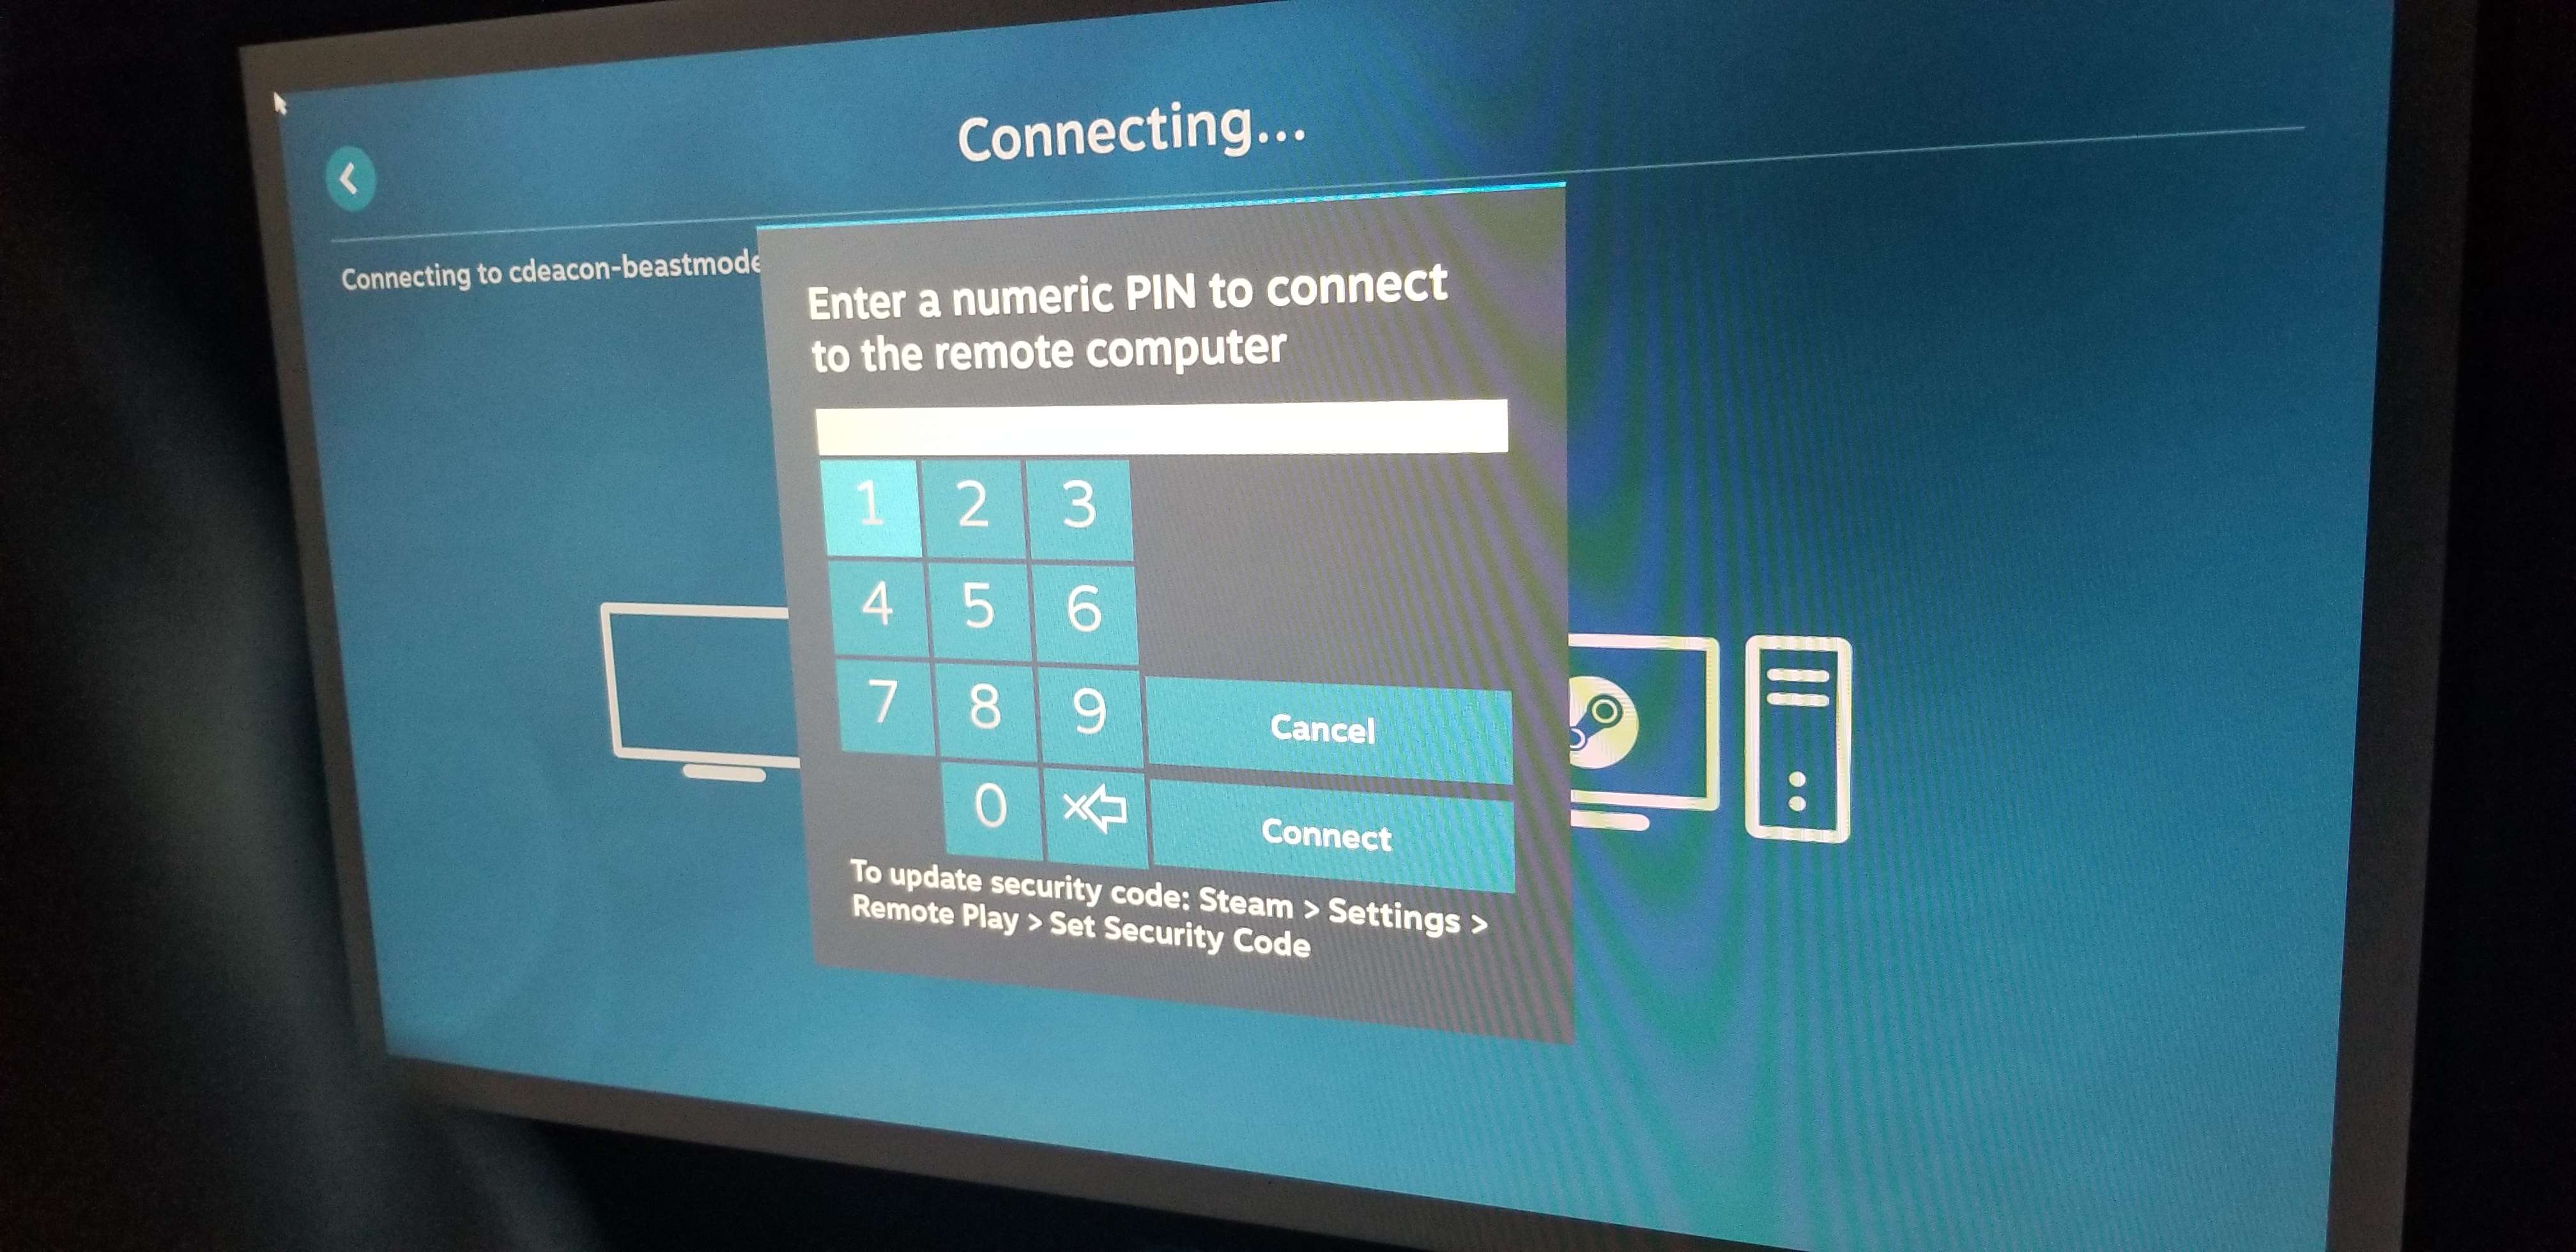
After hitting the "Get Started" button from the welcome message, you will either see existing computers on your network you can stream from or no computers. This depends on your network setup, but since my Steam Link is set up on its own VLAN, it couldn't find any existing computers. Therefore, I needed to hit the "Other Computer" button located at the bottom and pair my computer manually.
This will show a pin like below.
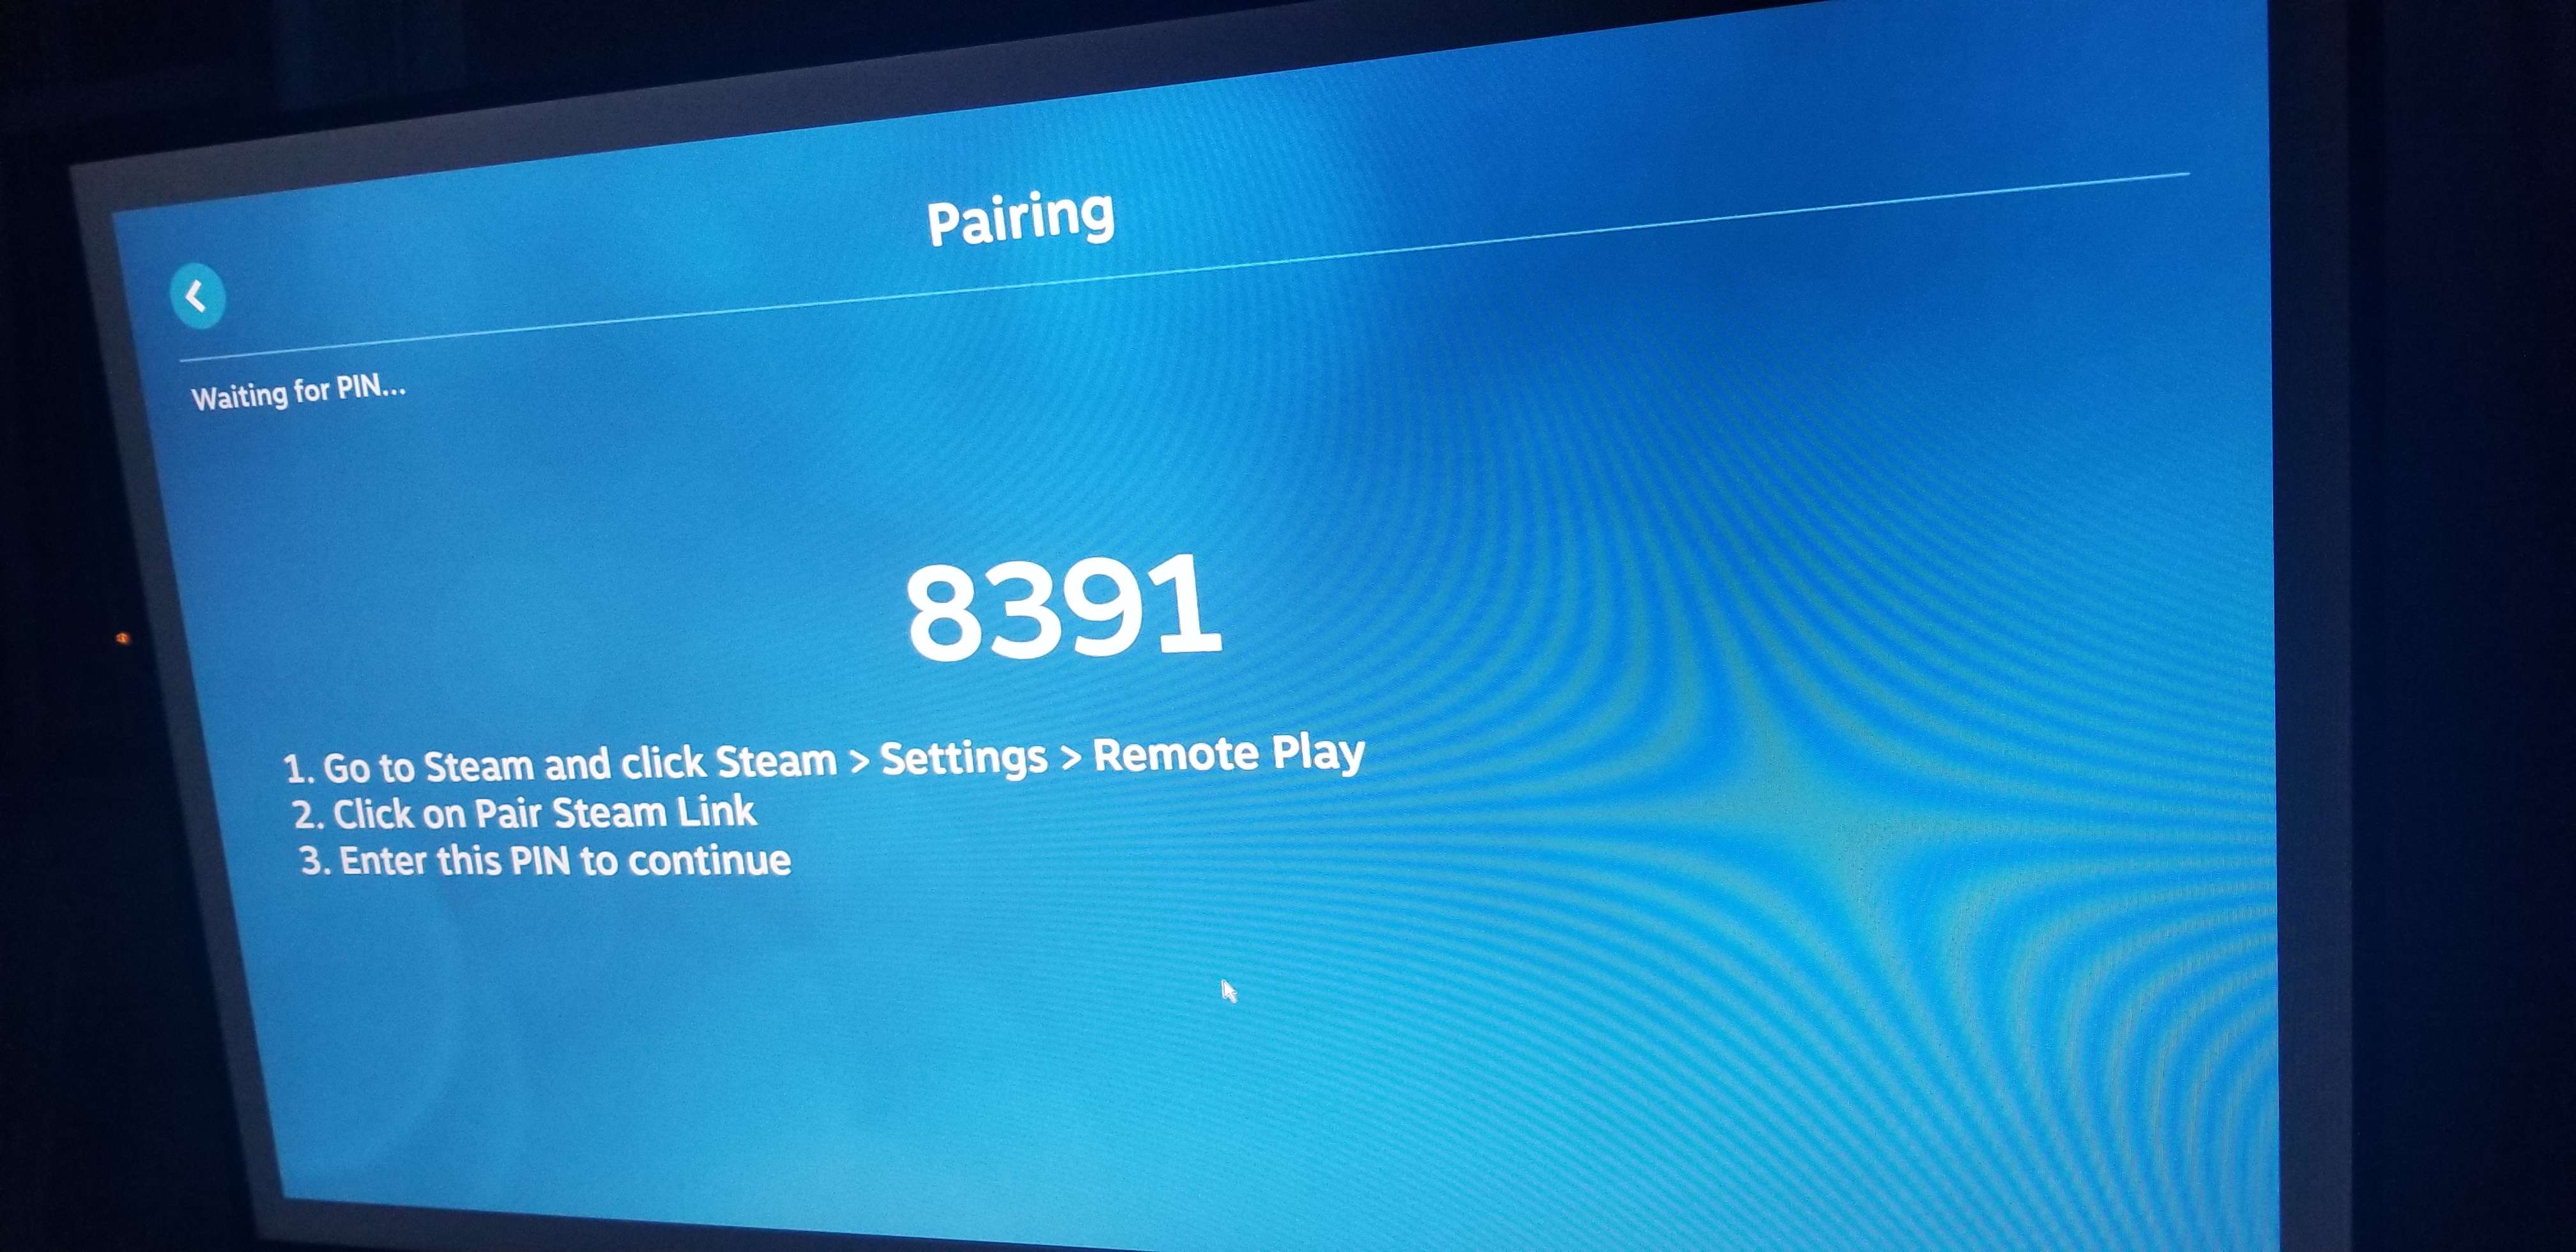
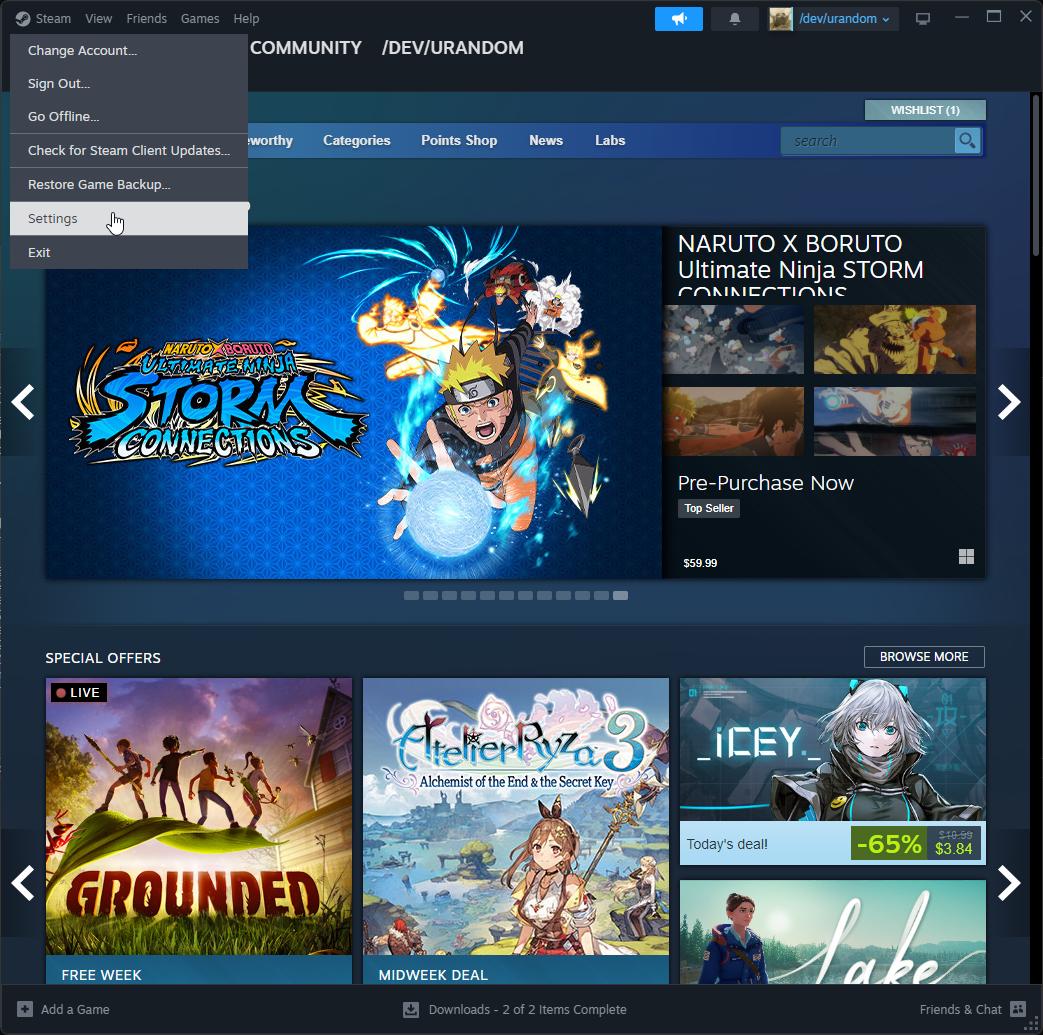
You will now need to open your Steam settings on your computer.
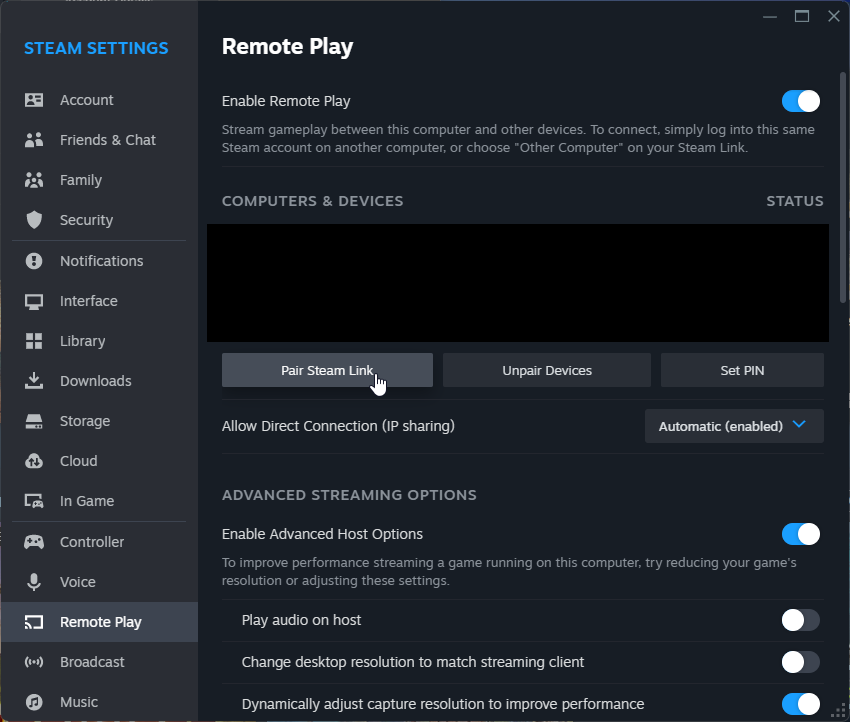
From here, click the "Remote Play" item from the menu on the left side.
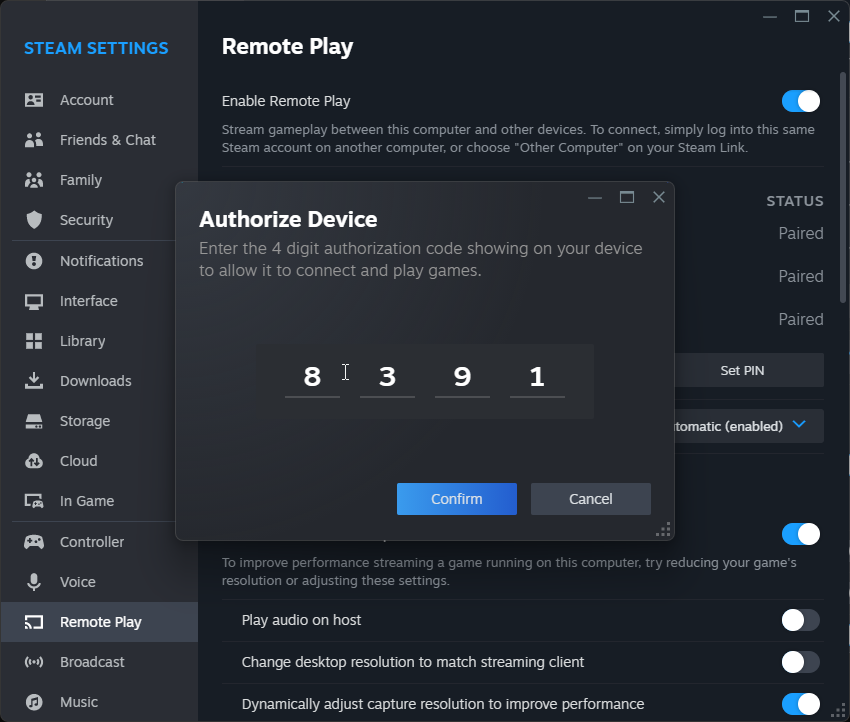
Afterwards, click the "Pair Steam Link" button and enter the PIN you received in the Steam Link application running on your Raspberry Pi!
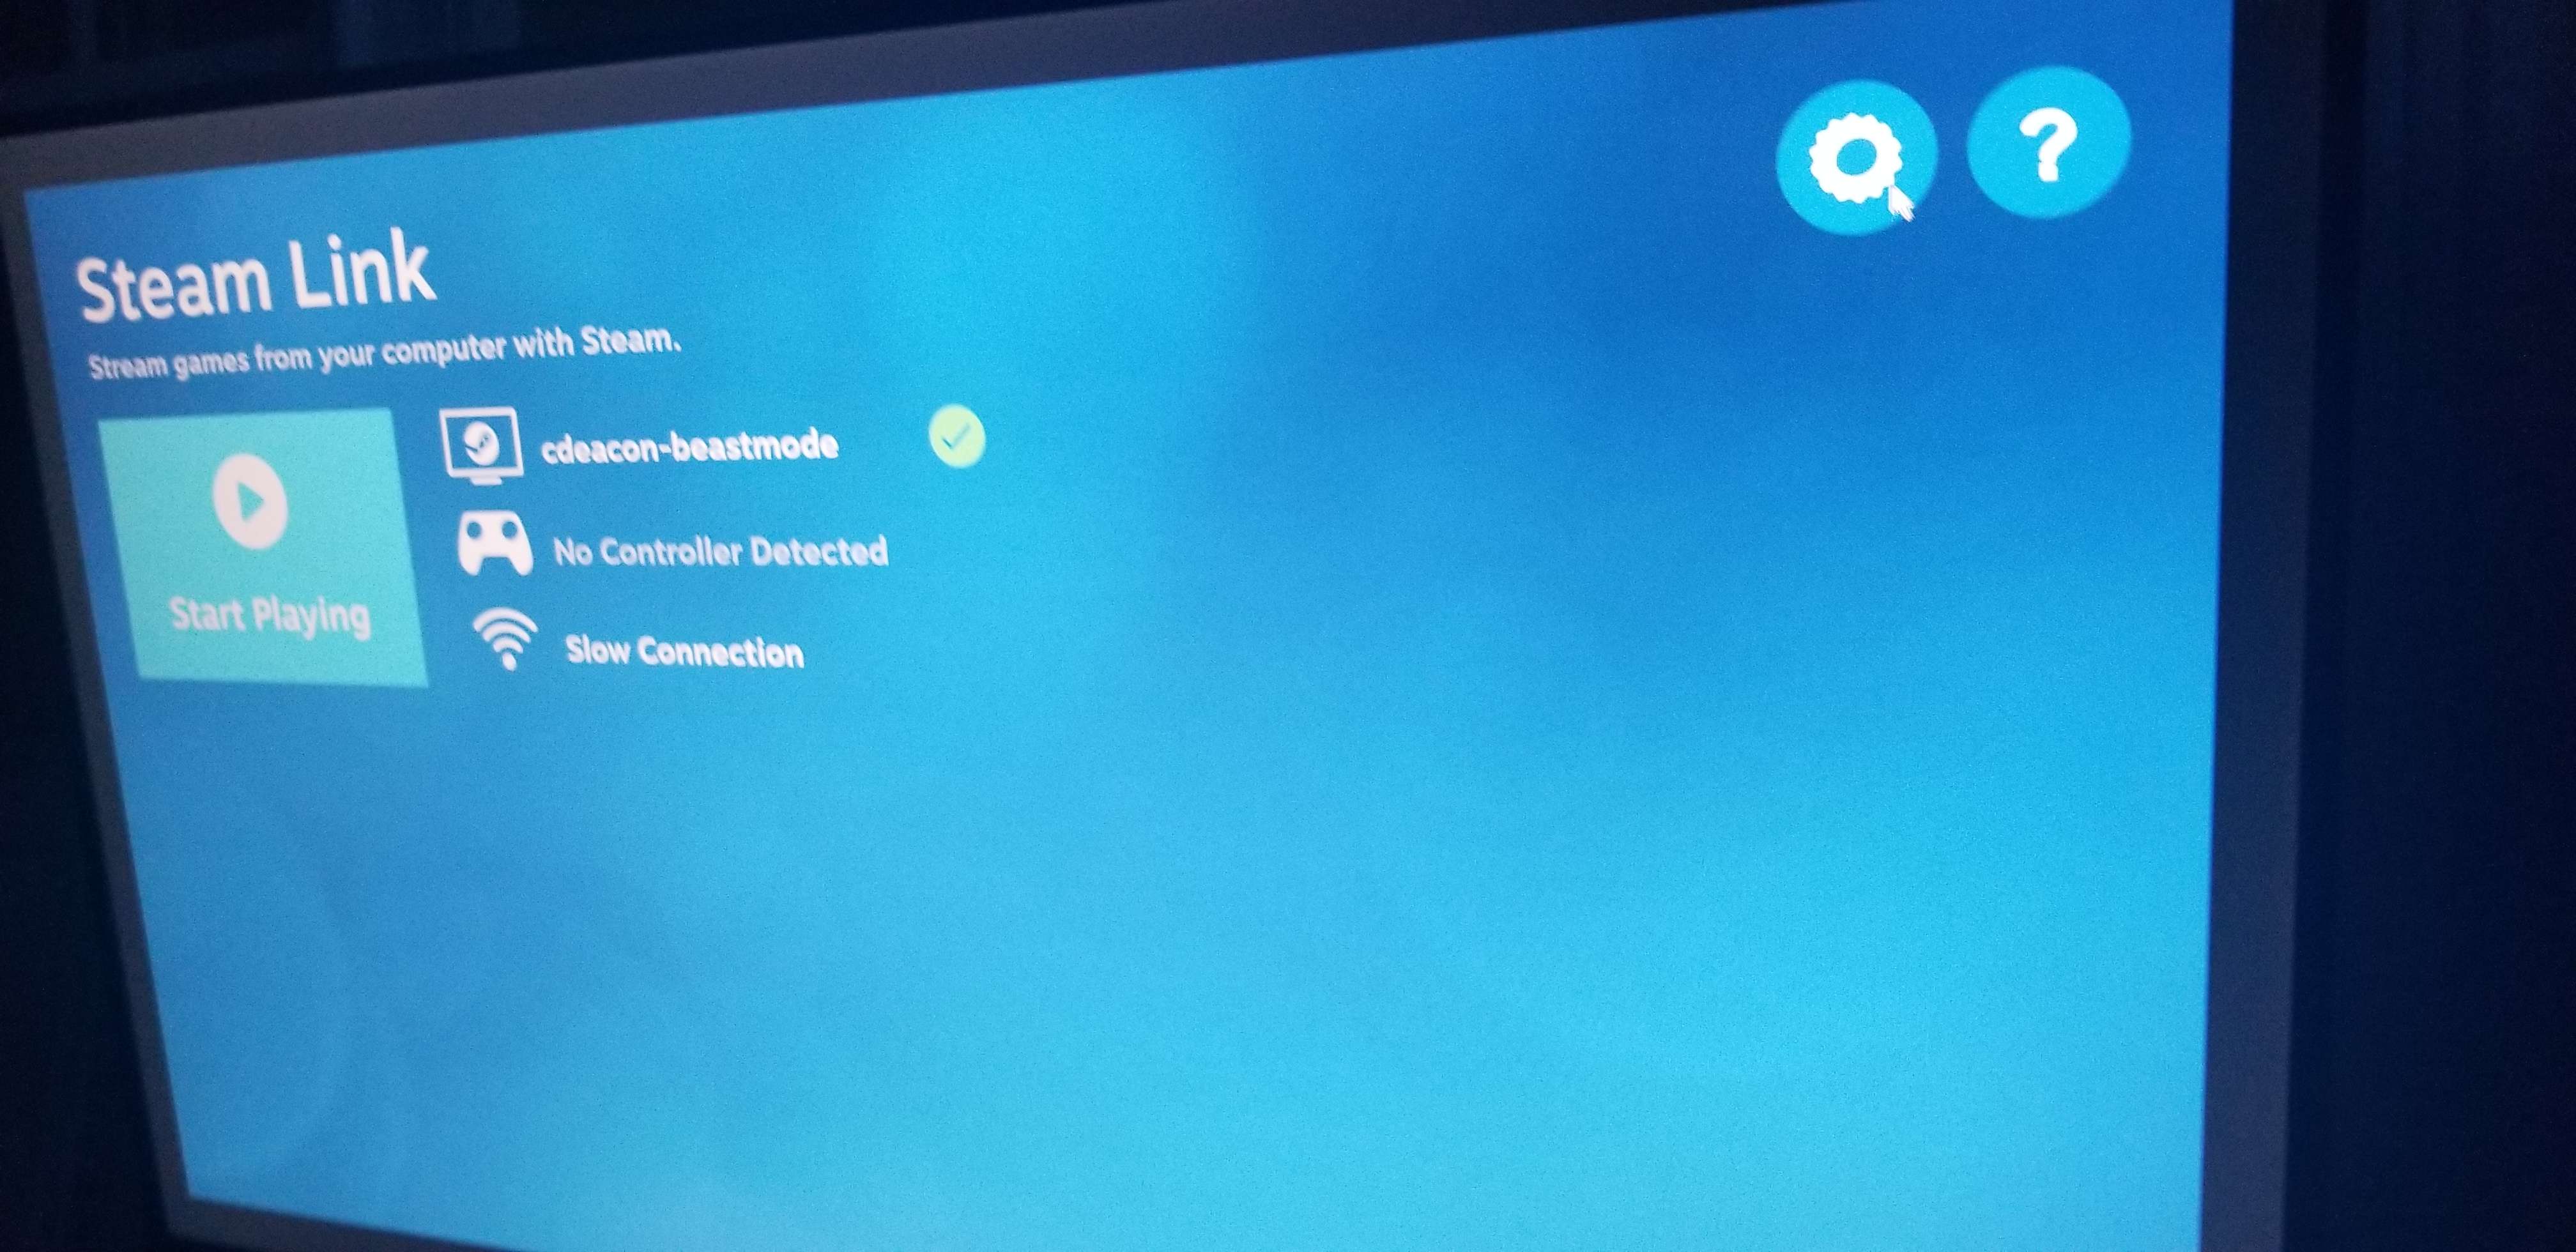
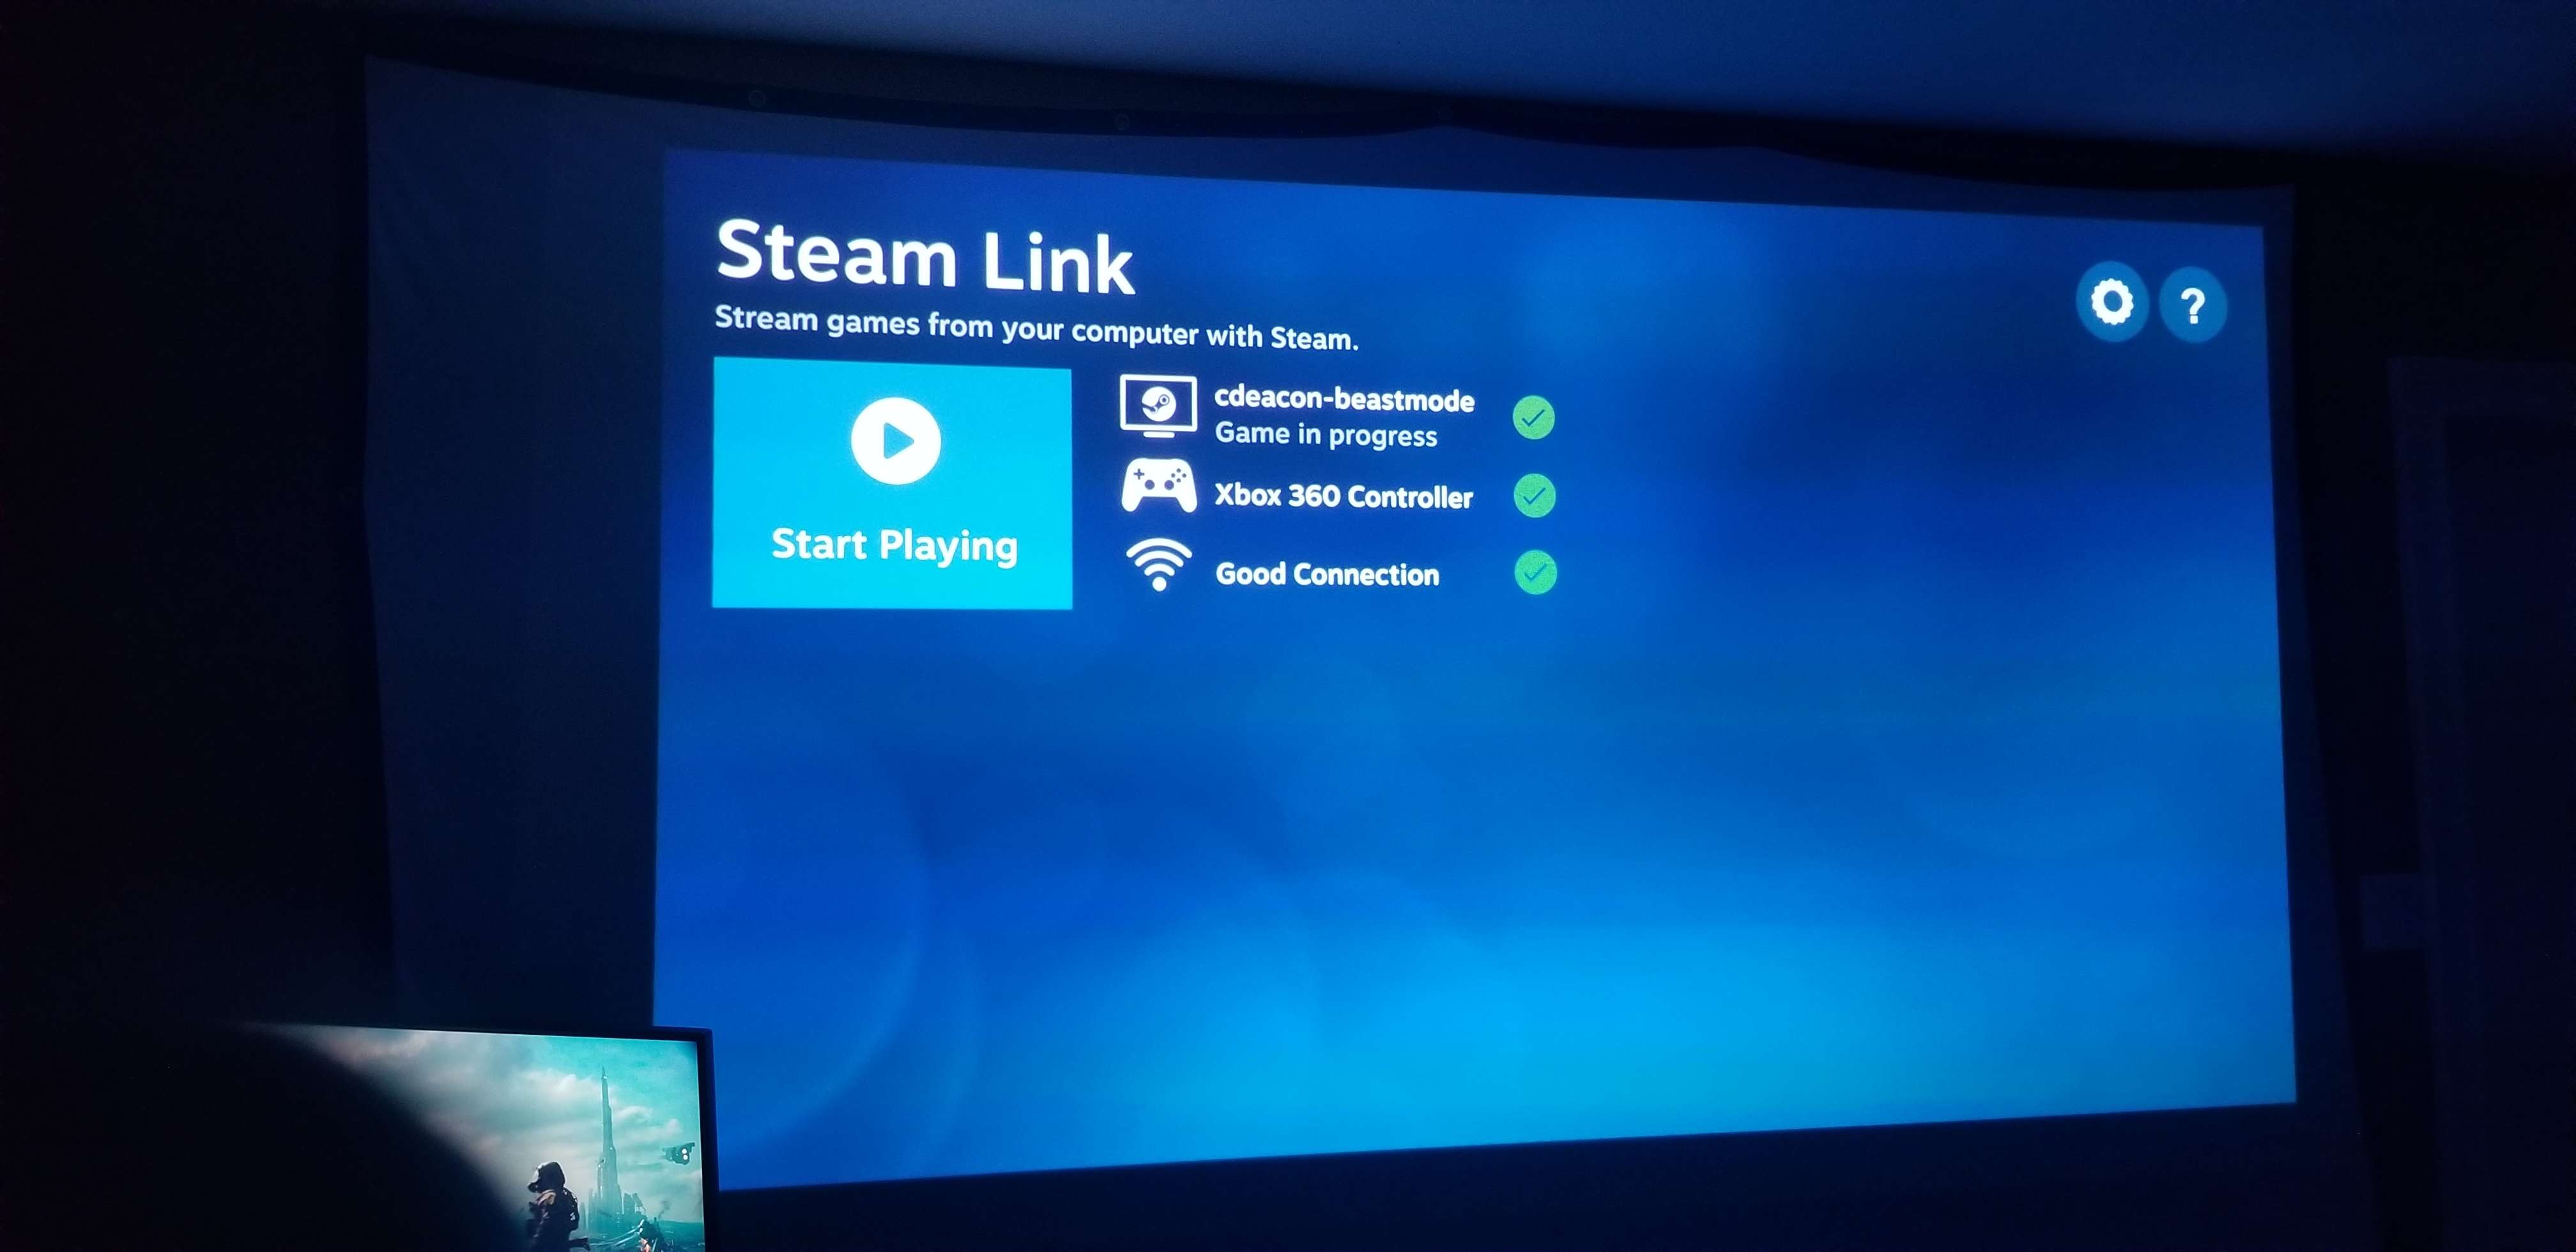
The Steam Link application should now start connecting and you should see something like below.
You can hit the "Skip" button unless if you want to perform a network test, which also can't hurt. You should see something like below afterwards indicating that you're ready to stream.
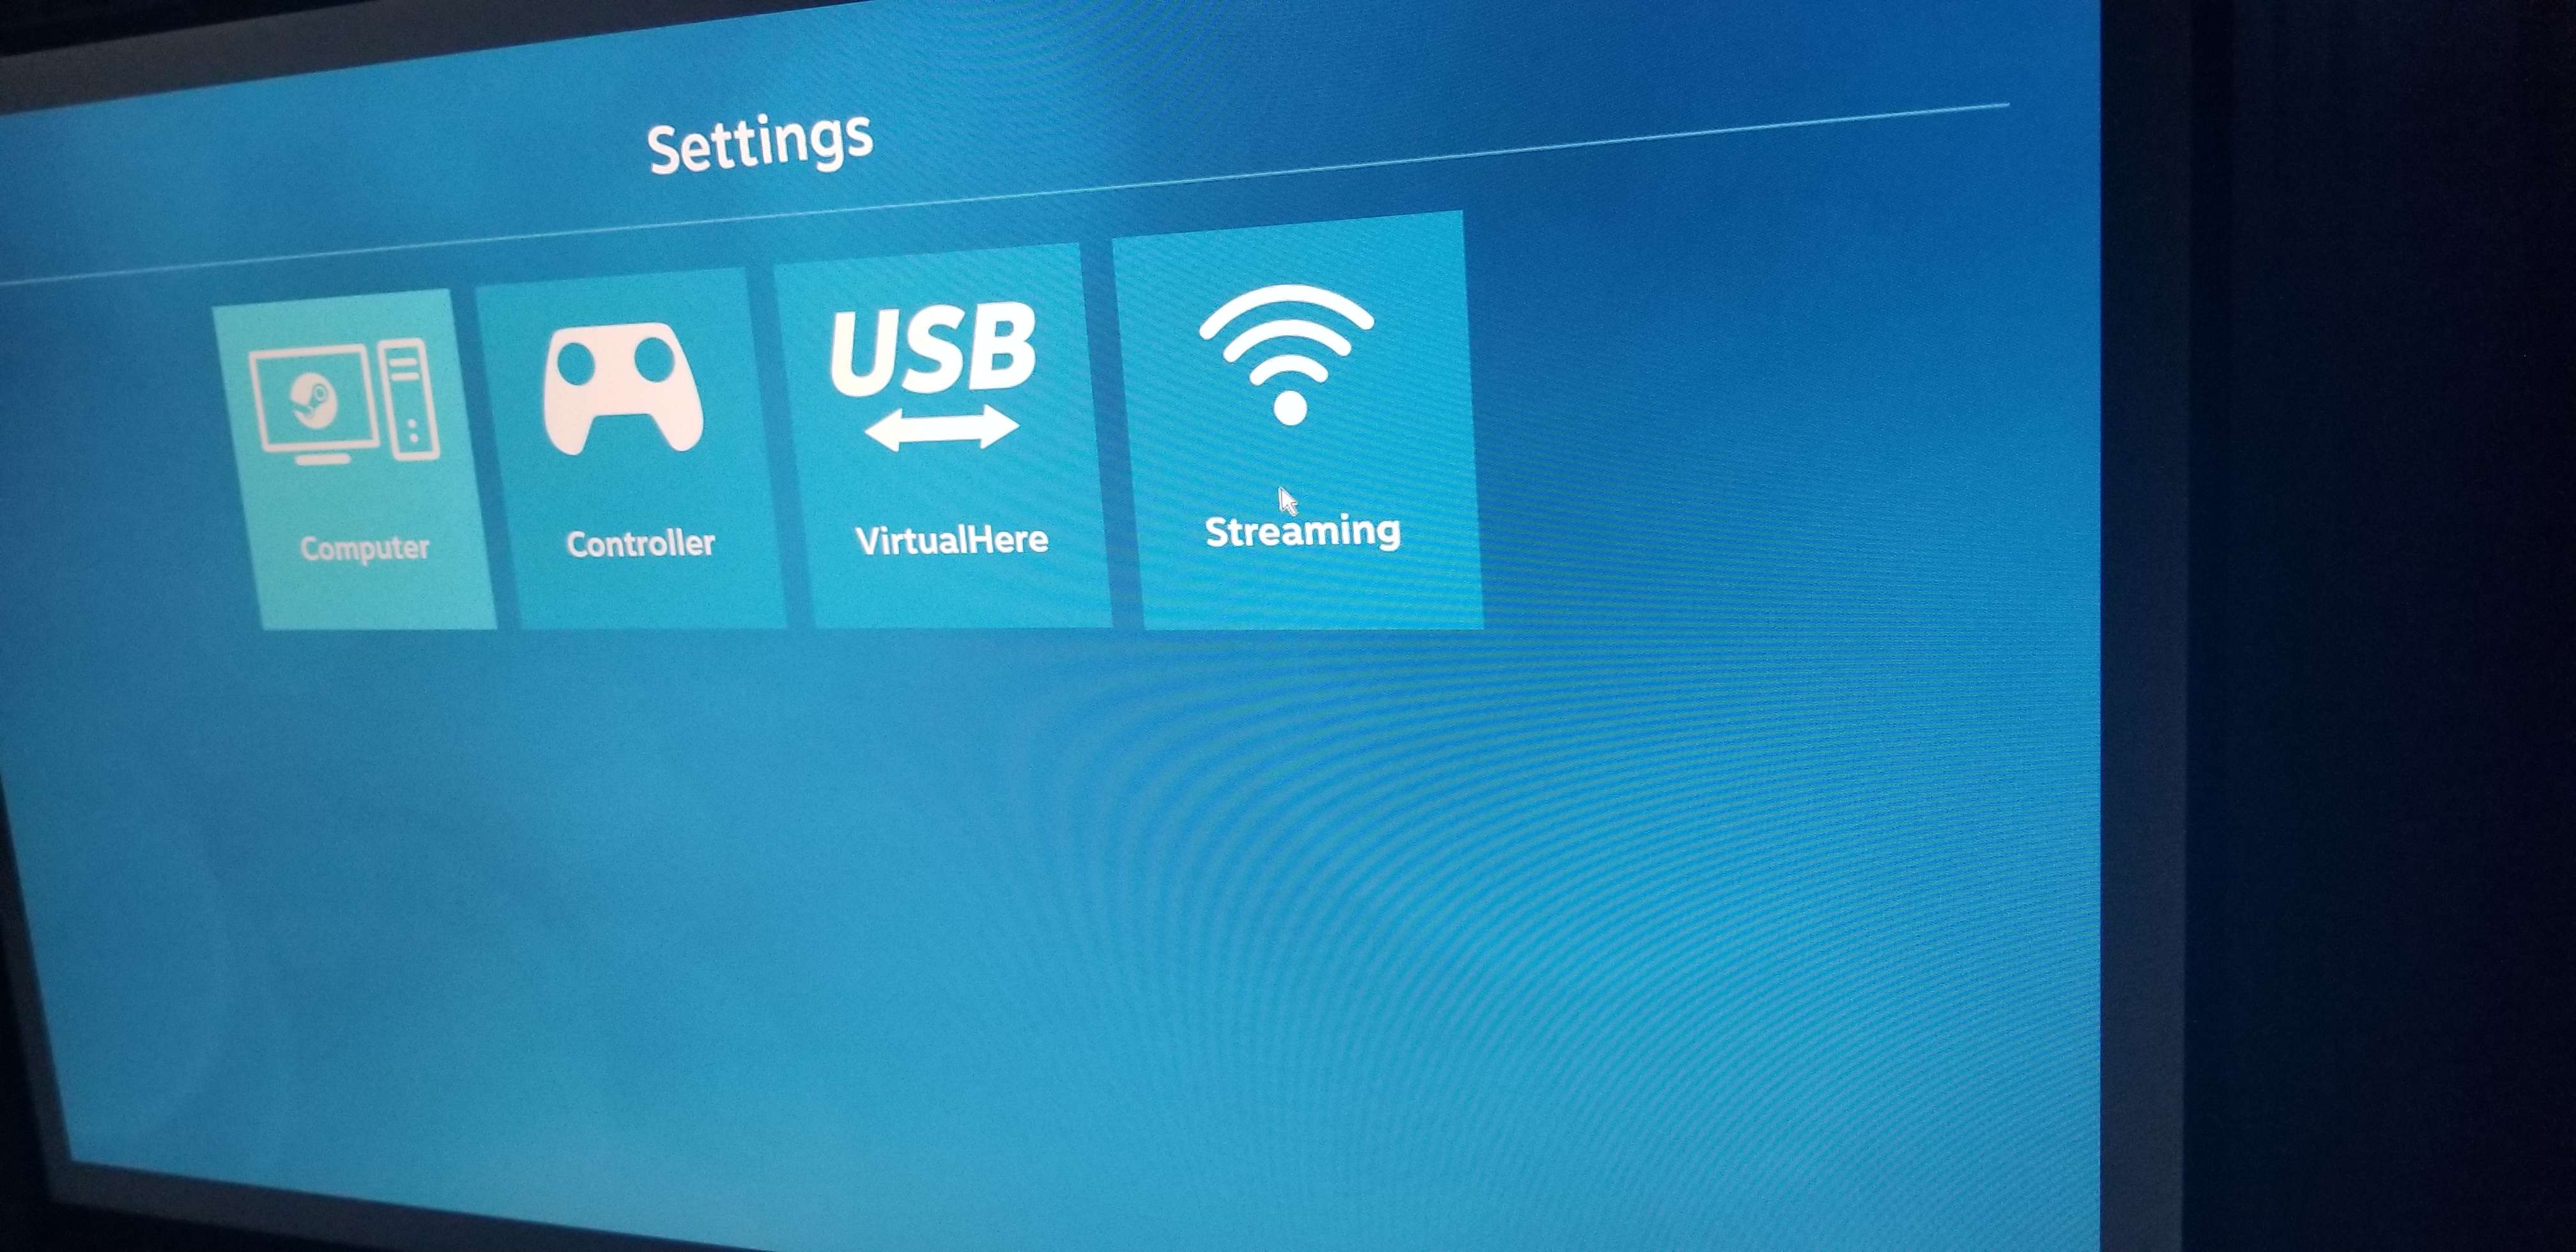
On the main Steam Link application page, you will want to click the settings icon in the top-right corner.
From here, you will want to click the "Streaming" button.
You will now be on page 1/3 for streaming settings. The only option you need to change on here is "Video" from "Balanced" to "Fast". You may not need to do this, but I found at times my controller would have input lag on any options other than Fast, even though display latency and frame loss were low.
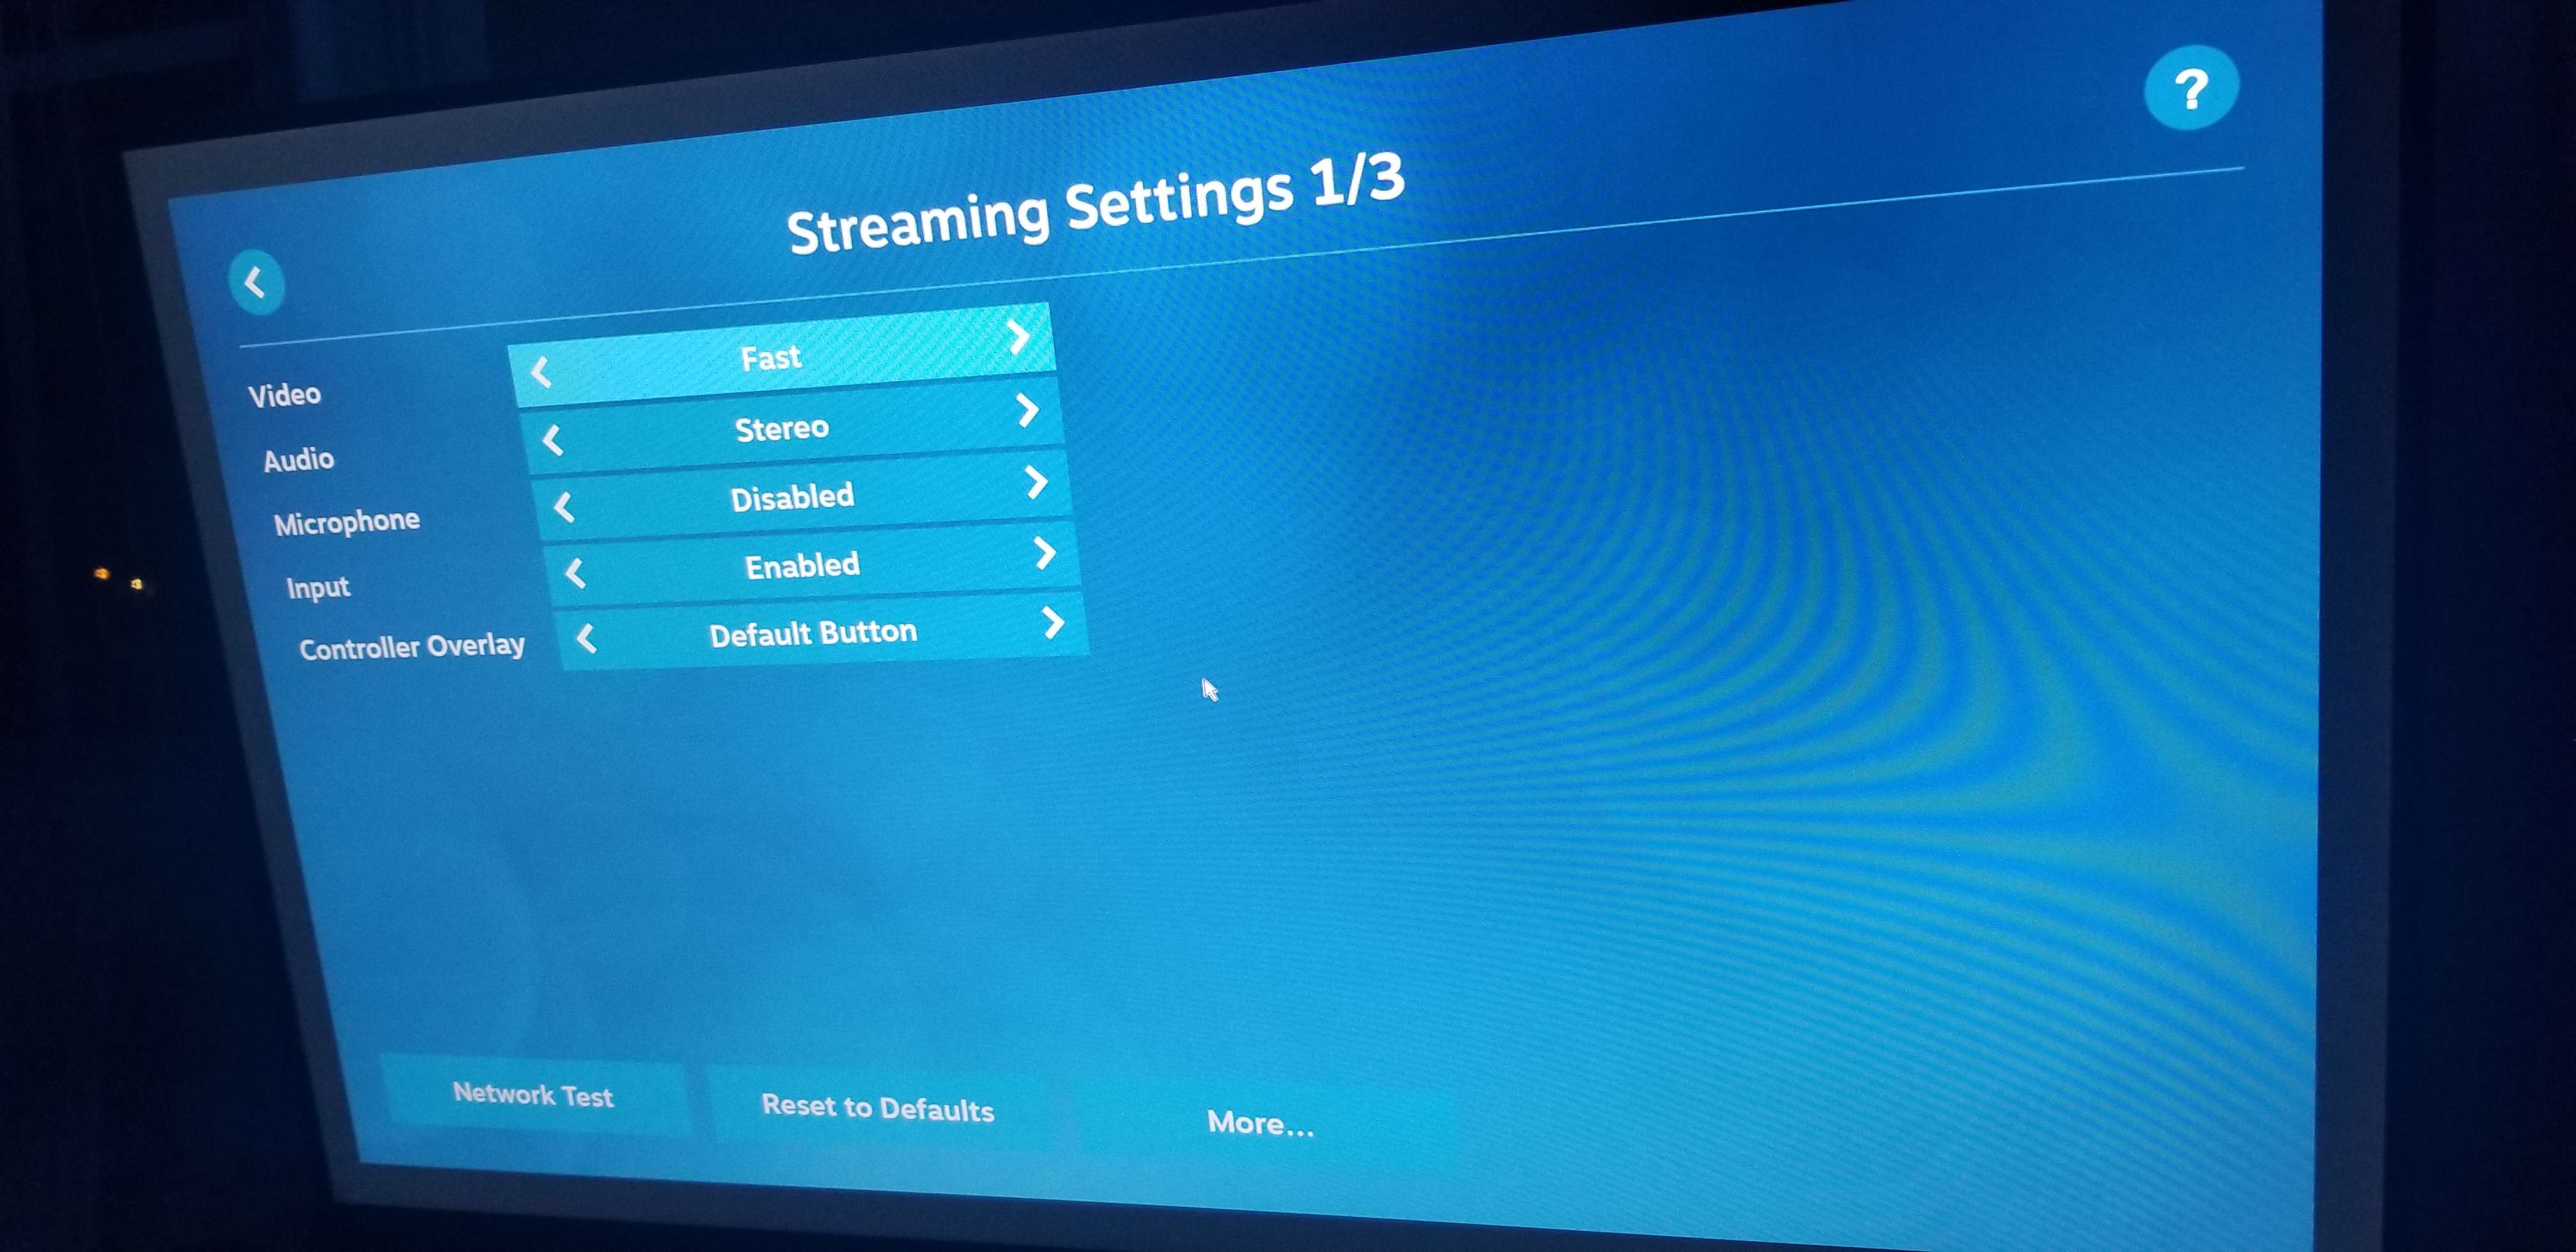
Next, you'll want to click the "More..." button in the middle-bottom area. This will take you to page 2/3.
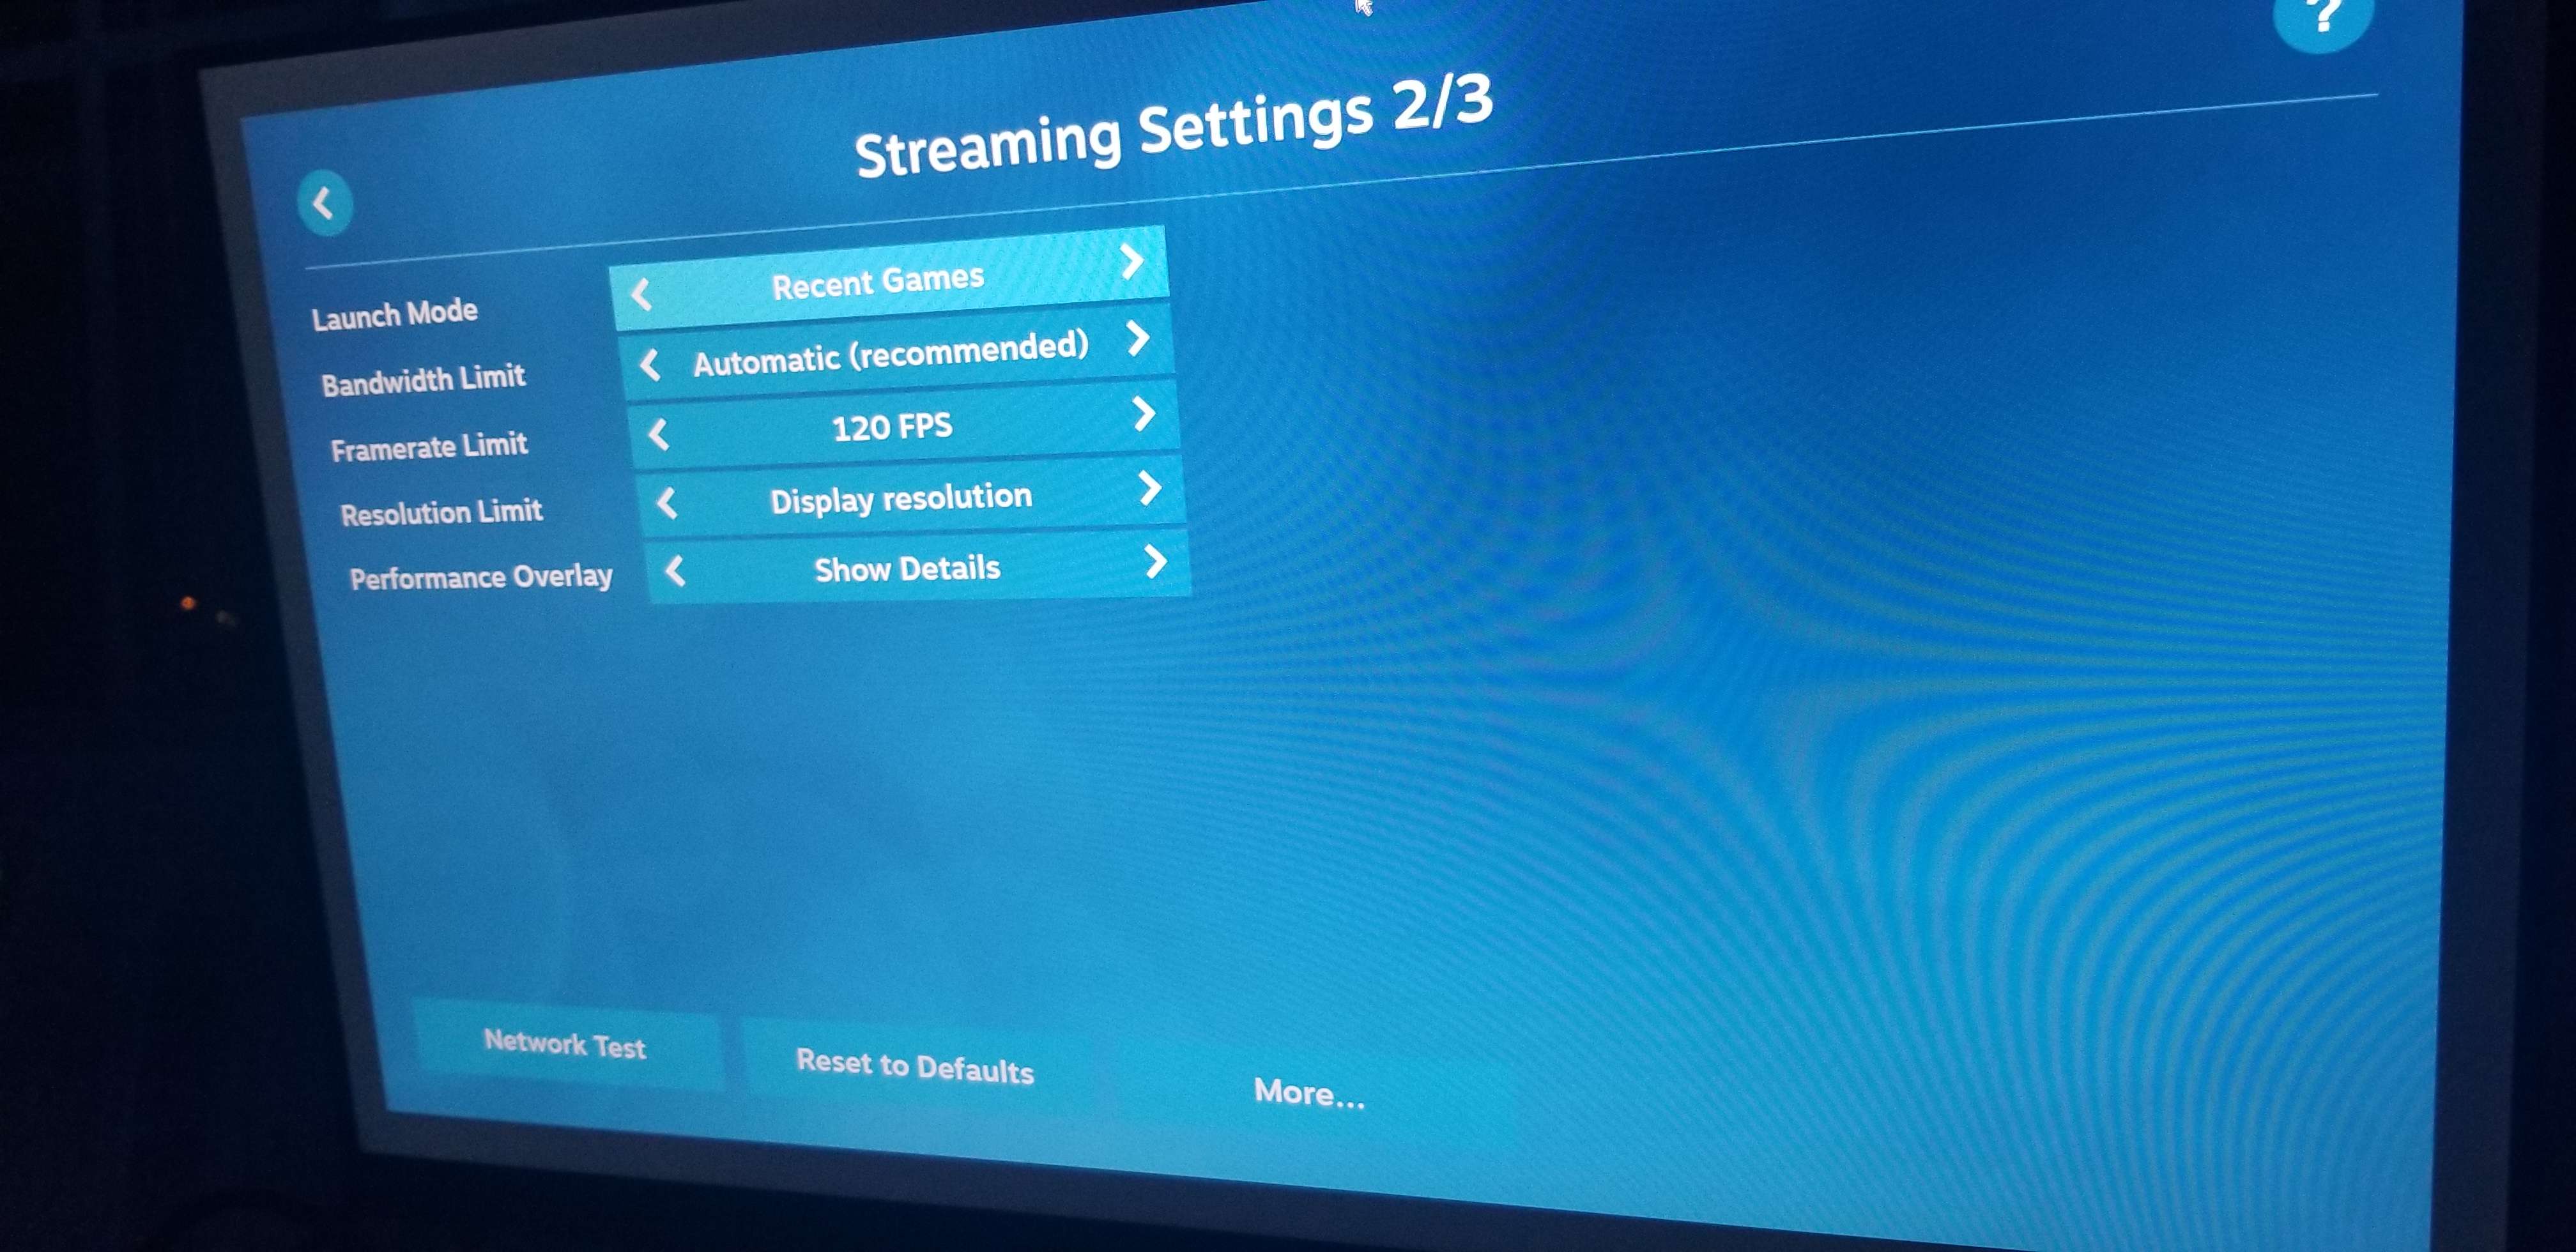
On this page, you'll want to set your framerate limit manually if you're trying to stream above 60 FPS. I've also enabled "Show Details" on "Performance Overlay" so that I could see graphs/stats for performance. I'd recommend enabling that option while setting up Steam Link to make troubleshooting easier and then disable it later on if you confirm things are running smoothly.
I also wanted to note, if you set the "Bandwidth Limit" option to "Unlimited", you will most likely experience high display latency and frame loss issues, especially with controllers which I've experienced and documented here. What's weird is I was using 90 mbps at most and that shouldn't have been an issue on my network since I had a wired 1 gbps NIC for the Raspberry Pi and I also confirmed my Raspberry Pi and computer can communicate at ~850 mbps using iperf3. The only thing I can think of is the Raspberry Pi's processing power is insufficient for using that much bandwidth specific to streaming and the Steam Link or a software-related issue.
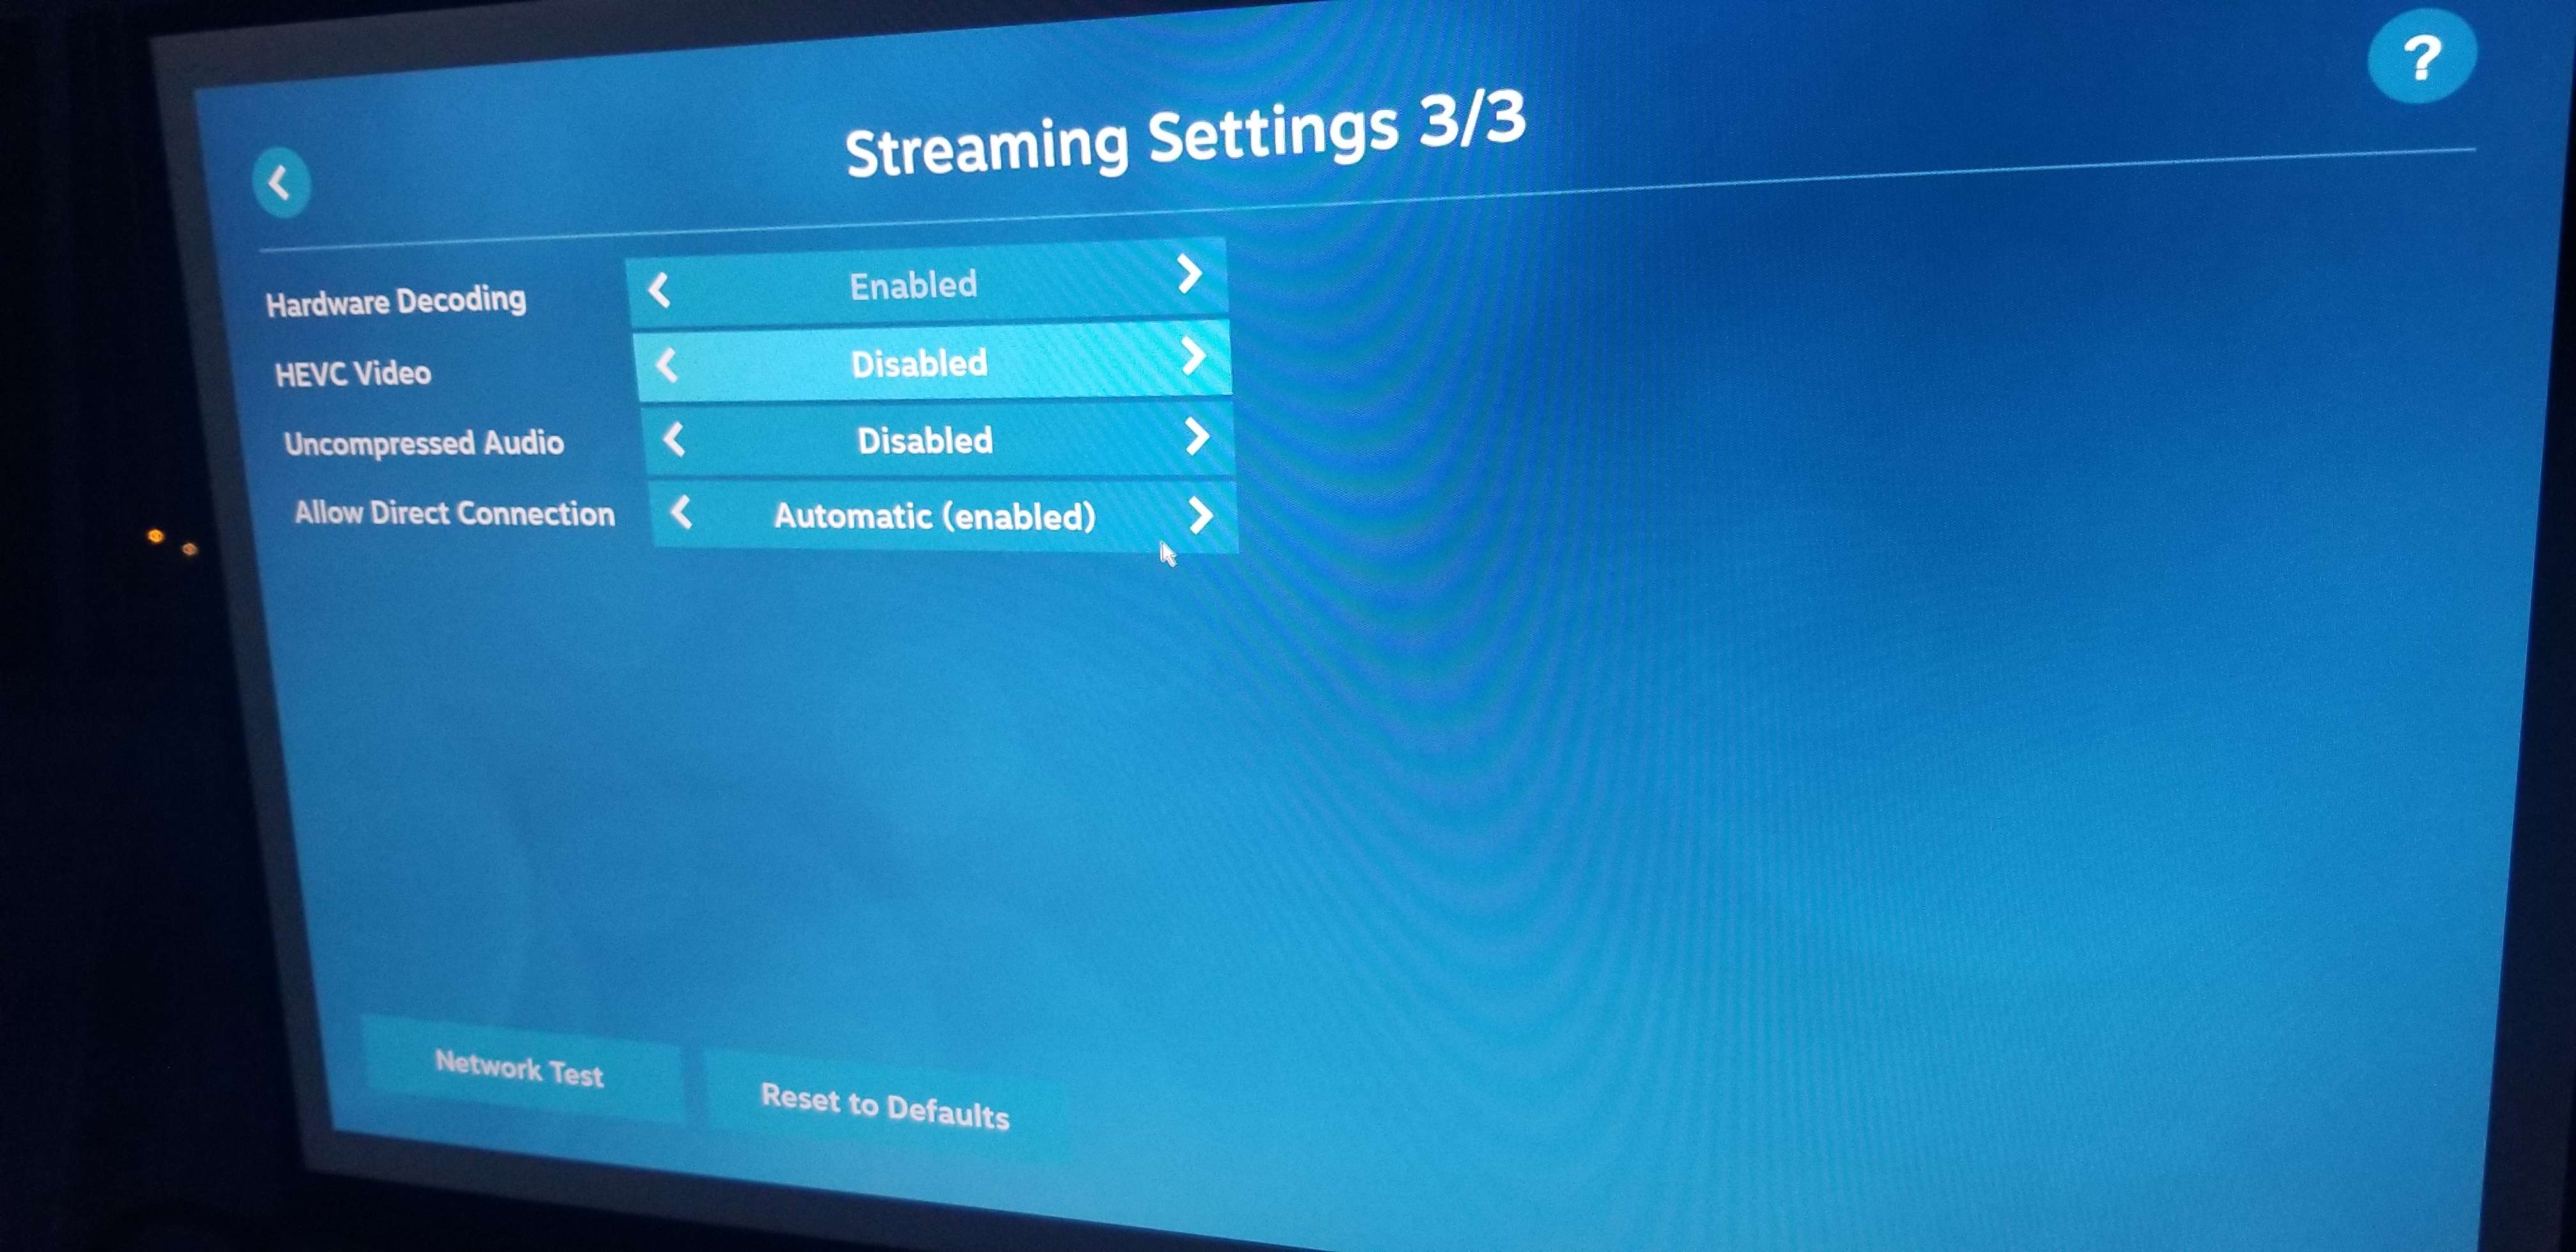
Anyways, if you click the "More..." button again, you'll come to page 3/3. I didn't change any settings here because I didn't need to, but you can try adjusting these settings if you'd like.
You can create a systemd service to automatically start Steam Link on boot. Make sure you've enabled Auto Login and OpenSSH as documented above before automatically starting Steam Link on boot, though.
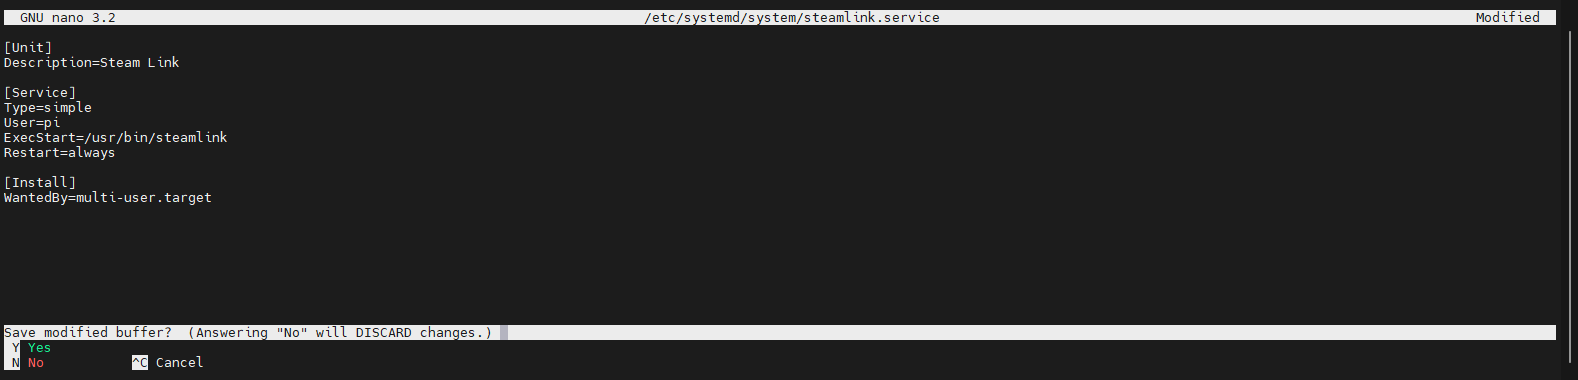
You can create a systemd service file for Steam Link using Nano via the nano /etc/systemd/system/steamlink.service command.
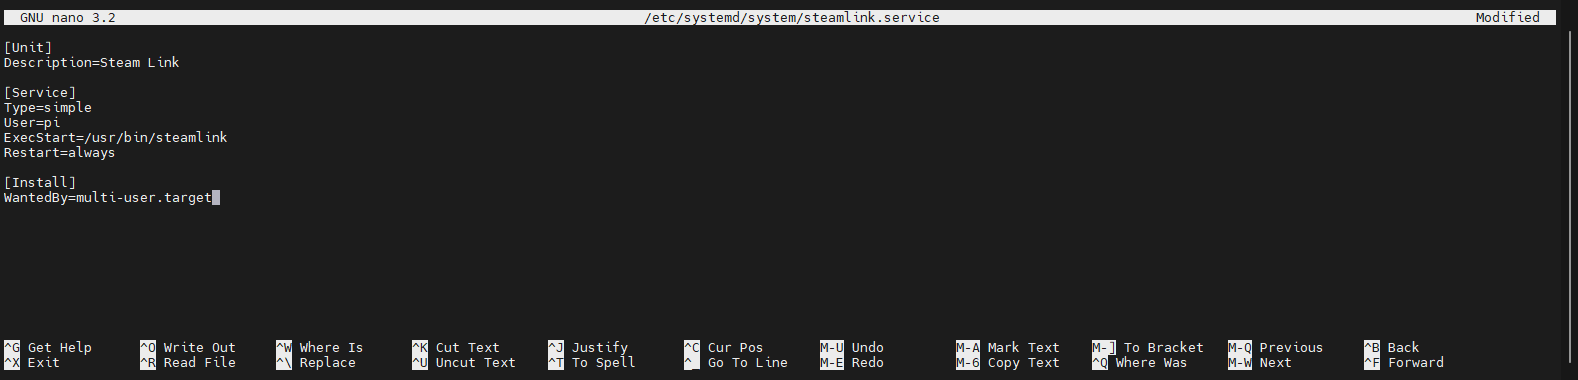
Afterwards, you can paste the following in the file.
[Unit]
Description=Steam Link

[Service]
Type=simple
User=pi
ExecStart=/usr/bin/steamlink
Restart=always

[Install]
WantedBy=multi-user.target
Please note that Restart=always will automatically restart Steam Link when it is manually closed. I added this to the service file because I kept accidentally closing the Steam Link application using my controller and I got annoyed manually starting the application back up afterwards each time. I would also recommend having OpenSSH enabled if you use this service since you will need to wait until the fail count is reached before systemd stops automatically restarting Steam Link. This would be very annoying to deal with on the main TTY since it heavily lags user input (even switching between different TTY's is impacted by this from my experience).
You may hit CTRL + X and then Y to save the file.
To enable the service on boot, you need to execute the following command.
sudo systemctl enable steamlink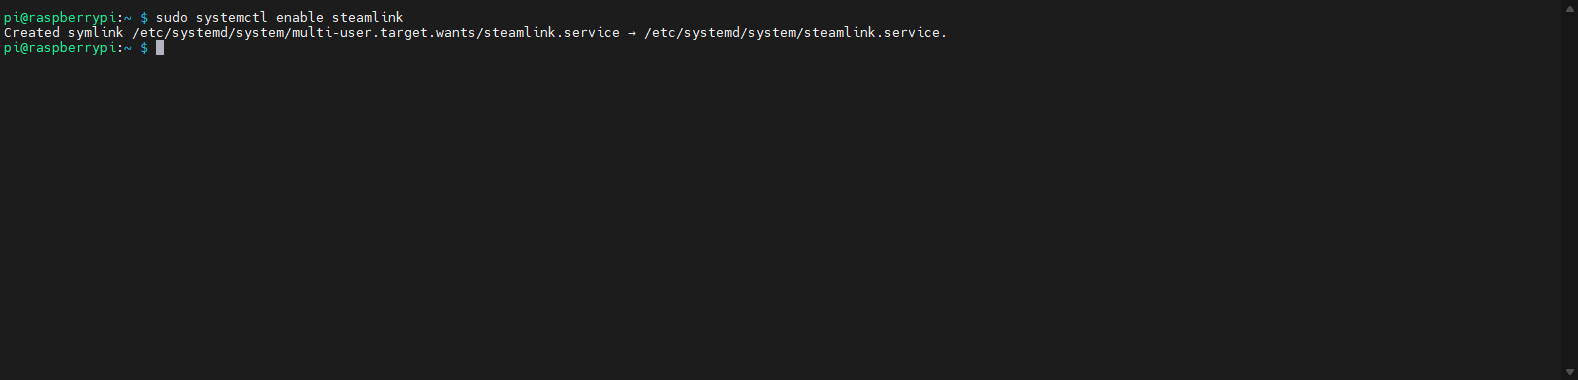
If you want to disable the service, you can use the following command instead.
sudo systemctl disable steamlinkNote - You may use sudo systemctl start steamlink to manually start the Steam Link application or sudo systemctl stop steamlink to stop the application.
You may now reboot the Raspberry Pi device, and see if it automatically logs into the user and starts Steam Link.

We are now ready to game! At this point, I've moved my Raspberry Pi from my testing environment/monitor to my projector.
Now, at the main Steam Link menu, press or click the "Start Playing" button.
I don't have a picture of this menu on my projector, but if you've set a pin under your computer's Steam settings, you will need to input it like below.
Steam's Big Picture has now launched on my projector.
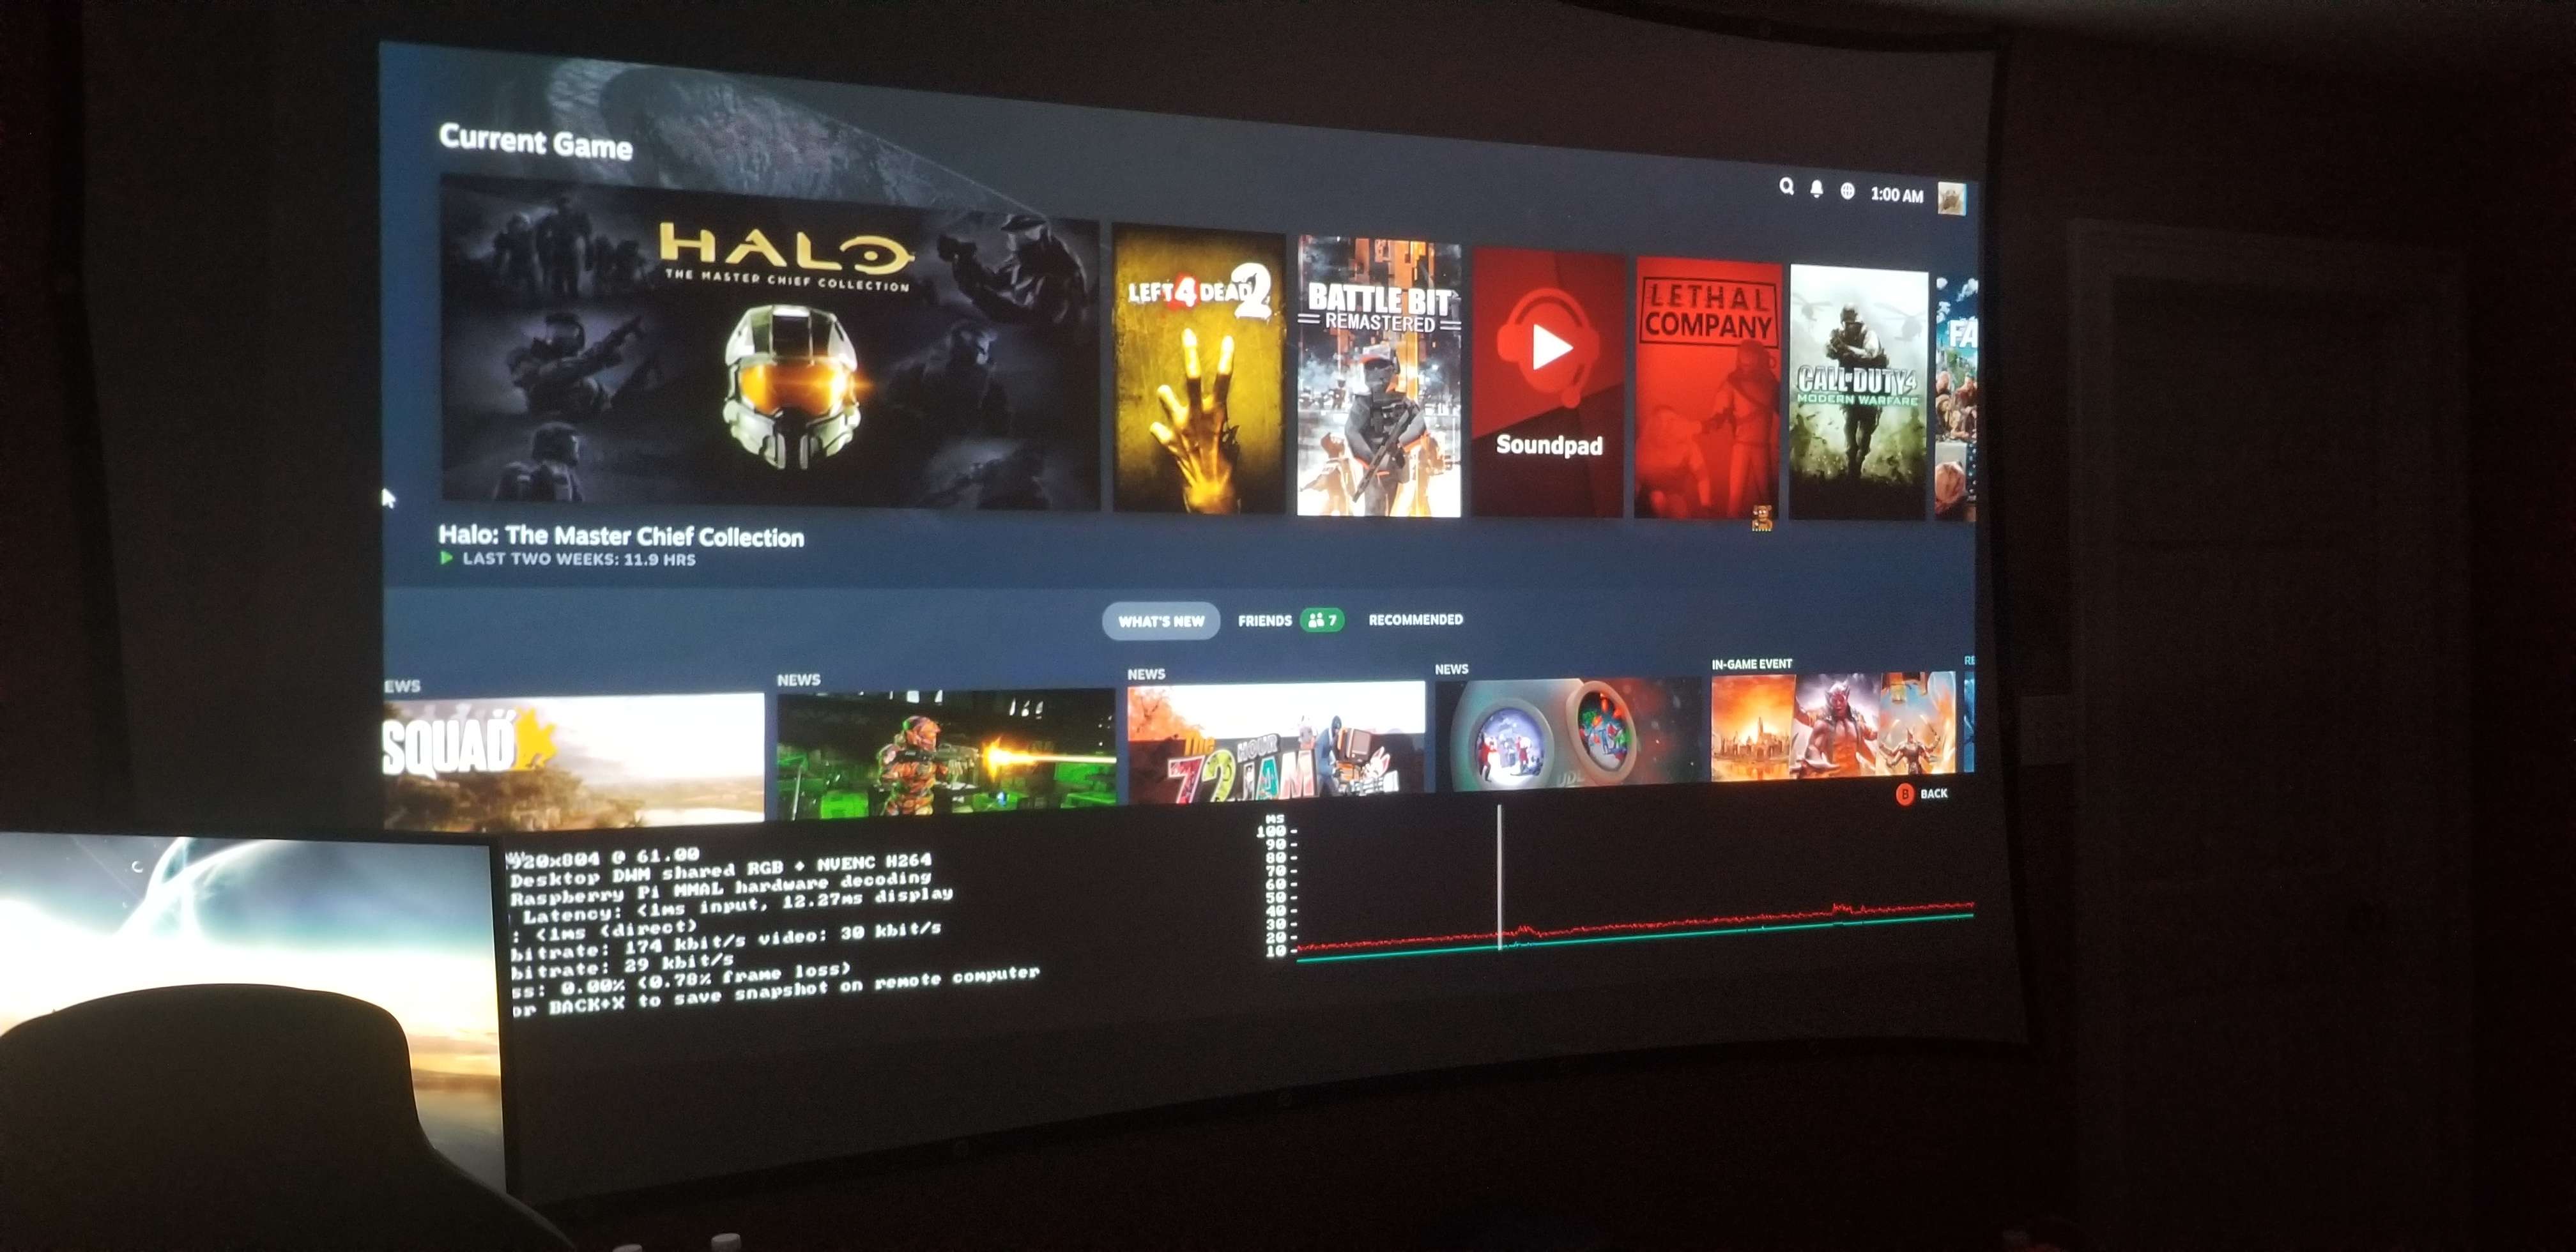
Now, let's play some Halo!
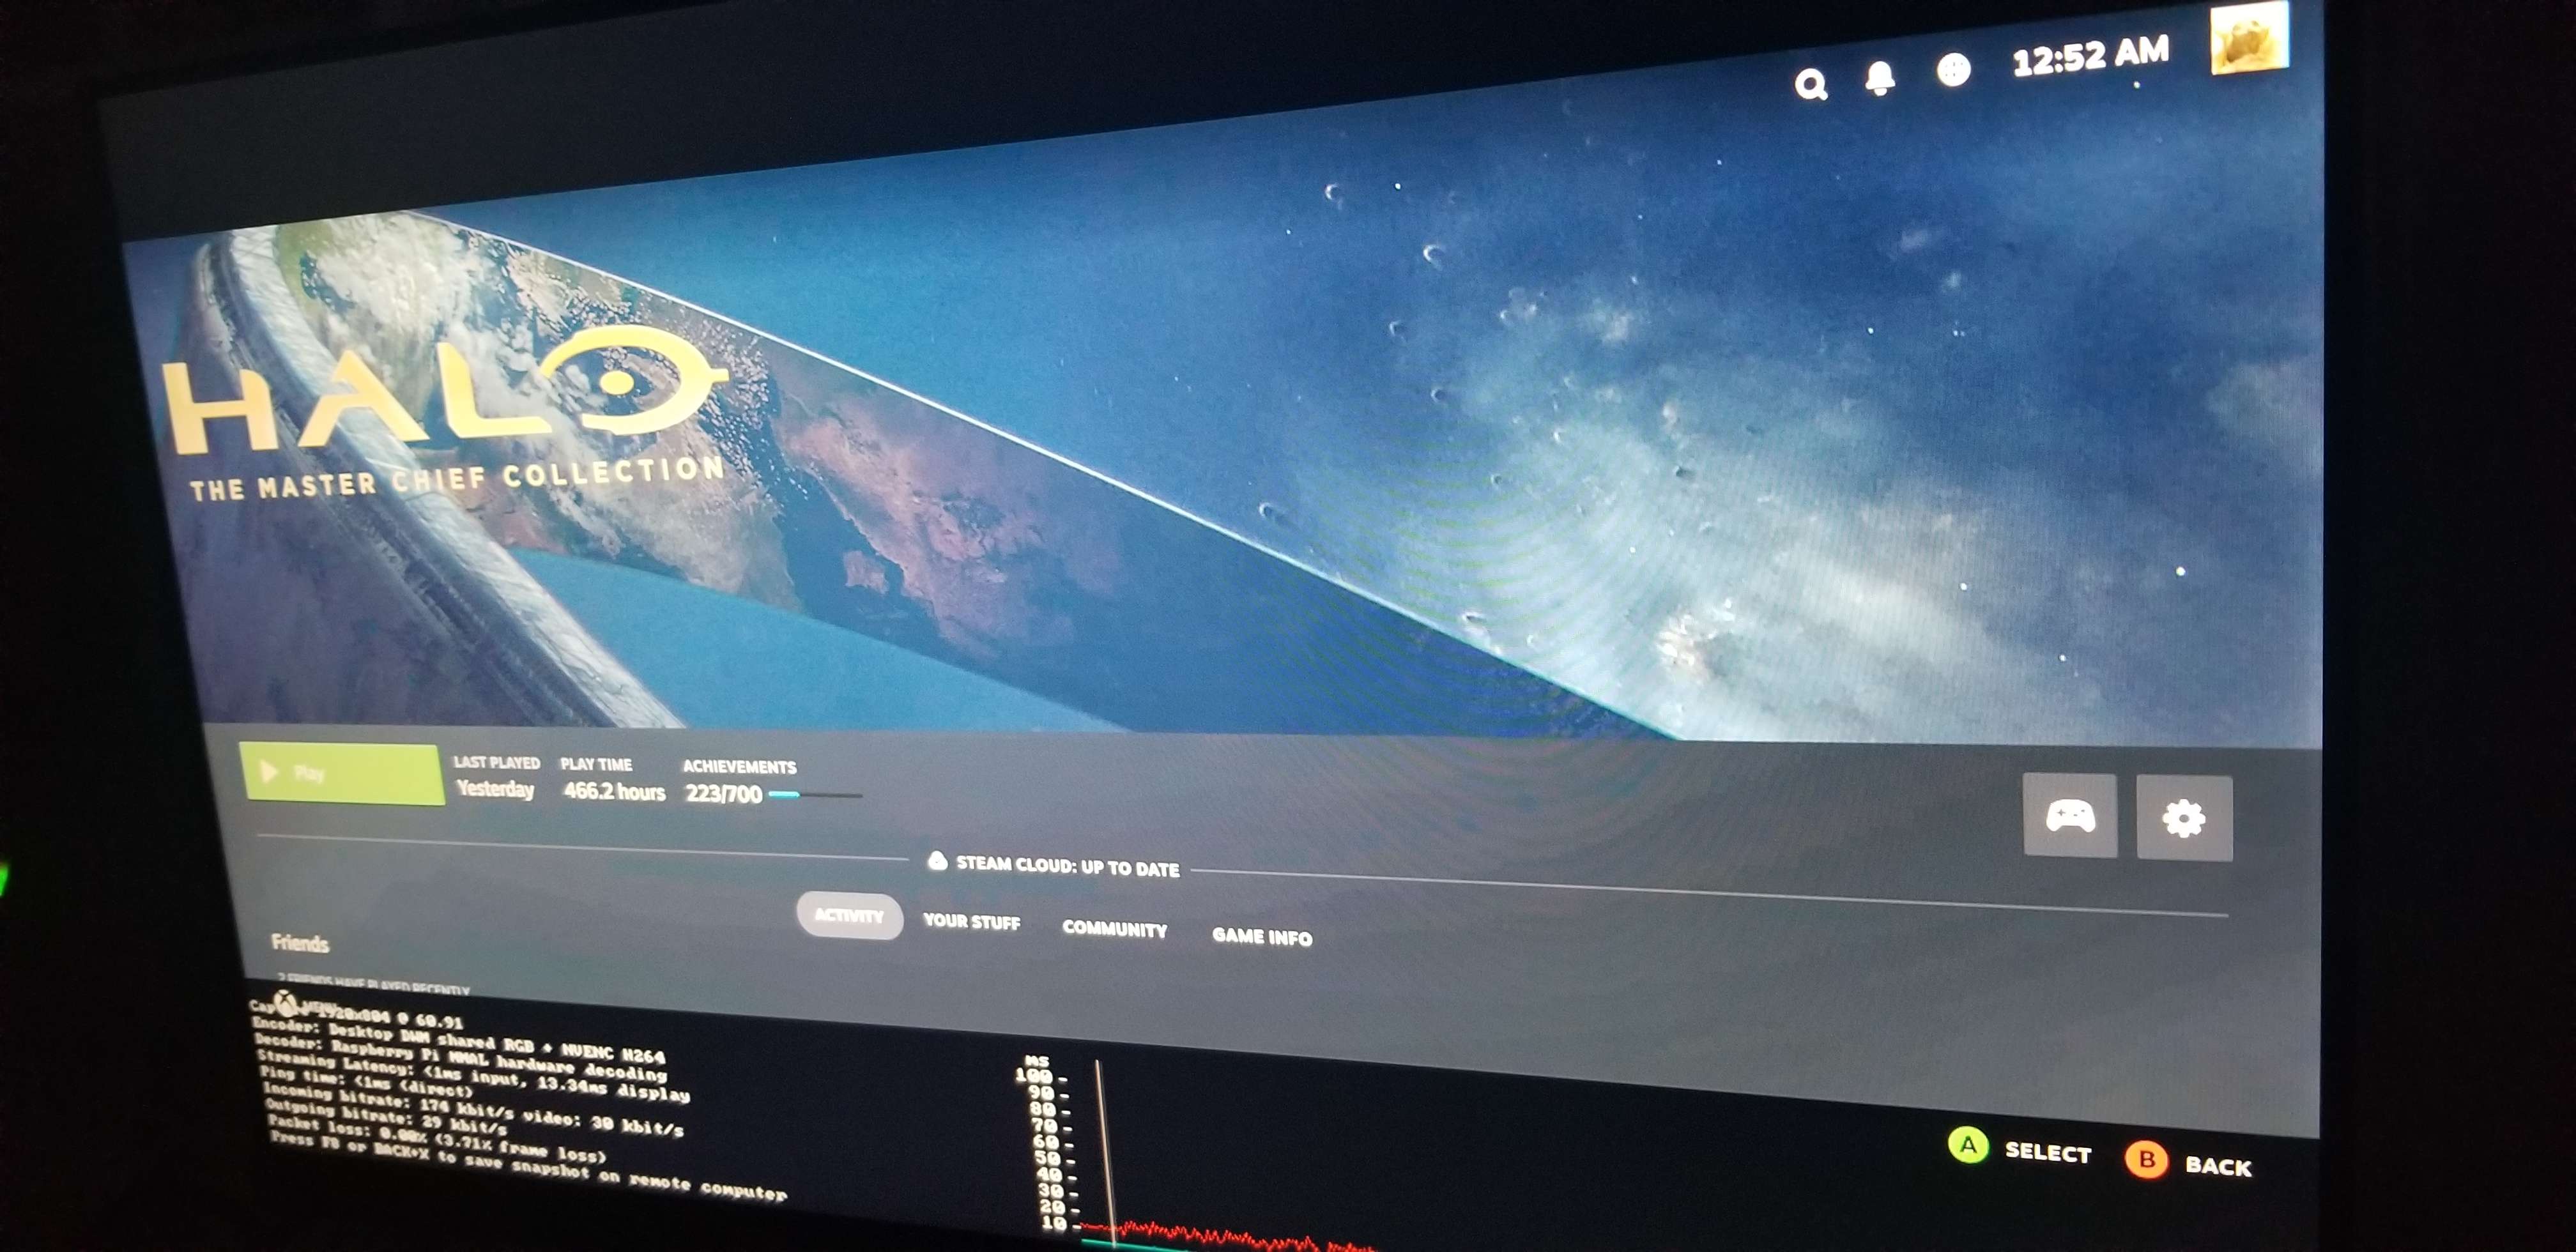
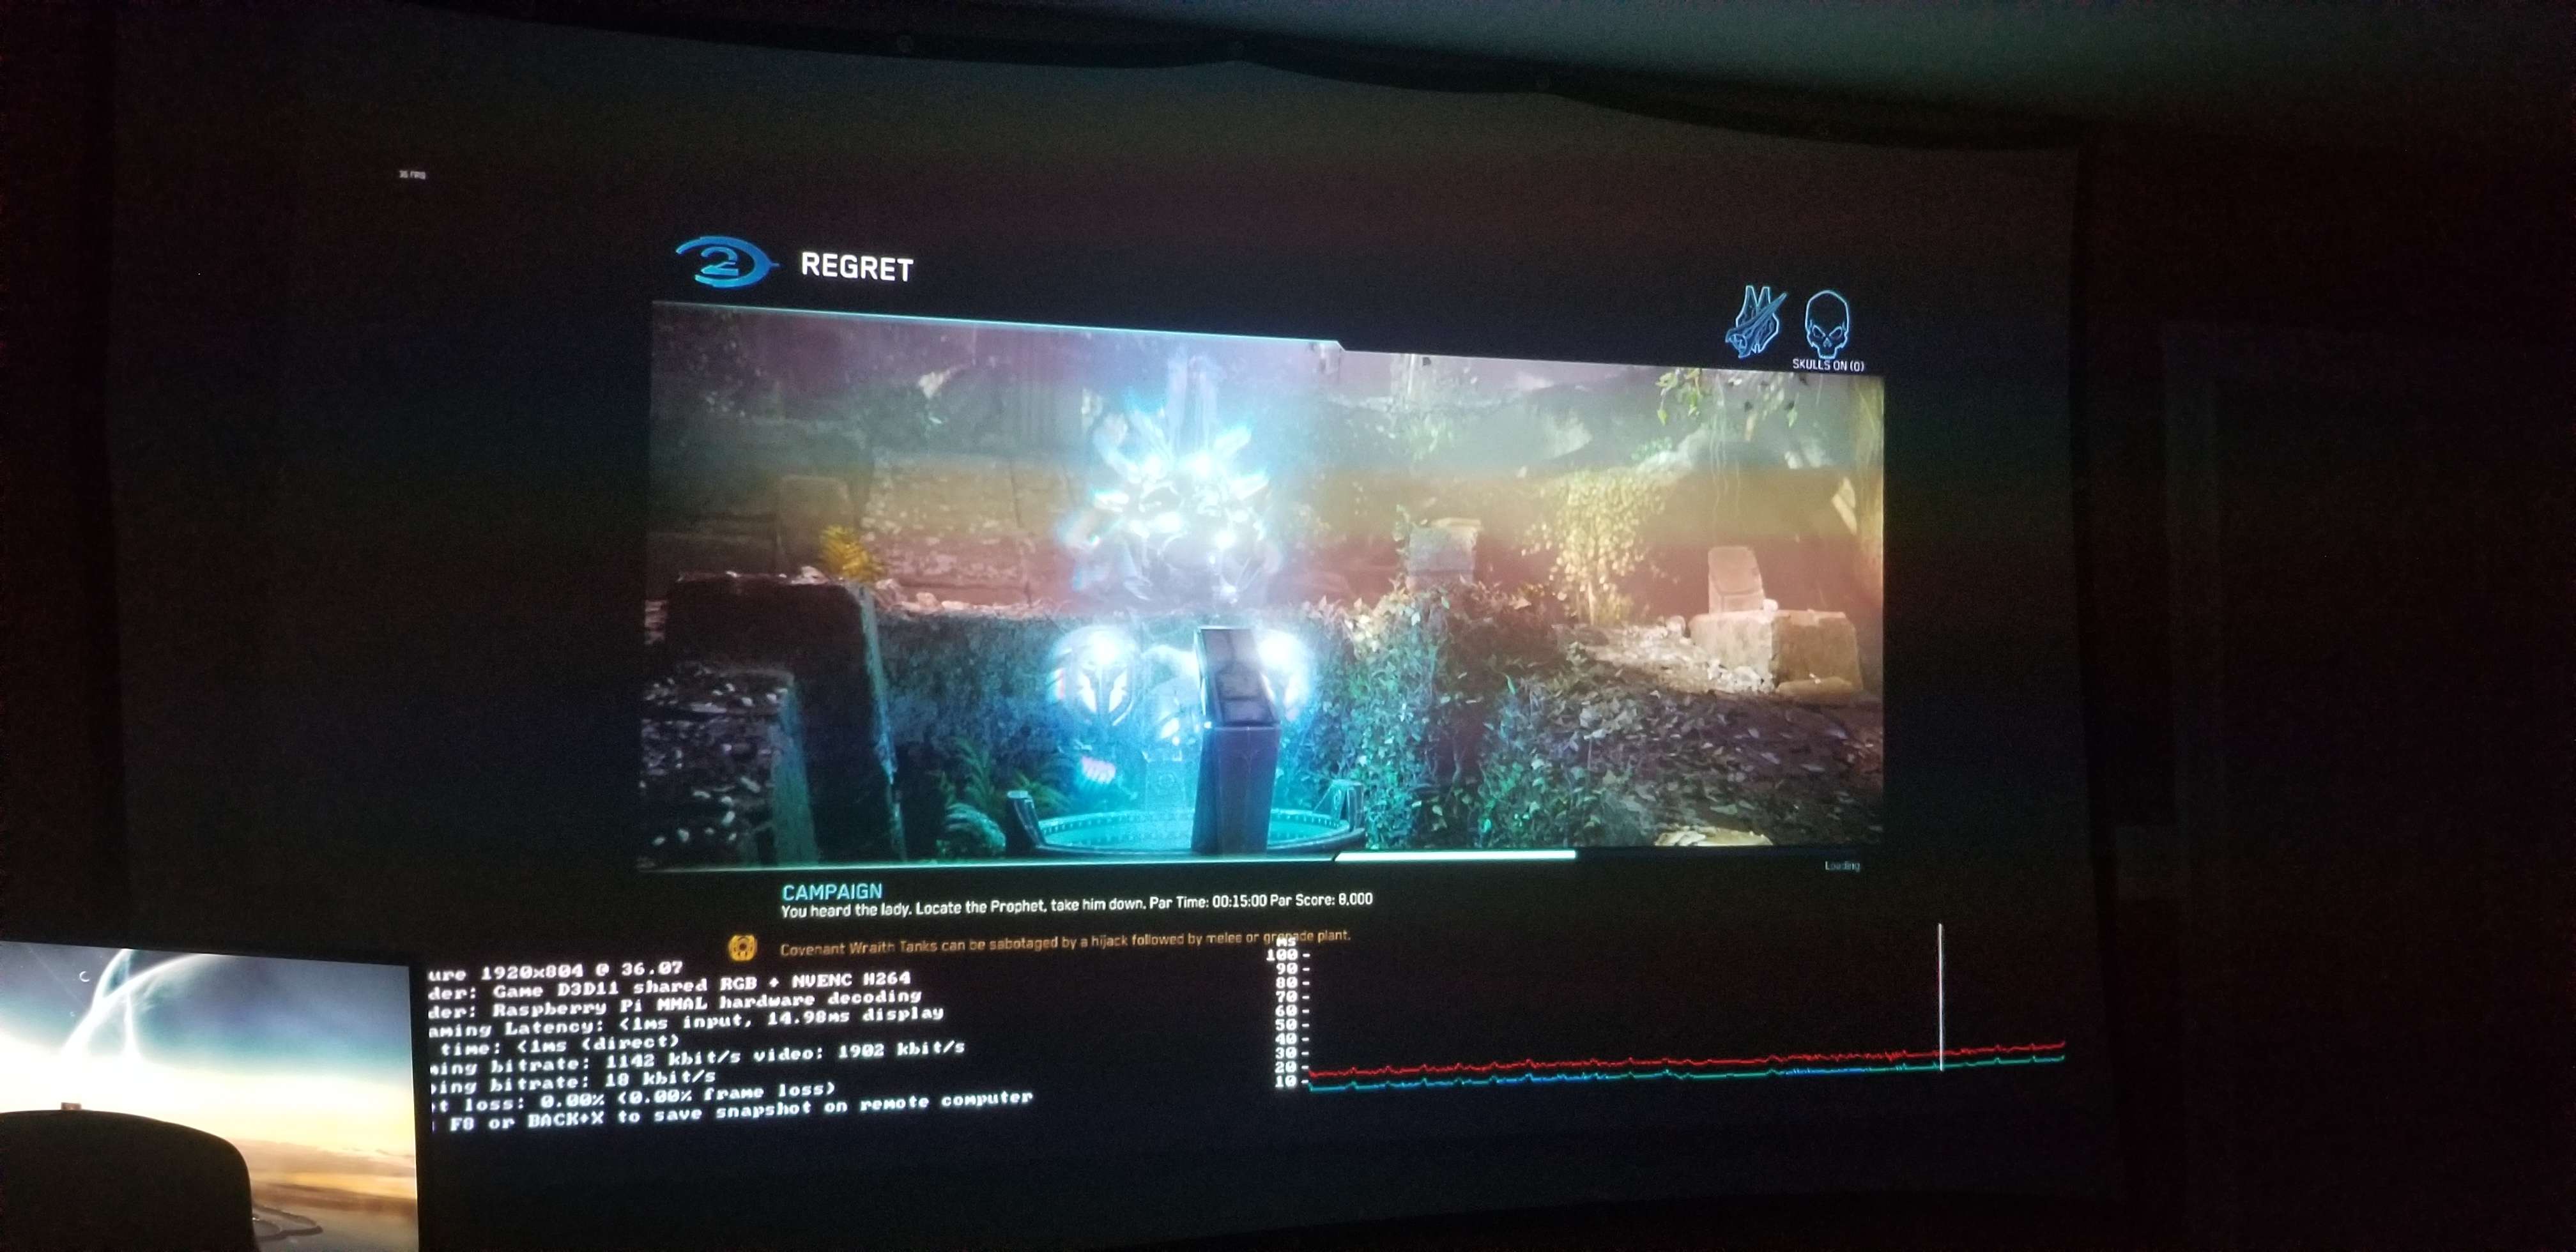
We are now streaming Halo 2 at 1080P@120Hz with around 14ms - 18ms display latency and <2% frame loss. This is pretty decent from the gameplay I've had!
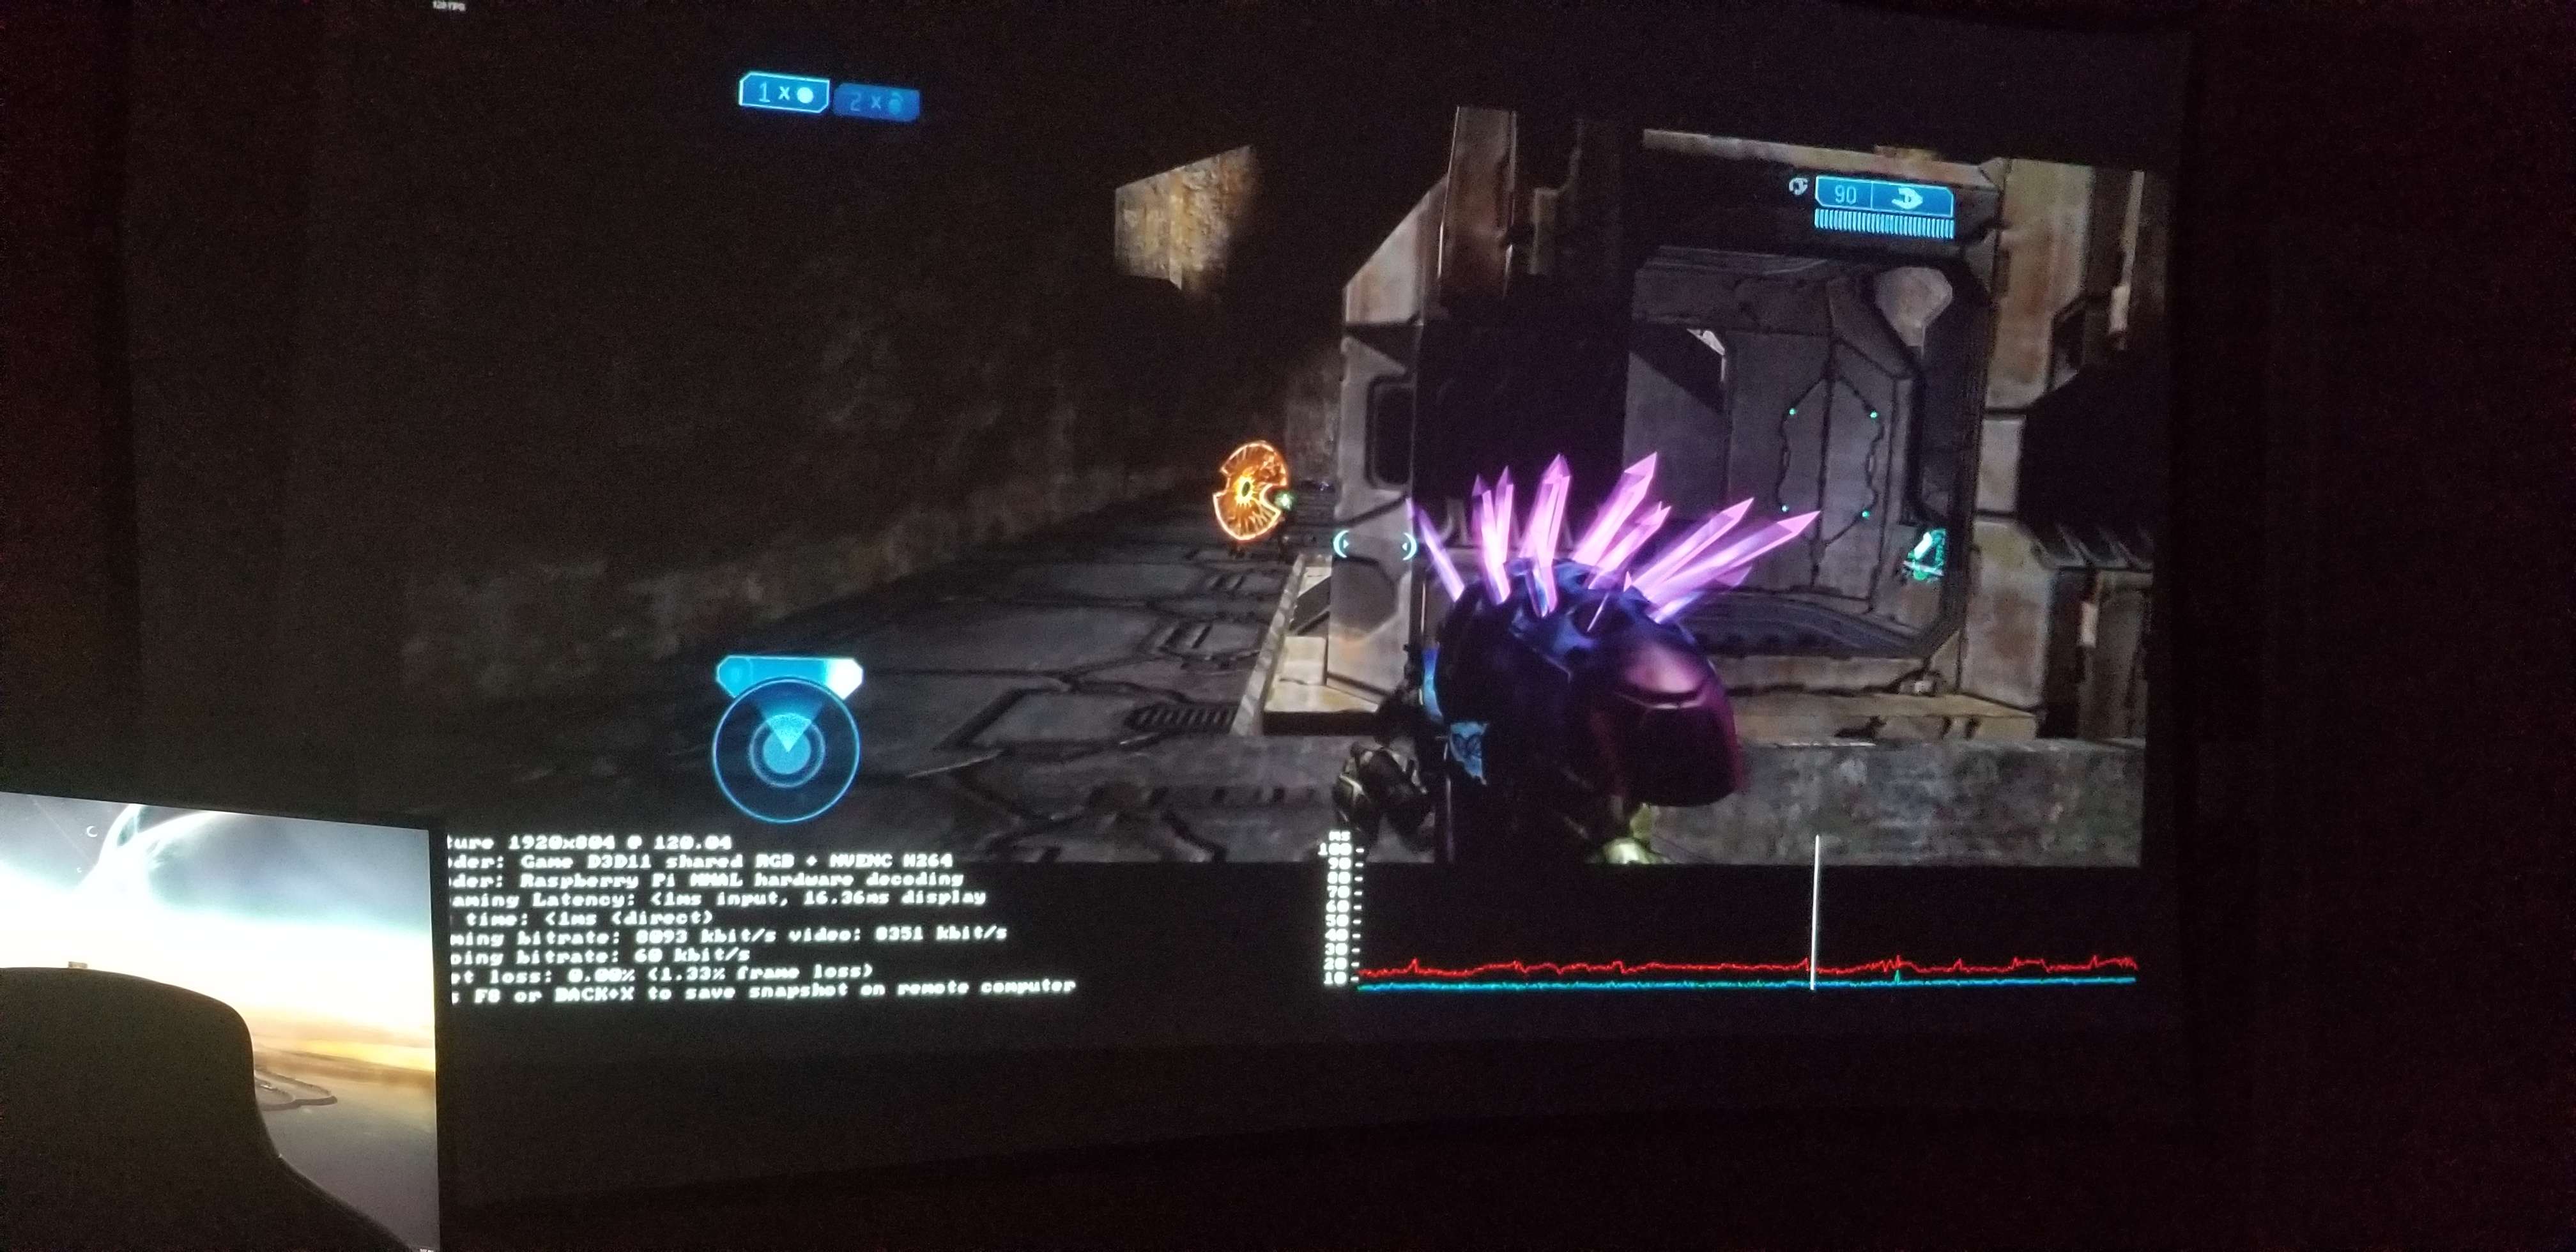
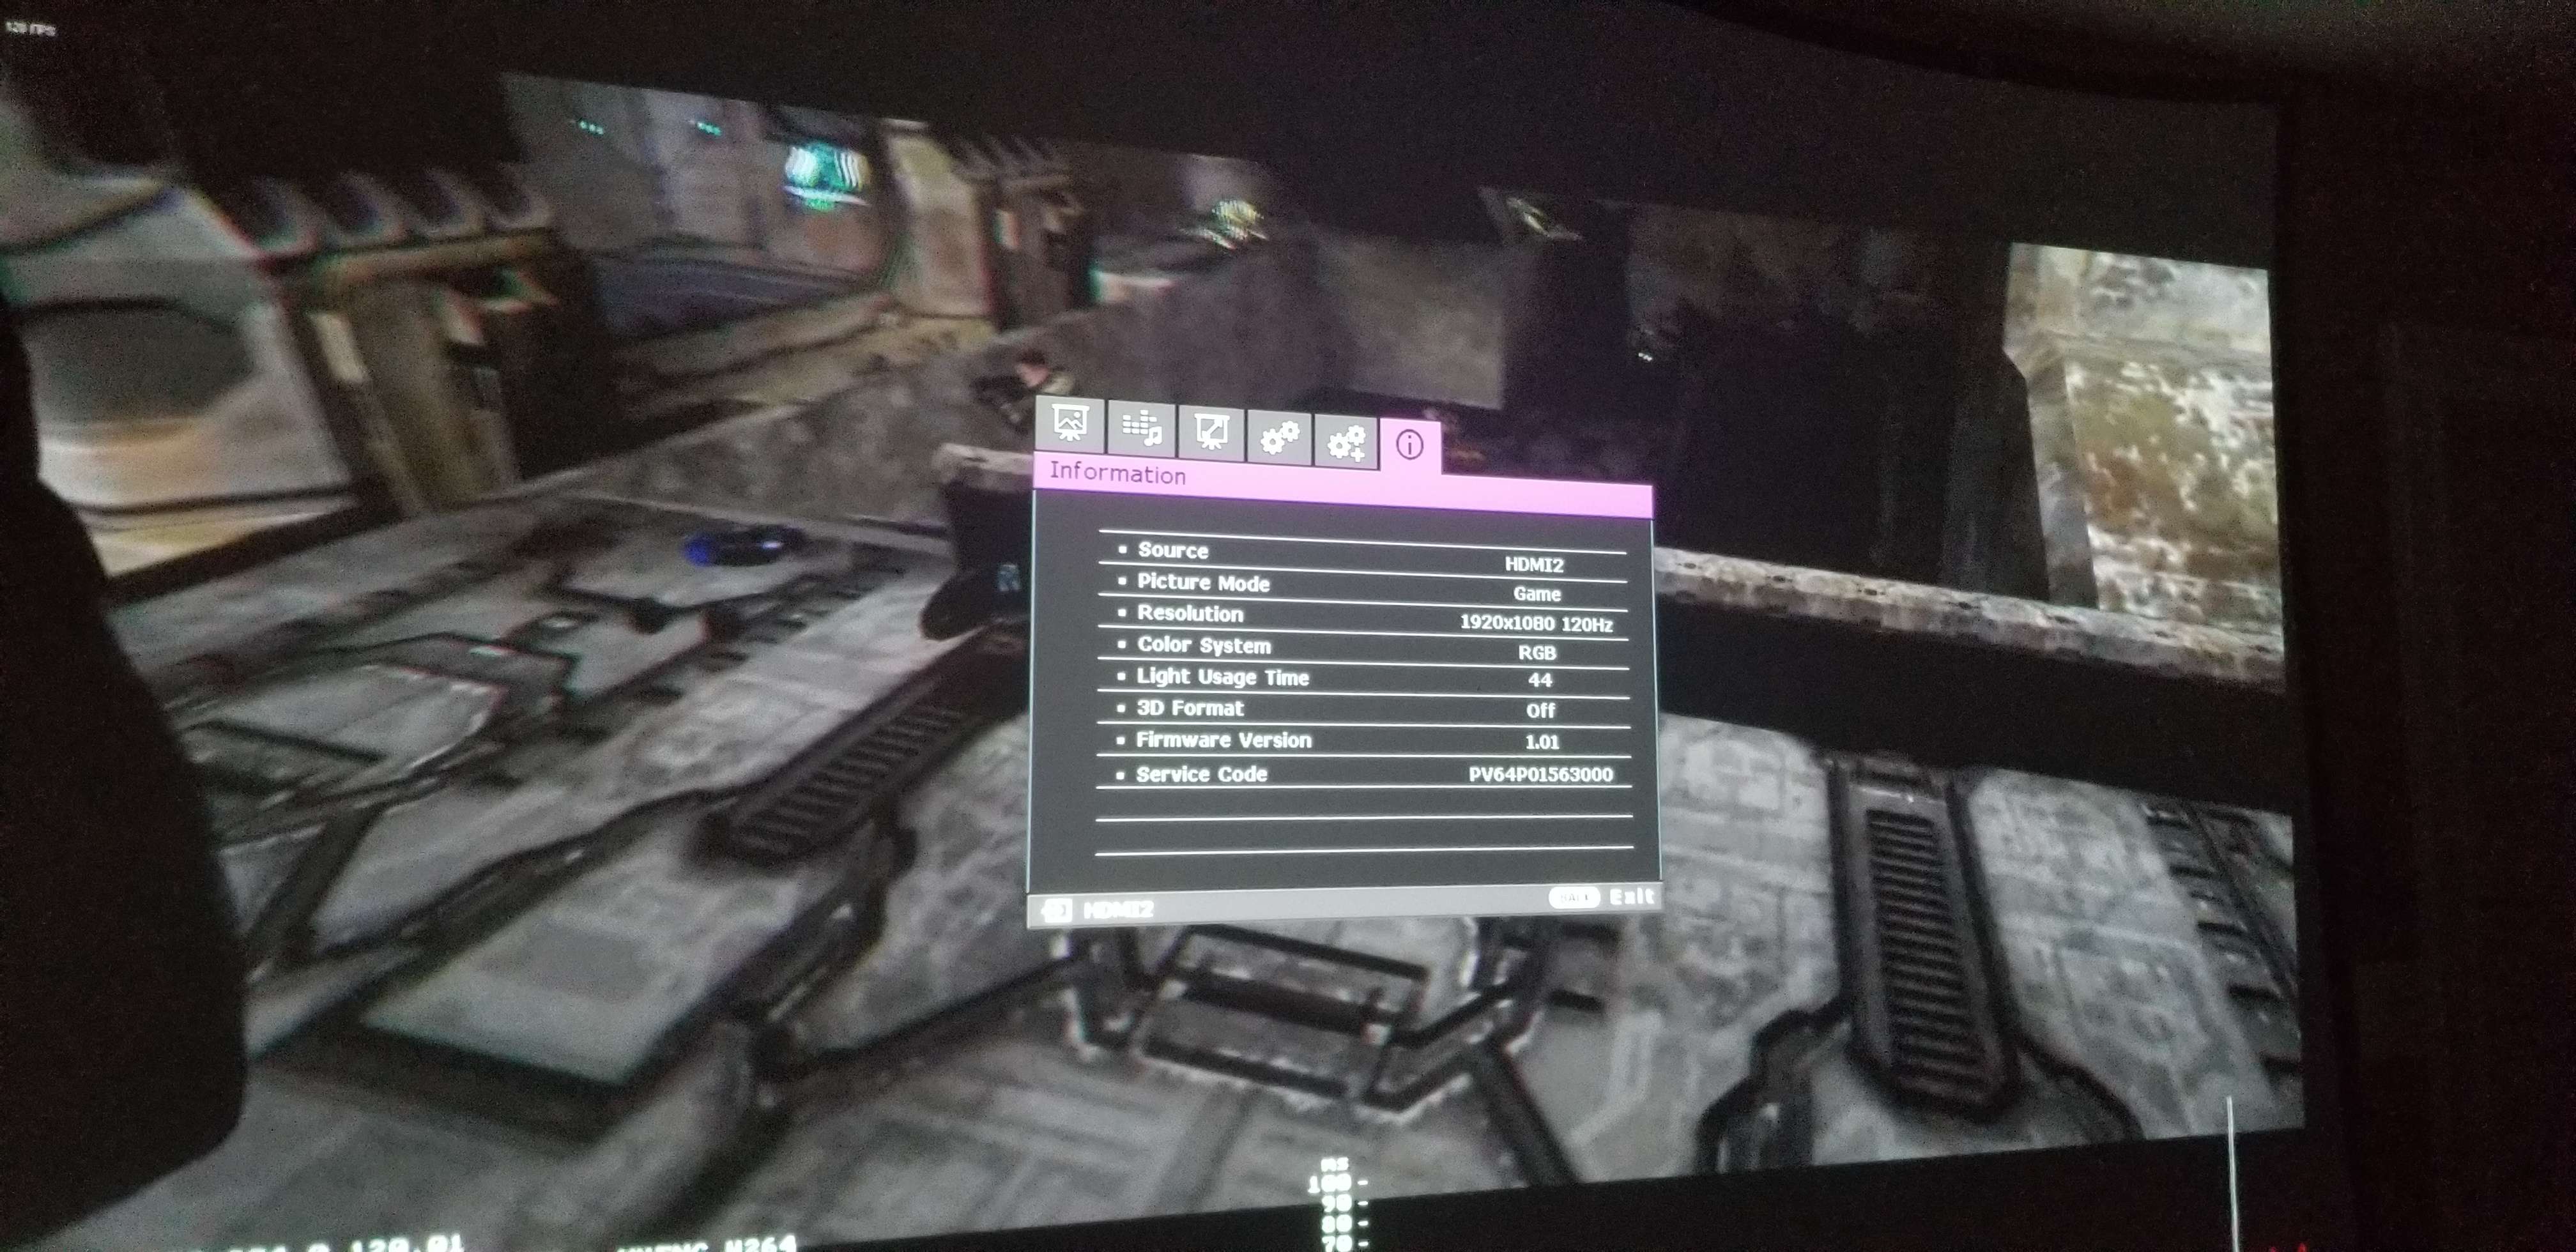
Here is the projector's display information showing us the projector is running at 1080P@120Hz.
Ultimately, I really hope this guide helps others out there who are going through the same struggles I've gone through while trying to setup Steam Link on Raspberry Pi devices. This also confirms Raspberry Pi 4's hardware is capable of streaming above 60FPS comfortably.
While I wouldn't recommend streaming competitive games due to the additional latency added through Steam Link and your network, I still think it works great for singleplayer games!
If you have any questions or see ways to improve this guide, please contact me on Deaconn's Discord server here!
If you aren't having any success with Steam Link, you could try alternatives listed below!
I will continue adding to this list as I discover more game streaming software.
Here are the outputs of commands showing more information on the Raspberry Pi device I have running Steam Link smoothfully at 1080P@120Hz.
# Kernel
pi@raspberrypi:~ $ sudo uname -r
5.10.103-v7l+
pi@raspberrypi:~ $ sudo uname -a
Linux raspberrypi 5.10.103-v7l+ #1529 SMP Tue Mar 8 12:24:00 GMT 2022 armv7l GNU/Linux

# Release
pi@raspberrypi:~ $ cat /etc/*-release
PRETTY_NAME="Raspbian GNU/Linux 10 (buster)"
NAME="Raspbian GNU/Linux"
VERSION_ID="10"
VERSION="10 (buster)"
VERSION_CODENAME=buster
ID=raspbian
ID_LIKE=debian
HOME_URL="http://www.raspbian.org/"
SUPPORT_URL="http://www.raspbian.org/RaspbianForums"
BUG_REPORT_URL="http://www.raspbian.org/RaspbianBugs"

# CPU info
pi@raspberrypi:~ $ cat /proc/cpuinfo
processor       : 0
model name      : ARMv7 Processor rev 3 (v7l)
BogoMIPS        : 108.00
Features        : half thumb fastmult vfp edsp neon vfpv3 tls vfpv4 idiva idivt vfpd32 lpae evtstrm crc32
CPU implementer : 0x41
CPU architecture: 7
CPU variant     : 0x0
CPU part        : 0xd08
CPU revision    : 3

processor       : 1
model name      : ARMv7 Processor rev 3 (v7l)
BogoMIPS        : 108.00
Features        : half thumb fastmult vfp edsp neon vfpv3 tls vfpv4 idiva idivt vfpd32 lpae evtstrm crc32
CPU implementer : 0x41
CPU architecture: 7
CPU variant     : 0x0
CPU part        : 0xd08
CPU revision    : 3

processor       : 2
model name      : ARMv7 Processor rev 3 (v7l)
BogoMIPS        : 108.00
Features        : half thumb fastmult vfp edsp neon vfpv3 tls vfpv4 idiva idivt vfpd32 lpae evtstrm crc32
CPU implementer : 0x41
CPU architecture: 7
CPU variant     : 0x0
CPU part        : 0xd08
CPU revision    : 3

processor       : 3
model name      : ARMv7 Processor rev 3 (v7l)
BogoMIPS        : 108.00
Features        : half thumb fastmult vfp edsp neon vfpv3 tls vfpv4 idiva idivt vfpd32 lpae evtstrm crc32
CPU implementer : 0x41
CPU architecture: 7
CPU variant     : 0x0
CPU part        : 0xd08
CPU revision    : 3

Hardware        : BCM2711
Revision        : c03115
Serial          : 10000000b02fe8cf
Model           : Raspberry Pi 4 Model B Rev 1.5

# Memory info
pi@raspberrypi:~ $ cat /proc/meminfo
MemTotal:        3748168 kB
MemFree:         3258348 kB
MemAvailable:    3372512 kB
Buffers:           16820 kB
Cached:           248116 kB
SwapCached:            0 kB
Active:           104912 kB
Inactive:         197116 kB
Active(anon):        432 kB
Inactive(anon):    79044 kB
Active(file):     104480 kB
Inactive(file):   118072 kB
Unevictable:       33736 kB
Mlocked:              16 kB
HighTotal:       3080192 kB
HighFree:        2749820 kB
LowTotal:         667976 kB
LowFree:          508528 kB
SwapTotal:        102396 kB
SwapFree:         102396 kB
Dirty:                36 kB
Writeback:             0 kB
AnonPages:         70828 kB
Mapped:           105500 kB
Shmem:             42384 kB
KReclaimable:      13004 kB
Slab:              28156 kB
SReclaimable:      13004 kB
SUnreclaim:        15152 kB
KernelStack:        1160 kB
PageTables:         1864 kB
NFS_Unstable:          0 kB
Bounce:                0 kB
WritebackTmp:          0 kB
CommitLimit:     1976480 kB
Committed_AS:     308604 kB
VmallocTotal:     245760 kB
VmallocUsed:        5380 kB
VmallocChunk:          0 kB
Percpu:              528 kB
CmaTotal:         327680 kB
CmaFree:          216452 kB

# Partition info
pi@raspberrypi:~ $ cat /proc/partitions
major minor  #blocks  name

   1        0       4096 ram0
   1        1       4096 ram1
   1        2       4096 ram2
   1        3       4096 ram3
   1        4       4096 ram4
   1        5       4096 ram5
   1        6       4096 ram6
   1        7       4096 ram7
   1        8       4096 ram8
   1        9       4096 ram9
   1       10       4096 ram10
   1       11       4096 ram11
   1       12       4096 ram12
   1       13       4096 ram13
   1       14       4096 ram14
   1       15       4096 ram15
 179        0  124835328 mmcblk0
 179        1     262144 mmcblk0p1
 179        2  124569088 mmcblk0p2

# Version info
pi@raspberrypi:~ $ cat /proc/version
Linux version 5.10.103-v7l+ (dom@buildbot) (arm-linux-gnueabihf-gcc-8 (Ubuntu/Linaro 8.4.0-3ubuntu1) 8.4.0, GNU ld (GNU Binutils for Ubuntu) 2.34) #1529 SMP Tue Mar 8 12:24:00 GMT 2022

# USB info
pi@raspberrypi:~ $ sudo lsusb
Bus 002 Device 001: ID 1d6b:0003 Linux Foundation 3.0 root hub
Bus 001 Device 002: ID 2109:3431 VIA Labs, Inc. Hub
Bus 001 Device 001: ID 1d6b:0002 Linux Foundation 2.0 root hub

# PCI info
pi@raspberrypi:~ $ sudo lspci
00:00.0 PCI bridge: Broadcom Limited Device 2711 (rev 20)
01:00.0 USB controller: VIA Technologies, Inc. VL805 USB 3.0 Host Controller (rev 01)

# Bluetooth version
[bluetooth]# version
Version 5.50