![]()

A Fully Async-based backend for Brave Chat. It is a multi-model server that is fully functional and supports all the usual messaging app capabilities, such as one-on-one (private) and room messaging. It enables users to send text and multimedia messages(e.g. images). Also, users can freely create, join, and leave chat rooms where everyone can message each other.
- Features
- SingleStoreDB Integration
- Development Requirements
- Project Structure
- Installation with Make
- 1. Create a virtualenv
- 2. Activate the virtualenv
- 3. Install dependencies
- 4. Setup a SingleStore account
- 5. Set your SingleStore Credentials
- 6. Setup a Redis account
- 7. Set your Redis Cloud Credentials
- 8. Create a Deta account
- 9. Set your Deta project key
- 10. Generate a secret key
- 11. Run The Project Locally
- Running locally with Compose v2
- Access Swagger Documentation
- Access Redocs Documentation
- Access Prometheus Metrics
- Access Grafana Dashboard
- Access The Client
- Cloud Deployments
- Core Dependencies
- TODO and Contributions
- License
This project supports the following features:
- Multi-model Database.
- Highly scalable architecture.
- Create, join, and leave rooms.
- Full-text search on a contacts list.
- Changing user profile information.
- Add, and remove users to/from a contacts list.
- Sending and Receiving images in real-time.
- Sending and Receiving text messages in real-time.
- Unicast messaging (e.g. Sending private messages).
- A pub/sub Redis architecture built on top of web sockets.
- Broadcast messaging (e.g. Sending messages in a chat room).
- A Monolith architecture, but its modularity allows it to be divided into microservices.
- Full control over your messages with the ability to create, delete and edit them as you please.

This project uses a multi-model relational database to store information about users. Each record in every data table can be considered a time series record, especially the messages table given the rate of read and write access, given a creation date and update date for each record.
In addition, a basic text search is being implemented to populate the chat list view and the room list view. The contact list view supports full-text search on a user's first name, last name, and email address.
You can refer to the official documentation for more information about the database and the architecture.
- Make (GNU command)
- Python (>= 3.9)
- Poetry (1.2)
❯ tree app
.
├── auth     # Package contains different config files for the `auth` app.
│   ├── crud.py     # Module contains different CRUD operations performed on the database.
│   ├── models.py     # Module contains different data models for ORM to interact with database.
│   ├── router.py     # Module contains different routes for this api.
│   └── schemas.py     # Module contains different schemas for this api for validation purposes.
├── chats     # Package contains different config files for the `chats` app.
│   ├── crud.py     # Module contains different CRUD operations performed on the database.
│   ├── models.py     # Module contains different data models for ORM to interact with database.
│   ├── router.py     # Module contains different routes for this api.
│   └── schemas.py     # Module contains different schemas for this api for validation purposes.
├── config.py     # Module contains the main configuration settings for project.
├── contacts     # Package contains different config files for the `contacts` app.
│   ├── crud.py     # Module contains different CRUD operations performed on the database.
│   ├── models.py     # Module contains different data models for ORM to interact with the database.
│   ├── router.py     # Module contains different routes for this api.
│   └── schemas.py     # Module contains different schemas for this api for validation purposes.
├── __init__.py
├── main.py     # Startup script. Starts uvicorn.
├── rooms     # Package contains different config files for the `rooms` app.
│   ├── crud.py     # Module contains different CRUD operations performed on the database.
│   ├── models.py     # Module contains different models for ORMs to inteact with database..
│   ├── router.py     # Module contains different routes for this api.
│   └── schemas.py     # Module contains different schemas for this api for validation purposes.
├── users     # Package contains different config files for the `users` app.
│   ├── crud.py     # Module contains different CRUD operations performed on the database.
│   ├── models.py     # Module contains different models for ORMs to inteact with database..
│   ├── router.py     # Module contains different routes for this api.
│   └── schemas.py     # Module contains different schemas for this api for validation purposes.
├── utils     # Package contains different common utility modules for the whole project.
│   ├── constants.py
│   ├── crypt_util.py
│   ├── db_utils.py     # A utility script that create, drop a test database used in the tests package.
│   ├── dependencies.py     # A utility script that yield a session for each request to make the crud call work.
│   ├── engine.py     # A utility script that initialize two sqlalchemy engines and set them as app state variables.
│   ├── full_text_search.py     # A utility script to make sqlalchemy and singlestore compatible for implementing full text search on a given table.
│   ├── jwt_util.py     # A utility script for JWT.
│   ├── mixins.py     # A utility script that contains common mixins for different models.
│   └── pub_sub_handlers.py     # A utility script that contains publishers and consumers handlers for the redis queue.
└── web_sockets     # Package contains different config files for the `web_sockets` app.
└── router.py # Module contains different routes for the websockets.The best way to configure, install main dependencies, and run the project is by using make. So, ensure you have make installed and configured on your machine. If it is not the case, head over to this thread on StackOverflow to install it on windows, or this thread to install it on Mac OS.
Having make installed and configured on your machine, you can now run make under the root directory of this project to explore different available commands to run:
make

Please use 'make <target>' where <target> is one of:

venv                     Create a virtual environment
install                  Install the package and all required core dependencies
run                      Running the app locally
create-deta              Set up a new Deta Space environment
deploy-deta              Deploy the app on a Deta Micro
clean                    Remove all build, test, coverage and Python artifacts
lint                     Check style with pre-commit
test                     Run tests quickly with pytest
test-all                 Run tests on every Python version with tox
coverage                 Check code coverage quickly with the default Python
build                    Build docker containers services
up                       Spin up the containers
down Stop all running containersmake venvsource .venv/bin/activatemake installNote: This command will automatically generate a .env file from .env.example, uninstall the old version of poetry on your machine, then install latest version 1.2.2, and install the required main dependencies.
You can refer to this tutorial to create a SingleStore account and a MySQL chat database.
Fill in the following environment variables in your .env file accordingly:
# Database
SINGLESTORE_USERNAME=admin
SINGLESTORE_PASSWORD=<database password>
SINGLESTORE_HOST=<database name>
SINGLESTORE_PORT=3306
SINGLESTORE_DATABASE=<database name>Create a free account on Redis Cloud.
Set the following environment variables in your .env file according to your account credentials:
# REDIS
# USER IN REDIS CLOUD
REDIS_USERNAME=default
# DATABASE PASSWORD
REDIS_PASSWORD=<database password>
# REDIS HOST
REDIS_HOST=<redis url>
# REDIS PORT
REDIS_PORT=15065- Create a Deta space, and then create a new collection.
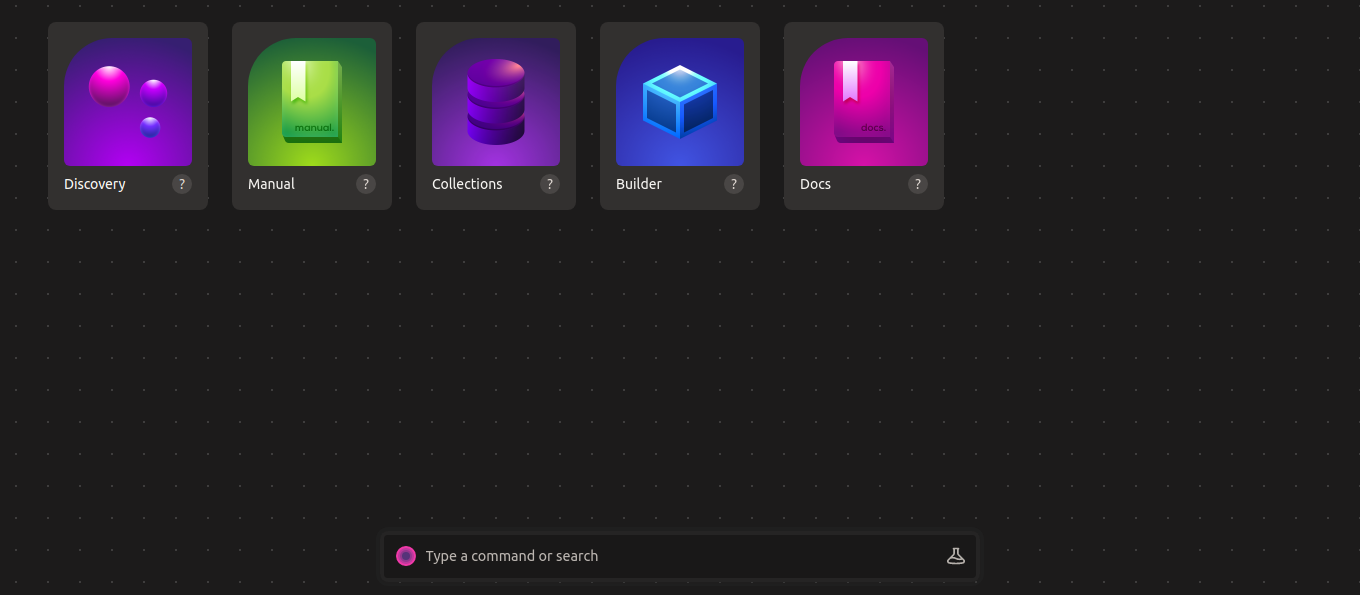

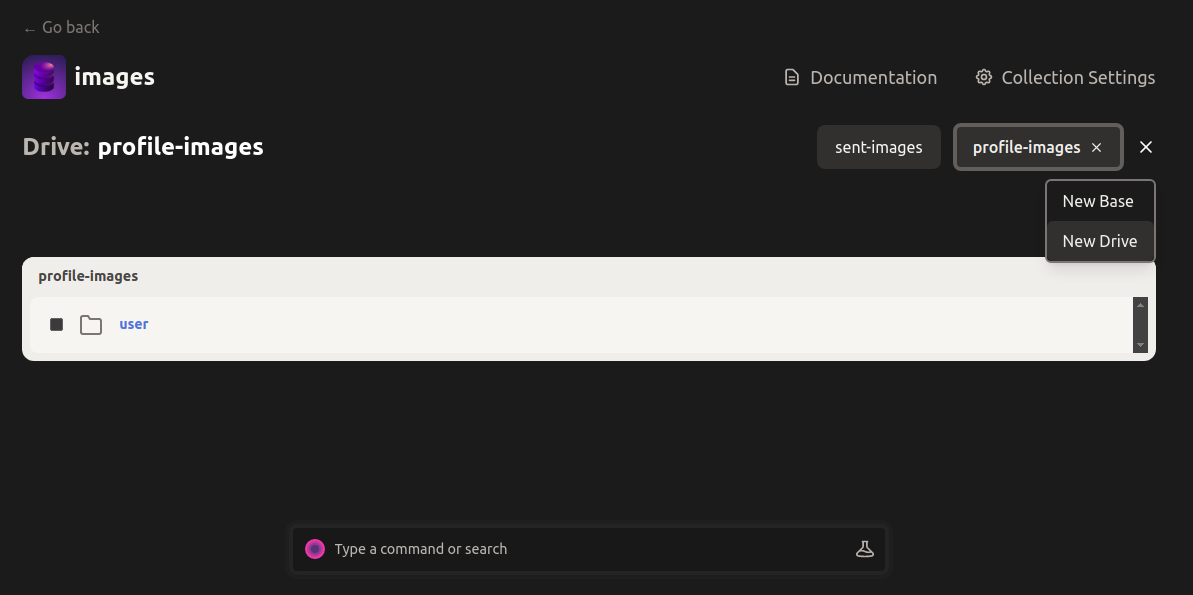
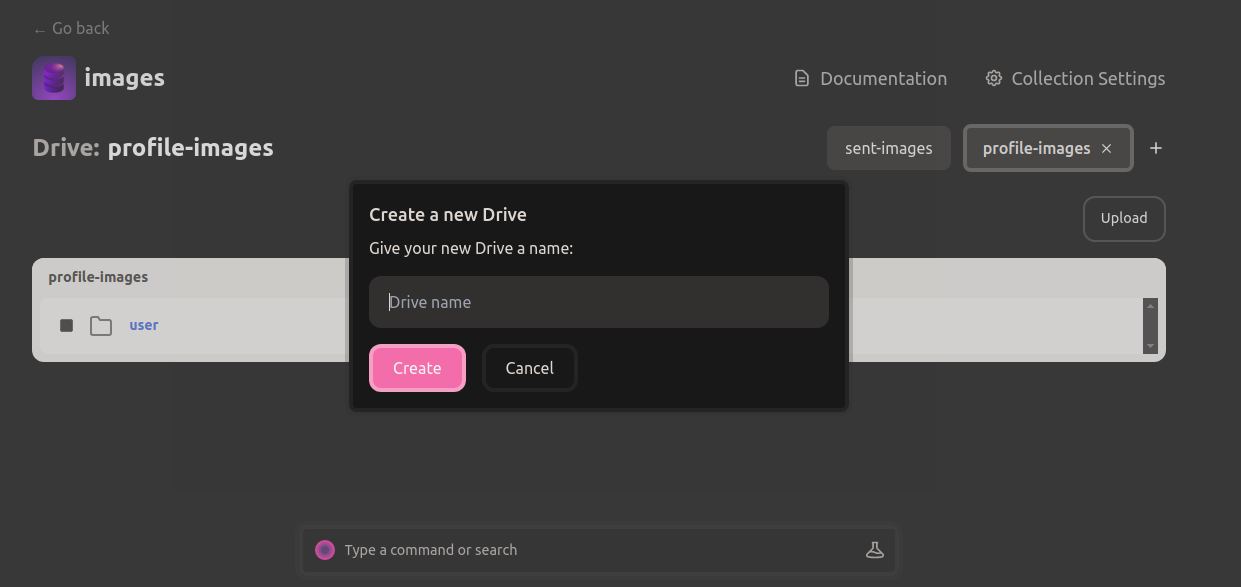
- Attach two drives, namely
sent-imagesandprofile-images, to this collection to store profile images and images sent in a conversation.
- Create a new data key and copy it for the next step:
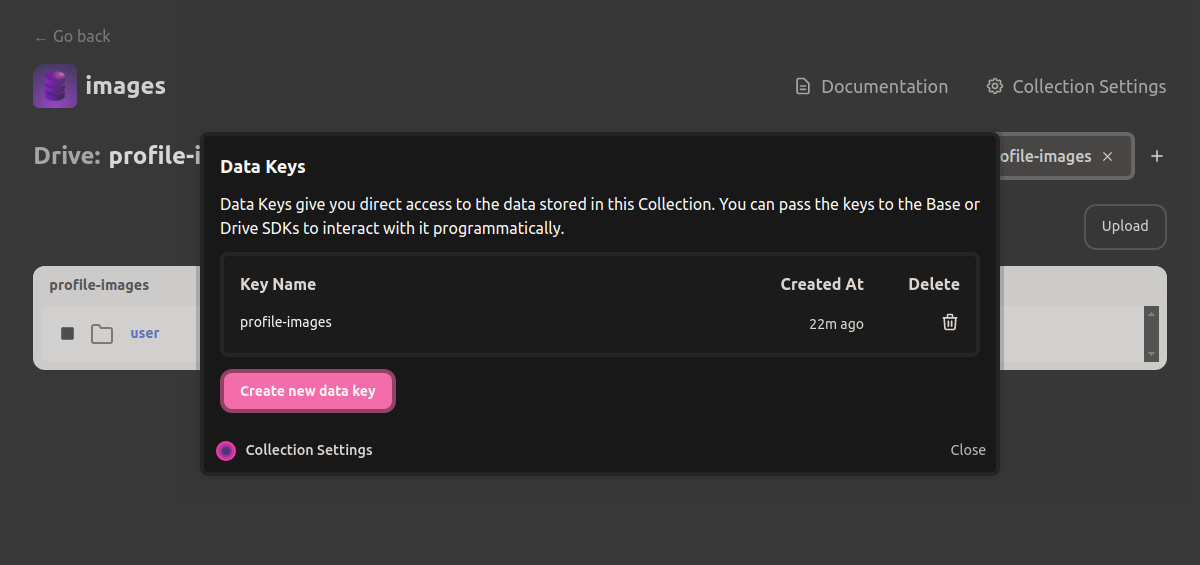
Set the following environment variable in your .env file according to your data key value:
# Deta
DETA_PROJECT_KEY=Generate a secret key using OpenSSL and update its env var in the .env file.
openssl rand -hex 128

afa1639545d53ecf83c9f8acf4704abe1382f9a9dbf76d2fd229d4795a4748712dbfe7cf1f0a812f1c0fad2d47c8343cd1017b22fc3bf43d052307137f6ba68cd2cb69748b561df846873a6257e3569d6307a7e022b82b79cb3d6e0fee00553d80913c1dcf946e2e91e1dfcbba1ed9f34c9250597c1f70f572744e91c68cbe76
# App config:
JWT_SECRET_KEY=afa1639545d53ecf83c9f8acf4704abe1382f9a9dbf76d2fd229d4795a4748712dbfe7cf1f0a812f1c0fad2d47c8343cd1017b22fc3bf43d052307137f6ba68cd2cb69748b561df846873a6257e3569d6307a7e022b82b79cb3d6e0fee00553d80913c1dcf946e2e91e1dfcbba1ed9f34c9250597c1f70f572744e91c68cbe76make runNote: You have to set DEBUG=info to access the docs.
First thing first, to run the entire platform, you have to clone the brave-chat submodule using the following command:
git submodule update --init --recursiveOnce that is done, make sure you have compose v2 installed and configured on your machine, and run the following command to build the predefined docker services(make sure you have a .env file beforehand):
Using Make
make buildor simply running:
docker compose build
Once that is done, you can spin up the containers:
Using Make
make upor running:
docker compose up
Wait until the client service becomes available:
brave-chat-server-client-1 | Starting the development server...
You can stop the running containers but issuing the following command on a separate terminal session:
make down
You'll need to create a Deta account to use the Deta version of the APIs.
Make sure you have Deta CLI installed on your machine. If it is not the case, just run the following command(on a Linux distro or Mac):
curl -fsSL https://get.deta.dev/space-cli.sh | shManually add /home/<user_name>/.detaspace/bin to your path:
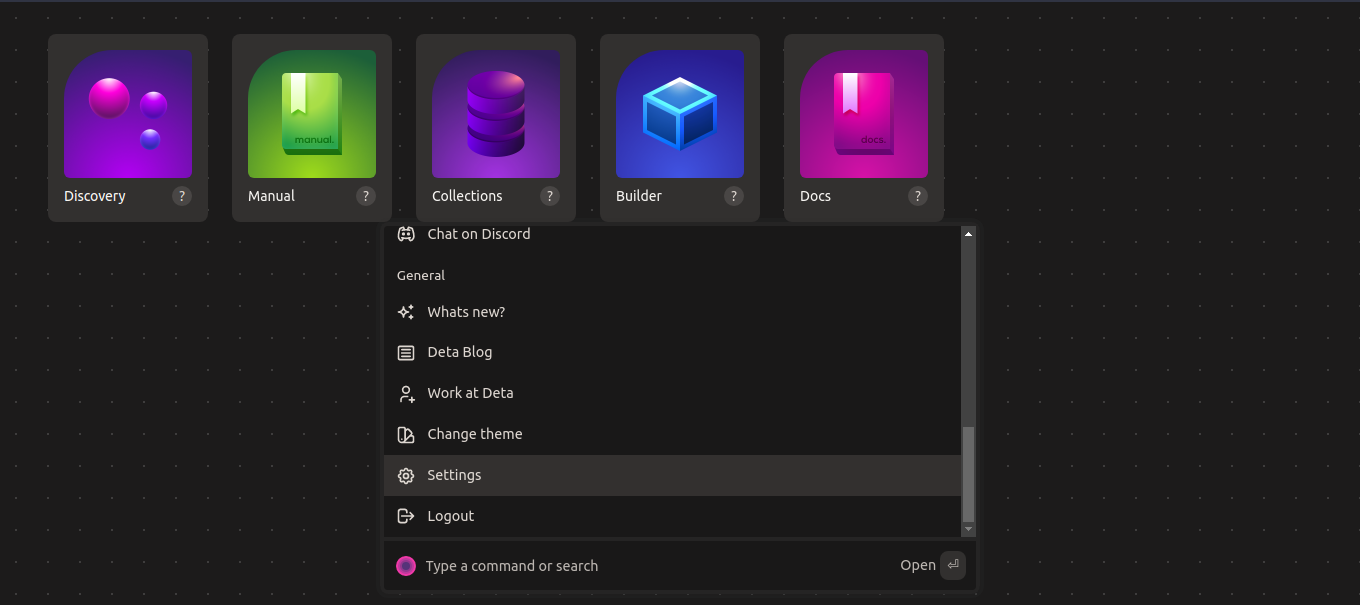
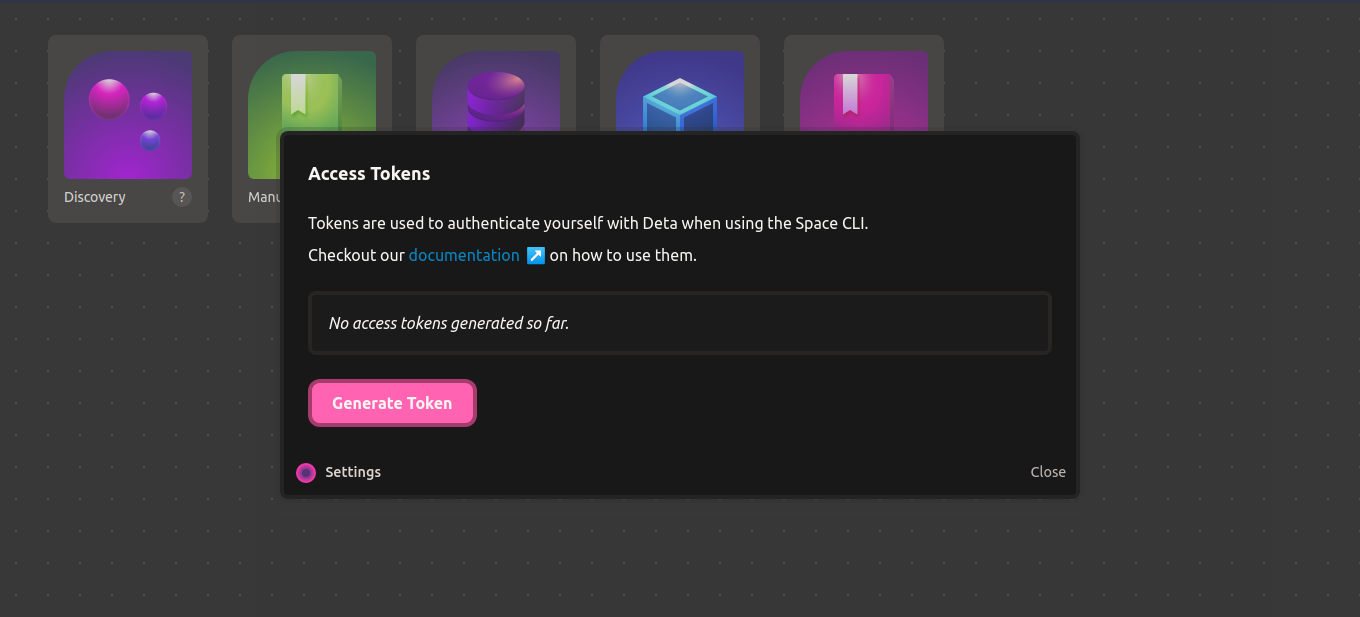
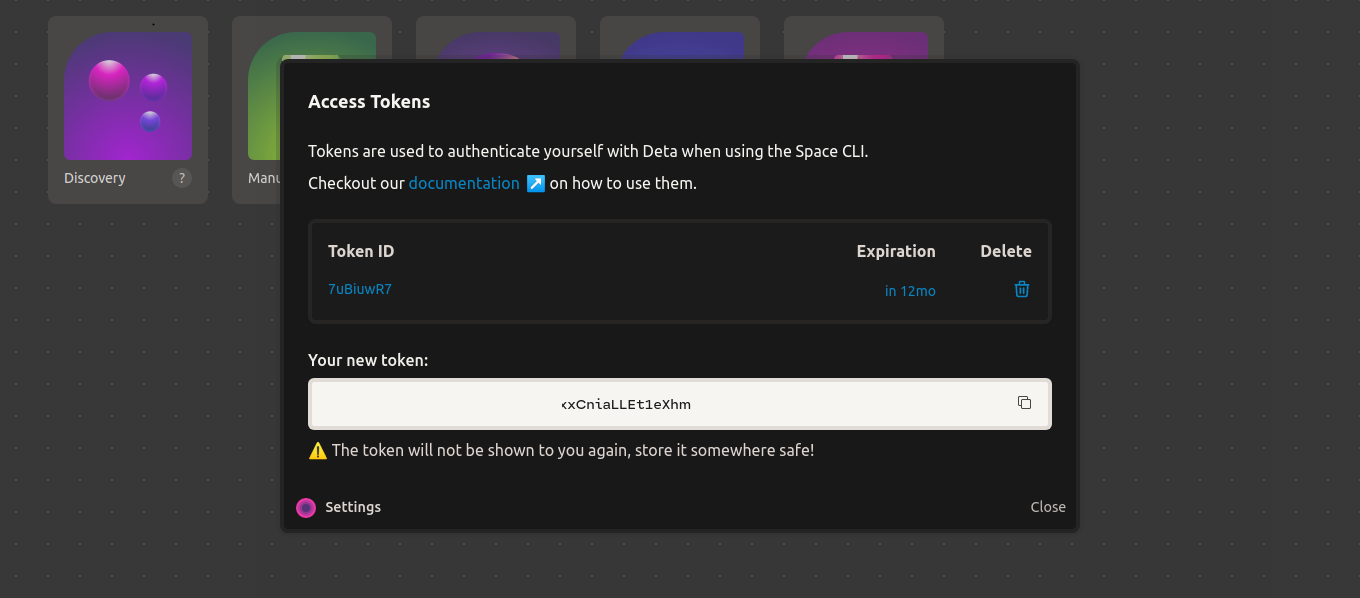
export PATH="/home/<user_name>/.detaspace/bin:$PATH"You can run the following command to set up a new Deta Space environment:
make create-detaGenerate a new access token and paste it into your terminal:
You need to append run: uvicorn main:app to the end of your Spacefile file:
sed -i '$ a \ \ \ \ run: uvicorn main:app' SpacefileNow, you can deploy it on Deta Space:
make deploy-detaYou can then use the Deta UI to check the logs and the URL the API is hosted on.
Notes:
-
Make sure your
.envfile is being provided with valid env vars values accordingly. -
The
main.pyfile is used as an entry point for Deta. The same goes forrequirements.txt.
This button will only deploy the server.

Note that this approach is not perfect because in the docker world, you should only have one service for each container, and you should use docker-compose to build and run more than two containers(e.g. one for the server and the other one for the client). However, Heroku doesn't support docker-compose with multiple services(except databases and such.). Hence running both services in one container.
To do so, ensure you have already installed and configured the Heroku CLI on your machine. If it is not the case, you can install it on Ubuntu using the following command:
sudo wget -qO- https://toolbelt.heroku.com/install-ubuntu.sh | shNow, you need to install the Heroku container registry plugin:
heroku plugins:install heroku-container-registryOnce that is completed, log in to your registry:
heroku container:loginNow, create a Heroku app:
heroku create <a unique app name>You can list all your apps to verify that your recent app has been created:
heroku appsSet your env variables in the .env file.
Build your container image:
docker compose -f heroku-compose.yml buildDeploy to Heroku:
heroku container:push web --app <your heroku app name>; heroku logs --tailOnce the build and push are completed, you can run the following command in a separate shell to interact with the app:
heroku open --app=<your app name>You can refer to heroku dev center for more info. Happy Herokuing!
This project uses WebSockets, which are unfortunately not supported by Vercel's serverless functions.
Unfortunately, this project uses WebSockets, which is not supported by Netlify's serverless functions.
Additionally, running a FastAPI app is not possible on Netlify because the app consists of server-side rendering. Only client-side rendering is currently allowed on Netlify, meaning you can only deploy statically generated websites like docs. I tried to hack my way around it by creating a serverless function that executes uvicorn main:app --reload in the background. However, the serverless function is being deployed in a different environment.

The following packages are the main dependencies used to build this project:
pythonfastapiuvicornpydanticSQLAlchemyPyJWTpasslibaiomysqlaioredispython-multipartdeta-pythonprometheus-fastapi-instrumentator
This project is open for anyone to contribute:
- Adding support for multimedia messages other than images such as PDFs, txt, and more.
- Store message content in the database as encrypted data rather than plain text. You can refer to the signal protocol for ideas.
- Sending voice messages.
- Design and implement a k8s architecture and deploy it on GCP.
This project and the accompanying materials are made available under the terms and conditions of the MIT LICENSE.