   __  ___     _                   __    ______        __             __          _
  /  |/  /_ __(_)__ _  _____ ___  / /_  /_  __/__ ____/ /  ___  ___  / /__  ___ _(_)__ ___
 / /|_/ / // / / _ \ |/ / -_) _ \/ __/   / / / -_) __/ _ \/ _ \/ _ \/ / _ \/ _ `/ / -_|_-<
/_/  /_/\_, /_/_//_/___/\__/_//_/\__/   /_/  \__/\__/_//_/_//_/\___/_/\___/\_, /_/\__/___/
       /___/                                                              /___/
ai.iot.cloud.technology.training.trading =================================================

Ts. Mohamad Ariffin Zulkifli
ariffin@myduino.com
Donkeycar is a minimalist and modular self driving library for Python. It is developed for hobbyists and students with a focus on allowing fast experimentation and easy community contributions.
Big salute and thank you to all Donkeycar

You can access Donkeycar updates & examples from their website http://donkeycar.com or build instructions and software documentation as well as community chat on Discord.
This repo is a fork from Donkeycar and modified to be use with Waveshare PiRacer AI Kit and works with the latest Raspberry Pi OS Bookworm 👍

PiRacer AI Kit featuring its Expansion Board comes with 3x battery holder of 18650 batteries with on-board lithium battery protection circuit with anti-overcharge, anti-over-discharge, anti-over-current short-circuit protection functions and voltage regulator chip to provide stable 5V to the Raspberry Pi.
The expansion board also comes with 2 units of PCA9685 16-channel PWM controller interfaced to:
- TB6612FNG 1.2A Dual Motor Driver to control the DC Motors with I2C Address:
0x60. - Servo Motor with I2C Address:
0x40.
The expansion board also comes with on-board 0.91" 128×32 resolution OLED with I2C Address: 0x3C and INA219 a bidirectional current/power monitor with I2C Address: 0x41.
I recommend to use Raspberry Pi 4 with at least 4GB of RAM or more, and MicroSD card > 64GB.
- Run the following command to update the package lists:
sudo apt update --allow-releaseinfo-change- Upgrade installed packages to the latest versions:
sudo apt upgrade- Configure
VNCandI2C. Use theraspi-configtool to enable both VNC and I2C. This tool provides an interactive menu for configuring various settings on your Raspberry Pi:
sudo raspi-config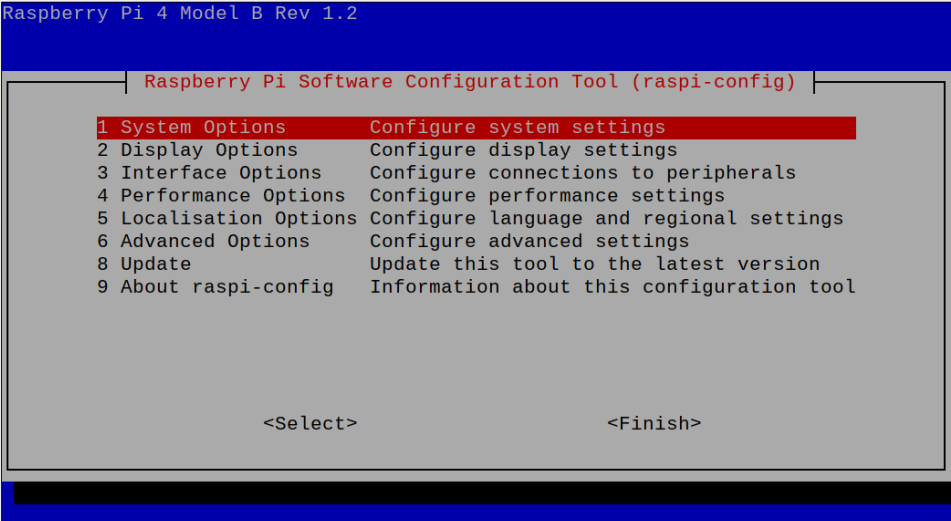
Use the arrow keys on keyboard to navigate to the Interface Options and enable both VNC and I2C. Enabling VNC you can remote desktop your Raspberry Pi from your PC using the TigerVNC and enabling the I2C you can communicate with all the important interface to the actuators or sensors on the PiRacer Expansion Board.
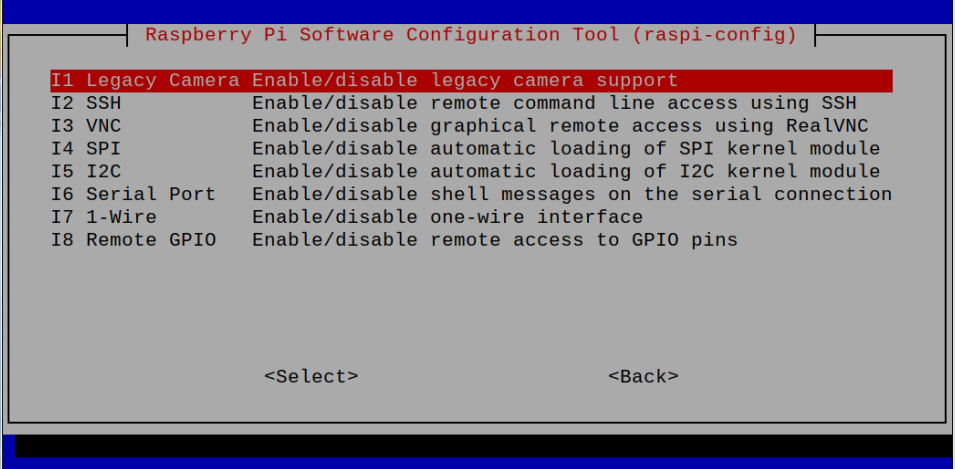
- Verify if I2C is enabled and detect devices on the I2C bus, by using the following command:
sudo i2cdetect -y 1You'll see the results like below, where the address 0x3c belongs to the OLED, the address 0x40 belongs to PCA9685 for the servo motor, the address 0x41 belongs to the INA219 for on-board power monitoring and the 0x60 belongs to PCA9685 for the DC motors.
     0  1  2  3  4  5  6  7  8  9  a  b  c  d  e  f
00:                         -- -- -- -- -- -- -- --
10: -- -- -- -- -- -- -- -- -- -- -- -- -- -- -- --
20: -- -- -- -- -- -- -- -- -- -- -- -- -- -- -- --
30: -- -- -- -- -- -- -- -- -- -- -- -- 3c -- -- --
40: 40 41 -- -- -- -- -- -- -- -- -- -- -- -- -- --
50: -- -- -- -- -- -- -- -- -- -- -- -- -- -- -- --
60: 60 -- -- -- -- -- -- -- -- -- -- -- -- -- -- --
70: 70 -- -- -- -- -- -- --
- Create a virtual environment named
piracerwith system site packages:
python -m venv piracer --system-site-packages- Append the following line to your
.bashrcfile to automatically activate the virtual environment when you open the Terminal:
echo "source ~/piracer/bin/activate" >> ~/.bashrc- Apply the changes to your current Terminal session, run:
source ~/.bashrc- Clone the Donkeycar repository from the provided URL:
git clone https://github.com/ariffinzulkifli/donkeycar- Change your current directory to the Donkeycar directory:
cd donkeycar- If you want to work with the "main" branch, you can check it out using this command:
git checkout main- Use the following command to install Donkeycar's dependencies for the Raspberry Pi:
pip install -e .[pi]- Verify the installed TensorFlow version by running the following command:
python -c "import tensorflow; print(tensorflow.__version__)"- Verify the installed OpenCV version by running the following command:
python -c "import cv2; print(cv2.__version__)"- Use the
donkey createcarcommand to create a Donkeycar project. Replace~/mycarwith the desired path for your project:
donkey createcar --path ~/mycar- Change your current directory to the Donkeycar project directory:
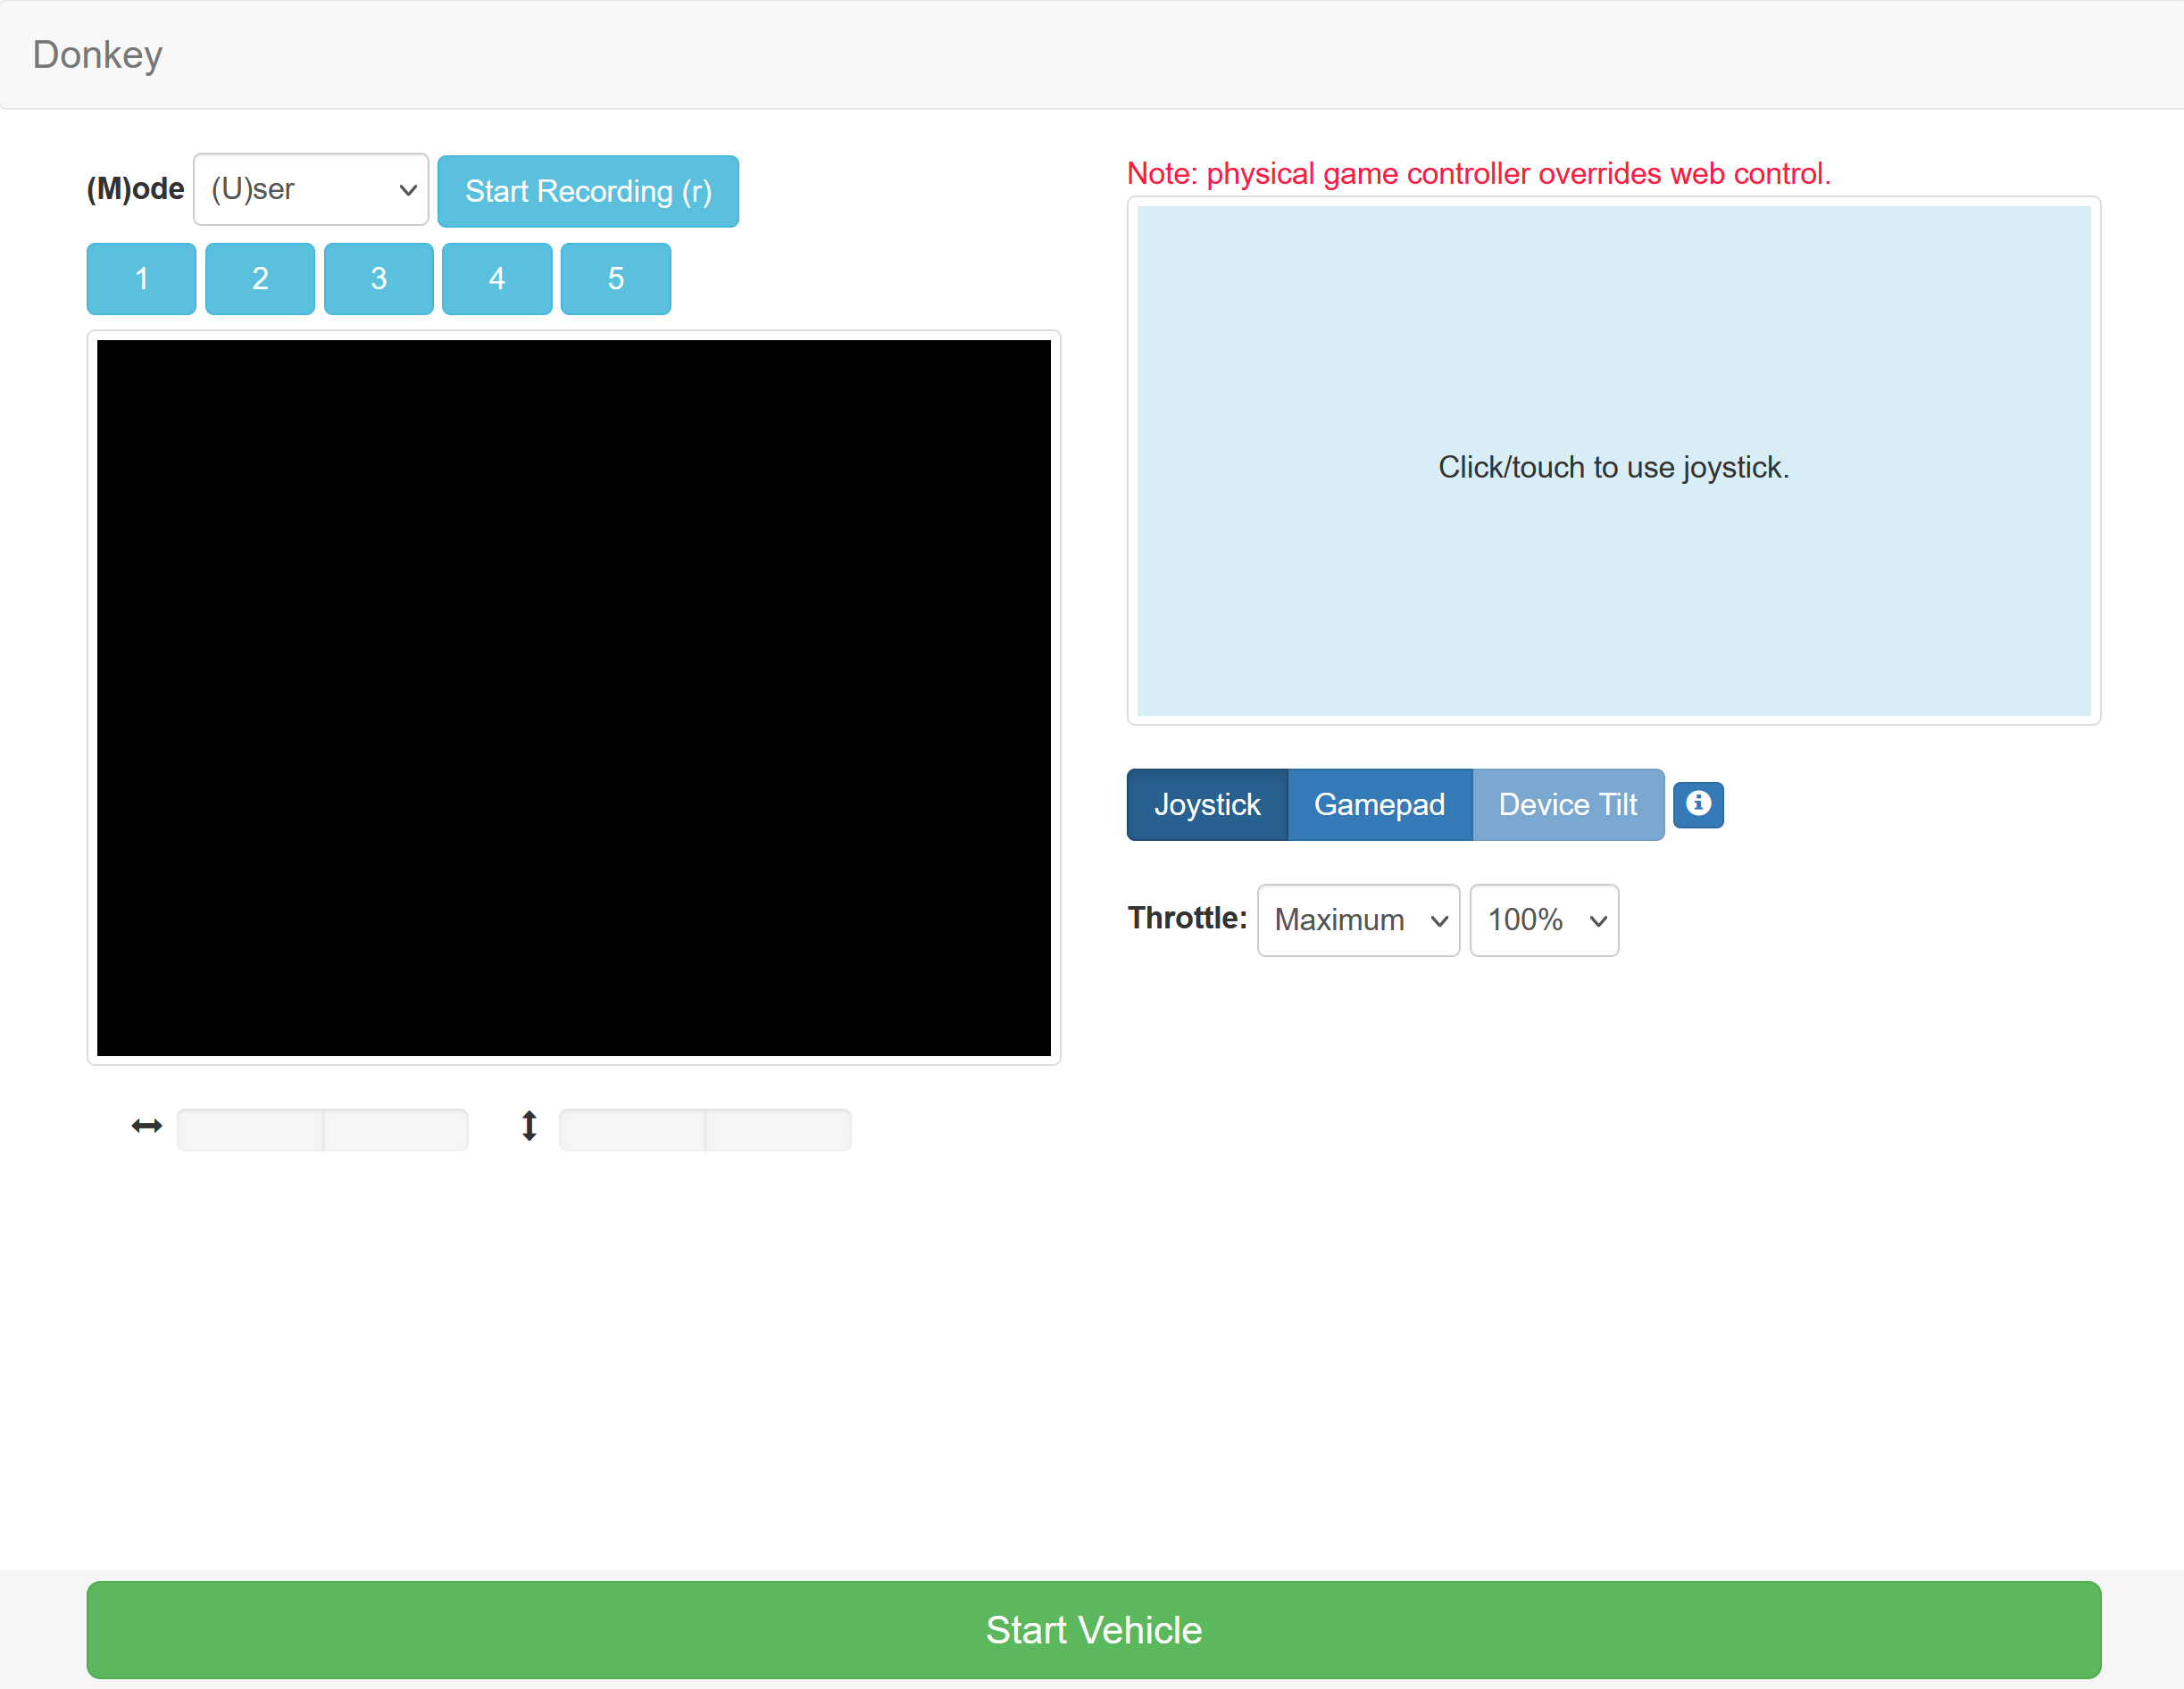
cd ~/mycar- Run the following command to start driving your car using Donkeycar's web server:
python manage.py driveOptionally add --js prefix at the end of the command to control the Donkeycar with joystick.
python manage.py drive --js- Control your car from your PC's web browser at the URL: Note: change the car-hostname with your Raspberry Pi hostname or IP address.
http://car-hostname.local:8887
For example:
http://piracer-10.local:8887