GitHub Repository: https://github.com/ananda13/swarm
This is a tutorial on how to setup a swarm simulation using SpatialOS, which is created by Improbable. SpatialOS is a really powerful tool, that can be used for a wide variety of amazing things.
Disclaimer: I am not a spatialOS expert, but a simulation enthusiast, and the intent of the tutorial is to understand how to build large scale simulations with SpatialOS, with the bulk of the computation (physics) running on the cloud. The additional advantage is that you can have multiple users log into it, to view or interact with the simulation
In this tutorial, we will set up a VR enabled (HTC Vive) simulation of a swarm.
Skills required:
a. Basic Unity/C#
b. SpatialOS
You will need to familiarize yourself with the basics of SpatialOS, which is a key component of this tutorial. They have excellent starter tutorials here
If you have a basic grasp of Unity, and know nothing about SpatialOS, I would suggest jumping in and trying it. I'm not a Unity expert, and it took me a few days to build this; and I'm sure you can too!
SWARMS
So what is a swarm, and why simulate it?
Swarms are really interesting because at a micro level, they follows extremely simple rules, but at a macro level, the effects look very sophisticated and frankly, awe-inspiring!
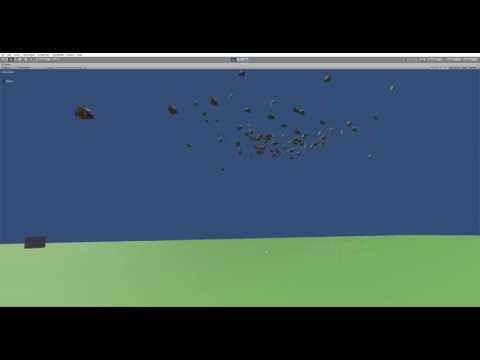
Just look at these guys:

BOIDS
Craig Reynold's created the first flocking algorithm, and called the simulated creatures 'boids'. You can read all about it here
I've summarized the basic principles below.
If you have a group of creatures, you need them to form a group, with these 3 basic rules in place:
- Cohesion
Move each boid towards the average position of the group
- Alignment
Align the heading of each boid towards the average heading of the group
- Separation
Steer away from other boids to prevent collision.
I've added a fourth rule, so that the flock has a goal to follow:
- Goal Seeking
Steer each boid towards an arbitrary goal
You can also add more sophisticated rules such as collision avoidance, goal intelligence, predator avoidance, etc
There are many in-depth tutorials on how to build a swarm online. I built the boid behavior based on this one.
I've built a simple flocking example in Unity. You can check out this code in this repo. You dont, strictly speaking, need to build this in order to proceed, but it does help you understand flocking behavior before you transition to the Improbable way of doing things!
The important section of the codebase are :
A. globalflock.cs
This defines the behavior of the goal, and sets up the global variables, such as number of boids, etc
B. flock.cs
Provides all the rules that each entity follows. This is the embodiment of the 4 rules above.
At this point, if you don't know what Improbable or SpatialOS is, I would highly encourage you to run through their excellent tutorials.
-
Helloworld tutorial : Get your feet wet by building, running locally and deploying to the cloud.
-
PiratesTutorial : Understand the basic mechanism of client-server architecture. This is the most important tutorial, and the rest of this tutorial is based off this one.
Once you're past these (and I would love your feedback on what you thought of them), the following may help you setup a simulation model, as opposed to a game. (We will gamify and add VR to this sim later!)
The code is on GitHub here. Please check out the tag v0.1, if you want to start with some basics and add on the rest yourself. Otherwise check out the latest [Recommended].
As you have noticed, the client-server architecture underpins any spatialOS setup. SpatialOS will let you create UnityServers and UnityClients on which you can run separate pieces of code. In general if you need a window into the world, or need to control anything within this world, you'll need a client, otherwise, everything runs on the server side. The advantage of using SpatialOS, is that now you can run hundreds of thousands of entities in a swarm, and spatialOS will manage all the underlying complexity, and make it work like magic.
Reality scale simulation. That's pretty cool!
Now, onto the fun stuff. Lets get a swarm going.
Each swarming entity in the system is called a boid, and in this tutorial, I have a model of a fish, with corresponding animation of it swimming, which we will use for the visualization. You can replace this with a dragon, drone or a daikon radish.
We need 2 main entities, and their corresponding components:
- Fish (FishEntityTemplate.cs)
- WorldTransform : To denote the position of each boid. I've modified the standard WorldTransform.schema file to include a speed component as well, since each boid needs to know the speed of it's neighbors to participate in swarming behavior
- FishParameters : The total number of fish, initial speed, and volume of the tank (i.e. the volume of space over which they will be active)
- Goal (SwarmGoalEntityTemplate.cs)
- WorldTransform : Each fish needs to know where the goal is, to be able to react to it.
- GoalParameters : Tank volume, and speed at which it moves.
There will be corresponding entity prefabs for fish and goal to which the model, animation, and corresponding scripts have been attached. You can find them in Assets/EntityPrefabs.
Overall, this architecture can be summed up as:

Every frame, it checks to see how many fish there are around, within a certain radius (denoted by neighborDistance). Similarly it find where the goal entity is, and then applies swarming behavior based on the position and speed of those entities.
We use spatial queries, to gather the information about neighboring fish and goal.
The goal controller simply moves the goal about to an arbitatry position within the tank volume, at a constant speed. It stays at a position for a random period of time, and then moves on. This provides the random movement of the flock. You can, ofcourse tailor its motion to whatever you want, and the swarm will try to follow it.
Modify spatialOS.json in your project root directory as follows (this is a critical step):
- Change the "name" to your account name provided by Improbable
- Change both the "sdk_version" & "version" to the SpatialOS SDK version to the one you are using (e.g. "10.1.1") If you are not on the same SDK version that this project has been written for (at the time of writing it was on 10.x), you will need to follow the upgrade guide to make changes to the code. Instructions here. Please use the upgrade guide from the version you are currently on, and not the one that is linked above.
This is a local build, also known as a development build, in spatialOS.
If you're on Windows, use the Improbable drop down menu within the Unity Editor to run these functions, and if you're on Mac, use command line on terminal. In fact, as of the date of writing this, if you dont follow the above convention, you may run into strange compile errors.
Mac:
$ spatial worker build --target=development
Launch locally:
$ spatial local launch --snapshot=snapshots/default.snapshot
Windows
Window > SpatialOS

- Window > SpatialOS
- Click on Player Target > Development
- Click on 'Codegen' (If you've changed any .schema files)
- Improbable > Snapshots > Generate Snapshot Programatically (this executes the file /Assets/Editor/SnapshotMenu.cs)
- Improbable > Prefabs > Export All Entity Prefabs (this exports all the prefabs in the folder /Assets/EntityPrefabs)
- Back to the Spatial Menu
- Click on 'Build'
- Click on the drop-down 'Run Spatial Locally' > 'Run'
In a browser window navigate to:
http://localhost:21000/inspector
You should see something like this:

Mac
Create the deployment assets, specifically for cloud deployment
$ spatial worker build --target=deployment
Upload to the cloud (GCP)
$ spatial cloud upload <assembly_name>
(You can use something like SwarmSimAssembly)
For example:
$ spatial cloud launch SwarmSimAssembly default_launch.json swarm --snapshot=snapshots/initial_world.snapshot
Windows
- Window > SpatialOS
- Click on Player Target > Deployment
- Click on 'Codegen' (If you've changed any .schema files)
- Improbable > Snapshots > Generate Snapshot Programatically (this executes the file /Assets/Editor/SnapshotMenu.cs)
- Improbable > Prefabs > Export All Entity Prefabs (this exports all the prefabs in the folder /Assets/EntityPrefabs)
- Back to the Spatial Menu
- Click on 'Build'
- Click on 'Spatial upload' > And type in an assembly name, like 'SwarmSimAssembly' > Upload (this uploads the assembly that you generated in the build step, to your spatial account)
- At the time of writing, there isn't a way to actually launch the deployment from within Unity. You will have to open up a shell, such as PowerShell, navigate to the root folder, and type the following:
$ spatial cloud launch SwarmSimAssembly default_launch.json swarm --snapshot=snapshots/default.snapshot
Check it out:
Open https://console.improbable.io/projects.
Up until now you have built a simulation from scratch on top of spatialOS, and have watched it mesmerize you with the simple beauty of swarming behavior, from within the inspector in 2D.
Now we'll plug in a client, that will let you watch from inside the game engine, and then plug in your HTC Vive headset!
If you don't have a VR headset, you can follow the first half of this section to understand how to enable a client viewer, that can move about in the space. If you have a PC-based VR headset, like the HTC Vive or Oculus Rift, the second section will be useful to you.
I've been using PirateTutorial as a reference, to build the swarm tutorial. The diagram below illustrates how inputs from the player are handled in the system:

This is a control flow diagram for the PlayerShip entity. Player input (keyboard: WASD,etc) is recorded by the PlayerInput.cs script, which runs on the client only, as denoted by:
[WorkerType(WorkerPlatform.UnityClient)]
This is then written into the component ShipControls, as defined in schema/improbable/ship/ShipControls.schema
This data is then read, every frame, by ShipController.cs, which modifies the inputs : inputSpeed & inputSteering into targetSpeed & targetSteering. These 2 variables, in turn are read by ShipMovement.cs, and it is applied to the 3D model of the ship.
These 3 scripts: PlayerInput.cs, ShipController.cs & ShipMovement.cs are attached to the GameObject PlayerShip (and hence the prefab).
Using a similar architecture, we create a Player prefab for our simulation, which represents the user who has logged in to view (and possibly interact) with the simulation.
The control flow used here is very similar to that of the PiratesTutorial. We use an FPS-like client, i.e. one that can be controlled by WASD + mouse:

PlayerMovement uses the inputs that it reads from PlayerControls component, and translates the Player gameobject accordingly:
transform.Translate(PlayerControlsReader.Data.keyHorizontal * Time.deltaTime, 0.0f, PlayerControlsReader.Data.keyVertical * Time.deltaTime);
It then writes this position and orientation information (speed is not important for players) to the WorldTransform component, so that other entities can visualize this player if they want. Or not.
We do not need a ShipController to modify the inputs, but we need a secondary controller, CameraRotationController, that applies the inputs from the mouse to move the camera's rotation and is attached to the Player gameobject.
In order to be able to inject a player into the simulation, we need to spawn them in, using a PlayerSpawnManager. Everytime a player connects, the bootstrap.cs script (on the client side), connects to the PlayerSpawner, and requests it to spawn a new player, and returns it's entity id.
We need to add the following entities+components, to enable this:
-
Player Spawner : This allows spatial to manage all incoming connections and assign them gameobjects
- WorldTransform : to know where it it
- Spawner : to request gameobjects (camera) be spawned for the connecting client
-
Player : The entity that embodies each player
- WorldTransform : to know where in space it is
- PlayerLifecycle : to keep track of when this player disconnects, by tracking a 'heartbeat'
- PlayerControls : to get inputs from the player, in order to move their camera
This allows the PlayerSpawner (which is created on boot) to spawn players, as they connect.
This being SpatialOS, you can have hundreds of people log into the experience, out of the box! We will start with one, but will build the base that will allow any number of players to join in. Later you can build any interaction in conjunction with multiplayer, and bring about very complex behaviors.
Note: The structure of component-entities will change somewhat once we introduce VR, but it's good to learn about different architectures.
You can find the new schemas for the components in Swarm/schema/improbable/player/
Next, we setup the EntityTemplates that make up the entities. We create the following EntityTemplates:
-
PlayerEntityTemplate (similar to the PlayerShipEntityTemplate in PiratesTutorial): We make sure that the WorldTransform and PlayerControls can be accessed by the Unity Client
playerEntityTemplate.Add(new WorldTransform.Data(new WorldTransformData(initialPosition, playerInitialRotation, 0))); playerEntityTemplate.Add(new PlayerLifecycle.Data(new PlayerLifecycleData(0, 3, 10))); playerEntityTemplate.Add (new PlayerControls.Data (new PlayerControlsData (0, 0, 0, 0))); -
PlayerSpawnerEntityTemplate (identical to the PlayerSpawnerEntityTemplate in PiratesTutorial) It's important to attach the Spawner component to this entity.
playerSpawner.Add(new Spawner.Data(new SpawnerData()));
We also add the following scripts to Assets/Gamelogic/Player/Behaviors:
-
PlayerInputController : This takes inputs from the player (in this case, using the mouse and keyboard WASD to control the motion of the player), and updates the PlayerControls component
-
PlayerMovement & CameraRotationController : These together receive the component updates of PlayerControls and move the Player gameobject and associated camera (we will use different scripts to enable VR).
-
PlayerSpawnManager : This is attached to the PlayerSpawner prefab, and contains callbacks that are invoked when a new player requests to join the simulation. This spawns the new player and gives them controls to look around and move.
-
PlayerHeartbeatSender : This sends heartbeats (HBs) ever so often (determined by the playerHeartbeatInterval), which is received by the PlayerEntityLifeCycleManager (below) to determine, which player is unresponsive, and kicking them out.
-
PlayerEntityLifeCycleManager : This checks to see if new HBs are coming in from any player, and if it reaches the threshold of missed heartbeats, it deletes the player.
We also need to modify Assets/Bootstrap.cs, and the modifications are identical to the file in PiratesTutorial and it is how the Unity Client (any player logging in) uses to connect to the simulation. This script first finds the PlayerSpawner, and then requests PlayerSpawner to create a new Player and inject them into the simulation at the designated coordinates (defaulted to (0,0,0))
At this point you can build, and run the simulation locally. Once that is successful, open the project in Unity and play the ClientScene. You should see something like this:

Thereafter, build for deployment, create assembly and launch into the cloud, and use the Improbable Launcher to log into client view.
At this point, you may want to check out the latest code from this repo, as it has all the SteamVR changes. In order to allow SteamVR to take over the camera, we need to make a few changes:
- PlayerVR (prefab)
-
VRPlayerMovement.cs : This replaces PlayerMovement.cs, and reads the inputs from SteamVR and writes those to the WorldTransform component. In Start(), it checks to make sure the [CameraRig] object (default SteamVR prefab name) is available on this GameObject. You can do this by making the [CameraRig] prefab, a child of the an empty gameobject, called PlayerVR, and making that a prefab. We only enable SteamVR camera if it is attached to this player. This is a safeguard that prevents clients from running steamVR when theyre not supposed to.
-
PlayerSpawnManager.cs : Change the name of the prefab to spawn to "PlayerVR" instead of "Player"
-
Add #ifdefs to the following files, to prevent SteamVR from being active on the Server side (linux). You can find the references in this forum thread
- SteamVR.cs
- SteamVR_Camera.cs
-
Add Teleport capability : This is done quite easily by adding the following scripts to either, or both, of your controllers:
- SteamVR_LaserPointer.cs
- SteamVR_Teleporter.cs
-
From a control flow perspective, we only have one script, VRPlayerController, that is getting the input from Steam, and plugging it into the WorldTransform component. I hope the client-server architecture is making sense by now!
With these changes, you can build and launch, first locally, and then in the cloud, and verify your changes. Put on your headset, teleport and walk with the fish swarm.
We will need to optimize the workers for the way the world is designed and the special needs of a swarm. With the way spatialOS distributes load across workers, is spatially! Of course this comes with the assumption that load is spread out, on average, spatially. However, this is not true for swarms, as they can cluster heavily in one region, and overload the Unity worker. This can result in the a visual freeze up, when one unity worker is processing the entire swarm, getting overloaded and giving up. I'm working on a couple of load balancing strategies currently, and can certainly use any inputs and ideas:
- Have more workers (currently with 16 workers for a 50x50m area) cover about equal ground each. So as the swarm moves through space (x-z), it gets split up between workers. I'm still seeing a lot of freezing up of workers with this method, as it happens that the swarms is pretty well ditributed in the vertical (y-space) direction, but all the processing is happening on one UnityWorker, as it's clustered in x-z space. This is also stress testing the handoff mechanism between adjacent workers.
- Another way is to have each worker cover the entire tank space (50x50m), and hence all the worker overlap, and share the load. This seems, atleast with minimal testing, seem like the more optimal approach. More on this later...
Here's how my load balancer is doing with the Auto Hex Grid setting.
 FYI, depending on swarm behavior, it crashes quite often.
If you got this far, hopefully you're being able to teleport around this simple world, and seeing fish all around, doing funny things
Here's a video of what I got:
This tutorial should help you take an empty project and build on it, using some of the concepts laid out here, which is really an explanation of what is happening within the PiratesTutorial.
What will you build?
Follow Ando on Twitter
Follow changes on GitHub
Follow the Improbable Forum
You can also find my work on my website
Let me know if you've made a simulation with Spatial! I'd love to check it out!
I will be updating this tutorial, as I find more insights, especially on worker load balancing, as this is quite challenging for the swarm mechanism.
I'm also building on this project, and creating a multi-user art-science experiment where players will be able to (try to) control swarms of different creatures (from starlings to drones!) on islands floating in the sky. In VR (duh)!
Here's a grab of a low-poly world I'm prototyping in

If you're interested in contributing, either with code, art or ideas, feel free to drop me a line.
Love & Cheers,
Ando