In this repository we want to show how to use Maestro with React Native apps built with Expo. You can read the full article on our blog at dev.to. If you want check out maestro with a React Native CLI app, you can have a look at this repository, because there are some differences when launching the app with Expo.
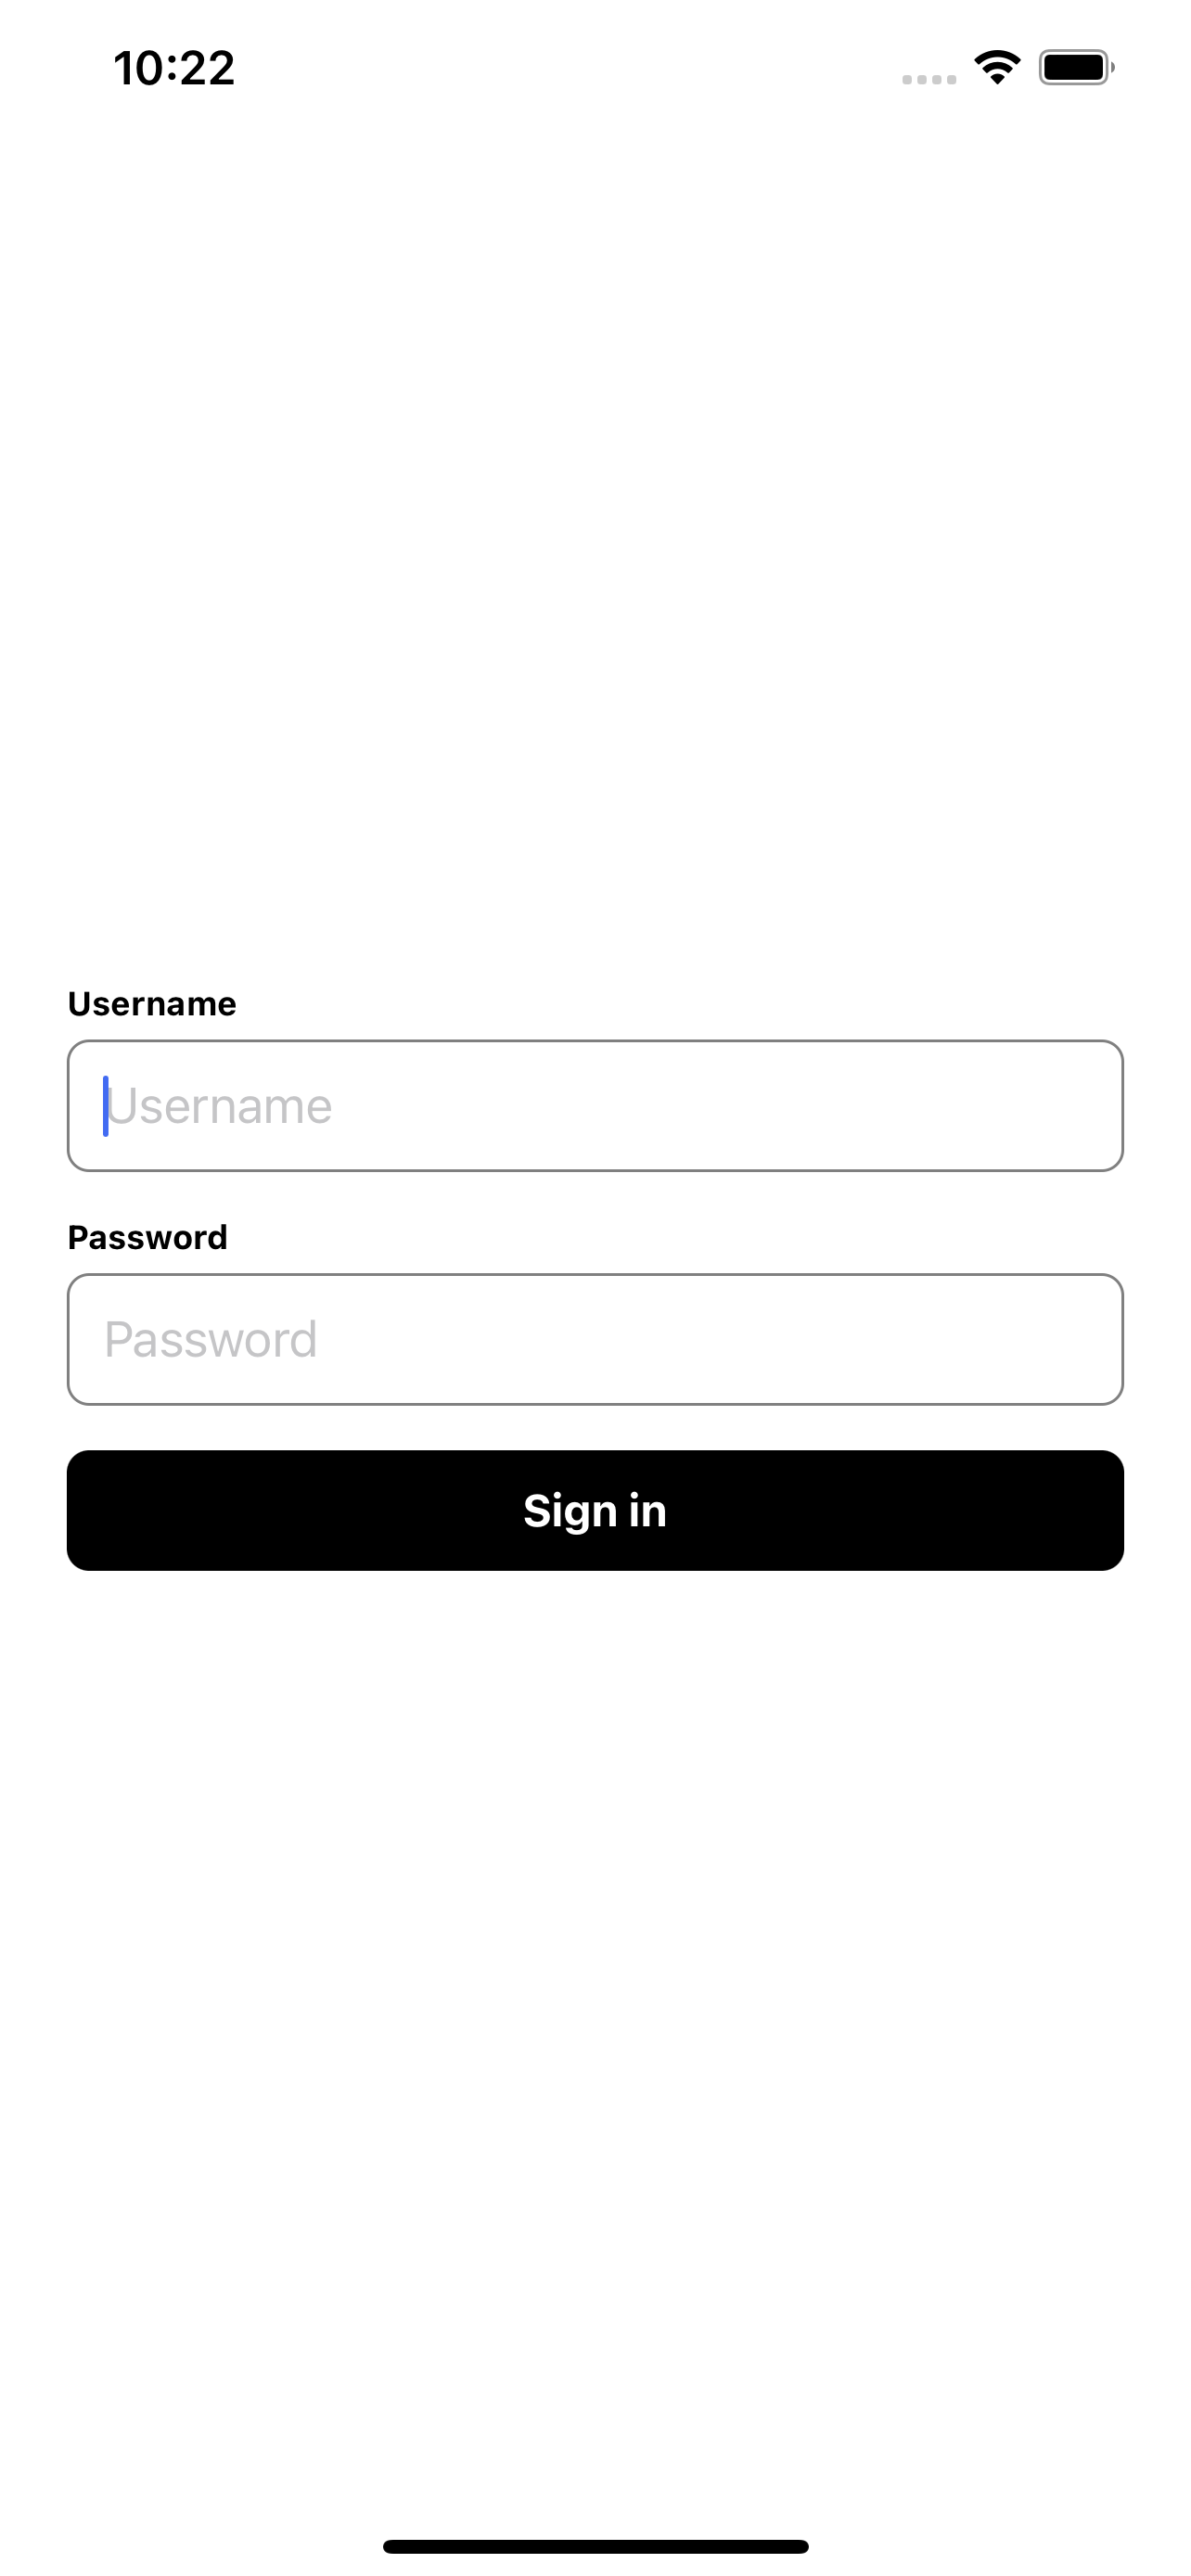
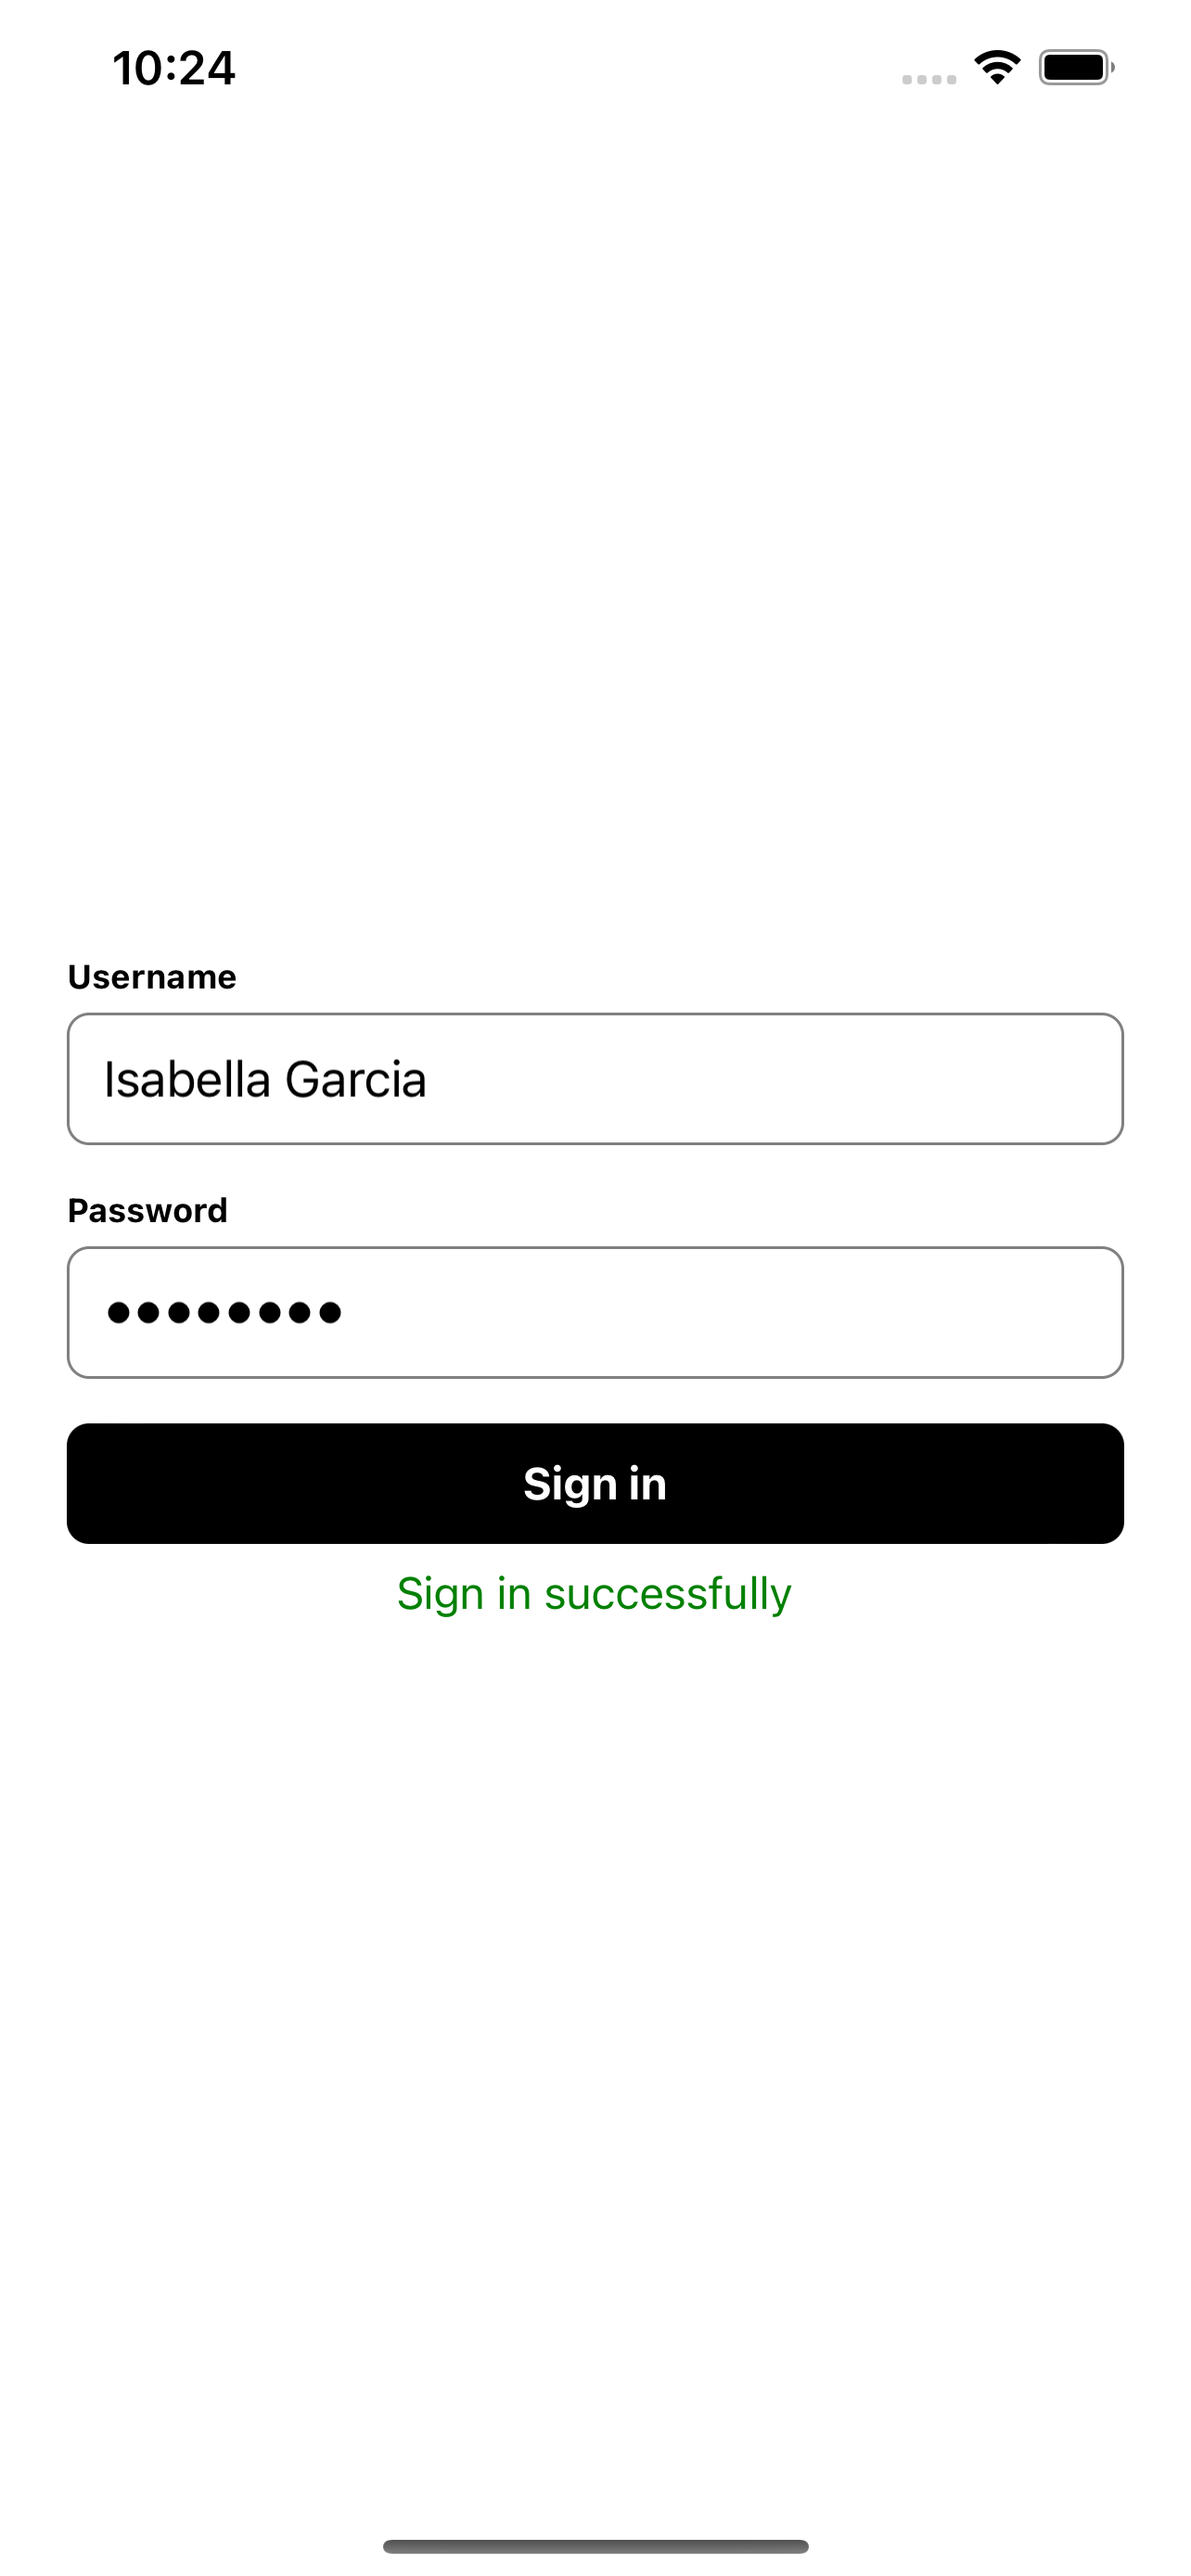
The application is a simple sign in interface where username and password can be entered. After clicking the sign in button a success message will be displayed below the button.
Preparing the app and installing the dependencies.
# Install dependencies
$ npm install
# Install ios pods
$ npm run ios:pods
# Start app
$ npm start
# Start ios app
$ npm run ios
# Start android app
$ npm run androidThe tests located in .expo-maestro directory are developed for running locally in your iOS simulator or Android emulator. If you want to run them on your real device you may need to replace the openLink section in the workflow files for starting the app.
# replace this url with the url exposed when starting your Expo app
- openLink: exp://127.0.0.1:19000
You can run the tests as well in the cloud. For running the tests in the cloud, you need to use the tests from .maestro directory. Here the command for starting the app is different compared to the tests in the .expo-maestro directory.
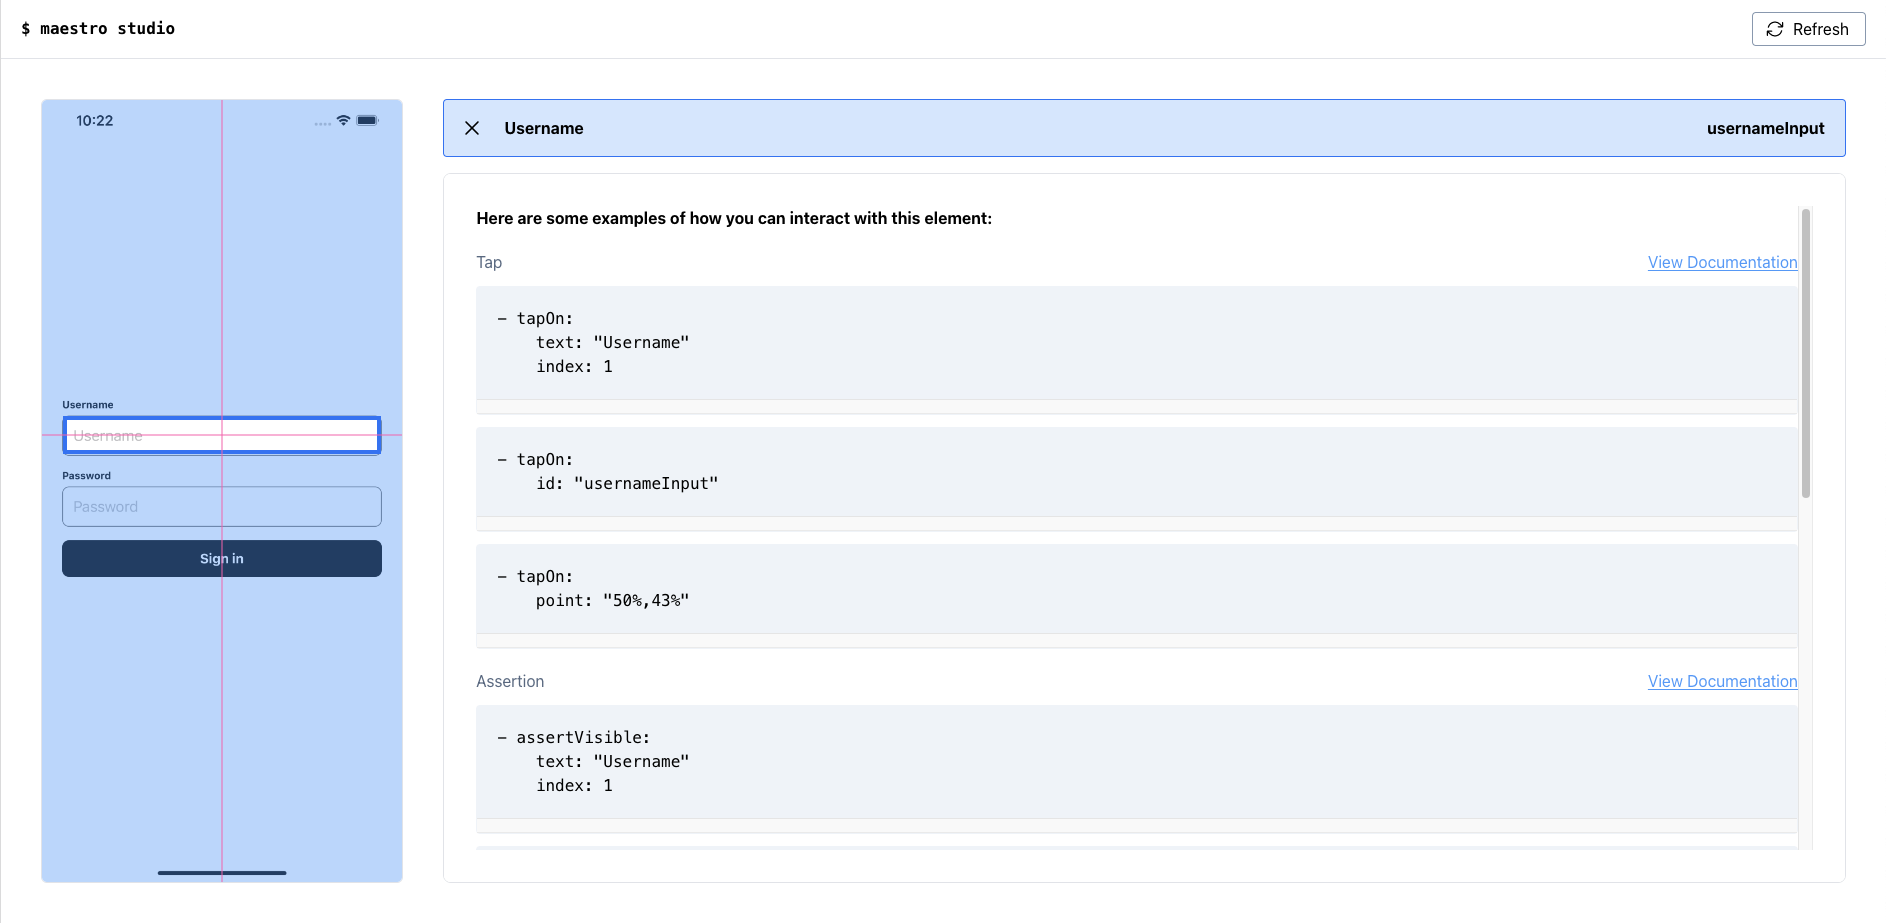
For creating new workflows you can check out the Maestro docs and Maestro studio.
Before running the tests, you need to setup Maestro on your machine. On MacOS and Linux you can follow these steps.
# install and upgrade maestro
$ curl -Ls "https://get.maestro.mobile.dev" | bash
Running flows on iOS Simulator requires installation of Facebook IDB.
$ brew tap facebook/fb
$ brew install facebook/fb/idb-companion
On windows you need to do further steps. A complete instruction can be found in the Maestro docs.
You can check if maestro is installed by checking the version. It should print the version number, e.g. 1.17.
$ maestro -vThe workflows can be started with the Maestro CLI. Below you can find some commands for starting a single or multiple tests.
# run single test
$ maestro test .expo-maestro/sign-in-flow.yaml
# run single test with external parameters
$ maestro test -e USERNAME="Test User" -e PASSWORD=Test123456 .expo-maestro/sign-in-flow-external-parameters.yaml
# running every test in directory
$ maestro test -e USERNAME="Test User" -e PASSWORD=Test123456 .expo-maestro
Furthermore, it's possible to create test reports like this:
<?xml version='1.0' encoding='UTF-8'?>
<testsuites>
  <testsuite name="Test Suite" device="iPhone 14 Plus - iOS 16.1 - E7F8022E-939F-4165-B887-F342740BFCE6" tests="5" failures="0">
    <testcase id="sign-in-flow" name="sign-in-flow"/>
    <testcase id="sign-in-flow-with-subflow" name="sign-in-flow-with-subflow"/>
    <testcase id="sign-in-flow-constants" name="sign-in-flow-constants"/>
    <testcase id="sign-in-flow-testid" name="sign-in-flow-testid"/>
    <testcase id="sign-in-flow-external-parameters" name="sign-in-flow-external-parameters"/>
  </testsuite>
</testsuites>
You can run these tests with this command:
$ maestro test --format junit --output results.xml -e USERNAME="Test User" -e PASSWORD="Test123456" .expo-maestroIn addition to running tests, you can record them for getting a screen record.
# start video recording
$ maestro record .expo-maestro/sign-in-flow-testid.yaml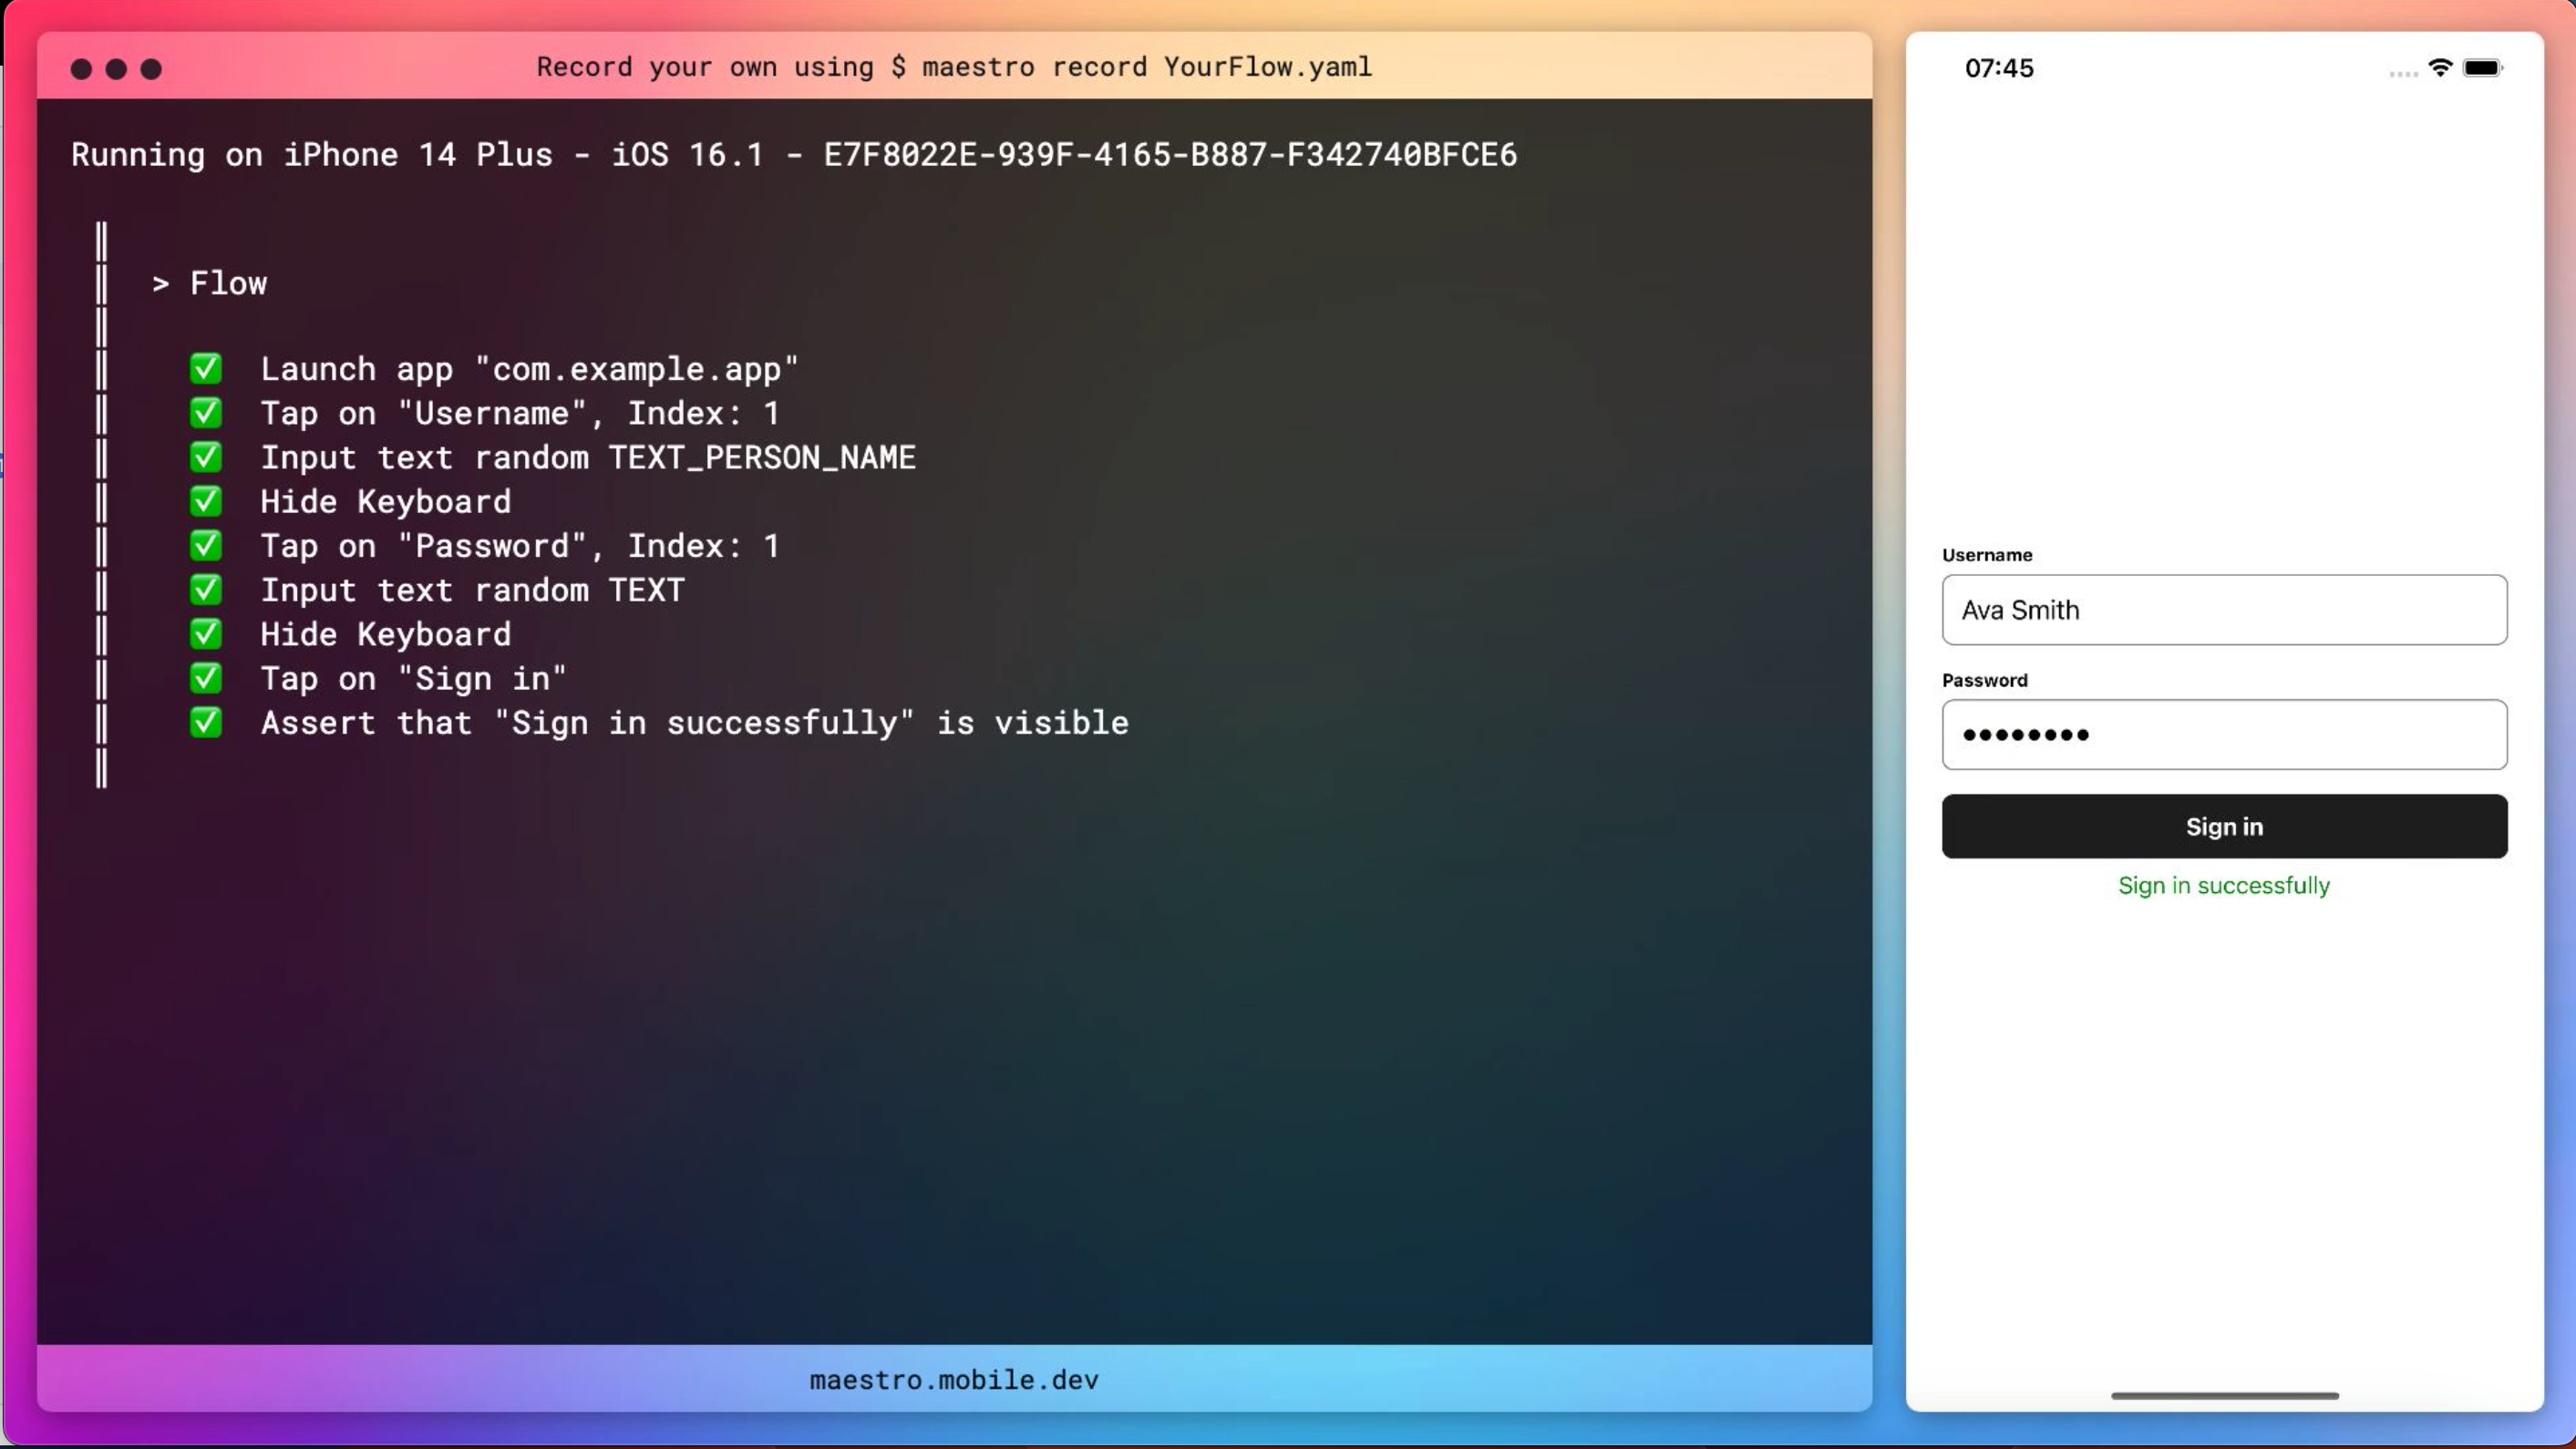
In our article we described some tips and tricks, like usage of testID, parameters and constants, recording workflows and nested flows.