The purpose of this Weather Station is to provide real time weather information to the user on demand. The weather station consists of Sensors capable of reading temperature, pressure, humidity, etc. These details are sent to a SQL Server that is hosted in a remote location. The android application then reads the data off the databse located in the server and presents it to the user. The existing system gets the data from satellites and sends it to the remote server from which the client side mobile application loads the data, this project takes the reading from the physical environment
- Raspberry Pi B+ [or later]
- Any Arduino board, using Uno here
- Gobbler
- Breadboard
- Connecting wires
- DHT22 [or DHT11] Digital Humidity and Temperature Sensor
- BMP180 Sensor
- GPS Antenna
- GPS Reciever
- Rain Detection board with control board.
- LDR
- 10K Ohm Resistor
- MQ2 Gas Sensor [the one shown in Fritzing is to depict the connection, but not the exact sensor used].
- USB Cable for the Arduino Uno
- Power Source for Raspberry Pi
- Power Source for GPS Reciever
- An ethernet cable or a Wifi Module [USB ones work fine]
- Router with DHCP capability
- Wired or wireless Router
- Local SQL server [ensure static IP and DNS registration] or a web hosting account that has SQL
- Android Phone
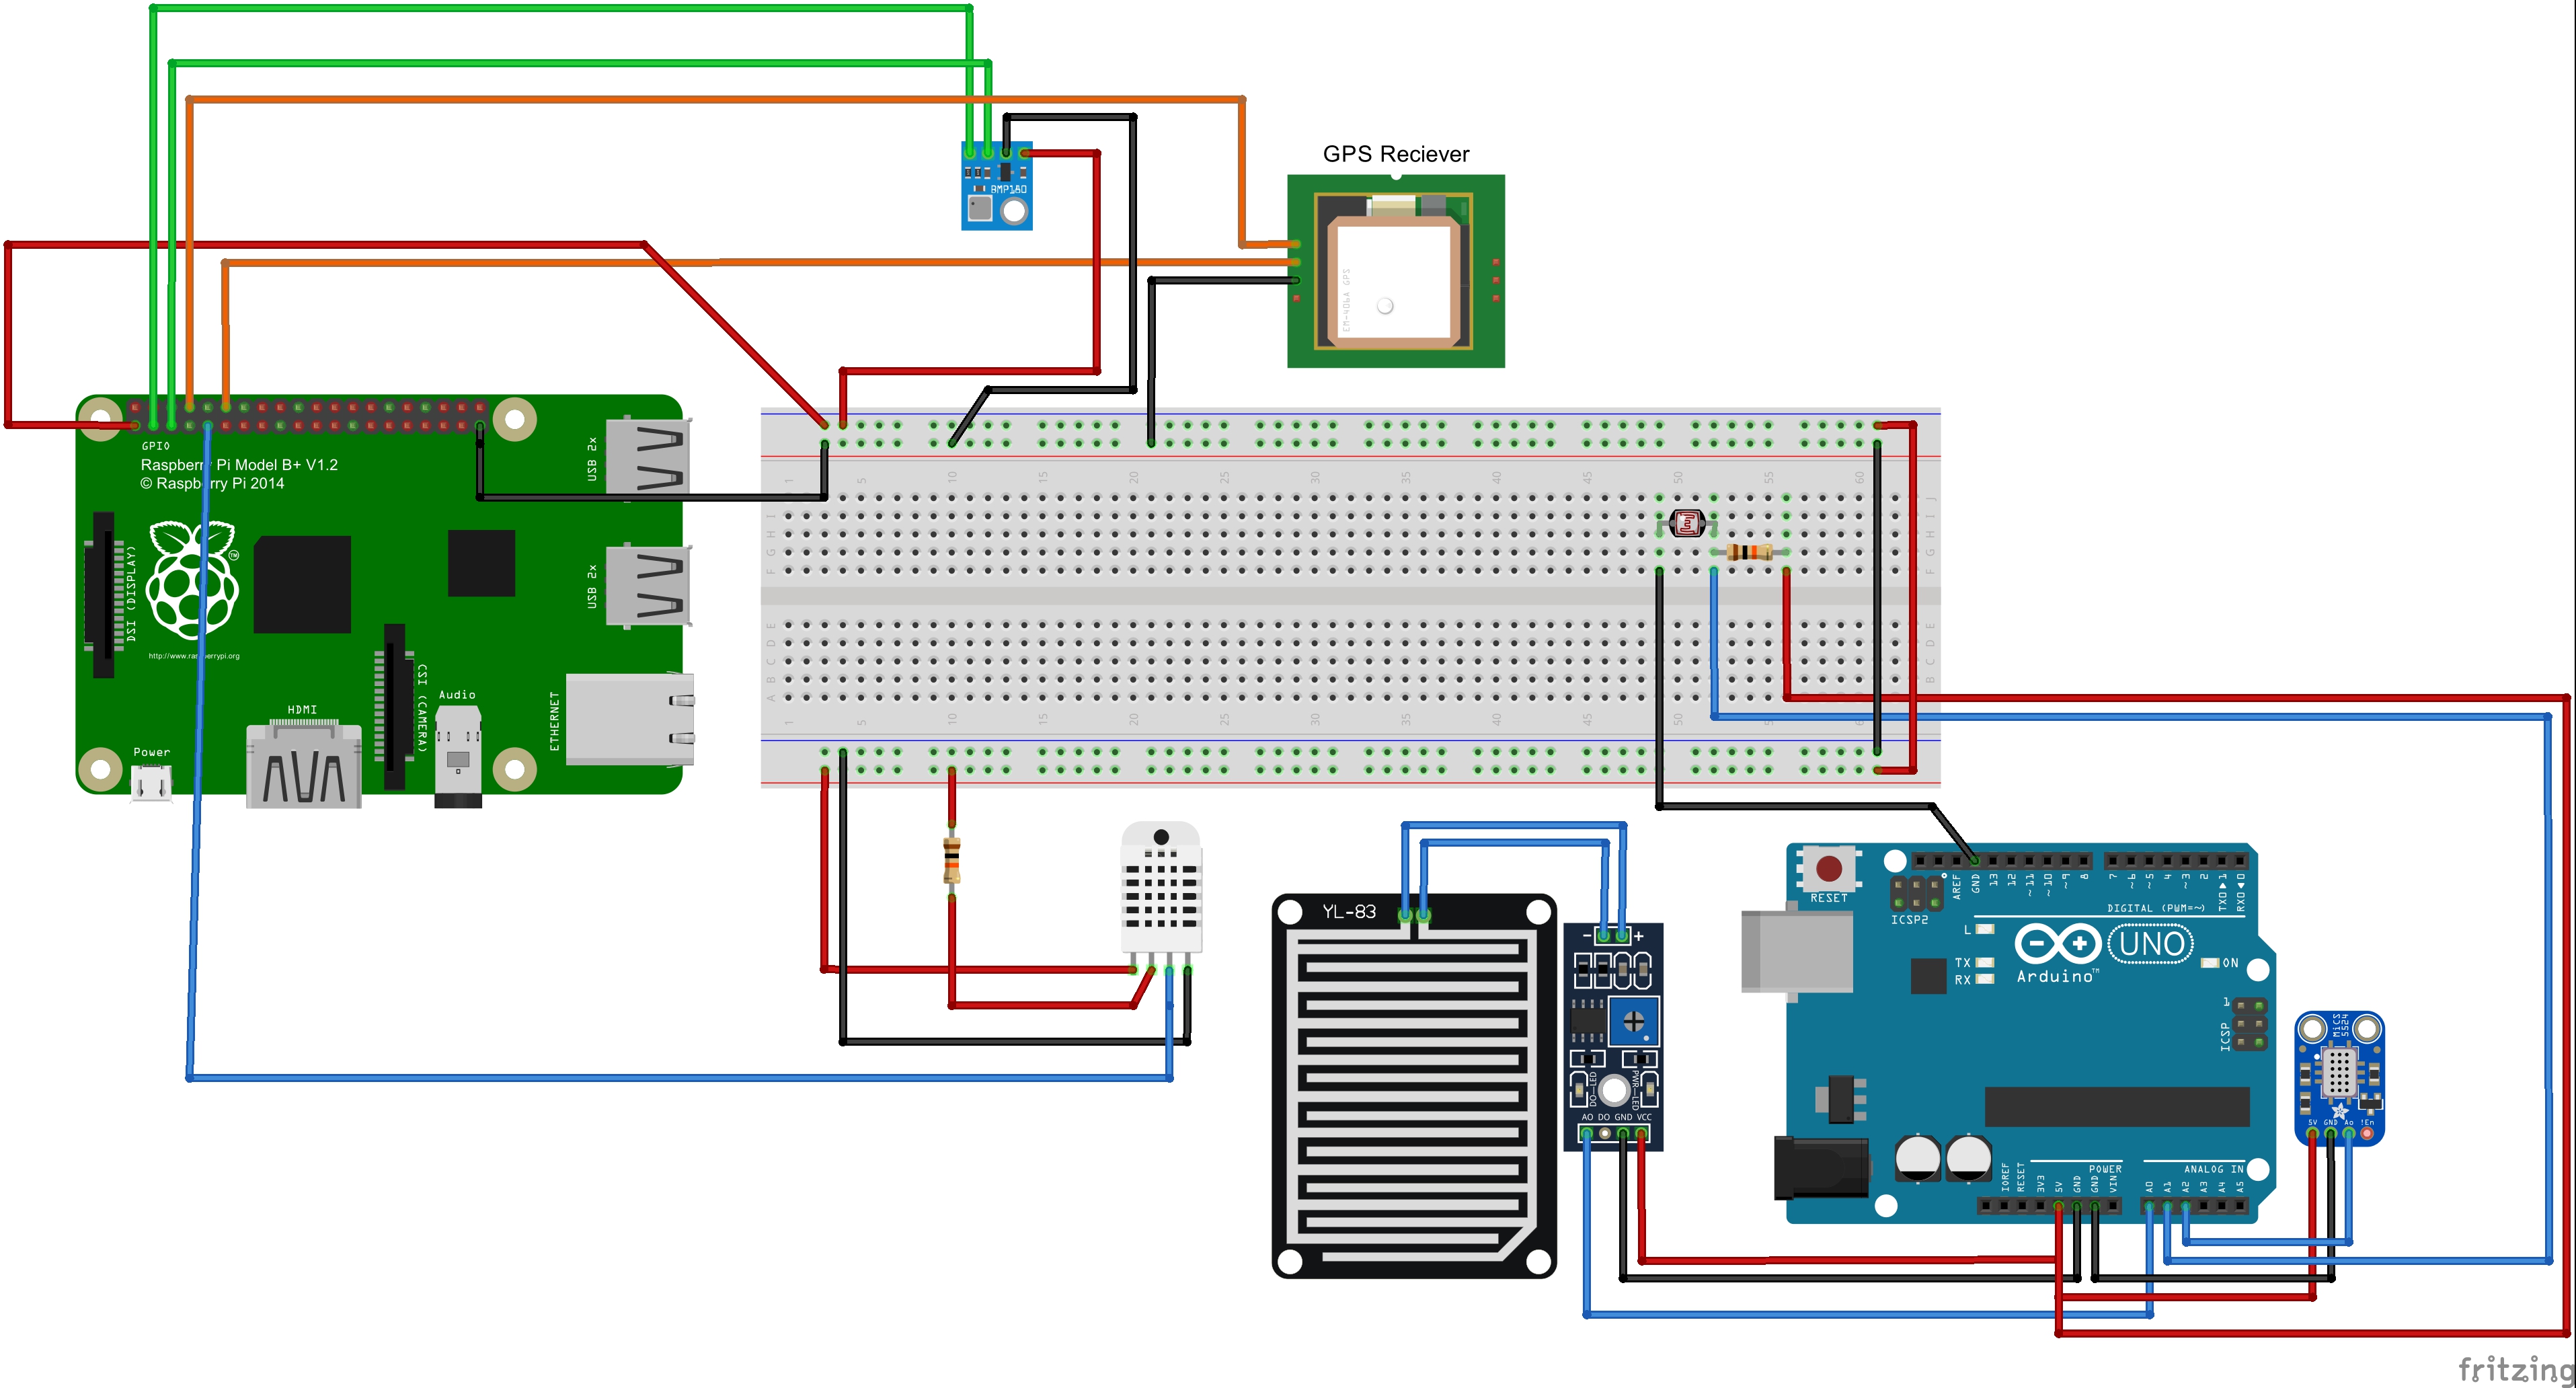
Download Fritzing from here and open the Fritzing project to have a better idea about the connections.
FULL DISCLOSURE The GPS Reciever used here is not the same as used in the real project, its for indication only, but even this should work fine, as the GPS tutorial is pretty much the same for any reciever.
- Flash the Raspbian Jessie OS into the MicroSD card of your Raspberry Pi using the Win32 Disk Imager Software
- Insert the MicrSD card into your Rapsberry Pi
- Download and run Putty, a SSH Client.
- Power up the Raspberry Pi and connect it to your router using an ethernet cable
- Determine the IP Address of your Raspberry pi from the router and enter that IP Address as hostname in the Hostname text field in putty
- Connect to the Pi using putty, even if the connection refuses once or twice, its okay, try again, it will connect.
- The default username is "pi" and password is "raspberry", login to your pi using these credentials
- Expand the file system in Raspberry pi
sudo raspi-config - Set the time zone of the system in Raspberry pi
sudo raspi-config - Run the udpate a few times
sudo apt-get update - Install the necessary softwares
sudo apt-get install git-core python-dev python-pip python-smbus.These will come in handy later - Then reboot,
sudo reboot
- Make the connections as shown in the circuit diagram.
- In your Arduino, upload the sketch into your board, instructions for the same are here.
- Once the code is uploaded, plug the USB cable from your PC and connect it to the Raspberry Pi, make sure the other end is still connected to the Uno.
- If you decide to change the Baud rate of the serial communication in the Arduino sketch, make sure to reflect the same change in the Python script that is going to run on the Pi as well [discussed later].
- This part of the project reads the values from the analog sensors and sends that data to the Pi using serial communication over the USB cable that comes with the Uno
- Once you plug the Arduino into the Pi, the Pi should be able to supply the power needed to the Pi over USB. Before plugging it in, in your Pi, give the command
ls /dev/tty*and run the same command after plugging in the Arduino to the Pi and see which port is added, this is the port to which the Arduino is connected to the Pi, it is usually ttyACM0 and it should not change technically. THIS IS FYI, you need not do anything with this information , will be useful for troubleshooting
- Connect the sensor to the Pi as shown in the circuit diagram
-
git clone https://github.com/adafruit/Adafruit_Python_DHT.gitto clone the ADafruit DHT repository into your Pi -
cd Adafruit_Python_DHT -
sudo apt-get install build-essential python-dev python-opensslto install the necessary packages needed to install external python libraries -
sudo python setup.py installto install the external library cd examples-
sudo ./AdafruitDHT.py 2302 4to run the example and check if the sensor is working or not
- Connect the sensor to the Pi as shown in the circuit diagram
- The BMP Sernsors use I2C Communication Interface to communicate with the Raspberry Pi
- Run
sudo raspi-configand follow the prompts to install i2c support for the ARM core and linux kernel - Then reboot,
sudo reboot - When you are done,run
sudo i2cdetect -y 0(if you are using a version 1 Raspberry Pi)
sudo i2cdetect -y 1(if you are using a version 2 Raspberry Pi)
Once you give this , an address should show up the output
Before plugging in the sensor
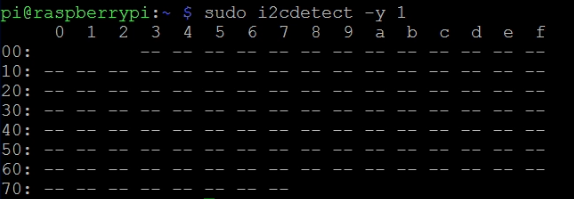
After plugging in the sensor
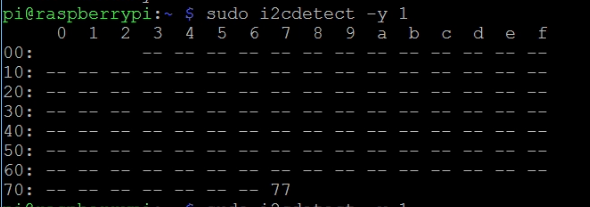
Notice the 77 ? - Install the Adafruit Python Library
sudo apt-get update
sudo apt-get install git build-essential python-dev python-smbus
git clone https://github.com/adafruit/Adafruit_Python_BMP.git
cd Adafruit_Python_BMP
sudo python setup.py install - Once the installation is complete
cd examples
sudo python simpletest.py
To check whether or not the sensor is working
sudo apt-get install python-smbus sudo apt-get install i2c-tools
- Connect the GPS antenna to the GPS Reciever
- Connect power to the GPS Reciever, and ensure to set it to the right power setting
- Esnure the GPS Reciever has a proper FIX to the satellites, different recievers indicate this in a different way. Mine has the status LED blinkng
- Once connected, run the following command
sudo nano /boot/cmdline.txt
and remove console=ttyAMA0,115200 and also if it is there remove kgdboc=ttyAMA0,115200 - Enter the following code,
sudo systemctl stop serial-gettty@ttyAMA0.service
sudo systemctl disable serial-gettty@ttyAMA0.service
And reboot withsudo reboot - Enter the code,
ssty -F /dev/ttyAMA0 raw 9600 cs8 clocal -cstopb
cat /dev/ttyAMA0 - Upon execution of the above command you should see running lines of output, we are only bothered about the line that starts with $GPRMC , if all that you see in this line is commas, then your reciever does not have a proper fix with the satellites, try moving the antenna around, and double check your connections
The python script Weather Station.py is the main script that runs in the python to send the data to the database, it recieves the data from the sensors and sends it to a php file in the server via HTTP POST, and the PhP file then sends the data to the database. Create a php code that reads data off the super global array $_POST[] and send the data to the mySQL or SQLite database. It is preferable to create a hosting account to take care of hosting your server side script. The best one we would reccommend is hostinger, which has php and mySQL support by default.
One more thing you need to do is to ensure that this code runs periodically as this code only sends data once, use crontab to automate this task. I would reccomend running this code for once in 15 or 30 minutes, any less will result in a very huge database with hardly an variation between neighbouring records.
You need to modify the path in /Python/WeatherStation.py as per your server. You can run a local server in your raspberry pi and make it handle all the request or you can do it as in our case a dedicated wamp server to handle all the request.
Download the application here.
Modify its source to get the data from your server and build the apk using Android Studio. you can check out this gitlink directly into andorid studio.
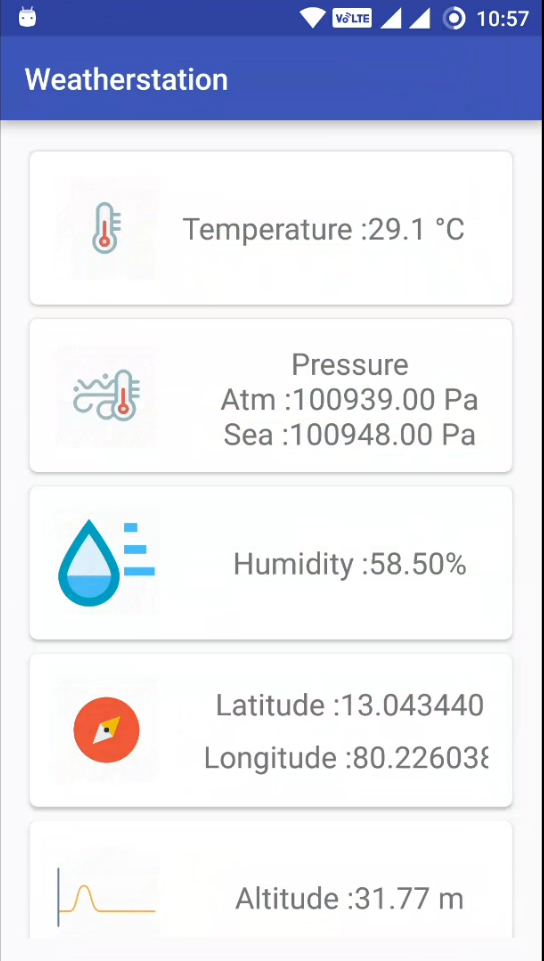
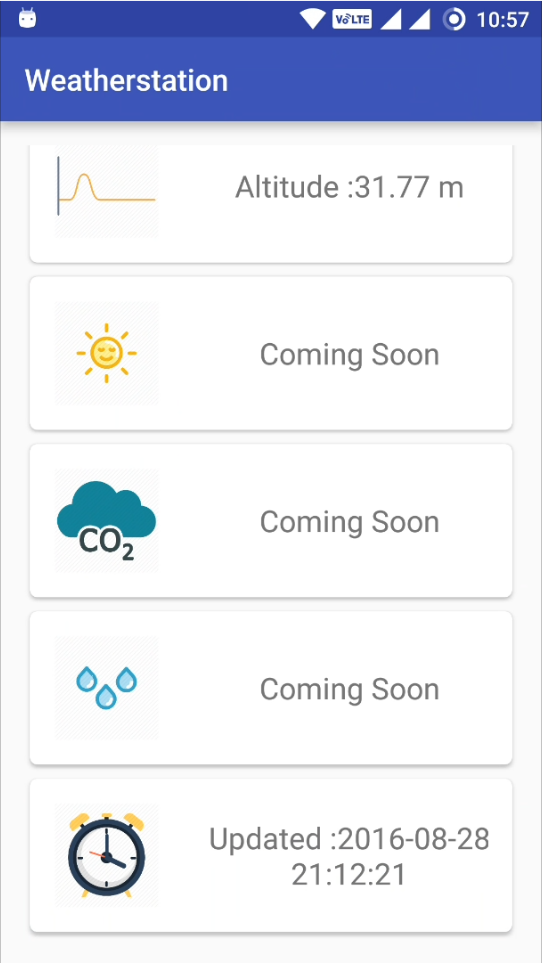
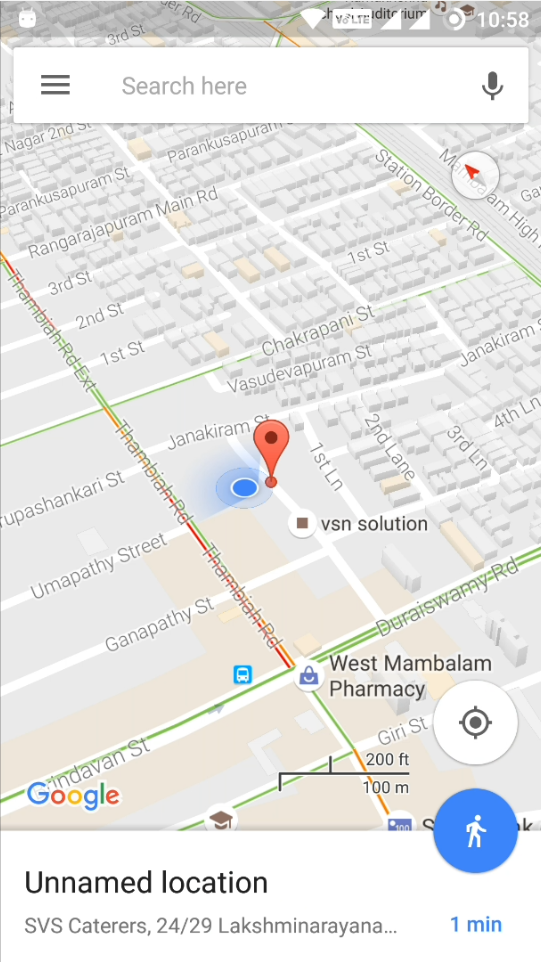
The Android application displays the weather information the Pi records from its sorroundings. Clicking on the location card will open up Google Maps pointing to the location of the Weather Station , this information is recieved from the GPS Module
This happens when you click on the location tile.
##Php Script
As you have the option to install a wamp server in pi its really easy to connect PHP with MySQL in a pi or you can do it as in our case to make a request from the Python (Pi) to the Dedicated Wamp Server to handle the request.
You need to place the Php folder to your /etc/var/www/html/temperature/ make sure to add the database parameters according to your database db_location, db_user, db_password, db_name
Php handles all the request to store all the values sent from the raspberry pi to database. It also is responsible for providing the values from the database to android application. If any Doubts in setting up a wamp server this should help you.
##Database Creation
We use MySql as our primary database this could be either in the same pi that records the temperature or as in our case a dedicated server to store the records. The create table command with the fields is listed down
create table temperature( id int(11) primary key auto_increment,temperature varchar(10), pressure varchar(10),
seapressure varchar(10), humidity varchar(10), latitude varchar(10), longitude varchar(10),
altitude varchar(10), lightintensity varchar(10), co2 varchar(10), rainfall varchar(10), time datetime);