
This repository provides an implementation of a bipedal locomotion controller, described in the paper Terrain-Adaptive, ALIP-Based Bipedal Locomotion Controller via Model Predictive Control and Virtual Constraints(pdf)(arXiv). The controller has two components: (1) an Angular Momentum Linear Inverted Pendulum (ALIP)-based Model Predictive Control (MPC) foot placement planner and (2) a gait controller which takes the foot placement solution as an input. This controller enables improved stability for walking on a variety of sloped and textured terrains. The controller is implemented on the Agility Robotics Cassie Robot.
- Authors: Grant Gibson, Oluwami Dosunmu-Ogunbi, Yukai Gong, and Jessy Grizzle
- Maintainer: Grant Gibson (grantgib@umich.edu)
- Affiliation: The Biped Lab, the University of Michigan
View Shortened Results Video here
View Extended Results Video here
This paper presents a gait controller for bipedal robots to achieve highly agile walking over various terrains given local slope and friction cone information. Without these considerations, untimely impacts can cause a robot to trip and inadequate tangential reaction forces at the stance foot can cause slippages. We address these challenges by combining, in a novel manner, a model based on an Angular Momentum Linear Inverted Pendulum (ALIP) and a Model Predictive Control (MPC) foot placement planner that is executed by the method of virtual constraints. The process starts with abstracting from the full dynamics of a Cassie 3D bipedal robot, an exact low-dimensional representation of its center of mass dynamics, parameterized by angular momentum. Under a piecewise planar terrain assumption and the elimination of terms for the angular momentum about the robot's center of mass, the centroidal dynamics about the contact point become linear and have dimension four. Importantly, we include the intra-step dynamics at uniformly-spaced intervals in the MPC formulation so that realistic workspace constraints on the robot's evolution can be imposed from step-to-step. The output of the low-dimensional MPC controller is directly implemented on a high-dimensional Cassie robot through the method of virtual constraints. In experiments, we validate the performance of our control strategy for the robot on a variety of surfaces with varied inclinations and textures.
The code is organized as follows:
.
├── codegen_alip_mpc
├── cpp_alip_mpc
├── external_packages
├── matlab_alip_mpc
└── media
codegen_alip_mpc- Contains MATLAB and CasADi code that was used to formulate and code-generate the foot placement planner for C++.
cpp_alip_mpc- CMake workspace used to build and run foot placement executable.
external_packages- Contains CasADi packages.
matlab_alip_mpc- Contains MATLAB/Simulink files used for simulating the controller in Simscape Mechanics and building the Simulink RealTime controller.
media- Miscellaneous images and files for this readme.
- Hardware
- Windows 10 Computer
- MATLAB 2017b
- Ubuntu 18.04 Computer
- Ethernet Cables
- Agility Robotics Cassie Robot (needed for experimental tests only)
- Basic understanding of building/operating controllers on Cassie.
- Software
- On Windows Computer
- this repo
- MATLAB 2017b
- On Linux Computer
- this repo
- MATLAB 2017b or newer
- Visual Studio Code
- On Windows Computer
A schematic is shown below that describes how the controller and cassie system are integrated. The controller is separated into two components due to computational limitations of the Cassie Simulink RealTime computer (fixed frequency of 2kHz). The foot placement planner portion is run on a secondary Linux computer. CasADi was used to formulate and code generate an optimization problem described in the (paper)[]. The gait controller is run on the main computer and sends torques to the robot to execute. These commands are computed using the method of virtual constraints and inverse kinematics passivity-based control.

The following section describes how to run the controller in simulation.
- Create an ethernet connection between the Windows 10 computer (running the Simulink Cassie Controller) and the Linux Computer (running the MPC footplacement algorithm)
- On the Windows computer, go to
Network and Sharing Center->Change Adapter options. Right-click your Ethernet connection and select properties. - Make sure Internet Protocol Version 6 (TCP/IPv6) is unchecked.
- Check and double-click Internet Protocol Version 4 (TCP/IPv4). Make sure
Obtain an IP address automaticallyandObtain DNS server address automaticallyare selected.
- On Linux computer, navigate to
Settings->Network->Wired. Create a new connection by clicking the + button. - Select the
Identitytab and enter a unique ID. - Select the
IPv4tab and enter a valid Address. The first 2 sequence of digits should match the ethernet address from the Windows computer (you can find this by runningipconfigin the command prompt). The next 2 can be uniquely made up. The Netmask should be set to255.255.0.0.- Example Windows Ethernet IP Address:
169.254.24.246with matching example Linux Ethernet IP Address:169.254.252.150.
- Example Windows Ethernet IP Address:
- You should now have a working connection. Check this by pinging each computer from each other.
- An example result from the Windows computer would return
C:\Users\gibso>ping 169.254.252.150

Pinging 169.254.252.150 with 32 bytes of data:
Reply from 169.254.252.150: bytes=32 time<1ms TTL=64
Reply from 169.254.252.150: bytes=32 time=1ms TTL=64
Reply from 169.254.252.150: bytes=32 time=1ms TTL=64
Reply from 169.254.252.150: bytes=32 time=1ms TTL=64

Ping statistics for 169.254.252.150:
    Packets: Sent = 4, Received = 4, Lost = 0 (0% loss),
Approximate round trip times in milli-seconds:
    Minimum = 0ms, Maximum = 1ms, Average = 0ms
This section gives instructions for building and running the foot placement component of the ALIP-MPC Controller on a secondary Linux computer. The Cassie Simulink RealTime Computer is fixed at 2kHz so this portion of the controller must be computed on a secondary computer to satisfy computational timing constraints.
- Build Install Casadi by Source and Install
- Open terminal and enter the following commands
cd external_packages/casadi sudo apt-get install gcc g++ gfortran git cmake liblapack-dev pkg-config --install-recommends mkdir build cd build cmake .. make sudo make install- Update library path by adding the following to
.bashrc
export LD_LIBRARY_PATH=LD_LIBRARY_PATH:/usr/local/lib - Build Executables with CMAKE
- We use Visual Studio code to build the executables. Open a VSCode workspace with
cpp_alip_mpc/the top directory. To build- Press
CTRL-SHIFT-Band selectmake. This will create a new build directory and call thecmakeandmakecommands. You can alternatively do this via the terminal. - Selecting
make cleanwith remove thebuild/directory.
- Press
- If this is your first build on the Linux Computer you need to re-create shared object libraries for the code-generated casadi mpc solvers in
cpp_alip_mpc/src/solvers/mpc.
cd src/solvers/mpc ./../../../build/generate_mpc_solver_libs- If you have run
make cleanyou can simply copy the libraries into thebuild/folder instead of generating them with
cd src/solvers/mpc ./../../../build/copy_mpc_solver_libs - We use Visual Studio code to build the executables. Open a VSCode workspace with
- Check that the executable works
- Navigate to the build directory and run the executable.
cd cpp_alip_mpc/build ./cassie_alip_mpc simulator- If you are not connected you should see
************************************************************* ** ALIP-MPC Foot Placement Controller for MATLAB Simulator ** ************************************************************* Error binding to interface address: Cannot assign requested address- If you are connected to the Windows laptop you should see
Make sure you see this before proceeding.************************************************************* ** ALIP-MPC Foot Placement Controller for MATLAB Simulator ** ************************************************************* --> ALIP-MPC Foot Placement Controller Initialized! --> Connecting to cassie...
- Open MATLAB 2017b with
matlab_alip_mpcas the top directory.- Run
start_up_sim.m- Opens all files that may require additional edits (IP address changes, initial simulator configurations, reference commands, etc).
- In
CustomInitFcn_wth_standing.mchange theudp_linux_ip_addressvariable to match the ip address of the linux computer explained here.
- Run
The default test has cassie initially stand, walk-in-place, and then walk down a 5 degree lateral slope (shown below).

To re-create follow these steps
- On the Linux Computer
- Make sure the foot placement controller has been built by following the steps above.
- Open a terminal, navigate to the build directory (
cd cpp_alip_mpc/build/). - Type
./cassie_alip_mpc simulatorbut wait to press enter until the simulator is running.
- On the Windows Computer
- Open
Mpc_SimMechanics_with_standing.slx. - Click the play button.
- You should see the Simscape Mechanics Explorer window appear.
- Open
- Once the simulator starts running (you see the time increasing in the Mechanics Explorer window), run the executable on the Linux Computer.
- You do not need to hit it immediately. If you run the foot placement controller too quickly the UDP connection can sometimes have issues.
Tips
- Make sure to wait until the simulator is running on the Windows computer prior to running the
./cassie_alip_mpcexecutable.
Modifying Reference Commands
- The
RemoteSpoofer_with_standing.mmatlab system is used to mimic radio commands that are sent from the Agility Robotics supplied Radio Transmitter. - The 'RadioCommandInterpreter_with_standing` matlab system gives insight as to how these radio signals are converted to controller reference commands.
- Modify values inside the spoofer script to change references like velocity, slope, friction, step width, step clearance, etc.
Modifying Terrain Slope
- The ground slope can be modified by changing variables in the
simulationInitFcn_with_standing.mfile.- Change the
alpha_xandalpha_yvaribles to do so.
- Change the
- You should also change the slope estimate that the controller uses. To do so, change
RadioButton.RSAandRadioButton.LSAto values between -1 and 1.- By default the 1 corresponds to a slope of 22 deg.
- To match the 5 degree lateral slope in the default example
RadioButton.LSAis set equal to5/22 = 0.2274.
- You can alternatively choose incorrect slope estimates to see how the controller reacts.


Modifying Friction
- In
RemoteSpoofer_with_standing.mchange theRadioButton.SCAvariable.

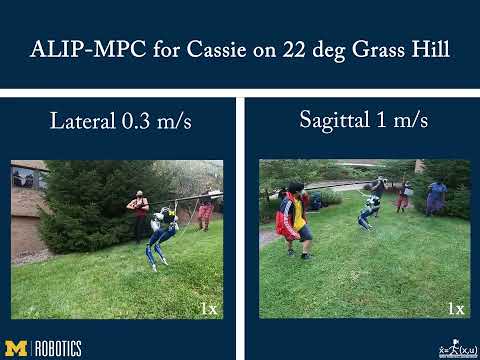
Click images for videos of Experiments.

- Open
Mpc_RealTime_with_standing.slx. PressCTRL-Dand Press build. - Create Bootable USB and copy controller files according to Agility Robotics documentation here.
- Plug the bootable USB with the controller into Cassie's computer.
- Connect Ethernet cables between the main Cassie computer and a secondary Linux Computer.
- For experimental tests, an ethernet connection between the onboard Cassie Computer and secondary Linux Computer is needed. After starting up Cassie and connecting the cables, follow the instructions for creating a new connection detailed above.
- The Cassie Computer IP Address is set to
10.10.10.3. - Set the new Linux Computer IP Address to
10.10.10.150and the netmask to255.255.0.0. - Check the connection once the robot is on and the radio transmitter has connected.
ping 10.10.10.3 - The Cassie Computer IP Address is set to
- Turn on Cassie and run the homing procedure according to the Agility Robotics documentation.
- Run the foot placement executable on the Linux Computer.
cd cpp_alip_mpc/build
./cassie_alip_mpc cassie
- Set the radio transmitter buttons to the default values used in the Remote Spoofer file. Adjust the
LSandRSbuttons such that they are 0 to represent flat ground.- The manual can be found here.
- Start the controller in standing mode by setting
SBto 0 and enable the torques by settingSAto 1. - Switch controller modes to walking by setting
SBto 1 and modify the other buttons accordingly.