OpenAmigaJoyMouseSwitcher is an Open Hardware adapter for Amiga computers that allows switching between a mouse and a joystick at a press of their buttons.
Amiga computers usually have two joystick ports. Normally, a mouse is connected to port 1, while Player 1's joystick is in port 2. Whenever a second joystick is needed, the mouse must be disconnected and Player 2's joystick connected in its place. When you finish playing and get back to Workbench, you have to unplug the joystick and plug the mouse back in. This can be tedious, since for instance the ports are on the back of the computer on A500 models, and thus not easily accessible. It is also dangerous, since while trying to connect a mouse/joystick blindly the power and ground pins might get shorted by the connector's metal shielding, blowing a resistor (or worse an 8520 CIA chip!) inside your beloved Amiga.
OpenAmigaJoyMouseSwitcher is an Open Hardware device that allows you to keep both your mouse and joystick connected at the same time. Whenever you want to switch to the other device, just press a button on it (either the left or right buttons on the mouse, or button 1 or 2 on the joystick).
Actually, none of the two peripherals strictly needs to be a mouse! So you can also use it in port 2 to switch between a joystick and a joypad, for instance.
Solder all components to the board. No particular order is recommended, but starting with the smaller components might be a good idea.
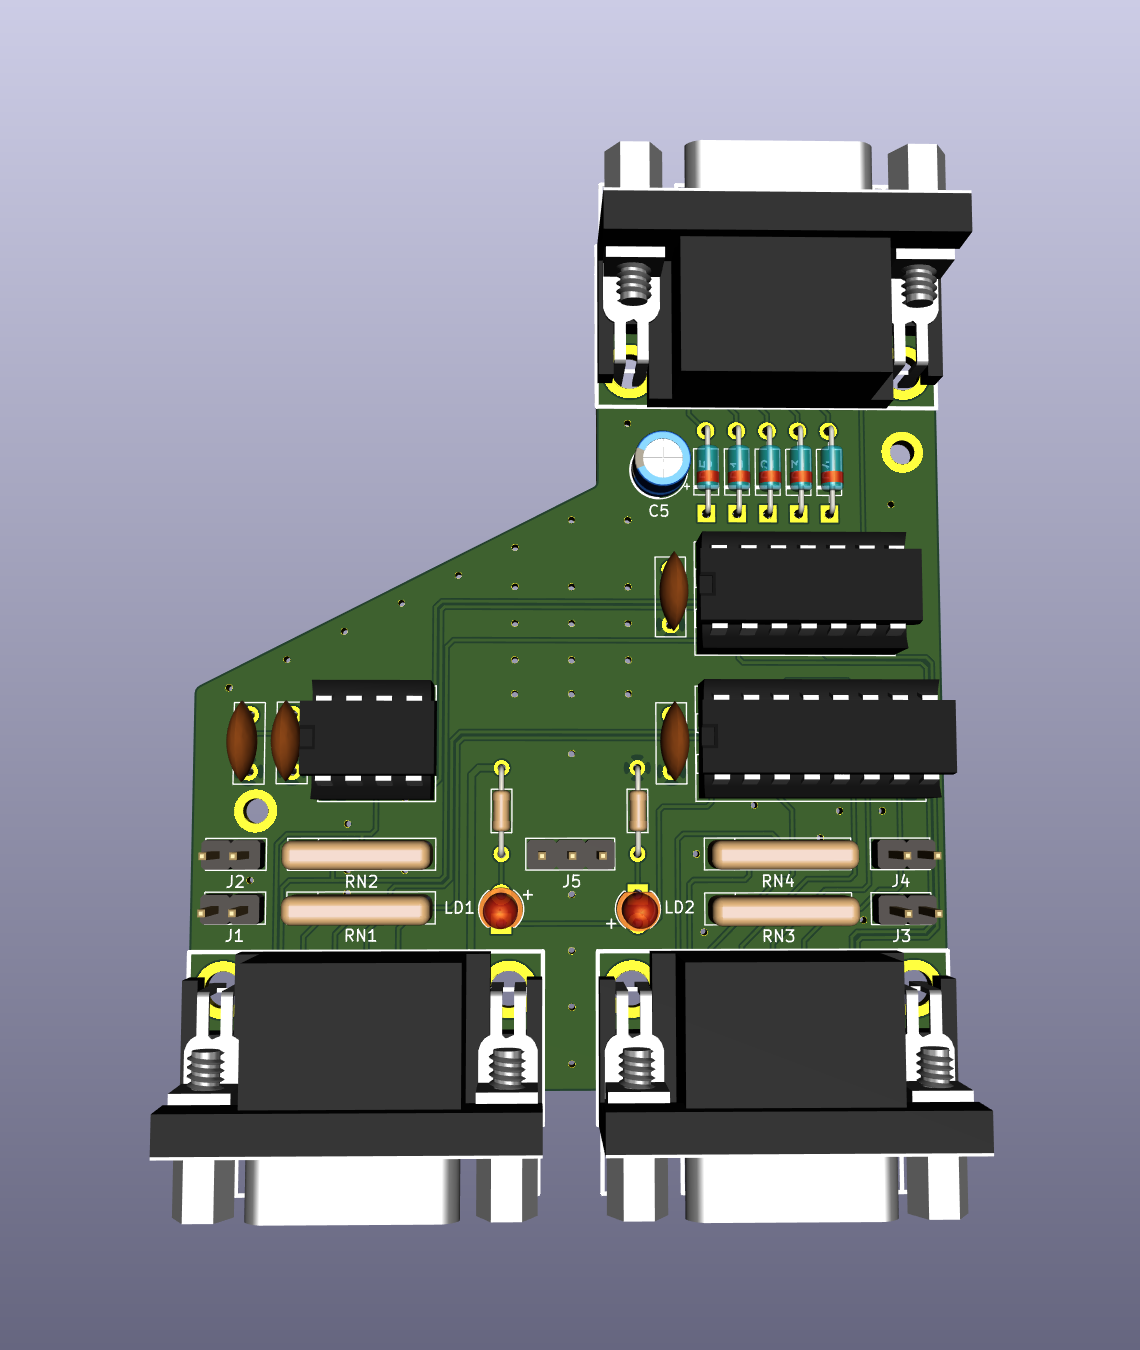
If you have one of the prototype boards with space for 6 diodes, do NOT solder D6, solder a straight wire (or a trimmed resistor/diode leg) to jumper the two pads.
A note about the LEDs: the cathode (shorter leg) goes to the square pad. If you solder them backwards, they will never light up. Also, make sure to dimension the series resistors properly, depending on how bright you want them: 220 ohm can be fine for older red LEDs, but I would recommend to do a test on your bench before soldering them in place.
The adapter has a few configuration jumpers, whose meaning can be found on the back of board. Usually you will want to keep J1/J2/J3/J4 closed. If you are experiencing any issues when you connect a controller that has internal pull-up resistors (that is essentially the Sega MegaDrive/Genesis controller, while the Master System controller does not) to the left port, open J1 and J2. Open J3 and J4 if using the right port. Note that if you disconnect the controller you will have to put the jumpers back on, otherwise the adapter might randomly switch to the unused port.
Button 3 (if any) is not switched automatically but rather manually through J5. Since I am not aware of any Amiga joystick with a third button (the MegaDrive/Genesis controller does, but to use it you would need a more complex adapter with a microcontroller on it) but there are definitely mice with three buttons, you are recommended to keep J5 to your mouse side.
Finally, note that the two ports are almost fully equivalent: the only difference is that the left port gets selected by default at power on.
OpenAmigaJoyMouseSwitcher was designed to work on all Amiga models.
It has been tested and found working fine on many different A500 and A600 mainboard revisions. It also works fine on A1200s revisions 1.D4 and 2B, where other adapters sometimes have issues with right mouse button clicks/joystick button 2 presses that are not detected.
On A600s you might need to use an extension cable, since the adapter might not physically fit into port 1 because of the case shape.
Even though it hasn't been tested on "Big Box" Amigas (A1000/A2000/A3000/A4000) yet, there is no reason why it should not work on any of those models, as long as it physically fits into the port (but you can always use an extension cable).
DO NOT USE ON CD32, it will not work and might be damaged or it might damage your console. Do not either use on Amigas with games that support the CD32 controller.
Finally, OpenAmigaJoyMouseSwitcher MIGHT also be compatible with Commodore 64 and Atari ST computers, but this HAS NOT BEEN TESTED.
It is definitely NOT COMPATIBLE with Sega Master System and MegaDrive/Genesis consoles, nor with MSX computers, despite the similarity of the connectors.
OpenAmigaJoyMouseSwitcher should work with all Atari-style joysticks/controllers and mice that normally work with Amiga computers.
It is also safe to use with Sega MegaDrive/Genesis control pads, which can be problematic on Amiga computers.
OpenAmigaJoyMouseSwitcher should only consume about 10 mA. This is not usually a cause of concern, but it might need to be taken in consideration if using a power-hungry joystick or mouse, as you should never draw more than 50 mA from the joystick port.
One 3D-printable enclosure is currently available for this board:
- Kindly contribution by Youen Chéné available in enclosure folder. It needs 2 screws for assembly.
The OpenAmigaJoyMouseSwitcher documentation, including the design itself, is copyright © SukkoPera 2018-2019.
OpenAmigaJoyMouseSwitcher is Open Hardware licensed under the CERN OHL v. 1.2.
You may redistribute and modify this documentation under the terms of the CERN OHL v.1.2. This documentation is distributed as is and WITHOUT ANY EXPRESS OR IMPLIED WARRANTIES whatsoever with respect to its functionality, operability or use, including, without limitation, any implied warranties OF MERCHANTABILITY, SATISFACTORY QUALITY, FITNESS FOR A PARTICULAR PURPOSE or infringement. We expressly disclaim any liability whatsoever for any direct, indirect, consequential, incidental or special damages, including, without limitation, lost revenues, lost profits, losses resulting from business interruption or loss of data, regardless of the form of action or legal theory under which the liability may be asserted, even if advised of the possibility or likelihood of such damages.
A copy of the full license is included in file LICENSE.pdf, please refer to it for applicable conditions. In order to properly deal with its terms, please see file LICENSE_HOWTO.pdf.
The contact points for information about manufactured Products (see section 4.2) are listed in file PRODUCT.md.
Any modifications made by Licensees (see section 3.4.b) shall be recorded in file CHANGES.md.
The Documentation Location of the original project is https://github.com/SukkoPera/OpenAmigaJoyMouseSwitcher/.
Since the project is open you are free to get the PCBs made by your preferred manufacturer, however in case you want to support the development, you can order them from PCBWay through this link:

You get my gratitude and cheap, professionally-made and good quality PCBs, I get some credit that will help with this and other projects. You won't even have to worry about the various PCB options, it's all pre-configured for you!
Also, if you still have to register to that site, you can use this link to get some bonus initial credit (and yield me some more).
Again, if you want to use another manufacturer, feel free to, don't feel obligated :). But then you can buy me a coffee if you want:
If you need help or have questions, you can join the official Telegram group.
- Thanks to the guys at the Italian Amiga Page forum, in particular:
- majinga for helping with the testing