User Manual
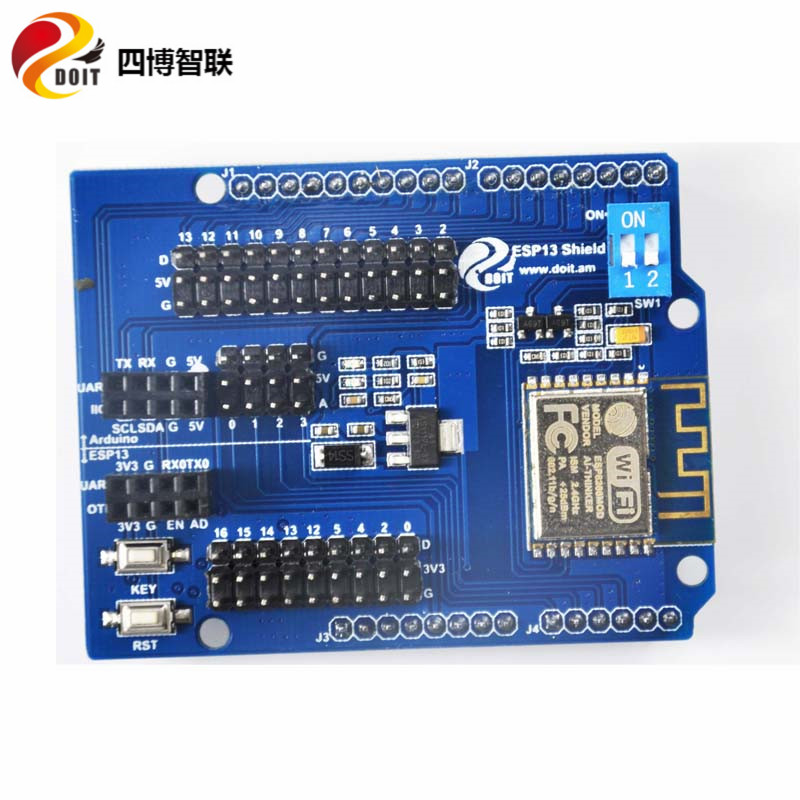
ESP8266 serial WiFi shield is designed and developed based on ESPressif by Shenzhen Doctors of Intelligence Technology, which can be compatible with Arduino UNO, Mega, and other standard development board. By this way, one can quickly go on the 2nd development and design. This WiFi shield can be easy to realize serial to WiFi function with the following features:
- WiFi chip is adopted the industrial ESP8266, and the module is encapsulated by a metal shell, which make the module have the strong anti-interference;
- This shield is fully compatible with Arduino UNO, Mega 2560, and so on, the working voltage of the connection between Arduino UNO and shield can be 3.3V and 5V by the voltage transformation;
- The serial port use a double-way switch to control the shield. If sw1 is off, then shield board can be used separately, otherwise, the shield board would work by connecting the shield board;
- Arduino board don’t need any configuration, then Arduino uno board can internet if insert this shield board;
- Be able to configure the WiFi parameters and serial port by the Webserver;
- This shield board can be used as a desperate ESP8266 board, and certainly use the AT command, and our other firmwares;
- Can be used as a shield board for Arduino UNO.
More details, please visit our official site, and online shop.
Online shop: Buy
User Manual: Download
- Insert this shield board into Arduino board, and power it;
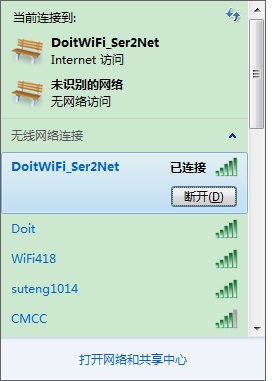
- Connect the WiFi signal named as “DoitWiFi_Ser2Net”, and input the password=“12345678”.
- Input 192.168.4.1 in the pc browser, and you can set the network configuration parameters;
- After that, you can download the PC TCP software tcpudpdebugger;

Another example is shown in the manual to exhibit the connection to the internet sever, More details, please download the user manual.
- when you download the code to the Arduino, please let the sw1 (1 and 2) as "OFF" state;
- before you input the IP address, please connect the wifi signal named as “DoitWiFi_Ser2Net” to set the parameters.