This Repository is part of the Israel Hiking Map project. It contains all the files and instructions needed to create the tiles and offline copies of the Israel Hiking Map - a topographic map with style similar to trail maps published by the Israel Trails Committee and the Israel MTB Map - a topographic map for MTB trails and urban bike lanes.
The maps can be seen at IsraelHiking.osm.org.il. The site has additional facilities including customized trip planning and sharing, points of interest, trails, and route upload and download.
Please see the License terms for using the repository and any tiles created using it.
Enjoy, open a OSM account, and add trails to make these map even better :-)
- Online maps
- Offline maps
- Tile Access
- Building the map
- Minimal recommended configuration
- One-time setup
- Map tiles generation
The maps are available for online use with several applications:
The map is available for Online use as part of OruxMaps' built-in maps.
Selected the maps using Maps → Switch map → ONLINE
Off-Road is available for Android and iOS devices. Selected the maps for online and offline viewing from the "Maps" menu.
Add the maps using Maps → ONLINE → "+"
The maps can be added to QGIS as a tiles layer.
- Install the "QuickMapServices" plug-in into QGIS.
- Click on the Search QMS icon.

- Type the word "Israel" in the search box and wait for the search results.

- Click "Add" next to the required map.
Please open the download dialog from your Android device and follow the instructions.
Notes:
- Locus Map allows the use of OruxMaps offline maps using:
- Maps → Offline → "+" → External maps → "+"
- Menu → Local drives
- Navigate to the
oruxmaps>mapfilesfolder - Approve
Please consult this pdf file.
Notice: Automatic updates for Android are no longer available
The offline maps can be automatically downloaded and updated on Android devices using the free Autosync Google Drive application
-
Open the offline map collection link from your PC.
-
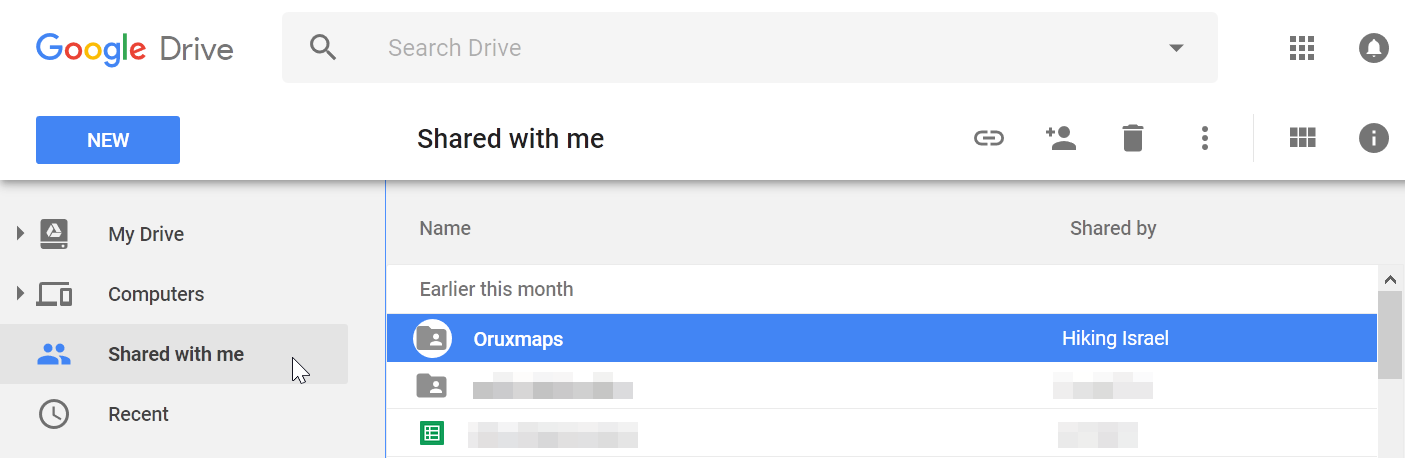
Navigate to to your Google Drive's "Shared with me" collection and check that you see "Oruxmaps" in the list. You cannot complete the next steps without it.
Maps in the "Shared with me" collection do not reduce the space on your Google Drive.
-
Install the free Autosync Google Drive application.
If you are happy with it, please consider supporting the developer by buying the Pro version. -
Open Autosync Google Drive
-
Review the Menu → Settings → Autosync page, and the following in particular:
- Enable Autosync or not
- Autosync interval
- Internet connection to use Mobile data or not
-
Switch to the "Synced Folders" tab
-
Add a new folder pair using
+button

-
Choose the remote folder in Google Drive: Navigating to "Shared with me" → "Oruxmaps" → <Map Name> and
SELECT


If the "Oruxmaps" folder is not showing in the "Shared with me" list, please wait a few minutes and try again.
-
Choose the local folder in Device: Navigating to the
Israel HikingorIsrael MTBfolder under the OruxMaps mapfiles folder and touchSELECTNotes:
- OruxMaps mapfiles folder is specified at "Maps" → "Maps Settings" → "Maps directory".
- If you never downloaded the map before, please create the
Israel HikingorIsrael MTBfolders as appropriate. - If Oruxmaps is not installed on your device, and you want to use offline maps for Off-Road or Locus Map, please also create the folder
/storage/emulated/0/oruxmaps/mapfiles.
-
Choose "Download only" Sync method and
SAVE


-
Enable Auto-Sync or perform manual syncs when desired.

- For Autosync Google Drive to work properly on Android 6.0 and later, please consider disablng battery optimization for this app.
- The Pro version is required in order to syncronize more than one folder, as shown above.
MOBAC - MOBile Atlas Creator is used to create offline maps for many navigation applications. It is a JAVA program that runs on Windows, Linux, macOS, and more.
- Download MOBAC - MOBile Atlas Creator.
- Download the
Israel Hiking Online.xmlorIsrael MTB Online.xmlmap source to the{MOBAC installation folder}\mapsourcesfolder.
Other*Online.xmlmap sources can also be used. - Download the
mobac-profile-Israel Hiking Online.xmlormobac-profile-Israel MTB Online.xmlprofile to the{MOBAC installation folder}folder.
Other*Online.xmlprofiles can also be downloaded using theRAWbutton. - Open MOBAC. It takes some time since it runs on Java.
- Move the map by right-click and drag in order to show Israel and then use the mouse scroll or the zoom slide to reach a zoom between 7 and 16.
- Choose your preferred "Map Source" on the left pane and verify that you see the desired map.
- Choose one of the "Saved Profiles" on the left pane and "Load" it.
- Use Atlas → Convert Atlas Format to select the atlas format accepted by the target map application.
- Expand the "Atlas Content" and delete unrequired zoom levels, if any.
- Click "Create Atlas". An "Atlas" is the map prepared for offline use.
- A window should pop up with progress, make sure to check "ignore download errors", the operation should take about 20 Minutes, depending on the zoom levels selected, your Internet speed, and the performance of your PC.
- Once finished, click "Open Atlas Folder", look for a folder named
{Atlas Name}_{Date}_{Time}and copy its contents (not the folder) to the application.
iPhone and iOS users can find instructions for using MOBAC to create and install offline maps for Galileo and Looking4Cache.
The tiles on the the Israel Hiking server are available according to the License terms.
The URLs are following the Slippy map tilenames naming conventions.
Please avoid overloading the server and use Tile Mirroring where possible to minimize the the load.
The following tile sources are currently available for zoom levels 7 to 16.
The trails overlays also include roads and elevation countours.
Note: Different applications and sites may use different syntax for specifying the {x}, {y}, and {z} parts of the URL. Please modify the URL below accordingly.
| Israel Hiking | URL |
|---|---|
| Hebrew Base Map | https://israelhiking.osm.org.il/Hebrew/Tiles/{z}/{x}/{y}.png |
| English Base Map | https://israelhiking.osm.org.il/English/Tiles/{z}/{x}/{y}.png |
https://israelhiking.osm.org.il/OverlayTiles/{z}/{x}/{y}.png |
| Israel MTB | URL |
|---|---|
| Hebrew Base Map | https://israelhiking.osm.org.il/Hebrew/mtbTiles/{z}/{x}/{y}.png |
| English Base Map | https://israelhiking.osm.org.il/English/mtbTiles/{z}/{x}/{y}.png |
https://israelhiking.osm.org.il/OverlayMTB/{z}/{x}/{y}.png |
Sites and application owners are encouraged to create a mirror of latest tiles on their servers.
We have found that wget is a simple and effective tool to maintain a tile mirror for a site. For example:
cd IsraelHiking
wget --recursive --timestamping --accept=png --no-parent --no-host-directories --no-verbose --limit-rate=200k https://israelhiking.osm.org.il/Hebrew/Tiles/ https://israelhiking.osm.org.il/Hebrew/mtbTiles/ > temp/wget_tiles.log 2>&1
wget comes pre-installed with most Unix and Linux distributions.
A free MS-windows version of wget is available for download online.
A periodic task for updating the tiles mirror can be created.
- MS-Windows: Windows' Task Scheduler
- Unix/Linux: the cron utility.
Follow the process below if you want to create your own tiles or modify the map style. Maperitive is used to create the map tiles and it runs on Windows, Linux and macOS.
- A 64-bit Windows PC
- 8 Gb RAM
- 20 Gb free disk space
Notes:
- This repository was not tested on Linux or macOS. Please submit your questions, comments and updates as new issues.
- Linux and MacOS require the use of Mono in order to run Maperitive.
- Download the latest Maperitive version from the Maperitive site
- Extract the contents of the zip file to a desired location.
- If you have Administrator permission for your Windows machine, you can unzip to the
Program Filesfolder, but this is not a requirement. - If MOBAC will be used for creation of offline maps, the two installation directories need to have the same parent directory or the MOBAC directory needs to be added to the
PATHenvironment variable.
- If you have Administrator permission for your Windows machine, you can unzip to the
- Download the Israel Hiking Map zip file from the IsraelHikingMap/Map on GitHub site (this site if you read this file in GitHub).
- Choose a location on a disk with no less than 10GB of free space. Our favorite locations are in the Maperitive Install folder, or within the Documents folders hierarchy.
- Unzip the zip file to chosen location.
- Rename the top
Map-masterfolder toIsraelHikingMap. - Download the wget zip file.
- Create a
wgetdirectory in the same parent directory as the Maperitive installation directory. Alternatively, place the wget directory elsewhere and add it to thePATHenvironment variable. - Extract the contents of the zip file to the wget directory.
- Download and install osmconvert in a derectory included in
%PATH% - Download and install osmupdate in a derectory included in
%PATH%. Renameosmupdate.exetoosmup.exe.
- Ensure you have Internet connection to enable downloading of the latest OpenStreetMap data.
- Double-click on the
IsraelHikingMap\Scripts\Maperipy\CreateOruxMap.pyscript file. - If asked how to open the file, please choose
maperitive.exefrom the Maperitive installation folder.
This should generate 256x256 png tile files inside the IsraelHikingMap\Site\Tiles folder and would take several hours.
You may choose to do it overnight, but you need to make sure you don't get out of memory.
To make the locally generated tiles available for offline use.
- Follow the instructions to prepare a map for offline use, and exit MOBAC.
- Download
Israel Hiking.xmlto the{MOBAC installtion folder}\mapsourcesfolder. - Edit the
IsraelHiking.xmlfile and change the\<sourceFolder\>tag to the full path of the directory were the tiles were created, such as...\{IsraelHikingMap Install folder}\Hebrew\Tiles. - Run MOBAC
- On the left side under "Map Source" choose "Isreal Hiking Local".
- Re-create the atlas using your locally generated map.
Created by Harel Mazor and Zeev Stadler 31-Mar-13.