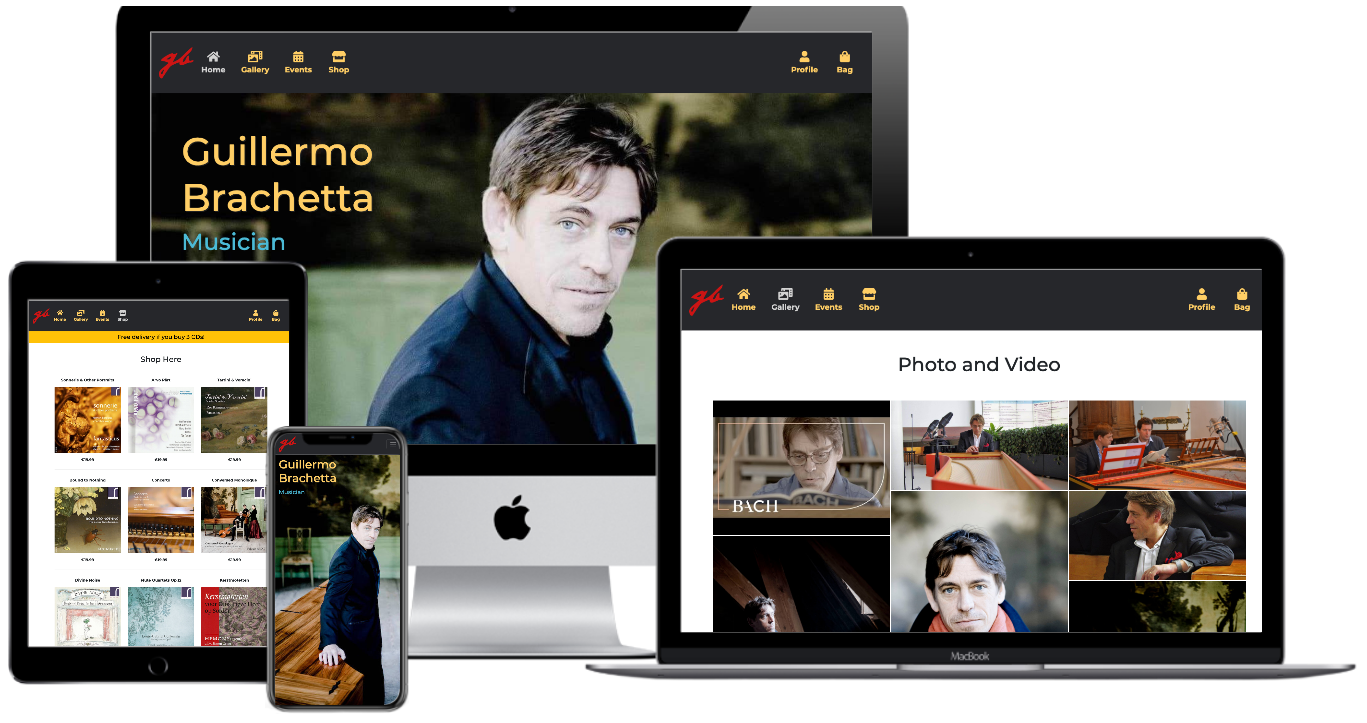
Guillermo Brachetta, harpsichordist, scholar and baroque music specialist showcases in this site his portfolio and connects with people interested in his work, activities, personal life and recordings he has to offer.
Guillermo shares his love for art, inviting users to discover the sophistication of an expression that despite having been created centuries past, are kept as alive as ever through the passion of artists across the world.
Feel welcome to engage with the content in a visual and auditive way, discover more about the artist, be aware of his future concerts, get to know him more closely through text, pictures and video and purchase his albums.
- Table of Contents
- UX
- Features
- Information Architecture
- Technologies Used
- Testing
- Deployment
- Credits
- Disclaimer
The ultimate goal of the app is to encourage people to discover the artist and connect with him. The app informs users about future and past events, offers media for them to get to know the artist and his art and purchase his recordings.
This website is intended for the author, to showcase his work and activities, and for the public to discover them.
The website is aimed at a general public, the target in general ranging from young adults onwards, in general educated people and with an inclination to enjoy classical (baroque) music.
Concert organisers will also benefit by being aware of the artist's calendar of activities and having a clear way to contact him.
Users will either want to find information about the artist, know when they could attend to one of his concerts and buy his recordings.
The app provides as much information about the artist as possible while keeping it decluttered. The web is the most appropriate vector to share multimedia such as sound, images and video, and gives the user the chance to purchase CDs and the site owner an effective channel to promote himself.
The app features information on several aspects, professional and personal, aimed at creating a relationship between the artist and the visitor.
Users can create a profile if they are interested in purchasing a CD, but the app lets anonymous users to freely browse all information in it.
Registered users can also edit all information related to their account and request a password reset.
Administrators are able to update the database on site by adding, editing and deleting media, events and albums.
To make all interaction as clear as possible, buttons are available only when they are permitted to the privileges of a registered user or admin. Access to admin-only pages are forbidden for plain users.
No anonymous writing to the database is permitted by the app.
The main objectives of the site for the owner are:
- Showcase his activities.
- Let the visitor know about who he is, what he does and when.
- Offer a platform to display his work and sell it.
- Give a clear way to get in touch and be contacted.
- Promote his concerts and activities by offering clear information of past and future engagements.
- Spread the love for baroque music in general and harpsichord in particular.
The main goals of the site for the visitors are:
- Get to know and connect with the artist.
- Know clearly where and when they can attend one of their concerts.
- Discover how he presents himself by looking at the media album.
- Have a preview of his art by watching his videos.
- Discover what CDs he offers on sale and be able to securely purchase them from home.
| As a user | I would like to | so |
|---|---|---|
| As a user | I would like to be visually engaged when I land on the site | so I desire to stay. |
| As a user | I would like to have a pleasant experience in whichever device I use | so I can visit regardless of where I do it from. |
| As a user | I would like to navigate the site easily | so I can quickly find what I look for. |
| As a user | I would like to easily find social media links | so I can quickly explore further. |
| As a user | I would like to always have access to contact information | so I can get in touch from whichever page I'm in. |
| As a user | I would like to know who the artist is | so I can feel connected to them. |
| As a user | I would like to be able to see what their looks are | so I can recognise him. |
| As a user | I would like to be able to see them in photo and video | so I can know what they look like. |
| As a user | I would like to be able to listen to what they do | so I know their artistry. |
| As a user | I would like to know his biography and experience | so I know what supports his art. |
| As a user | I would like to know what they thinks about being an artist | so I can feel related as a person. |
| As a user | I would like to be able to easily find information about events | so I can plan attending one. |
| As a user | I would like to know when and were have them performed before | so I know their experience. |
| As a user | I would like to be able to see what CDs has the artist recorded | so I can decide a purchase. |
| As a user | I would like to be able to purchase securely the CDs | so I feel peace of mind about my personal information. |
| As a user | I would like to be able to register an account | so I can make effortless future purchases. |
| As a user | I would like to be able to reset my password | so I can log in in case I forgot it. |
| As a user | I would like to be able to see my order history | so I can make sure to know what I have purchased. |
| As a user | I would like to be able to update my user details | so I can be sure my delivery information is accurate. |
| As a user | I would like to see clearly what's in my shopping bag at all times | so I don't forget to checkout. |
| As a user | I would like to | so |
|---|---|---|
| As a user | I would like to be able to add media and have it automatically added to my album | so I don't need extra effort. |
| As a user | I would like to be able to edit media | so it automatically updates my album. |
| As a user | I would like to be able to delete media | so it automatically disappears from my album. |
| As a user | I would like to be able to add events | so they display automatically on my site in the right order. |
| As a user | I would like to be able to modify events | so they update automatically on my site in the right order. |
| As a user | I would like to be able to delete events | so they disappear automatically from my site. |
| As a user | I would like to be able to add new items to my shop | so they populate it automatically without breaking the layout. |
| As a user | I would like to be able to edit existing items in my shop | so they reflex the changes automatically. |
| As a user | I would like to be able to delete existing items in my shop | so they disappear from the shop without breaking the layout. |
| As a user | I would like to be able to replace photos and have a preview of it | so I don't make mistakes. |
I chose Bootstrap (v.4.5) for my CSS framework for its solidity, flexibility and practicality in creating and adapting its many possible elements.
The navigation and footer are present throughout the site and possess a strong iconographic characteristic to accentuate the purpose.
The landing page relies basically on big background images that display the artist's personal views about his passion. A biography can be accessed at the end of the images on a separate modal.
The rest of the content has a more relaxed approach, focusing on individual visual elements to avoid distraction. For that reason, the color palette has been kept discreet so the visitor would focus their attention on the relevant items.
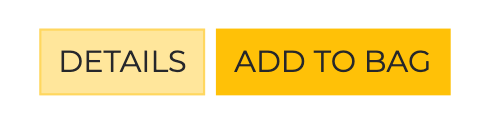
Buttons have been kept discreet, with a clear purpose of focussing on what they do without further distractions for the visitor. They only use the main two colours of the site.

The color palette has been kept to a minimum, having chosen dark gray for navbar and footer, white for background and a shade of dark yellow for nav items, hovered buttons and to highlight relevant information. Dark red has been chosen for the logo as the only occurrence of that color to differentiate it, as it's been the image of the artist for a period of time, and a shade of magenta for accenting some keywords on the landing page.

Montserrat was the font of choice for its excellent legibility specially on small screens and timeless elegance.
Font Awesome icons were used by their immediate and unmistakable impact. Navigation items are pictographically underlined by them, social media and edit and delete actions for admins also use them to avoid unnecessary text.
Note:The app evolved and several improvements were put in place through development.
The wireframes served as guidelines but some details such as positioning, placement of objects, images and buttons and other refinements diverge from the original wireframes on the current state of the application.
Since there's virtually little to no difference between tablet view and desktop view besides the navbar collapsing on smaller tablets, wireframes for them have been omitted


The app consists of the following apps:
- Home App
- Album App
- Events App
- Shop App
- Bag App
- Checkout App
- Profiles App


-
The navbar is fixed at the top and always visible and contains quick and easy access to all content.
-
The logo is svg injected directly in the template and serves as a "Home" button.
-
The shopping bag icon indicates the presence of items to be checked out, even when the navbar is collapsed, as a reminder for the user.
-
The navbar always reflects by a different colour the "active" or current page.
-
The "Profile" navigation item changes to the name of the current visitor if they are logged in, and displays in its dropdown menu relevant options for a logged in user. Otherwise it gives the user the choice of registering or logging in.
-
Admins have several extra options in the dropdown, such as manage photo and video, events and shop items.
-
The nav item
Profiledisplays the username when the user is authenticated. In order to ensure that an username too long won't mess up the layout of the navbar, a custom validator has been put in place for the username, limiting its length to 10 characters, which works as a good maximum length without creating too much margin with the following item. The method used was as follow as anadapter:class UsernameMaxAdapter(DefaultAccountAdapter): def clean_username(self, username): if len(username) > 10: raise ValidationError( "Please enter an username of maximum 10 characters" ) return DefaultAccountAdapter.clean_username(self, username)
-
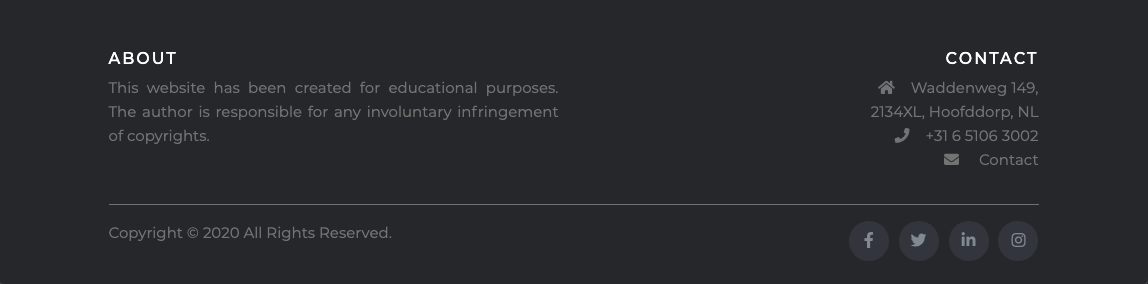
The footer is sticking to the bottom on all pages and shares theme with the navbar.
-
It's divided in two rows with two columns each (desktop view) displaying a disclaimer, contact information, copyright information and social media icons, respectively.
-
On mobile view the layout changes to 4 stacked rows for the same content.
-
The Contact link opens a modal with a contact form to send an email from the app. The contact form populates with the current user information if they are logged in.
-
JQuery was used in order to render the form in the modal and access the view, since I didn't want users to navigate to a new template to send the email:
$(function () {
    $("#trigger-contact").on("click", () => {
        $("#form-modal").load("/contact", () => {
            $("#contact").modal("show");
        });
    });
});
-
To prevent a potential user to access the view directly from the address bar, vanilla JS was put in place to redirect them to the homepage in that event (JQuery is not loaded directly in the modal), because accessing the contact url would result in an unformatted template since as it is a modal, it doesn't inherit from the base template.
if (window.location.href.indexOf("contact") > -1) {
    window.location.replace("https://guillermo-brachetta.herokuapp.com");
}
-
Social media links open an external page.

- The landing page is the first content the user sees and as such it has to make a strong impression.
- I decided to use 4 stacked divs with an image background covering the full viewport on each of them.
- There are several animations in place, including asynchronous parallax, overlays changing opacity and content translating and changing opacity.
- It was a challenge to make sure this was usable on all platforms, since some of them (particularly iOS) have a different approach when it comes to consider what 'viewport' is.
- GSAP and Parallax.js were used to deal with those, as each serve a different purpose and sort the issues encountered during development across platforms.
- The full process and troubleshooting of this is detailed in the testing page.
- The landing page uses bold images of the artist and the content is of personal tone, attempting to make an emotional connection with the user.
- There's a link at the end of the content that opens a modal with the artist's biography, since I considered unnecessary to have a dedicated template for that content.

- The Album app (gallery) displays a dynamic photo and video gallery.
- The gallery was created with Nanogallery2, which allows for a very elegant result and a lot of customisation.
- The grid was built using a
masonrystyle, and it renders randomly on every load, so the gallery looks always different. - Hovering on the thumbnails shows a
photo black and whiteeffect. - On scroll, the thumbnails render with animation.
- Clicking a thumbnail displays a lightbox with the full image, relevant information such as file name and caption, and several buttons to download, resize, zoom in and out and share the image, also through social media.
- The lightbox displays at the bottom a row of small thumbnails for a preview of other images in the album.
- The gallery can be set by a button to slide through the album automatically.
- The gallery is capable of playing video as well (YouTube, Vimeo) and created its thumbnail dynamically taking it from the one on the server side.
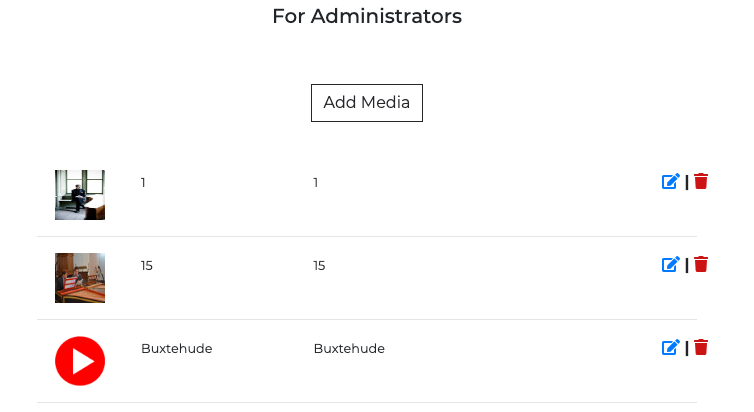
- Administrators have here as well an additional button to add new media, and a list of all images in the gallery with a small thumbnail that facilitates editing, replacing or deleting it.
Although the gallery was already perfectly functional, it bugged me that the thumbnails showing in it were the full-sized images, thus if the gallery contained large files those took time to download and render.
In order to offer the best possible experience I decided to incorporate the functionality of automatically creating small thumbnails of the original files.
The way I dealt with this is as follows:
- First I modified my model Photo, and added to it the
thumbnailfield. - I then created this method within the class:
    def save(self, *args, **kwargs):
      if self.image:
          self.thumbnail = make_thumbnail(self.image, size=(600, 600))

          super().save(*args, **kwargs)
      else:
super().save(*args, **kwargs)- This method saves the records:
- If it is an image, it passes it to the method
make_function(below) and saves it. - If it isn't an image, saves the record without going through the thumbnail creation, as this indicates it is the url of a youTube video and thumbnails are generated by them.
- If it is an image, it passes it to the method
- The method to create the thumbnail is:
    im = Image.open(image)
    if im.format == "JPEG":
        im.convert("RGB")
        im.thumbnail(size)
        thumb_io = BytesIO()
        im.save(thumb_io, "JPEG", quality=85)
        thumbnail = File(thumb_io, name=image.name)
    else:
        im.convert("RGBA")
        im.thumbnail(size)
        thumb_io = BytesIO()
        im.save(thumb_io, "PNG", quality=85)
        thumbnail = File(thumb_io, name=image.name)
return thumbnail- It uses PIL to open the image.
- Checks for one of the two allowed formats (JPEG and PNG) and converts them according to their color space (I also added
FileExtensionValidatorto myimagefield in the model, only allowing PNG, JPEG and JPG to be uploaded). - Then the method returns the thumbnail to the model.
- In order to generate the two files, image and thumbnail, I altered the form so it includes:
    image = forms.ImageField(
        label="Image", required=False, widget=CustomClearableFileInput
    )

thumbnail = image.hidden_widget- That way I made sure that the field thumbnail is not visible to the admins and that it gets populated with the same data the image field contains, so that the thumbnail and the image correspond to each other.
- As a result, the speed of the gallery increased dramatically, since the user only renders the full size image when they click on the thumbnail.
- As an indication, thumbnails are approximately 40Kb, while images can take up to a few Mb.
- Finally they are both uploaded to the method
random_filename(as indicated in the model):
def random_filename(instance, filename):

    ext = filename.split(".")[-1]
    filename = "%s.%s" % (uuid.uuid4(), ext)
return os.path.join("", filename)- This ensures that the filenames are unique, so even in the event the admin uploaded images with the same name the resulting file would be uniquely named, avoiding then obvious conflicts.
-
Customisation of Nanogallery2 is achieved in the template with a set of value-data pairs in the
datananogallery2attribute:<div id="nanogallery2" data-nanogallery2='{ "thumbnailWidth": "400 XS200 SM300", "thumbnailHeight": "auto XSauto SMauto", "thumbnailBaseGridHeight" : 100, "thumbnailGutterWidth" : 2, "thumbnailGutterHeight" : 2, "thumbnailBorderHorizontal" : 0, "thumbnailBorderVertical" : 0, "gallerySorting": "random", "galleryDisplayTransition": "slideUp", "galleryResizeAnimation": true, "galleryDisplayTransitionDuration": 1000, "thumbnailDisplayOrder": "random", "thumbnailDisplayTransition": "scaleUp", "thumbnailDisplayTransitionDuration": 500, "thumbnailHoverEffect2": "imageGrayOn", "viewerToolbar": { "display": true, "standard": "minimizeButton, shareButton, fullscreenButton", "minimized": "minimizeButton, fullscreenButton, downloadButton, infoButton" }, "viewerTools": { "topLeft": "label", "topRight": "playPauseButton, zoomButton, fullscreenButton, closeButton" }, "thumbnailLabel": { "display": false, "valign": "bottom", "position": "overImage", "hideIcons": false, "displayDescription": true } }'>
-
Many more combinations are possible and the plugin is extremely flexible.
Note NanoGallery2 animates the thumbnails in a random order and in a random sequence. This has an impact on the results of Lighthouse (performance) as it waits for all animations to end, but it's not what the user perceives as the animations are part of the features of it.
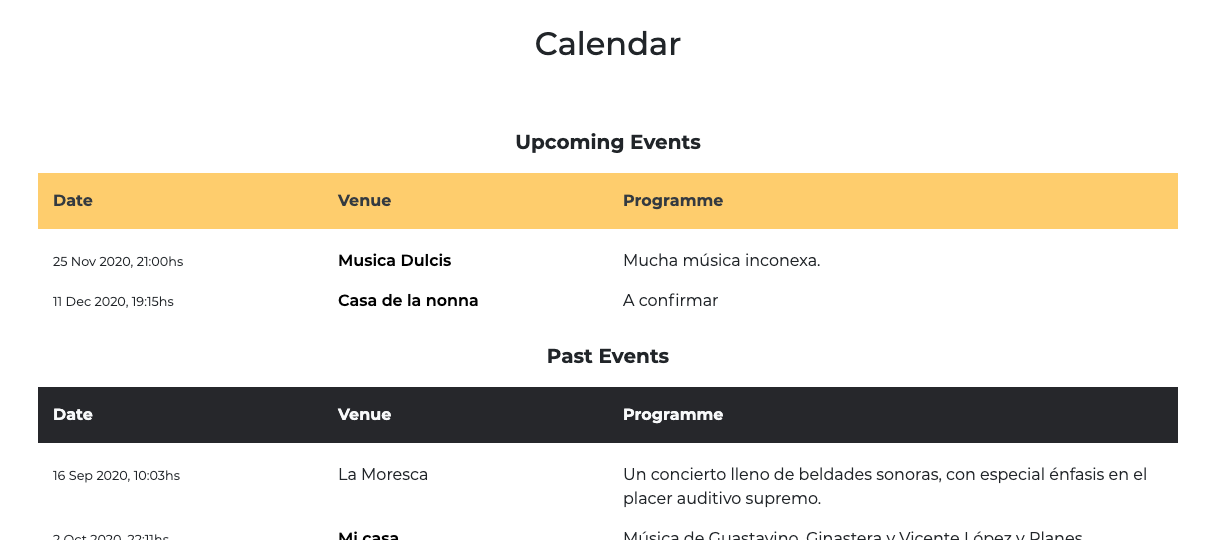
- The events app displays future and past events organised in two different grids respectively.
- As the admin adds new events through his dedicated view, they are placed in the correct order and displayed in reverse order so the user can see immediately which are the events happening sooner.
- To render events in their corresponding grid, the following property was attached to the Events class:
    @property
    def is_due(self):
        """ Allows to display the event in its corresponding grid """
        return date.today() > self.date

    @property
    def is_future(self):
        """Allows to display the event in its corresponding grid"""
return date.today() <= self.date- By that I could use
{% if event.is_due %}to place events accordingly. - The URL to an external page (venue) is optional and opens a blank page.
- Administrators have links after each event that allow him to either edit or delete the record.
- Administrators have as well an additional button to add a new event.
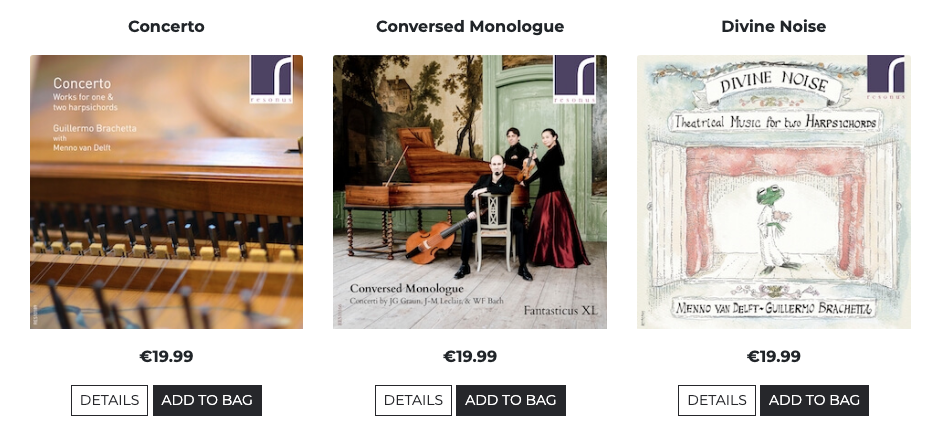
- The Shop main page display a responsive grid containing the cards for each CD offered.
- The cards consist of a header with the CD title, the CD image, the price and two buttons so either find out more about the particular CD or add a single unit to the shopping bag.
- Administrators also will see two icons to edit and delete them.
- More details about the CD can be also accessed by clicking on its image.
- Hovering on the images displays a semi-transparent overlay giving a visual indication of it acting as an hyperlink.
- Accessing the individual CD template by either clicking on the image or the button renders a bigger picture of the CD cover plus a written detail.
- Additionally customers have in the detail template the option to add to their shopping bag a quantity different than one if they want, the button on the main shop bag attaching to the bag just unit as it's the most likely amount to be purchased for these types of products.
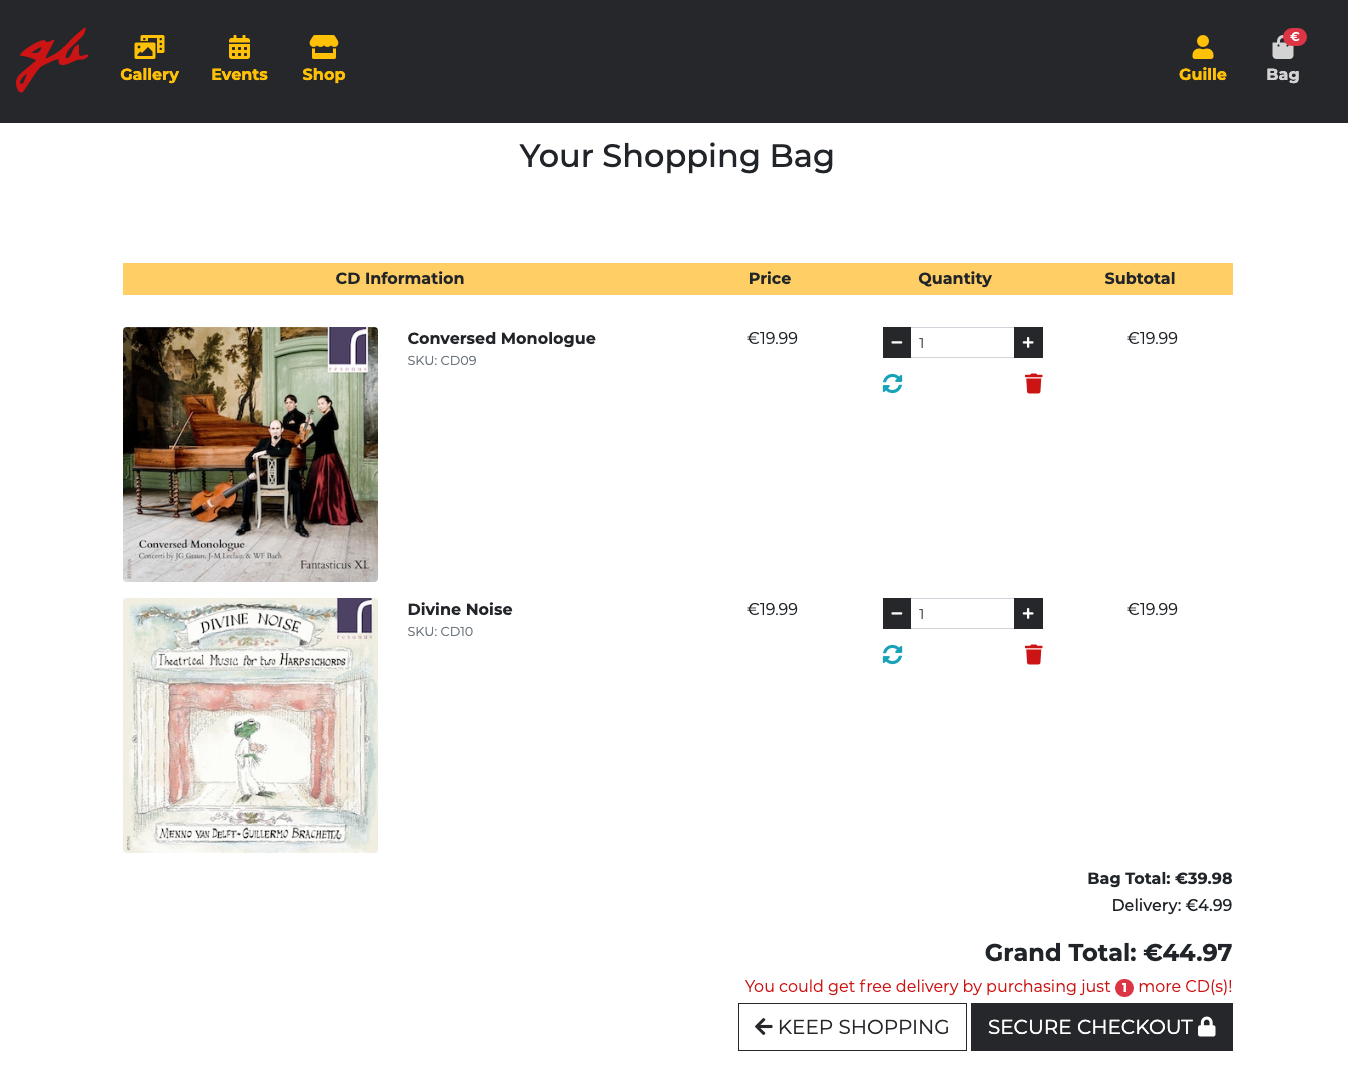
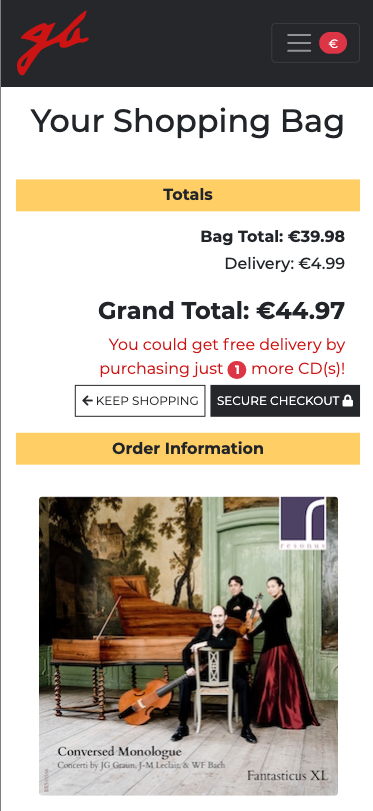
- The Bag app displays a summary of the order prior to checking out.
- Quantities can be adjusted, or line items entirely removed.
- Delivery cost is displayed during this process, so the user is enticed to buy additional items to get free delivery.
- When sufficient items are added to the bag, the delivery cost reflects that updating accordingly.
- The two buttons at the bottom take the user either back to the shop or to the secure checkout in order to complete the purchase.

- The Checkout app renders two columns with a form on the left and the order summary on the right.
- If the user is authenticated, the information already present in the database will populate the form, although the user can update it.
- If the user is not authenticated the user will be invited to fill out the form and make the purchase as a guest, or create an account or log in.
- The checkout system implements Stripe in its testing (developing) version.
- To test checkout, users can enter
4242 4242 4242 4242for the credit card number, any future date and any 3 digits for the CVC. - Webhooks have been put in place, so the order is created only after Stripe accepts the payment as valid.
- Once the Webhook return a success status, the system notifies both the customer and the admin of the site about a new order created, sending each one of them a differently customised email through an smtp server.
- A message also pops briefly up to let the user know immediately that their order has been successful.
- Users have a last possibility to go back and review and adjust their bag.
- There's a clear message letting the user know how much will they be charged.
- On success, the system renders a new template with a full summary of the order and a thank you message.
- The success page also displays a button to go back to the shop.
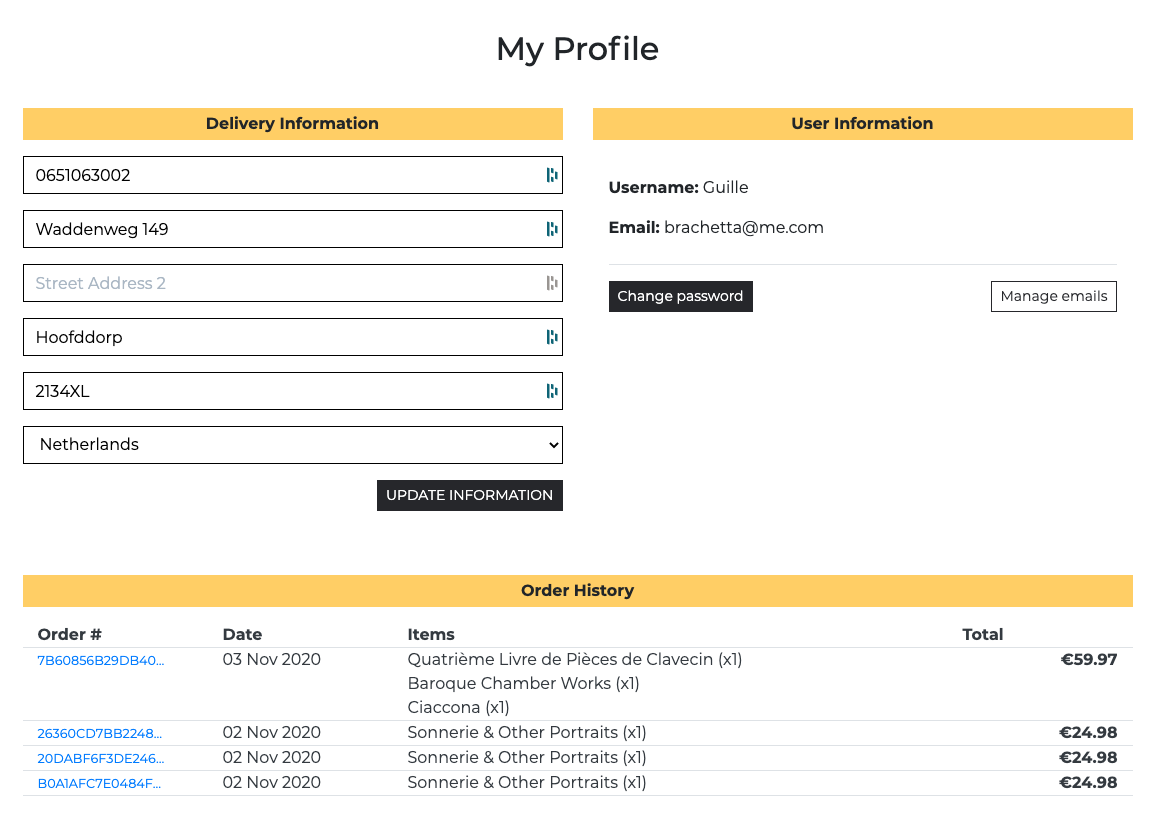
- The profile page is obviously available to authenticated users only.
- It contais the user's delivery information, user information and order history.
- The delivery information can be updated from the same template.
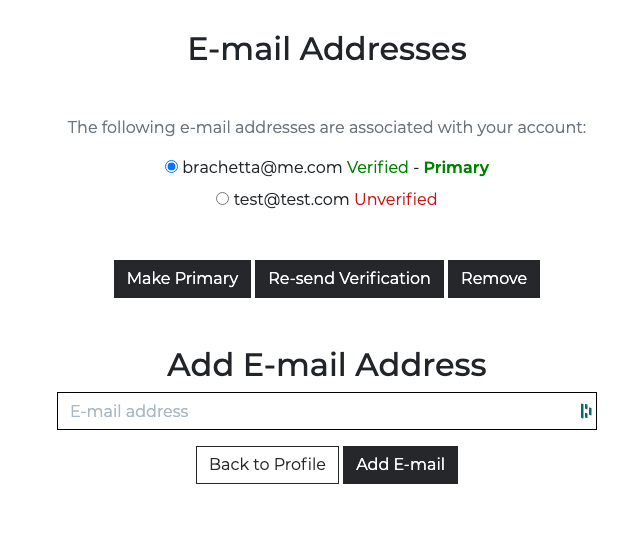
- The user information displays the username and the primary email address. There are two buttons that allow the user to change their password and to manage their email accounts, letting them replace the current one or adding a new one.
- Users can also choose which email address is the primary one.
- The order history lets the user see all their purchases in the site, and review each individual ones by clicking on the order number.
- Users can edit their account and change their delivery information.
- Users can edit and manage their email addresses.
- Users can request a password reset in case they forget it, or they can change the password from the Profile app.
- Users are allowed to delete email addresses, provided there's at least one present.
- Logout logs the user out without the intermediary page to confirm which allauth sets by default. To do this the following setting has been added to the app:
ACCOUNT_LOGOUT_ON_GET = True.
- Admins can add, edit and delete any item in the database without exiting the app (except deleting users).
- Administrators also receive a custom email when a user has placed an order.
- Administrators have access to all feature to perform CRUD on the database without needing to exit the app or visiting the admin panel.
- All images interacting with the database are dynamically stored in AWS S3, together with all other static files.
- Admins can upload CD photos using the interface provided. In case a photo is not provided during the creation of the CD, a default generic picture will be displayed as a fallback.
- Admins can upload media to the gallery in a similar way.
- Custom methods and templates have been put in place.
- In the event of one of the mentioned errors happening, the template will still retain footer and navbar, allowing the users to navigate back directly from those templates.
Future goals to further improve the app will be:
- Use the live version of Stripe to accept payments.
- Offer customers more payment methods, such as debit card, PayPal or money transfer.
- Put in place stock control.
- Offer users the possibility to register and login with social accounts.
- Deploy the app in a custom server.
The following models were used to develop the app.
| Key | Type | Validation |
|---|---|---|
| name | CharField | max_length=254 |
| caption | TextField | |
| image_url | URLField | max_length=1024, null=True, Blank=True |
| image | ImageField | upload_to=random_filename, null=True, blank=True |
| thumbnail | ImageField | upload_to=random_filename, null=True, blank=True, validators=[FileExtensionValidator(["jpeg", "jpg", "png"])] |
| Key | Type | Validation |
|---|---|---|
| name | CharField | max_length=254, null=False, blank=False |
| venue | CharField | max_length=254, null=False, blank=False |
| programme | TextField | null=False, blank=False |
| date | DateField | auto_now_add=False, null=False, blank=False |
| time | TimeField | auto_now_add=False, null=False, blank=False |
| event_url | URLField | max_length=1024, null=True, blank=True |
| Key | Type | Validation |
|---|---|---|
| order_number | CharField | max_length=32, null=False, editable=False |
| profile | ForeignKey: UserProfile | on_delete=models.SET_NULL, null=True, blank=True, related_name='orders' |
| full_name | CharField | max_length=50, null=False, blank=False |
| EmailField | max_length=254, null=False, blank=False | |
| phone_number | CharField | max_length=20, null=False, blank=False |
| country | CountryField | blank_label='Country*', null=False, blank=False |
| postcode | CharField | max_length=20, null=True, blank=True |
| town_or_city | CharField | max_length=40, null=False, blank=False |
| address_line1 | CharField | max_length=80, null=False, blank=False |
| address_line2 | CharField | max_length=80, null=True, blank=True |
| date | DateTimeField | auto_now_add=True |
| delivery_cost | DecimalField | max_digits=6, decimal_places=2, null=False, default=0 |
| order_total | DecimalField | max_digits=10, decimal_places=2, null=False, default=0 |
| order_items | DecimalField | max_digits=4, decimal_places=2, null=False, default=0 |
| grand_total | DecimalField | max_digits=10, decimal_places=2, null=False, default=0 |
| original_bag | TextField | null=False, blank=False, default="" |
| stripe_pid | CharField | max_length=254, null=False, blank=False, default="" |
| Key | Type | Validation |
|---|---|---|
| order | ForeignKey: Order | null=False, blank=False, on_delete=models.CASCADE |
| cd | ForeignKey: Cd | null=False, blank=False, on_delete=models.PROTECT |
| quantity | IntegerField | null=False, blank=False, default=0 |
| lineitem_total | DecimalField | max_digits=6, decimal_places=2 null=False, blank=False, editable=False |
| Key | Type | Validation |
|---|---|---|
| user | OneToOneField: User | on_delete=models.CASCADE |
| default_phone_number | CharField | max_length=20, null=True, blank=True |
| default_street_address1 | CharField | max_length=80, null=True, blank=True |
| default_street_address2 | CharField | max_length=80, null=True, blank=True |
| default_town_or_city | CharField | max_length=40, null=True, blank=True |
| default_postcode | CharField | max_length=20, null=True, blank=True |
| default_country | CountryField | blank_label="Country", max_length=40, null=True, blank=True |
| Key | Type | Validation |
|---|---|---|
| sku | CharField | max_length=10, null=True, blank=True |
| name | CharField | max_length=254 |
| description | TextField | |
| price | DecimalField | max_digits=6, decimal_places=2 |
| out_of_stock | BooleanField | default=False |
| image_url | URLField | max_length=1024, null=True, blank=True |
| image | ImageField | null=True, blank=True |
They have been altered and given extra functionality with methods, decorators and classes.
-
No data is stored in the file system.
-
Since Heroku has an ephemeral file system all static files are stored in an AWS S3 bucket.
HTML: Used for markup.
CSS: Used to style the elements of the app.
Bootstrap: to make use of its grid system and responsiveness.
JavaScript: Used for the functionality of the app.
jQuery, to access and manipulate the DOM.
Font Awesome, for all icons.
GSAP, for the animations on the landing page.
Parallax.js, for the parallax animations on the landing page.
Nanogallery2, for the gallery on the album page.
Google Fonts, to deliver the fonts used in the site.


Python Framework used as the base of the project.
Python, for all backend logic.
Django-allauth, for the app authentication.
Django-storages, to take care of all static files.
Pillow, to deal with images uploaded.
Stripe, to set up payment, checkout and webhook system.
AWS, to store all static and media files.
SQLite, local database.
Postgresql, the database storing all tables and records.
Django Cleanup, deletes files from fs when user does from the admin or app.
Django Bootstrap Datepicker Plus, displays a stylish datepicker in the events forms.


Visual Studio Code: my IDE of choice for all my projects.
GitHub: My remote storage for this project.
Heroku, the platform to deploy the app.
Balsamiq: to create the wireframes of this project.
Cloudinary: to store background images and the images of this readme file.
Tinypng: to reduce image files size.
Git: for version control.
Crispy Forms: To render forms across the project.
Pipenv, to deal with the virtual environment.
Django Bootstrap Datepicker Plus, to render date and time fields in style.


Testing can be viewed in this external file.
This project can be ran locally by following these steps:
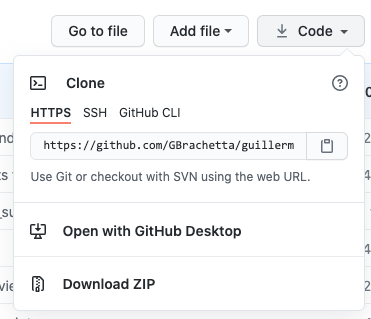
-
Visit this Repository link and click on the Clone or Download button to copy the link provided.
-
In your IDE, open a Terminal window and change to the directory where you want to clone this project and type:
Git clone "your copied link"After pressing Enter the project will be created and cloned locally.
(Alternatively you can download the zipped file, decompress it and use your IDE of choice to access it.)
-
Make sure you either have access to your email server settings and credentials or to your cloud based email, such as Gmail.
-
Install Pipenv. This app was developed on a Mac, and on MacOS you can install pipenv by typing
brew install pipenv(provided you have Homebrew installed). -
Create a virtual environment by typing
pipenv shell -
Install all dependencies present in pipfile by executing
pipenv install -
Make sure to have a test account on Stripe
-
Create a series of environment variables following the below criteria.
{ "DEVELOPMENT": true, "SECRET_KEY": "your_secret_key", "DATABASE_URL": "your_link_to_your_postgres_db", "STRIPE_PUBLIC_KEY": "your_Stripe_PK", "STRIPE_SECRET_KEY": "your_Stripe_SK", "STRIPE_WH_SECRET": "your_Stripe_WH_secret" }Note: There are environment variables not used or needed when working locally, such as the ones for AWS and smtp email server, which were only used once the app was deployed.
There are several methods to work with environment variables. I personally prefer to create a
.envfile which VS Code loads automatically. The format for a.envfile is as follows:KEY=VALUE
For alternative methods to deal with environment variables on VS Code, please refer to this link
Please refer to Stripe's documentation in order to create your Webhook handler!. Please modify your app settings.py file accordingly.
-
Run migrations by:
python3 manage.py makemigrations (--dry-run)python3 manage.py migrate (--plan) -
Create a superuser by typing in terminal
python3 manage.py createsuperuser -
You will then be able to run the app locally by typing either
python3 manage.py runserver.
Heroku was chosen as the deployment platform for this project. The steps to deploy the local app to Heroku were as follow:
-
In Heroku, created an app. The app must have a unique name.
-
Linked that app to the GitHub repository by going to the "Deploy" tab in the main app menu.
-
Selected a branch to deploy automatically (alternatively one could opt to deploy manually instead).
-
Attach an Heroku-Postgres database to the app.
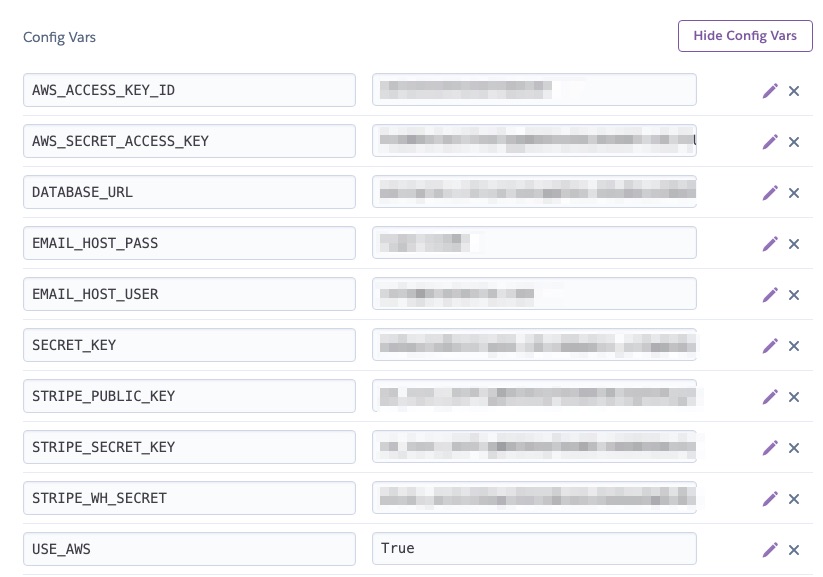
-
In the Settings tab, added the corresponding Config Variables as present in my local development.
-
Create an AWS S3 bucket
Please refer to AWS' documentation in order to setup a bucket and obtain access to it in the app. Please modify your app settings.py file accordingly.
-
I used Pipenv to deal with my virtual environment, which creates a pipfile for the dependencies needed for the app and a pipfile.lock to deal with versioning of these dependencies.
-
This pipfile renders the file 'requirements.txt' unnecessary, so it was not included in the project.
-
I installed the dependency Gunicorn which is a Python WSGI HTTP Server.
-
I also created a "Procfile", needed by Heroku in order to know how to run the app and instructed it to run my app using the Gunicorn server in it.
-
When deploying, Heroku reads the pipfile to install the dependencies, reads the Procfile and the Config Variables inserted above.
-
After that process, the app was live and running remotely in Heroku's servers.
-
Additionally I created a subdomain of my domain
www.brachetta.comand forwarded the app deployed on heroku, so this app can be accessed also at guillermo.brachetta.com, but at the moment of this writeup I don't have a ssl certificate attached to that subdomain and thus accessing the app through that url points to a non-secure site. Attaching a SSL certificate will be done once the app passed assessment and it justifies the extra expenses caused by it. For the secure url please refer to the link stated at the top.
-
During the development I used GitFlow for version control.
-
By this I was able to isolate features in different branches and integrated them as soon as they were finished and fully tested.
-
As soon as I considered that a feature was finished I then merged its branch to the develop branch. I then deleted stale branches once they were sufficiently tested and approved for release.
-
When a group of features made a release worthwhile I then merged the develop branch to the master branch.
-
Additionally, and for testing purposes, I often also deployed feature branches in order to double-check that the app was responsive remotely.
-
Over 20 branches were using during the development of this app, to ensure isolated environments for each of them without interfering with already functioning features.
-
To deal with these features i used GitHub issues and put in place a project board, which helped me organise my workflow and have a clear overview of where in the process of my development I was.
- All content is of my own property.
- I'm the owner of all rights of the images, media, video, music used in this site.
- Photos are taken by different photographers and are acknowledged in the respective slide in the gallery.
Code was written by the author for the present app, albeit inspired by freely available tutorials, instructional documentation and open source examples. On such instances, the sources have been mentioned in the code where it corresponds. Notable sources of information, inspiration and source to sort problems are:
- Stack Overflow sorted quite a few of my doubts.
- Code Institute and its Django module provided with some solid boilerplates, specifically related to Stripe, which were adapted to the needs of this site.
- Mi loyal mentor, Simen Daehlin
- Kind help by CKZ8780
- Amazing support from Kris-B
- They guys at GreenSock
- Unfailing encouragement by fdeboo
This app and its deployment are for instructional purposes only, not intended commercially in any way and its eventual copyright infringements are involuntary.