
Firmware and software to run an ESP32-CAM module on your Flipper Zero device.


- Introduction
- Videos
- Hardware Requirements
- Hardware Installation
- Firmware Installation
- Software Installation
- Software Guide
- Special Thanks
- Contributions
- Licensing
- Changelog

Discover a new dimension of possibilities by connecting your ESP32-CAM module with your Flipper Zero device. The ESP32-CAM module, a compact powerful cheap camera module, enables you to capture images and stream a live video to your Flipper Zero. With this suite, your Flipper Zero becomes a hub of creativity and utility.
What You Can Do:
-
Capture Moments: This custom Flipper Zero application empowers you to take pictures effortlessly. View real-time image previews on your Flipper Zero screen while you capture high quality blocky and pixelated memories! Hey it's still a memory and we're at least having fun...
-
Personalize Your Experience: Tailor your camera settings with ease. Adjust camera orientation, experiment with various dithering options, and toggle flash, haptic feedback, sound effects, and LED effects to match your preferences. Feel free to use this as a flashlight too, it's pretty bright and good at blinding yourself unexpectedly!
There will be many more features added in the future! If you have any ideas or suggestions, please let me know by opening an issue here.
[ Back to top ]
This section is dedicated to all the fans that have made videos of this project! Thank you!
If you have a video you'd like to share, please let me know by opening an issue here.
Expand for videos
Flipper Zero ESP32 CAM Camera Module - by TAKEAPART
https://www.youtube.com/watch?v=cEl5UnWH_Ok
Tech With Kids - Flipper Zero ESP32 Kamera - by @rechtsanwalt.okan.dogan
https://www.instagram.com/reel/C4DrufKoKrb/

[ Back to top ]
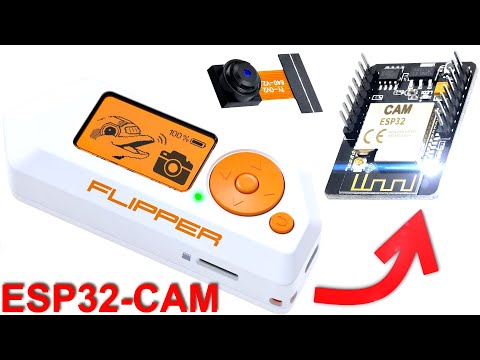
Requires an ESP32-CAM module. Below are two images of the ESP32-CAM module. You can find these all over Amazon, Ali Express, and other retailers.


[ Back to top ]
Below is the pinout guide and diagram for the ESP32-CAM module to the Flipper Zero. From the ESP32-CAM module to the Flipper Zero:
VCC to 3V3
GND to GND (Be sure to use the right GND, see image below.)
U0R to TX
U0T to RX
On the ESP32-CAM module itself you'll also need to connect the IO0 pin to GND. This will place the module into flash mode for installing the firmware later on (see Firmware Installation). You can do this by connecting a jumper wire, a button, or a switch to do this.

[ Back to top ]
The firmware is the software that runs on the ESP32-CAM module. It is required to use the camera module with your Flipper Zero. There are two ways to install the firmware, the new, easy way, and the old, hard way. The new way is a script that will do everything for you, the old way is a manual process that requires you to install the Arduino IDE and manually flash the firmware to the ESP32-CAM module. I recommend the new way, but if you have issues with it, try the old way.
Simple Installation - Firmware Flashing Utility
- Download/clone this repository to your computer.
- Run the script found at the root of this directory:
firmware-flash.bat. - Follow the on screen instructions to continue to flash the firmware to your ESP32-CAM module.
That's it, let me know if you have any issues!
Involved Installation - Manually flash with Arduino IDE
-
Clone/download this repository to your computer.
-
Download and install the Arduino IDE from here.
-
Open
flipper-zero-camera-suite\firmware\firmware.inowith your Arduino IDE. -
In the Arduino IDE, go to
File > Preferences. -
In the
Settingstab, add the following URL to theAdditional Boards Manager URLsfield:https://dl.espressif.com/dl/package_esp32_index.json -
In the Arduino IDE, go to
Tools > Board > Boards Manager. -
Search for
esp32and installesp32byEspressif Systems. -
Plug in your Flipper Zero via USB. Make sure qFlipper or something else isn't connected to it already after doing so.
-
On your Flipper Zero, open
GPIO > USB-UART Bridge. -
In the Arduino IDE, go to
Tools > Board > esp32 > AI Thinker ESP32-CAM. -
In the Arduino IDE, go to
Tools > Portand select the port that your Flipper Zero is connected to. -
Plug in the ESP32-CAM module to your Flipper Zero while connecting the
IO0pin toGND. See Hardware Installation for more information. -
Press the RST button on the back of the ESP32-CAM module to boot it into flash mode.
-
In the Arduino IDE, go to
Sketch > Uploadto upload the firmware to your ESP32-CAM module. You will see upload progress in % and receive a message on completion if successful. -
Fin! Now you may use the Software Installation section to install the software on your Flipper Zero to take advantage of this hardwares firmware.
Note the upload may fail a few times, this is normal, try again. If it still fails, try pressing the RST button on the back of the ESP32-CAM module again or checking your connections.
On success, your screen should look like this:

[ Back to top ]
Below are two ways to install the software on your Flipper Zero. The first way is the simple way, the second way is the involved way. The simple way is to install the fap file via the Flipper Zero application catalog. The involved way is to manually install the fap file to your Flipper Zero MicroSD card.
Simple Installation - Flipper Zero Application Catalog
This fap app is available on your phones Flipper Zero application catalog! Simply open the Flipper Zero app on your phone, go to the "Applications" tab, and search for "Camera Suite". Install it and you're good to go! More information about Flipper Zero applications can be found here.
Involved Installation - Manually Install Files
-
Connect your Flipper Zero via USB, or insert your MicroSD.
-
Navigate to the latest GitHub "Build + upload" action here.
-
Open the most recent action on that page (top of the list) and download the fap zip for either "dev" or "release" build versions of the Flipper Zero firmware depending on your usage. Generally you'll want to use the "release" build version.
-
Move "camera_suite.fap" into
~\apps\gpio\on your Flipper Zero MicroSD:. # The Flipper Zero MicroSD root. ├── apps # The Flipper Zero Applications folder. | ├── gpio # The Flipper Zero GPIO folder. | | ├── camera_suite.fap # The Camera Suite application.
-
Reinsert your MicroSD into your Flipper Zero if you took it out.
-
Plug in your ESP32-CAM module to your Flipper Zero.
-
Press the "Power" button on your Flipper Zero to turn it on.
-
Open the application "[ESP32] Camera Suite":
Applications > GPIO > [ESP32] Camera Suite
-
That's it! Follow the on screen instructions to continue.
[ Back to top ]
| Button | Action |
|---|---|
| 🔼 | Contrast Up |
| 🔽 | Contrast Down |
| Toggle invert | |
| Toggle dithering on/off | |
| ↩️ | Go back |
| 🔵 | Take a picture and save to the "DCIM" folder at the root of your SD card. Image will be saved as a bitmap file with a timestamp as the filename ("YYYYMMDD-HHMMSS.bmp"). If flash is on in the settings (enabled by default) the ESP32-CAM onboard LED will light up when the camera is opened. |
| Setting | Description |
|---|---|
| Orientation | Rotate the camera image 90 degrees counter-clockwise starting at zero by default (0, 90, 180, 270). This is useful if you have your camera module mounted in a different orientation than the default. |
| Dithering Type | Change between the Cycle Floyd–Steinberg, Jarvis-Judice-Ninke, and Stucki dithering types. |
| Flash | Toggle the ESP32-CAM onboard LED on/off while using the camera. |
| Setting | Description |
|---|---|
| Haptic Effects | Toggle haptic feedback on/off. |
| Sound Effects | Toggle sound effects on/off. |
| LED Effects | Toggle LED effects on/off. |
[ Back to top ]
A huge thanks to the following people and projects for making this possible:
- This project is based on & forked from the Flipper Zero Camera Application by Z4urce. Thanks Z4urce for the inspiration and the great work!
- I based this projects application structure on the Flipper Zero Boilerplate Application by leedave. Thanks leedave for the great boilerplate application that helped me learn how to structure a Flipper Zero application properly!
- WillyJL for your guidance and wisdom, contributions to the F0 community, and the amazing Momentum Firmware!
- TalkingSasquach for your contributions to the F0 community, for all of your helpful YouTube videos, and the Discord community!
- RogueMaster for your contributions to the F0 community, and the amazing RogueMaster Firmware!
- The project images were drawn using the a application called "lopaka" by sbrin. Thanks sbrin for your help in creating the images for this project!
- The Flipper Zero community for all your support and feedback!
[ Back to top ]
To contribute to this project, please follow the steps below:
- Fork.
- Create a new branch:
<username>/[<issue-#>]-<feature-or-bug-fix-desc> - Program. Commit changes, push.
- Request PR here, introduce work via your branch.
- Wait for review and merge.
When developing the firmware, be sure to download the dependencies by running the firmware-assets.bat batch script at the root of this directory. This will download the ESP32-CAM firmware dependencies (Arduino Build & Git Assets) to your Windows TEMP folder. You can run the same script over again later to remove the temporary files when you're done using them. Once installed, add these dependencies and their directories to your "Include path" in your IDE of choice. I prefer Visual Studio Code; there's a guide on how to get started with that workflow here:
https://github.com/CodyTolene/Flipper-Zero-Development-Toolkit
Example include path:
C:/Users/<username>/AppData/Local/Temp/arduino-cli/**/**Thank you for any and all contributions to this project, I'm looking forward to seeing what you come up with! If you have any questions, please let me know by opening an issue here.
[ Back to top ]
This project is licensed under the BSD 3-Clause license. See the LICENSE file for details. Certain files in this project are based on code from Espressif Systems (Shanghai) PTE LTD and are licensed under the Apache License, Version 2.0. See the APACHE_2_LICENSE file for the pertaining license text.
SPDX-License-Identifier: BSD 3-Clause, Apache-2.0
[ Back to top ]
Thanks to all the people and projects that made this possible! I hope you enjoy this project as much as I enjoyed working on it. If you have any questions, please let me know by opening an issue here.
| Type | Info |
|---|---|
| webmaster@codytolene.com | |
| https://www.buymeacoffee.com/codytolene | |
| bc1qfx3lvspkj0q077u3gnrnxqkqwyvcku2nml86wmudy7yf2u8edmqq0a5vnt |
Fin. Happy programming friend!
Cody Tolene