Simple self-hosted frontend for Google Custom Search Engine.
While this engine does use Google's API to perform searches, you aren't directly connecting to google.com which means none of Google's analytics and tracking is running in the background as you search. They do still collect some data on your API usage, though it's minimal compared to using their proprietary search engine. ALSO You don't get any of the spammy "promoted" or advertisement links that usually appear at the top of the search page. Using a custom frontend for Google's search API gives you ONLY the results you need.
Prerequisites:
Create a new Programmable Search Engine. Feel free to name your engine whatever you want. Ensure that you choose "search the entire web" for what to search and enable Image Search functionality. Once your engine has been created, click "customize" and then copy your Search Engine ID.
Go to console.cloud.google.com and create a new project. Again, you can name it whatever you want but matching your Custom/Programmable Search Engine's name would make organization easier. Select your newly created project once it is finished.
Head to developers.google.com and scroll down to where it says "Identify your application to Google with API key" and click the blue "Get a key" button next to "Programmable Search Engine (free edition) users." Choose your project you created on Google Cloud and when the option shows up, click "Show Key" and copy this as well.
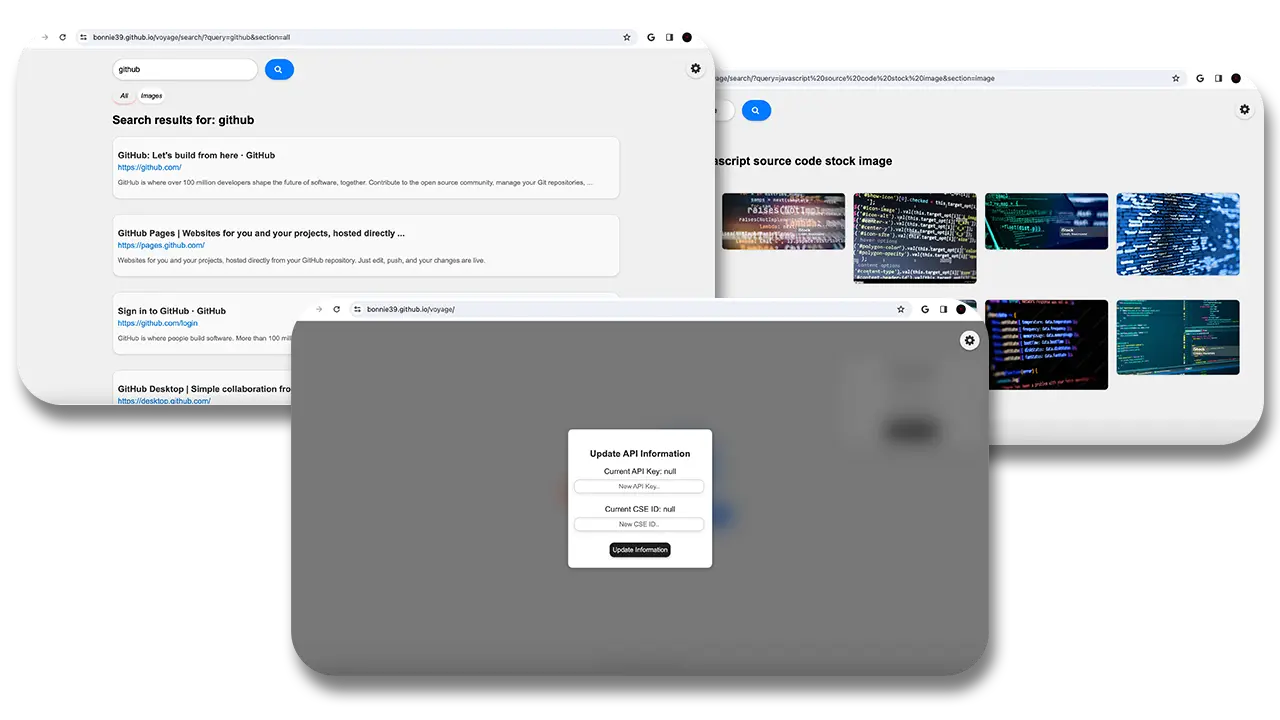
Before using Voyage you will need to click the gear icon in the top right and choose "Change API Key" and enter in your JSON Api Key and CSE ID that you acquired in the previous steps. Once this has been completed, you can start searching!
Download the source code from this repository and extract the ZIP file's contents to where ever you wish. If you don't have it already, download Visual Studio Code. Once you have it downloaded open it and head to the Extensions Marketplace (button on the left with 4 blocks) and search for Live Server by Ritwick Dey. Once that is downloaded, open any file from Voyage's source code in the editor and press the "Go Live" button on the bottom left. Note that if you close VSCode you will have to launch the live server again. If you wish to use Voyage on another device, you will need to know the IP address of the device it is hosted on. Type that IP address into the address bar followed by ":" and the port your live server is being hosted on. By default, Live Server uses port 5500. Your address bar should look something like this: ###.###.#.#:5500.
I personally use GitHub Pages since it is free and easy. However, you can use whatever hosting service you want. Unfortunately I myself cannot provide help with this since I have no experience in using any other hosting sites and setting up a GitHub pages website is extremely easy and you can follow this official guide here.
If you don't want to host Voyage yourself, you can use my publicly hosted instance on my website.