My plugin is free for everyone to use, but feel free to donate, if you feel like it ;)


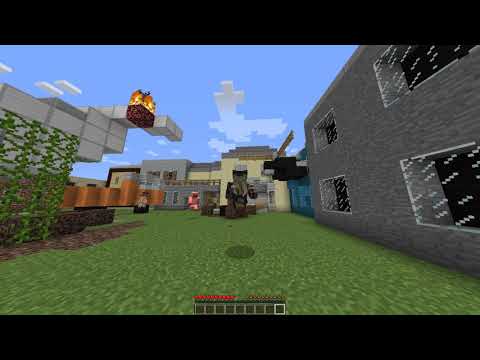
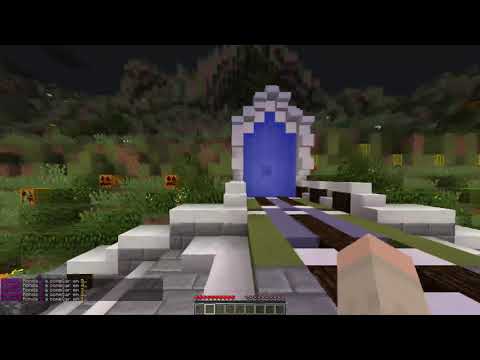
These are old videos of an old version of the plugin, and there were some bugs. There still are, surely. I just haven't found them yet :)
These videos serve a purpose of simply displaying the plugin's functionality.
The Xinada Project consists of a plugin for the Minecraft game. The plugin organizes and starts rounds of a mini-game based on the well-known Murder Mystery. For those unfamiliar with the Murder Mystery game, here's a brief explanation: At least 3 players are required and there are 3 different roles. The Cop, the Assassin and the Innocent. The Assassin must wipe all players out, while the Cop must identify and arrest the Assassin before he achieves his goal. The Innocent will be just watching and trying to survive. In case there are 5 players, for example, 3 of them would be Innocent.
The Murder Mystery game is already quite fun in itself. But what if all Innocents had a unique ability? What if in addition to Innocents, there were other roles that may help or frame the Assassin? That's where the Xinada plugin comes in! With over 30 different aroles, Xinada offers a mini-game with great replayability! At least 3 players are required, the more the better (maximum 10).
To properly setup the plugin follow these steps:
-
Make sure you're using the 1.17 version of Minecraft;
-
Put xinada-X.X.X.jar in your Spigot server plugins folder (.../server_folder/plugins/);

- Run the server once. When the server loads up, you should see somewhere in the console: "[Xinada] Enabling Xinada vX.X", X.X being the version of the plugin;

-
Close the server;
-
Back in your server folder, you'll see the plugin created the world Xinada, as well as Xinada_nether and Xinada_the_end. This happened because the default world for this plugin is called Xinada. This can be changed in the plugin's config files (more on that here);

- Also, inside the plugins folder, you'll see a new folder called Xinada. This folder has important config files inside. They all have flags you can mess with, except for the stringsXX.yml files. You don't want to mess with those, since they contain translations of Xinada's supported idioms. Click here to learn more about Xinada Configuration Files.

-
Now that you know how to use the Configuration Files, all that's left is add maps to maps.yml. All you have to do is create a world containing various different small maps (this would be easier with mcedit). You can find lots of small maps on planetminecraft.com, if you search for something in the lines of "Murder Mystery map" or "TTT map" or "Call of Duty map". You can add whatever maps you like. Just make sure players won't be able to walk out of them in-game. You can use this Dropbox link to download the world compatible with the default maps.yml the plugin generated.
-
Then, you'll have to choose 10 spawn points for each small map and fill maps.yml with that information. You can see how here. You don't need to do this if you are using the world provided by the last step's Dropbox link.
-
That's it! Now use the commands to start playing! Enjoy!
-
For a better experience, use the NoNameTag plugin to prevent players from seeing name tags through walls.
If you run into any issues, feel free to contact me.
In the game.yml file, you may adjust some game related flags.
These are the world configurations. In the world.yml file is where you may change the name of the default world Xinada will use. You can also adjust lobby coordinates. These are the coordinates to which the players will be teleported when they join and when a Xinada game ends. It's the lobby in its essence.
The maps.yml file is where you setup and add your maps. All maps must be contained inside the same minecraft world (this easier to achieve using mcedit). The template in maps.yml is really easy to follow. Just add the name of the map (whatever you like) and 10 different spawn points where players may spawn in the beggining of a Xinada round. Example of a map:
whatever_name_i_like:
  location1:
    x: 287.5
    y: 56
    z: 857.5
  ...
  location10:
    x: 331.5
    y: 56
    z: 847.5
Unless you don't want to play the plugin in english or portuguese, you won't need to mess with the stringsXX.yml files. If you are, let's say, italian and want to play Xinada in italian, you'll need to generate your own strings. Just create a stringsIT.yml file with the same content as the others stringsXX.yml files, but in italian. Then, go to game.yml and change language: "EN" to language: "IT".
- Use /start to start a game with the players that are in the server. A game starts in 5 seconds.
- Use /end to end the current game.
- Use /next to jump to the next round. No points are assigned to any players.
- Use /role to see your role and objective, if you forgot.

O Projeto Xinada consiste num plugin para o jogo Minecraft. O plugin organiza e inicia rondas de um mini-jogo baseado no conhecido Murder Mystery. Para quem não conhece o jogo Murder Mystery, eis uma breve explicação: São necessários pelo menos 3 jogadores e existem 3 papéis diferentes. O papel de Polícia, o papel de Assassino e o papel de Inocente. O Assassino tem de limpar o sebo a todos os jogadores, e o Polícia tem de identificar e prender o Assassino antes que este atinja o seu objetivo. O Inocente fica apenas a observar e a tentar sobreviver. No caso de haverem 5 jogadores, por exemplo, 3 deles seriam Inocentes.
O jogo Murder Mystery é já bastante divertido por si mesmo. Mas e se todos os Inocentes tivessem uma habilidade única? E se além de Inocentes, existissem outros papéis cujo objetivo consiste em ajudar o Assassino? É aí que entra o plugin Xinada! Com mais de 30 habilidades diferentes, o Xinada oferece um mini-jogo com grande rejogabilidade! São necessários pelo menos 3 jogadores, sendo que quantos mais, melhor (máximo de 10).
Para preparar o plugin corretamente, segue estas etapas:
-
Certifica-te que estás a usar a versão 1.17 do Minecraft;
-
Coloca xinada-X.X.X.jar na pasta de plugins do teu servidor Spigot (.../server_folder/plugins/);
- Executa o servidor uma vez. Quando o servidor carregar, deverás conseguir ver algures na consola: "[Xinada] Ativando Xinada vX.X", sendo X.X a versão do plugin;
-
Termina o servidor;
-
De volta à pasta do servidor, verás que o plugin criou o mundo Xinada, bem como Xinada_nether e Xinada_the_end. Isso aconteceu porque o mundo padrão para este plugin chama-se Xinada. Isso pode ser alterado nos ficheiros de configuração do plugin (mais sobre isso aqui);
- Além disso, dentro da pasta plugins, você verá uma nova pasta chamada Xinada. Esta pasta contém ficheiros de configuração importantes. Todos eles têm campos que podem ser alterados consoante as preferências de cada um, exceto os ficheiros stringsXX.yml. Não deves mexer nesses porque contêm as traduções para os idiomas suportados pelo Xinada. Clica aqui para saberes mais sobre os ficheiross de configuração do Xinada.
-
Agora que sabes usar os ficheiros de configuração, tudo o que resta é adicionar mapas a maps.yml. Tudo que você precisa fazer é criar um mundo (mundo minecraft) contendo vários pequenos mapas (o software mcedit facilita imenso este passo). Poderás encontrar vários mapas adequados em planetminecraft.com, se pesquisares algo nas linhas de "Murder Mystery map" ou "mapa TTT" ou "Mapa do Call of Duty". Podes adicionar os mapas que bem te apetecerem. Apenas certifica-te de que os jogadores não conseguem sair deles durante o jogo. Podes usar este link da Dropbox para fazer download de um mundo minecraft compatível com o ficheiro maps.yml gerado pelo plugin.
-
Por fim, terás de escolher 10 pontos de spawn para cada mapa e preencher maps.yml com essa informação. Podes ver como fazê-lo aqui. Se estás a utilizar o mundo minecraft fornecido pelo link Dropbox do passo anterior, não precisas de fazer isto.
-
É isso mesmo! Agora usa os comandos para começar a jogar! Diverte-te!
-
Para uma melhor experiência, utiliza o plugin NoNameTag para que não se consiga ver nomes de outros jogadores através das paredes.
Se surgir algum problema, sinta-se à vontade para entrar em contato comigo.
No ficheiro game.yml, poderás ajustar alguns campos relacionados com o jogo.
Estas são as configurações do mundo minecraft. O ficheiro world.yml é onde poderás alterar o nome do mundo padrão que o Xinada utilizará. Também podes ajustar as coordenadas do lobby. Estas são as coordenadas para as quais os jogadores serão teletransportados quando se juntarem e quando um jogo do Xinada terminar. É o lobby na sua essência.
O ficheiro maps.yml é onde irás configurar e adicionar os teus mapas. Todos os mapas devem estar contidos no mesmo mundo minecraft (mais fácil com a ajuda do software [mcedit] (https://www.mcedit.net/)). O exemplo em maps.yml é muito fácil de seguir. Basta adicionar o nome do mapa (o que quiseres) e 10 pontos de spawn diferentes onde os jogadores poderão nascer no início de uma rodada do Xinada. Exemplo de mapa:
o_nome_que_me_apetecer:
  location1:
    x: 287.5
    y: 56
    z: 857.5
  ...
  location10:
    x: 331.5
    y: 56
    z: 847.5
A menos que não queiras jogar o plugin em inglês ou português, não precisarás mexer nos arquivos stringsXX.yml. Se fores, digamos, italiano e quiseres jogar ao Xinada em italiano, precisarás de gerar as tuas próprias strings. Basta criar um arquivo stringsIT.yml com o mesmo conteúdo dos outros arquivos stringsXX.yml, mas em italiano. Em seguida, vais ao ficheiro game.yml e alteras language: "EN" para language: "IT".
- Utiliza /start para iniciar um jogo com os jogadores que estão no servidor. Um jogo começará em 5 segundos.
- Utiliza /end para encerrar o jogo atual.
- Utiliza /next para pular para a próxima ronda. Nenhum ponto é atribuído a qualquer jogador.
- Utiliza /role para veres o teu papel e objetivo, caso te tenhas esquecido.
