

Plug me to your RESTFul API to get a complete administration tool (CRUD, multi-model relationships, dashboard, complex form widgets) in no time!
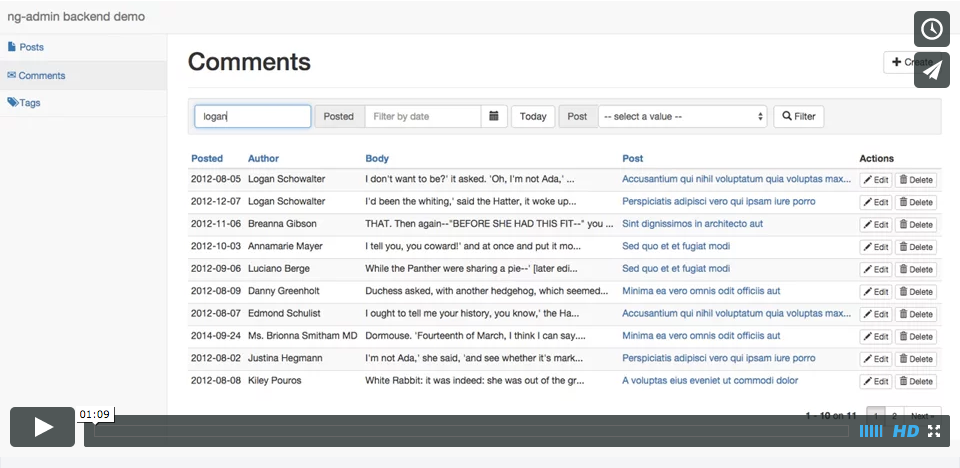
Check out the online demo (source), and the launch post.
- Installation
- Example Configuration
- Application Configuration
- Entity Configuration
- View Configuration
- Menu Configuration
- Dashboard Configuration
- Reusable Directives
- Relationships
- Customizing the API Mapping
- Theming
- Adding Custom Pages
- Adding Custom Types
- Support (via StackOverflow)
- Contributing
- License
Retrieve the module from bower:
bower install ng-admin --saveIf you just want to embed ng-admin script and stylesheet including all dependencies, you can use the stand-alone files. Just add them into your page:
<link rel="stylesheet" href="/path/to/bower_components/ng-admin/build/ng-admin.min.css">
<script src="/path/to/bower_components/ng-admin/build/ng-admin.min.js"></script>If you rather like to embed dependencies separately, here is a snippet showing all required scripts:
<link rel="stylesheet" href="bower_components/bootstrap/css/bootstrap.min.css" />
<link rel="stylesheet" href="bower_components/ng-admin/build/ng-admin-only.min.css" />

<script src="bower_components/angular/angular.js"></script>
<script src="bower_components/angular-bootstrap/ui-bootstrap-tpls.min.js"></script>
<script src="bower_components/angular-bootstrap/ui-bootstrap.min.js"></script>
<script src="bower_components/angular-resource/angular-resource.min.js"></script>
<script src="bower_components/angular-sanitize/angular-sanitize.min.js"></script>
<script src="bower_components/angular-ui-codemirror/ui-codemirror.min.js"></script>
<script src="bower_components/angular-ui-router/release/angular-ui-router.min.js"></script>
<script src="bower_components/angular-numeraljs/dist/angular-numeraljs.min.js"></script>
<script src="bower_components/humane/humane.js"></script>
<script src="bower_components/inflection/inflection.min.js"></script>
<script src="bower_components/lodash/lodash.min.js"></script>
<script src="bower_components/ng-file-upload/ng-file-upload-all.min.js"></script>
<script src="bower_components/ngInflection/ngInflection.js"></script>
<script src="bower_components/nprogress/nprogress.js"></script>
<script src="bower_components/restangular/dist/restangular.min.js"></script>
<script src="bower_components/textAngular/dist/textAngular.min.js"></script>
<script src="bower_components/papaparse/papaparse.min.js"></script>
<script src="bower_components/numeral/min/numeral.min.js"></script>
<script src="bower_components/codemirror/lib/codemirror.js"></script>
<script src="bower_components/codemirror/addon/edit/closebrackets.js"></script>
<script src="bower_components/codemirror/addon/lint/lint.js"></script>
<script src="bower_components/jsonlint/lib/jsonlint.js"></script>
<script src="bower_components/codemirror/addon/lint/json-lint.js"></script>
<script src="bower_components/codemirror/addon/selection/active-line.js"></script>
<script src="bower_components/codemirror/mode/javascript/javascript.js"></script>
<script src="bower_components/ng-admin/build/ng-admin-only.min.js"></script>Make your application depend on ng-admin:
var admin = angular.module('myApp', ['ng-admin']);First step is to map ng-admin entities to your API:
app.config(function (NgAdminConfigurationProvider) {
    var nga = NgAdminConfigurationProvider;
    // set the main API endpoint for this admin
    var admin = nga.application('My backend')
        .baseApiUrl('http://localhost:3000/');

    // define an entity mapped by the http://localhost:3000/posts endpoint
    var post = nga.entity('posts');
    admin.addEntity(post);

    // set the list of fields to map in each post view
    post.listView().fields(/* see example below */);
    post.creationView().fields(/* see example below */);
    post.editionView().fields(/* see example below */);

    nga.configure(app);
});
Your application should use a ui-view:
<div ui-view></div>You can enable ng-strict-di angular mode to boost your application performance:
<body ng-app="myApp" ng-strict-di>Ng-admin library is already compatible, but you have to explicitly declare dependencies on your custom application code.
See Angular documentation for more details about this tweak.
We chose to define the entities & views directly in JavaScript to allow greater freedom in the configuration.
Here is a full example for a backend that will let you create, update, and delete some posts (posts entity). Those posts can be tagged (tags entity) and commented (comments entity).
var app = angular.module('myApp', ['ng-admin']);

admin.config(function (NgAdminConfigurationProvider) {
    var nga = NgAdminConfigurationProvider;
    var app = nga.application('ng-admin backend demo', false) // application main title and debug disabled
        .baseApiUrl('http://localhost:3000/'); // main API endpoint

    // define all entities at the top to allow references between them
    var post = nga.entity('posts') // the API endpoint for posts will be http://localhost:3000/posts/:id
        .identifier(nga.field('id')); // you can optionally customize the identifier used in the api ('id' by default)

    // set the application entities
    admin.addEntity(post);

    // customize entities and views
    post.listView()
        .title('All posts') // default title is "[Entity_name] list"
        .description('List of posts with infinite pagination') // description appears under the title
        .infinitePagination(true) // load pages as the user scrolls
        .fields([
            nga.field('id').label('ID'), // The default displayed name is the camelCase field name. label() overrides id
            nga.field('title'), // the default list field type is "string", and displays as a string
            nga.field('published_at', 'date'), // Date field type allows date formatting
            nga.field('views', 'number'),
            nga.field('tags', 'reference_many') // a Reference is a particular type of field that references another entity
                .targetEntity(tag) // the tag entity is defined later in this file
                .targetField(nga.field('name')) // the field to be displayed in this list
        ])
        .listActions(['show', 'edit', 'delete']);

    post.creationView()
        .fields([
            nga.field('title') // the default edit field type is "string", and displays as a text input
                .attributes({ placeholder: 'the post title' }) // you can add custom attributes, too
                .validation({ required: true, minlength: 3, maxlength: 100 }), // add validation rules for fields
            nga.field('teaser', 'text'), // text field type translates to a textarea
            nga.field('body', 'wysiwyg'), // overriding the type allows rich text editing for the body
            nga.field('published_at', 'date') // Date field type translates to a datepicker
        ]);

    post.editionView()
        .title('Edit post "{{ entry.values.title }}"') // title() accepts a template string, which has access to the entry
        .actions(['list', 'show', 'delete']) // choose which buttons appear in the top action bar. Show is disabled by default
        .fields([
            post.creationView().fields(), // fields() without arguments returns the list of fields. That way you can reuse fields from another view to avoid repetition
            nga.field('tags', 'reference_many') // reference_many translates to a select multiple
                .targetEntity(tag)
                .targetField(nga.field('name'))
                .cssClasses('col-sm-4'), // customize look and feel through CSS classes
            nga.field('views', 'number')
                .cssClasses('col-sm-4'),
            nga.field('comments', 'referenced_list') // display list of related comments
                .targetEntity(comment)
                .targetReferenceField('post_id')
                .targetFields([
                    nga.field('id'),
                    nga.field('body').label('Comment')
                ])
        ]);

    post.showView() // a showView displays one entry in full page - allows to display more data than in a a list
        .fields([
            nga.field('id'),
            post.editionView().fields(), // reuse fields from another view in another order
            nga.field('custom_action', 'template')
                .template('<other-page-link></other-link-link>')
        ]);

    nga.configure(app);
});
You can find a more detailed configuration in the blog demo configuration.
Application is the base of your admin.
Create a new application:
// set the title and disable debug for this admin
var app = nga.application('My backend', false);-
title()Defines the titlevar app = nga.application().title('My backend') -
baseApiUrl()Defines the main API endpointvar app = nga.application().baseApiUrl('http://localhost:3000/') -
debug()Enable or disable debug (enabled by default)var app = nga.application().debug(false)
Each entity maps to a different API endpoint. The name of the entity, defines the endpoint:
// set the main API endpoint for this admin
var app = nga.application('My backend')
    .baseApiUrl('http://localhost:3000/');

// define an entity mapped by the http://localhost:3000/posts endpoint
var post = nga.entity('posts');-
label()Defines the name of the entity, as displayed on screenvar comment = nga.entity('comments').label('Discussions'); -
readOnly()A read-only entity doesn't allow access to the mutation views (editionView, creationView, deletionView). In addition, all links to the editionView are replaced by links to the showView.var tag = nga.entity('tags').readOnly(); -
baseApiUrl()Defines the base API endpoint for all views of this entityvar comment = nga.entity('comments').baseApiUrl('http://localhost:3001/'); -
url()Defines the API endpoint for all views of this entity. It can be a string or a function.var comment = nga.entity('comments').url(function(entityName, viewType, identifierValue, identifierName) { return '/comments/' + entityName + '_' + viewType + '?' + identifierName + '=' + identifierValue; // Can be absolute or relative });
Each entity has 5 views that you can customize:
listViewcreationVieweditionViewshowView(unused by default)deletionView
These settings are available on all views.
-
fields([field1, field2, ...])Add fields to a view (columns to a list, or a form controls to a form). Each field maps a property in the API endpoint result.listView.fields([ nga.field('first_name'), nga.field('last_name'), nga.field('age', 'number') ]); -
fields()Retrieve the list of fields added to a view. The result can be added to another view, to avoid repetition. -
title(String)The title of the view. ng-admin sees it as a template, and compiles it with the view scope. That means you can customize the title of a view using details from the current entry.editionView.title('Edit item "{{ entry.values.title }}"'); -
description(String)A text displayed below the title. Like thetitleng-admin sees it as a template and it can be customized in the same way. -
actions(String|Array)Customize the list of actions for this view. You can pass a list of button names among 'back', 'list', 'show', create', 'edit', 'delete', 'batch', and 'export':editionView.actions(['show', 'list', 'delete']);Alternately, if you pass a string, it is compiled just like an Angular template, with access to the current
entryin the scope. This allows to easily add custom actions, or customize the buttons appearance:var template = '<show-button entry="entry" entity="entity" size="sm"></show-button>' + '<delete-button entry="entry" entity="entity" size="sm"></delete-button>' + '<my-custom-directive entry="entry"></my-custom-directive>' + '<back-button></back-button>'; editionView.actions(template); -
disable()Disable this view. Useful e.g. to disable views that modify data and only leave thelistViewenabled -
url()Defines the API endpoint for a view. It can be a string or a function.comment.listView().url(function(entityId) { return '/comments/id/' + entityId; // Can be absolute or relative });
-
perPage(Number)Define the number of element displayed in a page -
sortField(String)Set the default field for list sorting. Defaults to 'id' -
sortDir(String)Set the default direction for list sorting. Defaults to 'DESC' -
infinitePagination(boolean)Enable or disable lazy loading. -
filters()[field1, field2, ...])Add filters to the list. Each field maps a property in the API endpoint result.listView.filters([ nga.field('first_name'), nga.field('last_name'), nga.field('age', 'number') ]);Filters appear when the user clicks on the "Add filter" button at the top of the list. You can also set a filter field as "pinned", to be sure it's always displayed.
  listView.filters([
      nga.field('q').label('Search').pinned(true)
  ]);
Filter fields can be of any type, including
referenceandtemplate. this allows to define custom filters with ease.listView.filters([ nga.field('q', 'template').label('') .template('<div class="input-group"><input type="text" ng-model="value" placeholder="Search" class="form-control"></input><span class="input-group-addon"><i class="glyphicon glyphicon-search"></i></span></div>'), ]); -
listActions(String|Array)Add an action column with action buttons on each line. You can pass a list of button names among 'show', 'edit', and 'delete'.listView.listActions(['edit', 'delete']);Alternately, if you pass a string, it is compiled just like an Angular template, with access to the current
entryin the scope. This allows to add custom actions on each line:var template = '<show-button entry="entry" entity="entity" size="xs"></show-button>' + '<my-custom-directive entry="entry"></my-custom-directive>'; listView.listActions(template); -
batchActions(String|Array)Add your own batch action directives.The datagrid contains a selection column (an initial column made of checkboxes). Once the user selects lines, a button appears and displays the number of selected entries. A click on this button reveals the list of "batch actions", i.e. actions that can be performed on a selection of entries. By default, the only batch action available is a batch delete.
Add your own directives to the list of batch acctions at will. The scope contains a
selectionvariable, which holds the current selection:listView.batchActions(['delete', '<my-custom-directive selection="selection"></my-custom-directive>'])To remove the list of checkboxes, simply set an empty
batchActionslist on the view:listView.batchActions([])Tip: The
selectionvariable is also in the scope of the main view actions.listView.actions('create', '<my-custom-directive selection="selection"></my-custom-directive>'); -
exportFields(Array)Set the fields for the CSV export function. By default, ng-admin uses the fields displayed in the datagrid, but you can choose to export a different set of fields.listView.exportFields([ nga.field('id', 'number'), nga.field('author'), nga.field('post_id', 'reference') .label('Post') .map(truncate) .targetEntity(post) .targetField(nga.field('title').map(truncate)) nga.field('body', 'wysiwyg') .stripTags(true) ]);
A field is the representation of a property of an entity.
-
nga.field(name, type)Create a new field of the given type. Default type is 'string', so you can omit it. Bundled types includenumber,string,text,boolean,wysiwyg,email,date,datetime,choice,choices,json,file, andtemplate -
label(string label)Define the label of the field. Defaults to the uppercased field name. -
editable(boolean)Define if the field is editable in the edition form. Usefult to display a field without allowing edition (e.g for creation date). -
order(number|null)Define the position of the field in the view. -
isDetailLink(boolean)Tell if the value is a link in the list view. Default to true for the identifier and references field, false otherwise. The link points to the edition view, except for read-only entities, where it points to the show view. -
detailLinkRoute(string)Define the route for a link in the list view, i.e.isDetailLinkof the field is true. The default isedit, hence the link points to the edition view. The other option isshowto point to the show view. -
map(function)Define a custom function to transform the value received from the API response to the value displayed in the admin. This function receives 2 parameters: the value to transform, and the corresponding entry. Works in list, edit views and references.nga.field('characters') .map(function truncate(value, entry) { return value + '(' + entry.values.subValue + ')'; });Multiple
mapcan be defined for a field:nga.field('comment') .map(stripTags) .map(truncate); -
transform(function)Define a custom function to transform the value displayed in the admin back to the one expected by the API. This function receives 2 parameters: the value to transform, and the corresponding entry. Used in edit view only. Use it in conjunction withmap()to ease the conversion between the API response format and the format you want displayed on screen.// API // map() v ^ tranform() // Entry︎ // // The API provides and expects last names in all caps, e.g. 'DOE' // The admin should display them with capitalized last names, e.g 'Doe' nga.field('last_name') .map(function capitalize(value, entry) { return value.substr(0,1).toUpperCase() + value.substr(1).toLowerCase() }) .transform(function allCaps(value, entry) { // the API expects upper case last names return value.toUpperCase(); }); -
validation(object)Tell how to validate the view
required: booleanvalidator: function(value){}minlength: numbermaxlength: number
-
attributes(object)A list of attributes to be added to the corresponding field.nga.field('title').attributes({ placeholder: 'fill me !'}) -
cssClasses(String|Function)A list of CSS classes to be added to the corresponding field. If you provide a function, it will receive the current entry as first argument, to allow dynamic classes according to values.nga.field('title') .cssClasses(function(entry) { return entry.values.needsAttention ? 'bg-warning' : ''; }); -
defaultValue(*)Define the default value of the field in the creation form. -
pinned(boolean)Whether the field should always appear. Used in filters (see listView Settings). Default to false.
-
format(string)Format for number to string conversion. Based on Numeral.js, which uses a syntax similar to Excel. You can configure the locale and create named formats by following angular-numeraljs instructions.nga.field('cost', 'number').format('$0,0.00'); // now 1234.5 will render as '$1,234.50'
-
choices(array|function)Define array of choices forchoicetype.When given an array, each choice must be an object litteral with both a value and a label.
  nga.field('currency', 'choice')
      .choices([
        { value: 'USD', label: 'dollar ($)' },
        { value: 'EUR', label: 'euro (€)' },
      ]);
When given a function, the returned choice list must be in the same format (value and label) and can depend on the current entry. This is useful to allow choice fields dependent on each other.
nga.field('country', 'choice') .choices([ { value: 'FR', label: 'France' }, { value: 'US', label: 'USA' }, ]); var cities = [ { country: 'FR', value: 'Paris', label: 'Paris' }, { country: 'FR', value: 'Nancy', label: 'Nancy' }, { country: 'US', value: 'NY', label: 'New York' }, { country: 'US', value: 'SF', label: 'San Francisco' } ] nga.field('city', 'choice') .choices(function(entry) { return cities.filter(function (city) { return city.country === entry.values.country }); });Tip: When using a function for choice values, if you meet the "Uncaught Error: [$rootScope:infdig] 10 $digest() iterations reached. Aborting!", that's because the
choices()function returns a new array every time. That's a known AngularJS limitation (see the infinite digest loop documentation).
-
format(string ['yyyy-MM-dd' by default]) -
parse(function [remove hours, minutes and timezone by default])Filter applied to modify date object returned by date picker if needed.
-
format(string ['yyyy-MM-dd HH:mm:ss' by default]) -
parse(function [no change by default])Filter applied to modify date object returned by date picker if needed.
template(*)Define the template to be displayed for fields of typetemplate(can be a string or a function).
uploadInformationGive upload information forfilefield type
url: url for server side uploadaccept: values allowed by the standard HTML file input accept attributeapifilename: filename assigned by the server and returned by your API.
If the uploaded file is renamed server-side, you can get the new filename from an api return.
HTTP/1.1 200 OK
Content-Type: application/json
{ "picture_name": "post_12_picture1.jpg"}
you can configure file field as :
nga.field('picture', 'file').uploadInformation({ 'url': 'your_url', 'apifilename': 'picture_name' })
Some other properties are allowed, see https://github.com/danialfarid/angular-file-upload#upload-service for the complete list.
-
stripTags(boolean)Enable removal of all HTML tags - only the text is kept. Useful for displaying rich text in a table, or before truncation. False by default. -
sanitize(boolean)Enable HTML sanitization of WYSIWYG Editor value (removal of script tags, etc). True by default.
By default, ng-admin creates a sidebar menu with one entry per entity. If you want to customize this menu (labels, icons, order, adding submenus, etc), you have to define it manually instead.
The sidebar menu is built based on a Menu object, constructed with nga.menu(). A menu can have child menus. A menu can be constructed based on an entity. Here is the code to create a basic menu for the entities post, comment, and tag:
admin.menu(nga.menu()
  .addChild(nga.menu(post))
  .addChild(nga.menu(comment))
  .addChild(nga.menu(tag))
);
The menus appear in the order in which they were added to the main menu. The Menu class offers icon(), title(), and template() methods to customize how the menu renders.
admin.menu(nga.menu()
  .addChild(nga.menu(post))
  .addChild(nga.menu(comment).title('Comments'))
  .addChild(nga.menu(tag).icon('<span class="glyphicon glyphicon-tags"></span>'))
);
You can also choose to define a menu from scratch. In this case, you should define the internal state the menu points to using link(), and the function to determine whether the menu is active based on the current state with active().
admin.menu(nga.menu()
    .addChild(nga.menu()
        .title('Stats')
        .link('/stats')
        .active(function(path) {
            return path.indexOf('/stats') === 0;
        })
    )
);
You can add also second-level menus.
admin.menu(nga.menu()
    .addChild(nga.menu().title('Miscellaneous')
        .addChild(nga.menu().title('Stats').link('/stats'))
    )
);Tip: admin.menu() is both a setter and a getter. You can modify an existing menu in the admin configuration by using admin.menu().getChildByTitle()
admin.addEntity(post)
admin.menu().getChildByTitle('Post')
    .title('Posts')
.icon('<span class="glyphicon glyphicon-file"></span>');The home page of a ng-admin application is called the Dashboard. Use it to show important pieces of information to the end user, such as latest entries, or charts.
See Dashboard Configuration dedicated chapter.
The template field type allows you to use any HTML tag, including custom directives. ng-admin provides ready-to-use directives to easily add interactions to your admin views:
<ma-show-button><ma-edit-button><ma-delete-button>
Buttons linking to the related view for the given entry.
entity.listView().fields([
    // ...
    nga.field('actions', 'template').template('<ma-show-button entry="entry" entity="entity" size="xs"></ma-show-button>')
]);<ma-create-button><ma-list-button>
A button linking to the related view for the given entity.
<ma-filtered-list-button>
A button linking to an entity list view, prefiltered.
entity.listView().fields([
    // ...
    nga.field('', 'template').label('')
        template('<ma-filtered-list-button entity-name="comments" filter="{ post_id: entry.values.id }" size="sm">')
]);The listActions() method available on the listView is a shortcut to adding a template field with one of the directives listed above. In practice, calling:
listView.listActions(['edit', 'delete']);Is equivalent to:
var template = '<ma-edit-button entry="entry" entity="entity" size="xs">' +
               '</ma-edit-button>' +
               '<ma-delete-button entry="entry" entity="entity" size="xs">' +
               '</ma-delete-button>';
listView.fields([
    nga.field('actions', 'template').template(template)
]);
You can also provide custom label using the label attribute:
listView.listActions([
    '<ma-edit-button entry="entry" entity="entity" label="Edit me" size="xs">' +
    '</ma-edit-button>',
    '<ma-delete-button entry="entry" entity="entity" label="Delete me" size="xs">' +
    '</ma-delete-button>'
]);The reference type also defines label, order, map, list & validation options like the Field type.
-
targetEntity(Entity)Define the referenced entity. -
targetLabel(string)Define the target field name used to retrieve the label of the referenced element.myView.fields([ nga.field('post_id', 'reference') .label('Post title') .map(truncate) // Allows to truncate values in the select .targetEntity(post) // Select a target Entity .targetField(nga.field('title')) // Select a label Field ]); -
singleApiCall(function(entityIds) {}Define a function that returns parameters for filtering API calls. You can use it if you API support filter for multiple values.// Will call /posts?post_id[]=1&post_id[]=2&post_id%[]=5... commentList.fields([ nga.field('post_id', 'reference') .singleApiCall(function (postIds) { return { 'post_id[]': postIds }; }) ]); -
sortField(String)Set the default field for list sorting. Defaults to 'id' -
sortDir(String)Set the default direction for list sorting. Defaults to 'DESC' -
filters({ field1: value, field2: value, ...})Add filters to the referenced results list. It may be either an object or a function with a single parameter: the current search string.myView.fields([ nga.field('post_id', 'reference') .targetEntity(post) // Select a target Entity .targetField(nga.field('title')) // Select a label Field .filters(function(search) { // will send `GET /posts?title=foo%` query return { title: search + '%' }; }); ]); -
remoteComplete([true|false], options = {})Enable remote completion. When enabled, it fetches remote API references corresponding to your input to refresh the choices list. If set to false, all references (in the limit ofperPageparameter) would be retrieved at view initialization.
Available options are:
* **refreshDelay:** minimal delay between two API calls in milliseconds. By default: 500.
perPage(integer)Define the maximum number of elements fetched and displayed in the list.
The referenced_list type also defines label, order, map, list & validation options like the Field type.
-
targetEntity(Entity)Define the referenced entity. -
targetReferenceField(string)Define the field name used to link the referenced entity. -
targetFields(Array(Field))Define an array of fields that will be displayed in the list of the form.myEditionView.fields([ nga.field('comments', 'referenced_list') // Define a N-1 relationship with the comment entity .label('Comments') .targetEntity(comment) // Target the comment Entity .targetReferenceField('post_id') // Each comment with post_id = post.id (the identifier) will be displayed .targetFields([ // Display comment field to display nga.field('id').label('ID'), nga.field('body').label('Comment') ]) ]); -
sortField(String)Set the default field for list sorting. Defaults to 'id' -
sortDir(String)Set the default direction for list sorting. Defaults to 'DESC' -
filters({ field1: value, field2: value, ...})Add filters to the referenced results list. It should be an object. -
perPage(integer)Define the maximum number of elements fetched and displayed in the list.
The reference_many field type also defines label, order, map & validation options like the Field type.
-
targetEntity(Entity)Define the referenced entity. -
targetField(Field)Define the field name used to link the referenced entity.myView.fields([ nga.field('tags', 'reference_many') .label('Tags') .isDetailLink(false) .targetEntity(tag) // Targeted entity .targetField(nga.field('name')) // Label Field to display in the list ]) -
singleApiCall(function(entityIds) {}Define a function that returns parameters for filtering API calls. You can use it if you API support filter for multiple values.// Will call /tags?tag_id[]=1&tag_id[]=2&tag_id%[]=5... postList.fields([ nga.field('tags', 'reference_many') .singleApiCall(function (tagIds) { return { 'tag_id[]': tagIds }; }) ]); -
filters({ field1: value, field2: value, ...})Add filters to the referenced results list. It may be either an object or a function with a single parameter: the current search string.myView.fields([ nga.field('tags', 'reference_many') .targetEntity(tag) // Select a target Entity .targetField(nga.field('name')) // Select a label Field .filters(function(search) { // will send `GET /tags?name=foo%&published=true` query return { name: search + '%', published: true }; }); ]); -
remoteComplete([true|false], options = {})Enable remote completion. When enabled, it fetches remote API references corresponding to your input to refresh the choices list. If set to false, all references (in the limit ofperPageparameter) would be retrieved at view initialization.
Available options are:
* **refreshDelay:** minimal delay between two API calls in milliseconds. By default: 500.
All HTTP requests made by ng-admin to your REST API are carried out by Restangular, which is like $resource on steroids.
The REST specification doesn't provide enough detail to cover all requirements of an administration GUI. ng-admin makes some assumptions about how your API is designed. All of these assumptions can be overridden by way of Restangular's request and response interceptors.
That means you don't need to adapt your API to ng-admin; ng-admin can adapt to any REST API, thanks to the flexibility of Restangular.
See the Customizing the API Mapping dedicated chapter.
You can override pretty much all the HTML generated by ng-admin, at different levels.
See the Theming dedicated chapter.
For each entity, ng-admin creates the necessary pages for Creating, Retieving, Updating, and Deleting (CRUD) this entity. When you need to achieve more specific actions on an entity, you have to add a custom page - for instance a page asking for an email address to send a message to. How can you route to a specific page and display it in the ng-admin layout?
See the Adding Custom Pages dedicated chapter.
When you map a field between a REST API response and ng-admin, you give it a type. This type determines how the data is displayed and edited. It is very easy to customize existing ng-admin types and add new ones.
See the Adding Custom Types dedicated chapter.
Your feedback about the usage of ng-admin in your specific context is valuable, don't hesitate to open GitHub Issues for any problem or question you may have.
All contributions are welcome. New applications or options should be tested with the make test command.
Install bower and npm dependencies (for tests) wi calling the install target:
make installTo test your changes, run the example app, which is bundled with a sample REST api, by calling:
make runThen, connect to http://localhost:8000/ to browse the admin app.
Concatenate and minify the app with:
make buildAll build files (stand-alone et lite versions) will then be updated and minified, ready for production.
ng-admin has unit tests (powered by karma) and end to end tests (powered by protractor). Launch the entire tests suite by calling:
make test
Tip: if you are working on Karma tests, you can prevent from relaunching the whole process by disabling single-run:
KARMA_SINGLE_RUN=false grunt karma:unit
ng-admin is licensed under the MIT Licence, courtesy of marmelab.