Hello, World! (FlashDevelop)
So this has been a long time coming, but I am working on providing and maintaining some simple projects that people can use as starters or templates for experimenting with flixel. ‘mode’, the de facto flixel game, is sort of absurdly complicated and was/is really more of a code testbed than a good example or introduction to flixel. This should be remedied in the very near future with some nice new github projects that you can use as basic development templates.
NOTE: This is a FlashDevelop version of Adam’s Hello, World! tutorial.
The first, most basic project you can make is, of course, Hello World! I am going to walk you through all the menus and line changes, but ultimately we are creating these two files:
HelloWorld.as
package {
	import org.flixel.*; //Allows you to refer to flixel objects in your code
	[SWF(width="640", height="480", backgroundColor="#000000")]; //Set the size and color of the Flash file

	public class HelloWorld extends FlxGame
	{
		public function HelloWorld()
		{
			super(320,240,PlayState,2); //Create a new FlxGame object at 320x240 with 2x pixels, then load PlayState
		}
	}
}
PlayState.as
package
{
	import org.flixel.*;

	public class PlayState extends FlxState
	{
		override public function create():void
		{
			add(new FlxText(0,0,100,"Hello, World!")); //adds a 100px wide text field at position 0,0 (upper left)
		}
	}
}
Both of these files are available right here on github. Looks pretty easy, right? It is! LET’S DO THIS!!
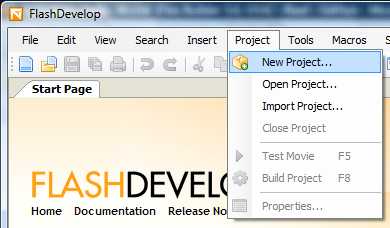
STEP 1.1: Open FlashDevelop, and create a new project by clicking Project→NewProject…:
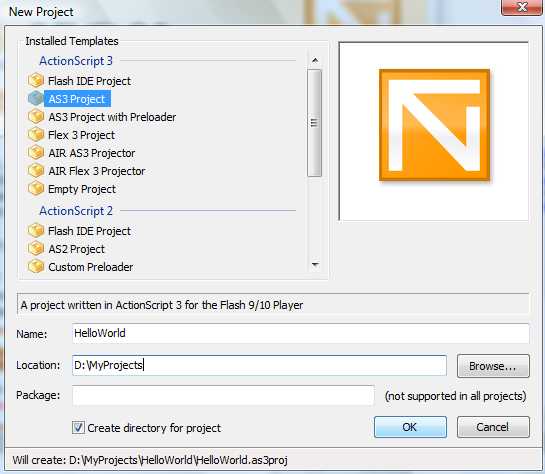
STEP 1.2: Set your project type as AS3 Project, give it an appropriate name and choose its location:
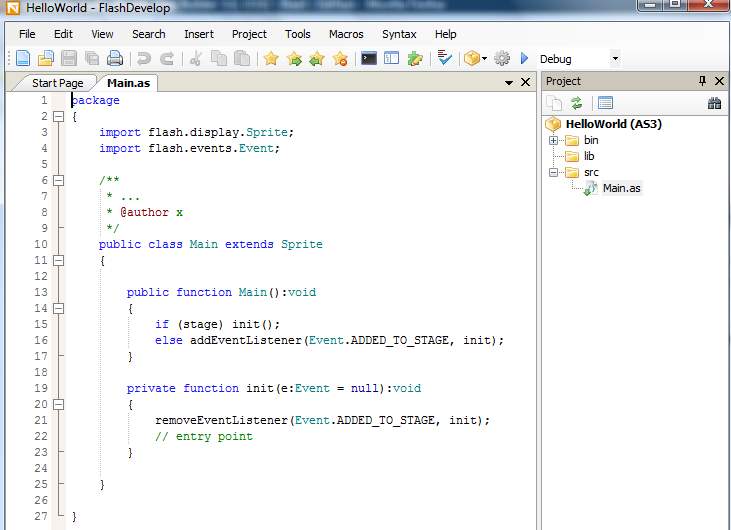
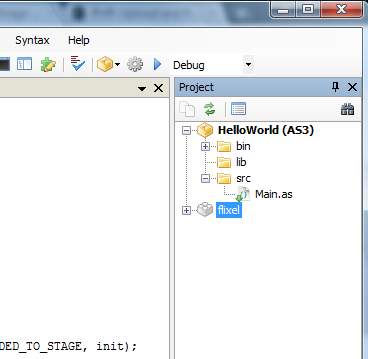
STEP 1.3: Hit ‘OK’ and you’ll see your project structure appear in the project panel. Take a look in the src folder and open the Main.as file to see your new program in all its glory:
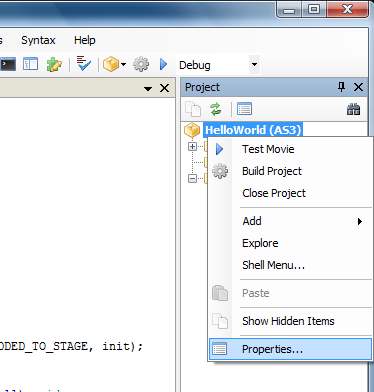
STEP 2.1: High fives, bro! You just created your first flixel project. It will run, but nothing will happen. And it isn’t even really a flixel project yet. We’re going to remedy that right now by right-clicking on our new project and selecting Properties from the dropdown:
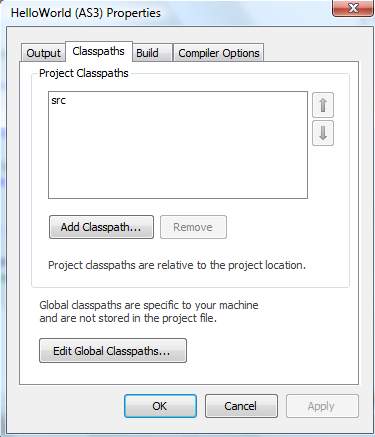
STEP 2.2: Clicking on that should pop up the Project Properties dialog, which looks something like this after you click the Classpaths tab:
STEP 2.3: To add flixel to your actionscript project, you need to press the Add Classpath… button, which will pop up a directory tree browser. Use it to locate the flixel folder and click ‘OK’ to add it to your project. NOTE: the folder you point to is the one containing the org\flixel directory structure, not the one inside the org folder.
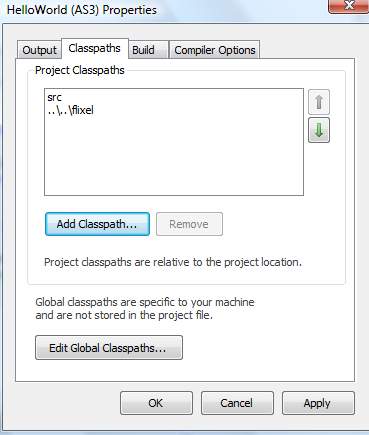
STEP 2.7: Press OK again to close the Project Properties dialog. Look! There’s flixel, it’s part of your project now!
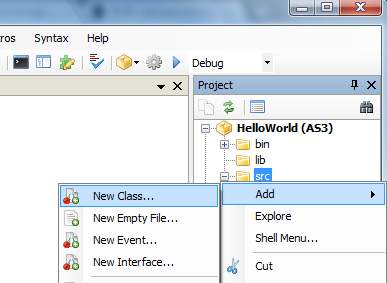
STEP 3.1: Alright, flixel is part of your project now. Let’s get some text drawing on screen! FlashDevelop is going to generate a main class file, in this case Main.as, but we’re better off with a new file. To add it, right-click on the src folder and choose Add→New Class…:
STEP 3.2: In the dialog box replace NewClass with HelloWorld. Your new file should look like this:
package
{

	/**
	 * ...
	 * @author x
	 */
	public class HelloWorld
	{

		public function HelloWorld()
		{

		}

	}

}
STEP 3.3: Now for some cleaning up. Right-click on your HelloWorld.as file and choose Always compile – it will be set as the project’s main class file. You can now delete the Main.as, as well as the comment lines from the HelloWorld.as – those are the ones I mean:
/**
 * ...
 * @author x
 */
STEP 3.4: First, we need access to flixel, so we are going to add this line after the first curly bracket, but before the class declaration:
import org.flixel.*; //Allows you to refer to flixel objects in your codeSTEP 3.5: Then, right below that line, we should decide how big to make our project using this weird macro thing:
[SWF(width="640", height="480", backgroundColor="#000000")]; //Set the size and color of the Flash fileSTEP 3.6: Then we are going to alter the class declaration to extend FlxGame:
public class HelloWorld extends FlxGameSTEP 3.7: Finally, we need add this line of code to the constructor of our main class:
super(320,240,PlayState,2); //Create a new FlxGame object at 320x240 with 2x pixels, then load PlayStateSTEP 3.8: The resulting file should look exactly like this:
package {
	import org.flixel.*; //Allows you to refer to flixel objects in your code
	[SWF(width="640", height="480", backgroundColor="#000000")]; //Set the size and color of the Flash file

	public class HelloWorld extends FlxGame
	{
		public function HelloWorld()
		{
			super(320,240,PlayState,2); //Create a new FlxGame object at 320x240 with 2x pixels, then load PlayState
		}
	}
}
STEP 4.1: Almost done! All we have to do is create a FlxState object. FlxStates are states of the game; usually divided into things like menus, gameplay, game over screens, etc. To create a new FlxState, add a new class file just like you did with HelloWorld.as, but this time call it PlayState.
STEP 4.2: To make this class into an FlxState, first you have to import it:
import org.flixel.FlxState;STEP 4.3: Now make your class extend FlxState:
public class PlayState extends FlxStateSTEP 4.4: Next replace the constructor with a new function called create():
package
{
	import org.flixel.FlxState;

	public class PlayState extends FlxState
	{
		override public function create():void
		{
		}
	}
}
STEP 4.5: We’re not changing or adding much here. First, it saves annoyance if you change the import to just pull in all of flixel like in Step 3.1. Then, we’re going to add one line of code to that “create” function:
add(new FlxText(0,0,100,"Hello, World!")); //adds a 100px wide text field at position 0,0 (upper left)STEP 4.6: The resulting file should look like this:
package
{
	import org.flixel.*;

	public class PlayState extends FlxState
	{
		override public function create():void
		{
			add(new FlxText(0,0,100,"Hello, World!")); //adds a 100px wide text field at position 0,0 (upper left)
		}
	}
}
STEP 4.7: That’s it! Hit F5 or use main menu’s Project→Test Movie to build your file and read those sweet, chunky words:
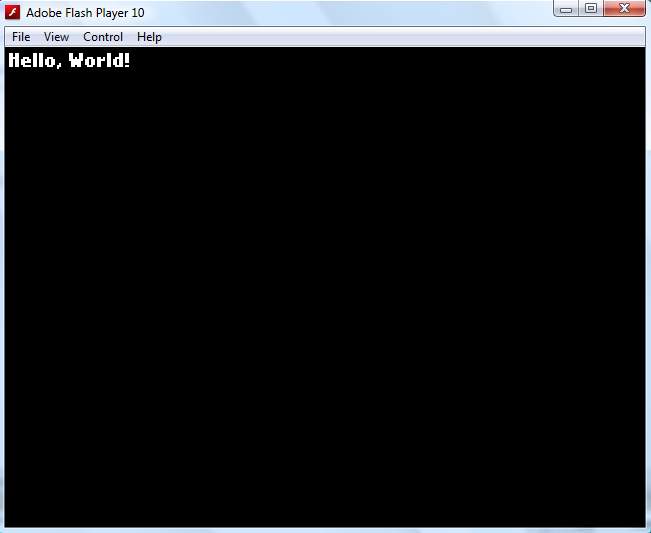
Preloaders in AS3 are a little bit messed up, so flixel takes care of MOST of it for you. However, you need to make a new file and add some code to it to help flixel finish the job. The class we need to create should be called, for the sake of simplicity, Preloader.as, and reside in your normal source folder. Paste or edit the file to look like this:
package
{
	import org.flixel.FlxPreloader;
	public class Preloader extends FlxPreloader
	{
		public function Preloader():void
		{
			className = "HelloWorld";
			super();
		}
	}
}
HelloWorld must be spelled and capitalized exactly the way your main class is spelled and capitalized. If your main class is HelloGlobe, then className should be set to “HelloGlobe”. Finally, underneath the size macro in your main class (see Step 3.3), add this line of code:
[Frame(factoryClass="Preloader")]; //Tells flixel to use the default preloaderNow your project will automatically display the default flixel preloader and the flixel logo each time it loads, although it will be awfully hard to see it since there isn’t much to load in a Hello World app!