
The lab consists of several tasks that will guide you through the process of creating a virtual network, setting up subnets, creating application security groups, configuring network security groups, and creating inbound security rules. These steps are essential for building a secure and well-structured virtual networking environment.
By completing this lab, you will gain hands-on experience in creating and managing virtual networks in Azure, as well as understanding how to control network traffic using security groups and rules. This knowledge will be valuable for designing and implementing networking solutions in Azure, ensuring the security and efficiency of your virtual infrastructure. This lab is from Microsoft's AZ-500 exam preparation walkthrough that can be found here.
Now, let's dive into the lab and start building your virtual networking infrastructure in Azure!
Estimated Time: 20 minutes
In this lab exercise, you will set up the virtual networking infrastructure by completing the following tasks:
Task 1: Create a virtual network with one subnet.
Task 2: Create two application security groups.
Task 3: Create a network security group and associate it with the virtual network subnet.
Task 4: Create inbound network security group rules to allow traffic to web servers and RDP to management servers.
Exercise 1 ---> Task 1: Create a virtual network
Sign in to the Azure portal using an account that has the Owner or Contributor role in the Azure subscription.
- In the Azure portal, search for
Virtual networksand select it from the results. - Click on
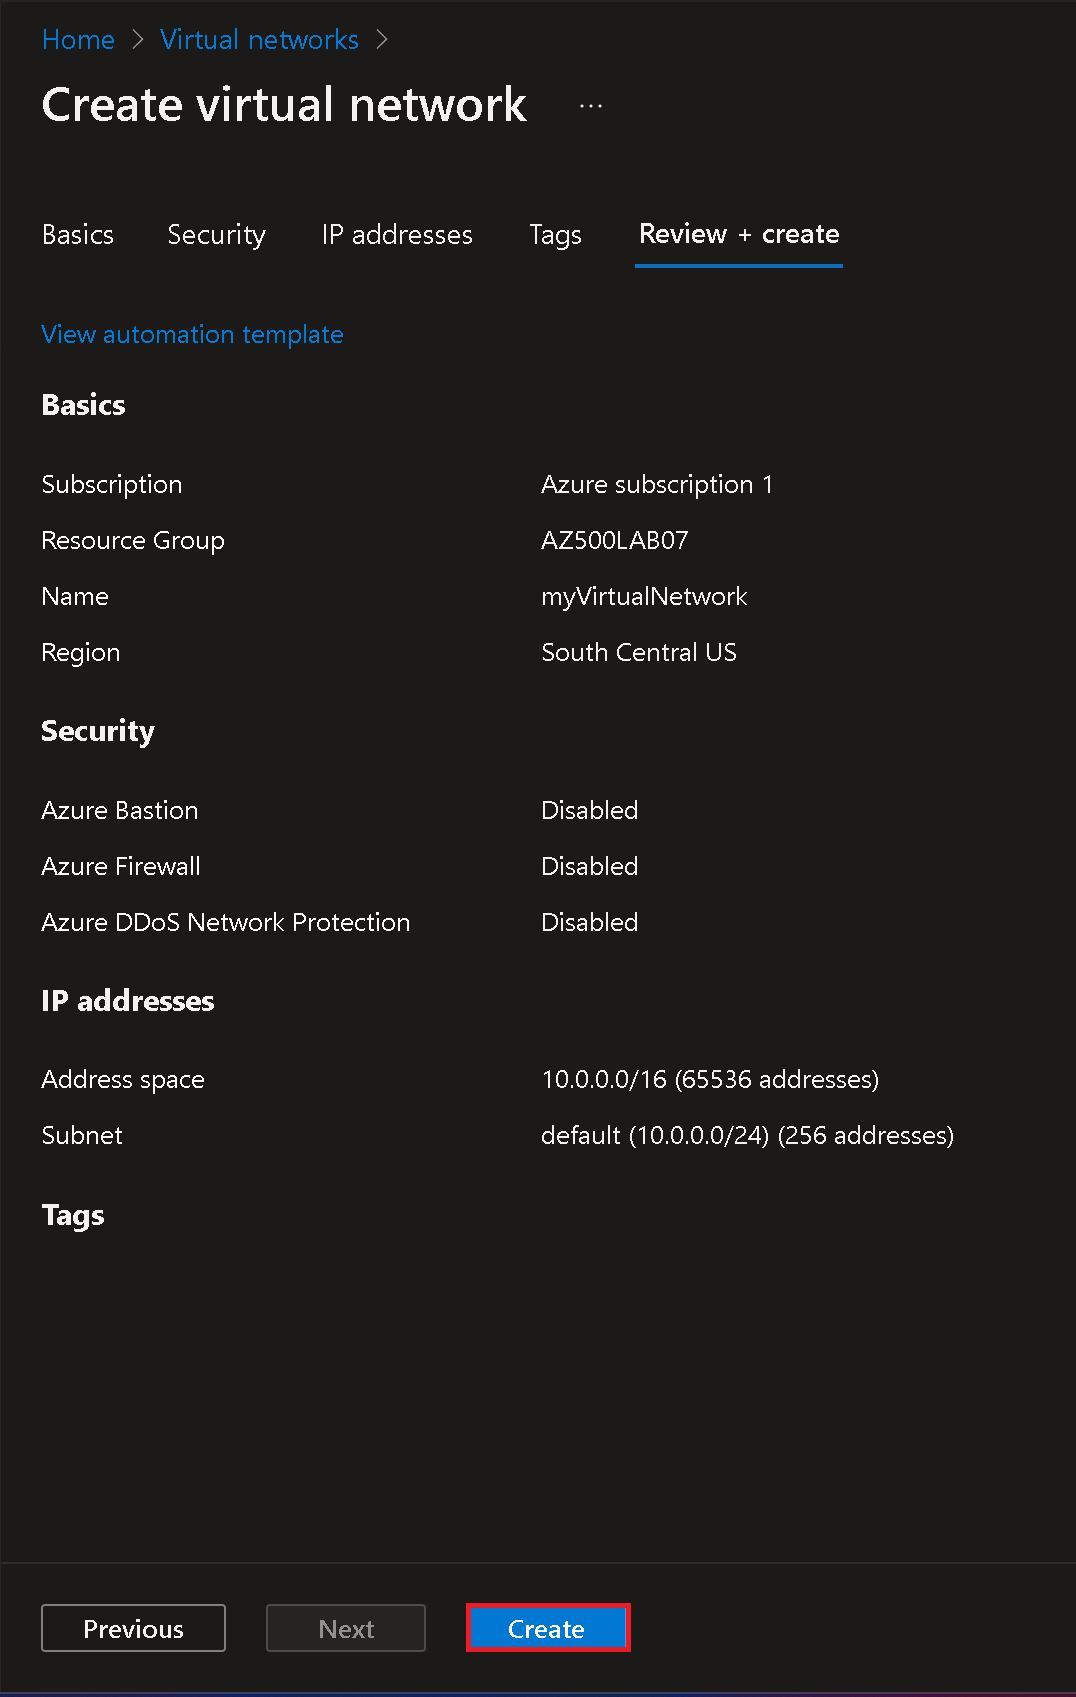
+ Createon the Virtual networks blade. - On the Basics tab of the Create virtual network blade, provide the following details:
- Subscription: Select the Azure subscription you are using for this lab.
- Resource group: Click on
Create newand enter the nameAZ500LAB07. - Name: Enter
myVirtualNetwork. - Region: Select
South Central USor a region that would be nearest to you.
| Setting | Value |
|---|---|
| Subscription | the name of the Azure subscription you are using in this lab |
| Resource group | click Create new and type the name AZ500LAB07 |
| Name | myVirtualNetwork |
| Region | South Central US or Preferred Regions That is Nearest to You |

Switch to the IP addresses tab, set the IPv4 address space to 10.0.0.0/16, and set the Subnet address range to 10.0.0.0/24
Click on Review + create and then click Create to create the virtual network.
| Setting | Value |
|---|---|
| Subnet name | default |
| Subnet address range | 10.0.0.0/24 |
Exercise 1 ---> Task 2: Create application security groups
In the Azure portal, search for Application security groups and select it from the results.
- Click on
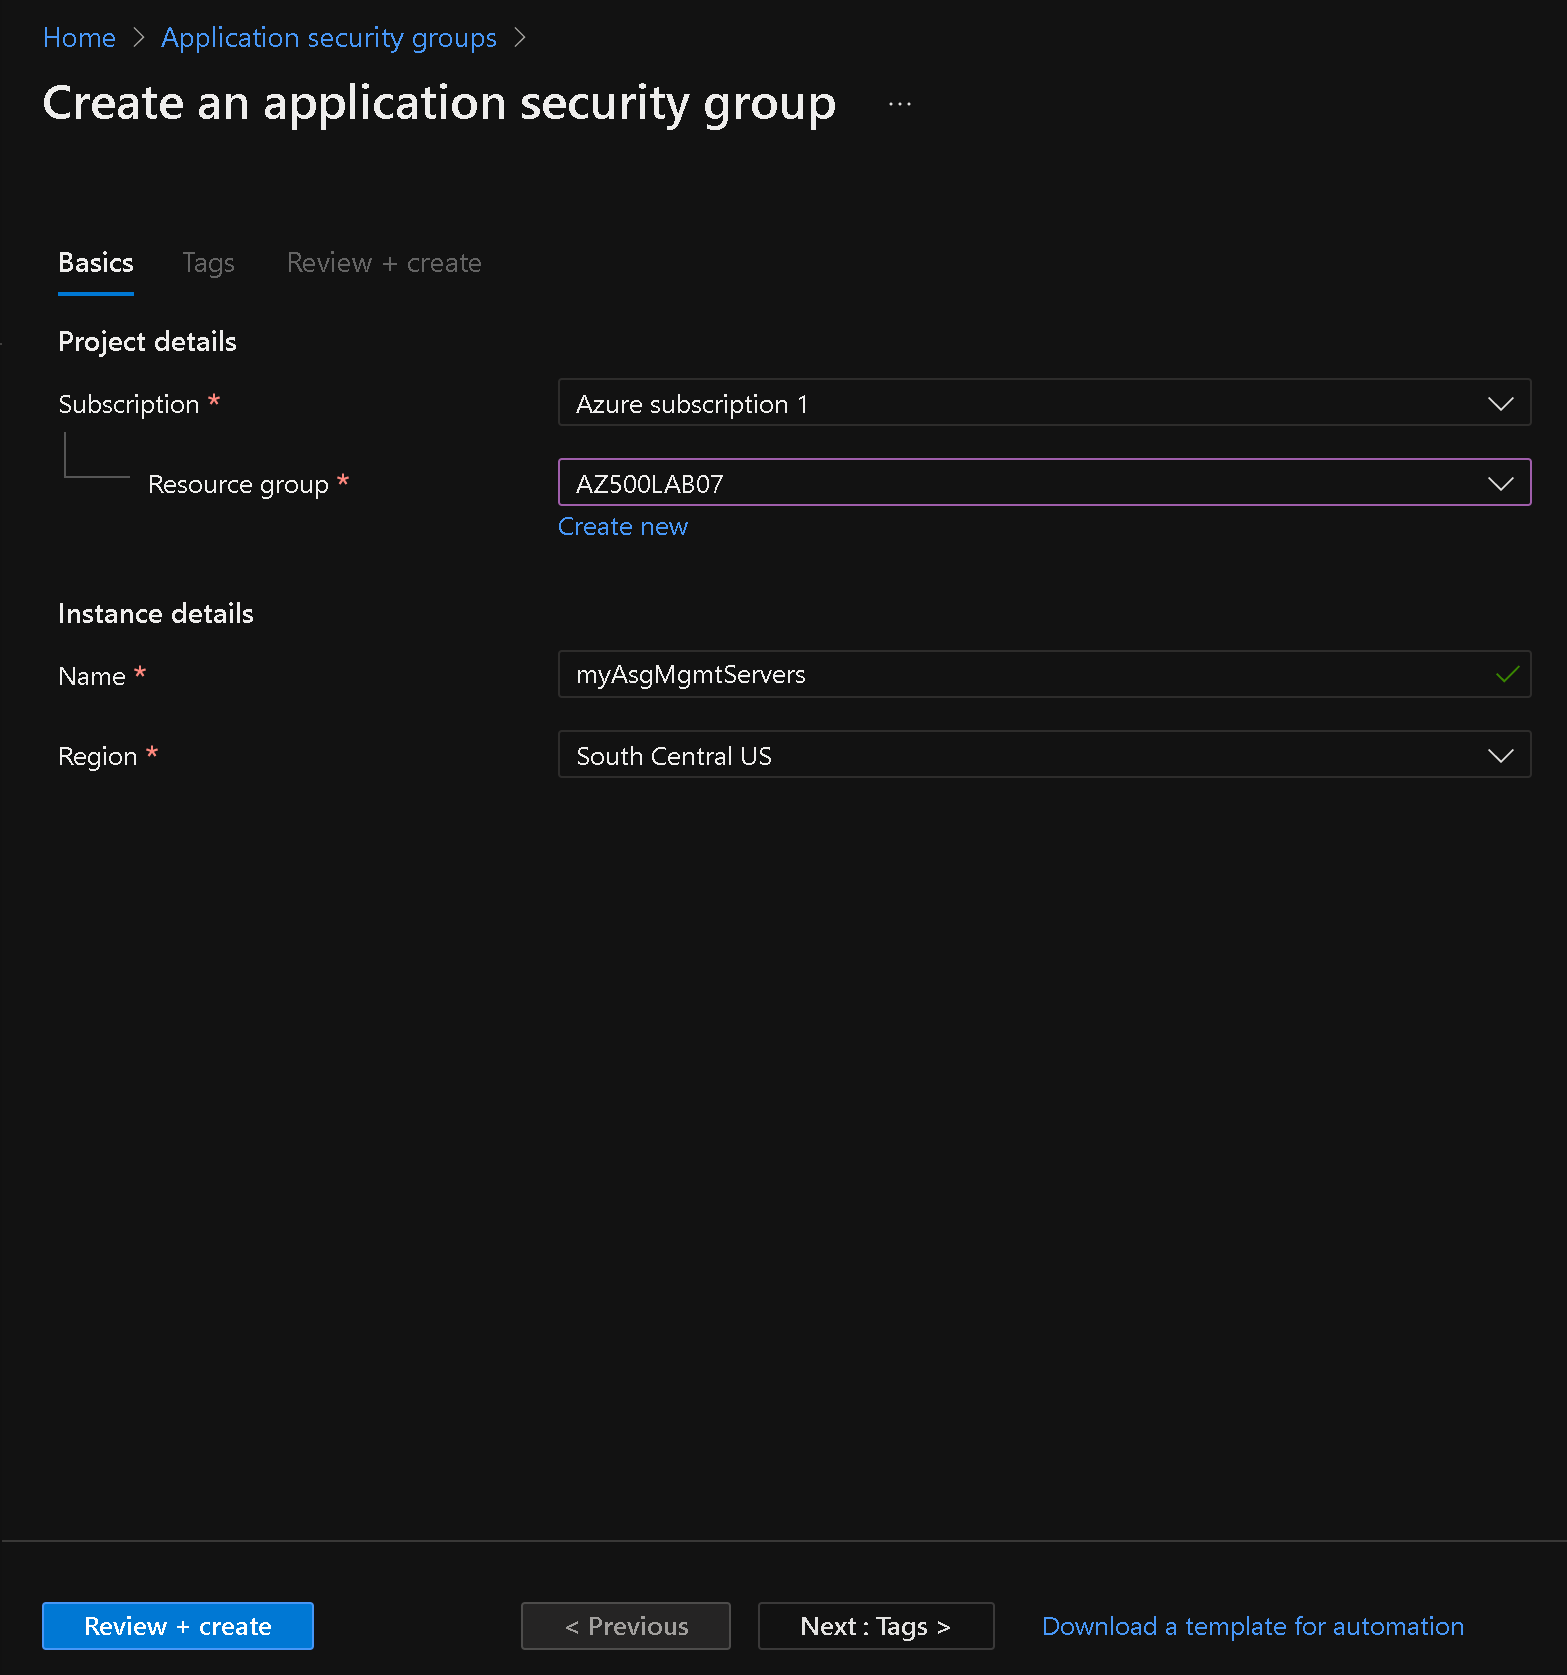
+ Createon the Application security groups blade. - On the Basics tab of the Create an application security group blade, provide the following details:
- Resource group: Select
AZ500LAB07or your preferred Resource Group Name that would be that lab. - Name: Enter
myAsgWebServers(this group will be for web servers). - Click on
Review + createand then clickCreate. - Repeat steps 2-4 to create another application security group with the following details:
- Resource group: Select
AZ500LAB07. - Name: Enter
myAsgMgmtServers(this group will be for management servers).
| Setting | Value |
|---|---|
| Resource group | AZ500LAB07 |
| Name | myAsgWebServers |
| Region | South Central US |
Note: This group will be for the web servers.

| Setting | Value |
|---|---|
| Resource group | AZ500LAB07 |
| Name | myAsgMgmtServers |
| Region | South Central US |
Note: This group will be for the management servers.
Exercise 1 ---> Task 3: Create a network security group and associate it with the subnet
In the Azure portal, search for Network security groups and select it from the results.
- Click on
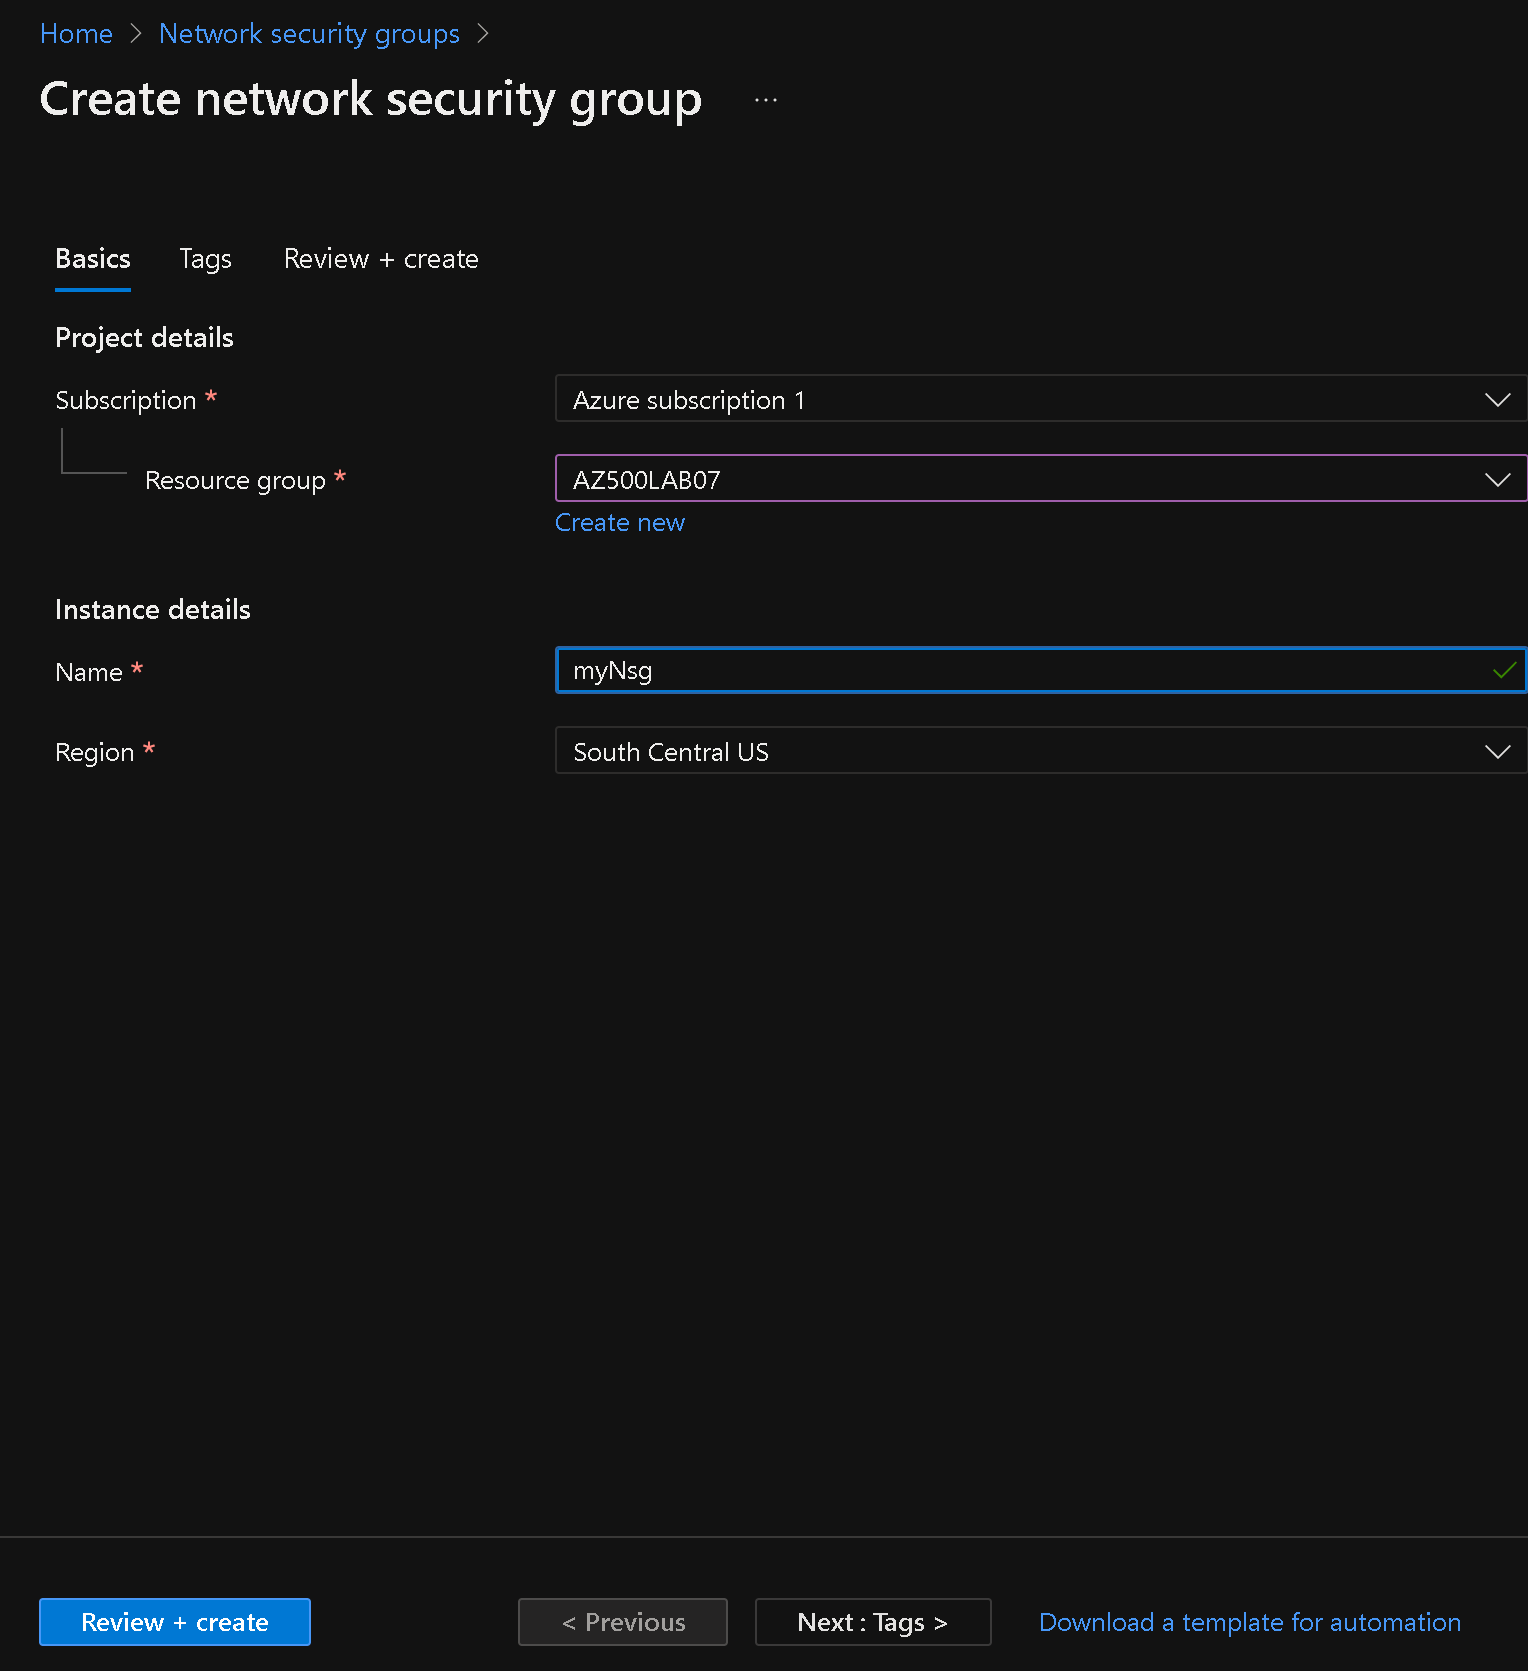
+ Createon the Network security groups blade. - On the Basics tab of the Create network security group blade, provide the following details:
- Subscription: Select the Azure subscription you are using for this lab.
- Resource group: Select
AZ500LAB07. - Name: Enter
myNsg. - Region: Select
East US. - Click on "Review + create" and then click
Create.
| Setting | Value |
|---|---|
| Subscription | the name of the Azure subscription you are using in this lab |
| Resource group | AZ500LAB07 |
| Name | myNsg |
| Region | South Central US |
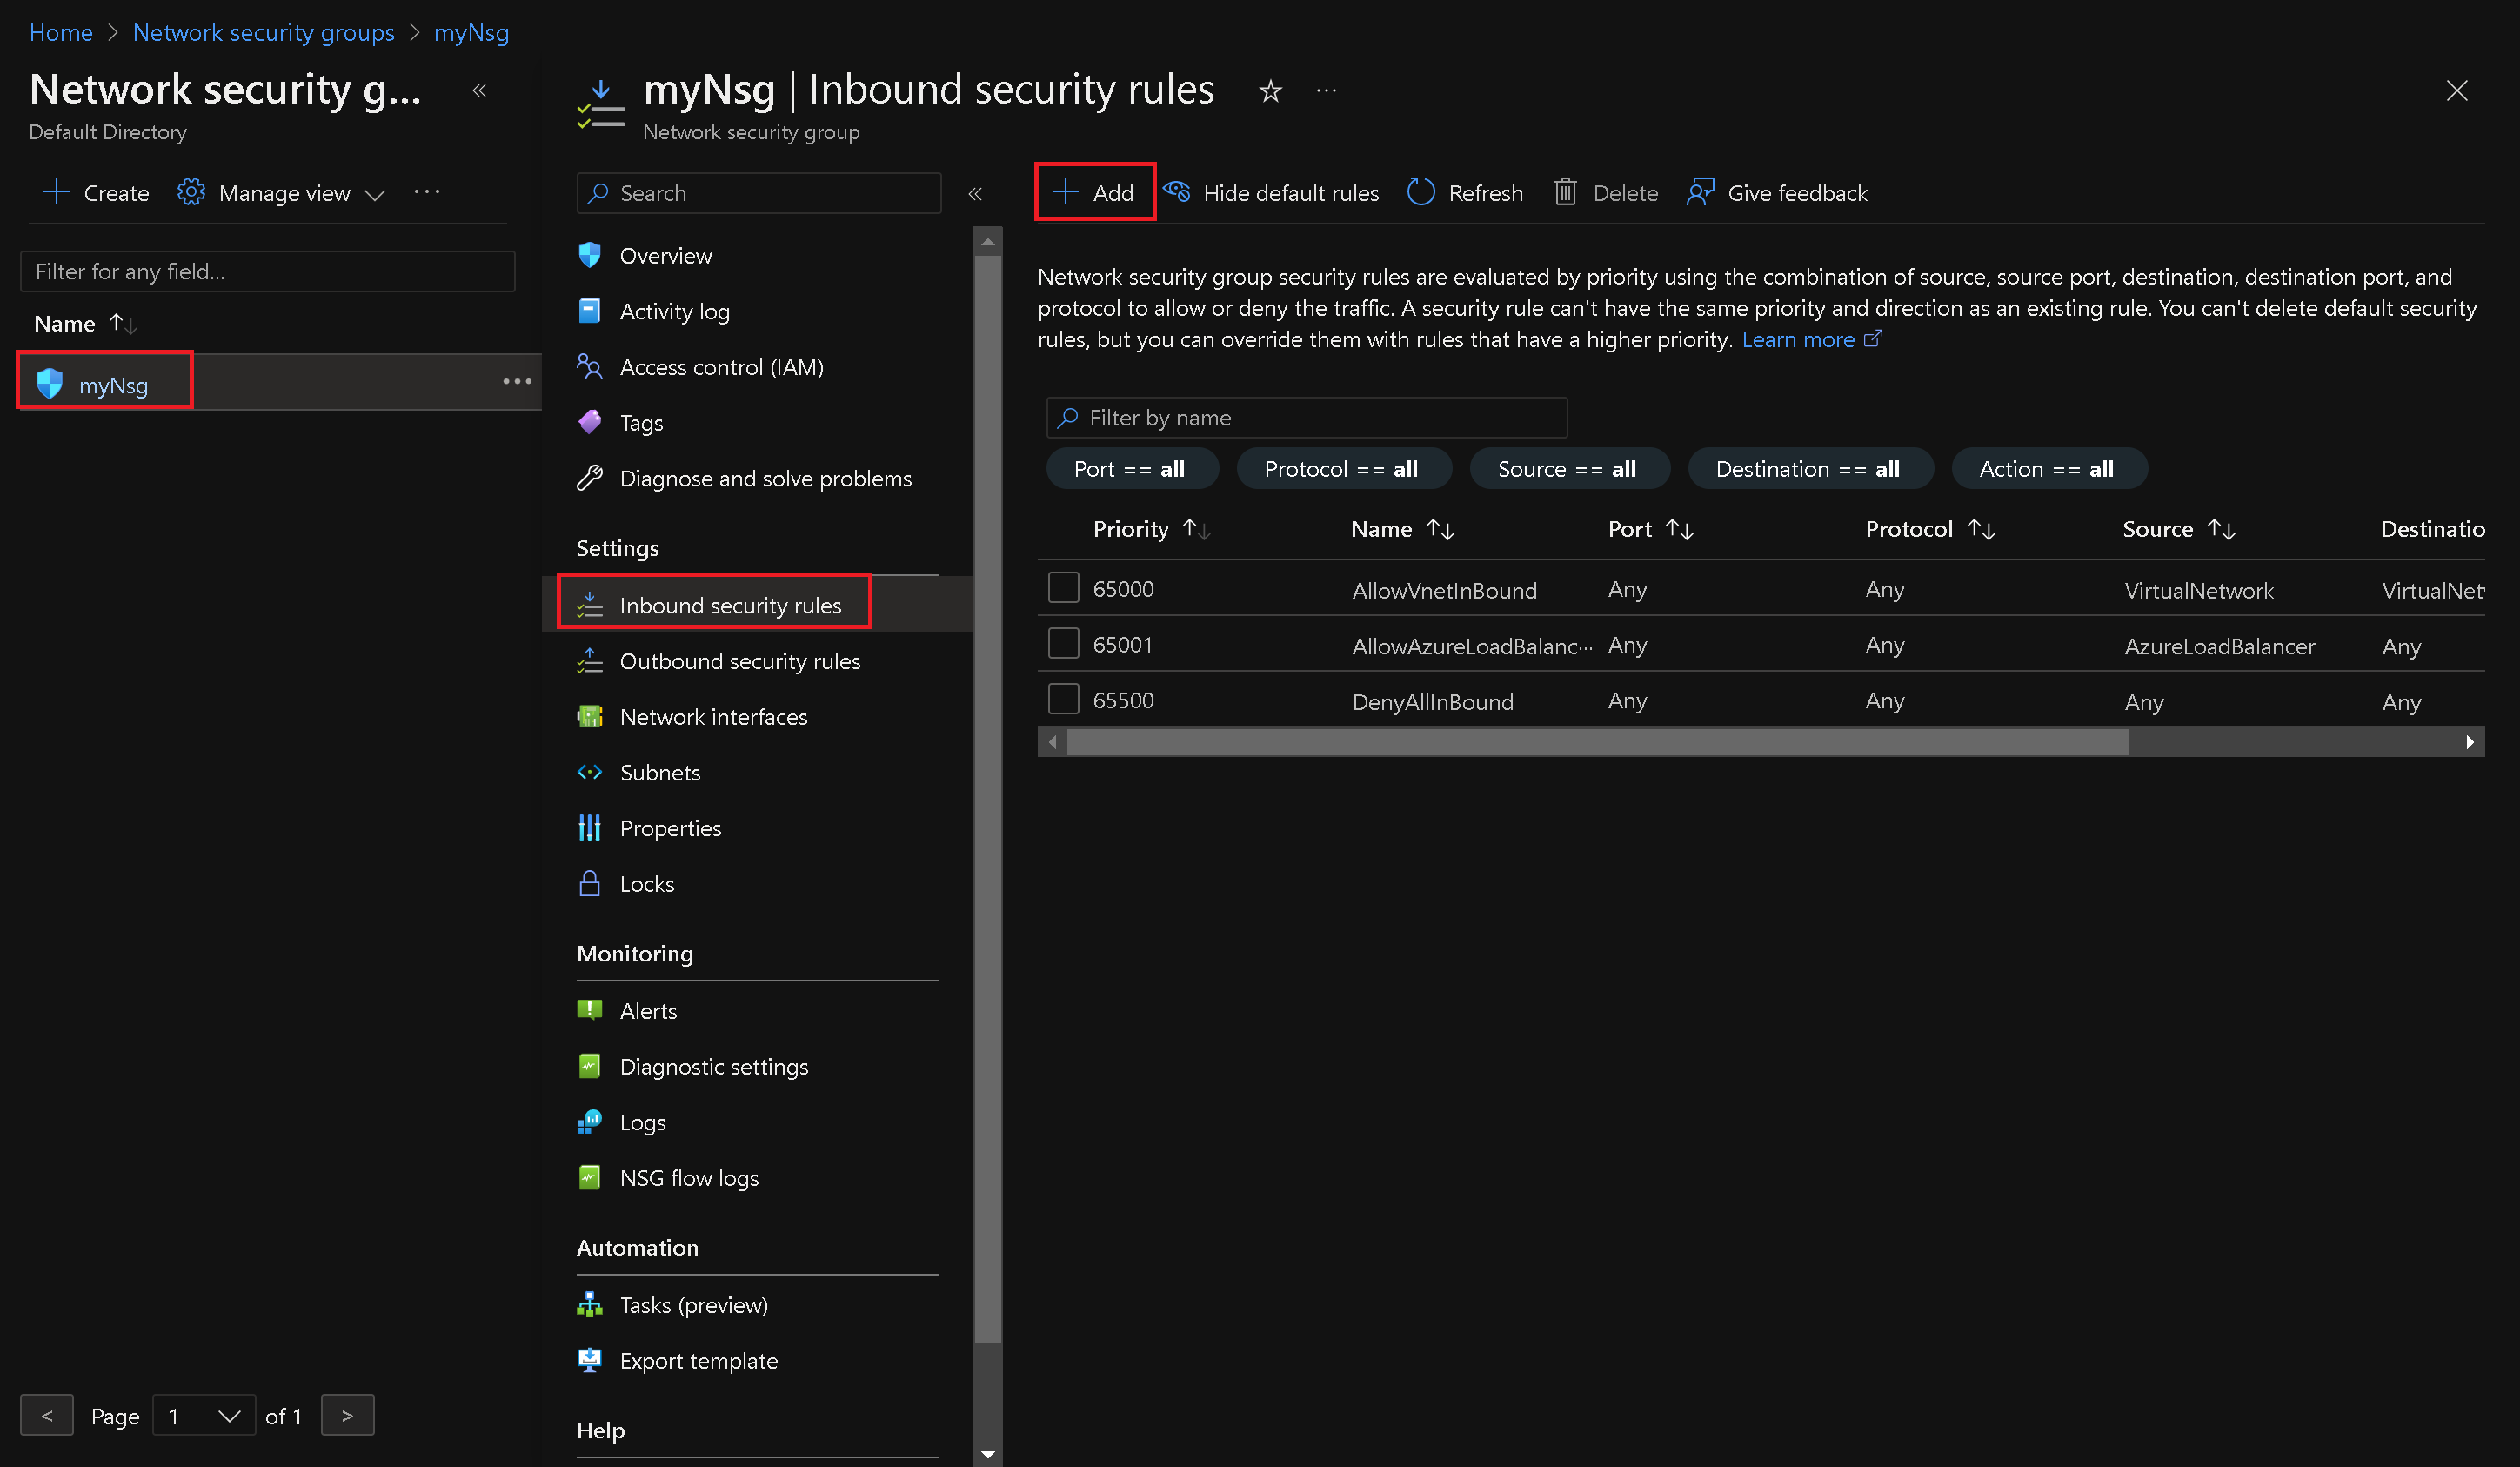
- Navigate back to the Network security groups blade and select the
myNsgentry. - On the myNsg blade, in the Settings section, click
Subnetsand then click+ Associate. - On the Associate subnet blade, provide the following details:
- Virtual network: Select
myVirtualNetwork. - Subnet: Select
default. - Click
OKto associate the network security group with the subnet.

| Setting | Value |
|---|---|
| Virtual network | myVirtualNetwork |
| Subnet | default |
Exercise 1 ---> Task 4: Create inbound NSG security rules
- On the myNsg blade, in the Settings section, click
Inbound security rules. - Review the default inbound security rules and then click
+ Addto add a new rule.
- On the Add inbound security rule.
- On the Add inbound security rule blade, specify the following settings to allow TCP ports 80 and 443 to the myAsgWebServers application security group (leave all other values with their default values):
| Setting | Value |
|---|---|
| Destination | in the drop-down list, select Application security group and then click myAsgWebServers |
| Destination | port ranges 80,443 |
| Protocol | TCP |
| Priority | 100 (lower the number, the higher the priority) |
| Name | Allow-Web-All |

Add inbound security rule:
- Navigate to the "myNsg" blade.
- In the Settings section, click "Inbound security rules" and then click "+ Add."
- On the "Add inbound security rule" blade, provide the following settings:
- Destination: Select "Application security group" and choose "myAsgMgmtServers."
- Destination port ranges: Enter "3389."
- Protocol: Select "TCP."
- Priority: Set it to "110."
- Name: Enter "Allow-RDP-All."
- Click "Add" to create the new inbound rule.
- Result: You have added an inbound security rule to allow RDP (TCP port 3389) traffic to the "myAsgMgmtServers" application security group.
| Setting | Value |
|---|---|
| Destination | in the drop-down list, select Application security group and then click myAsgMgmtServers |
| Destination port ranges | 3389 |
| Protocol | TCP |
| Priority | 110 |
| Name | Allow-RDP-All |
.png?raw=true)
Note: Result: You have deployed a virtual network, network security with inbound security rules, and two application security groups.
Estimated timing: 25 minutes
In this exercise, you will complete the following tasks:
Task 1: Create a virtual machine to use as a web server.
Task 2: Create a virtual machine to use as a management server.
Task 3: Associate each virtual machines network interface to it’s application security group.
Task 4: Test the network traffic filtering.
Exercise 2 ---> Task 1: Create a virtual machine to use as a web server.
Navigate to the Azure portal and search for `Virtual machines.` - Click `+ Create` and select `+ Azure virtual machine` from the dropdown list.

- On the Basics tab of the "Create a virtual machine" blade, provide the following settings:
- Subscription: Select the Azure subscription for this lab.
- Resource group: Choose
AZ500LAB07 - Virtual machine name: Enter
myVmWeb - Region: Select
(US)South Central US or the nearest region to you - Image: Choose
Windows Server 2022 Datacenter: Azure Edition - x64 Gen2 - Size: Select
Standard D2s v3 - Username: Enter
Student - Password: Use your personal password.
- Confirm password: Retype your password.
- Public inbound ports: Set it to 'None'
- Would you like to use an existing Windows Server License: 'Leave selection unchecked`
.png?raw=true)
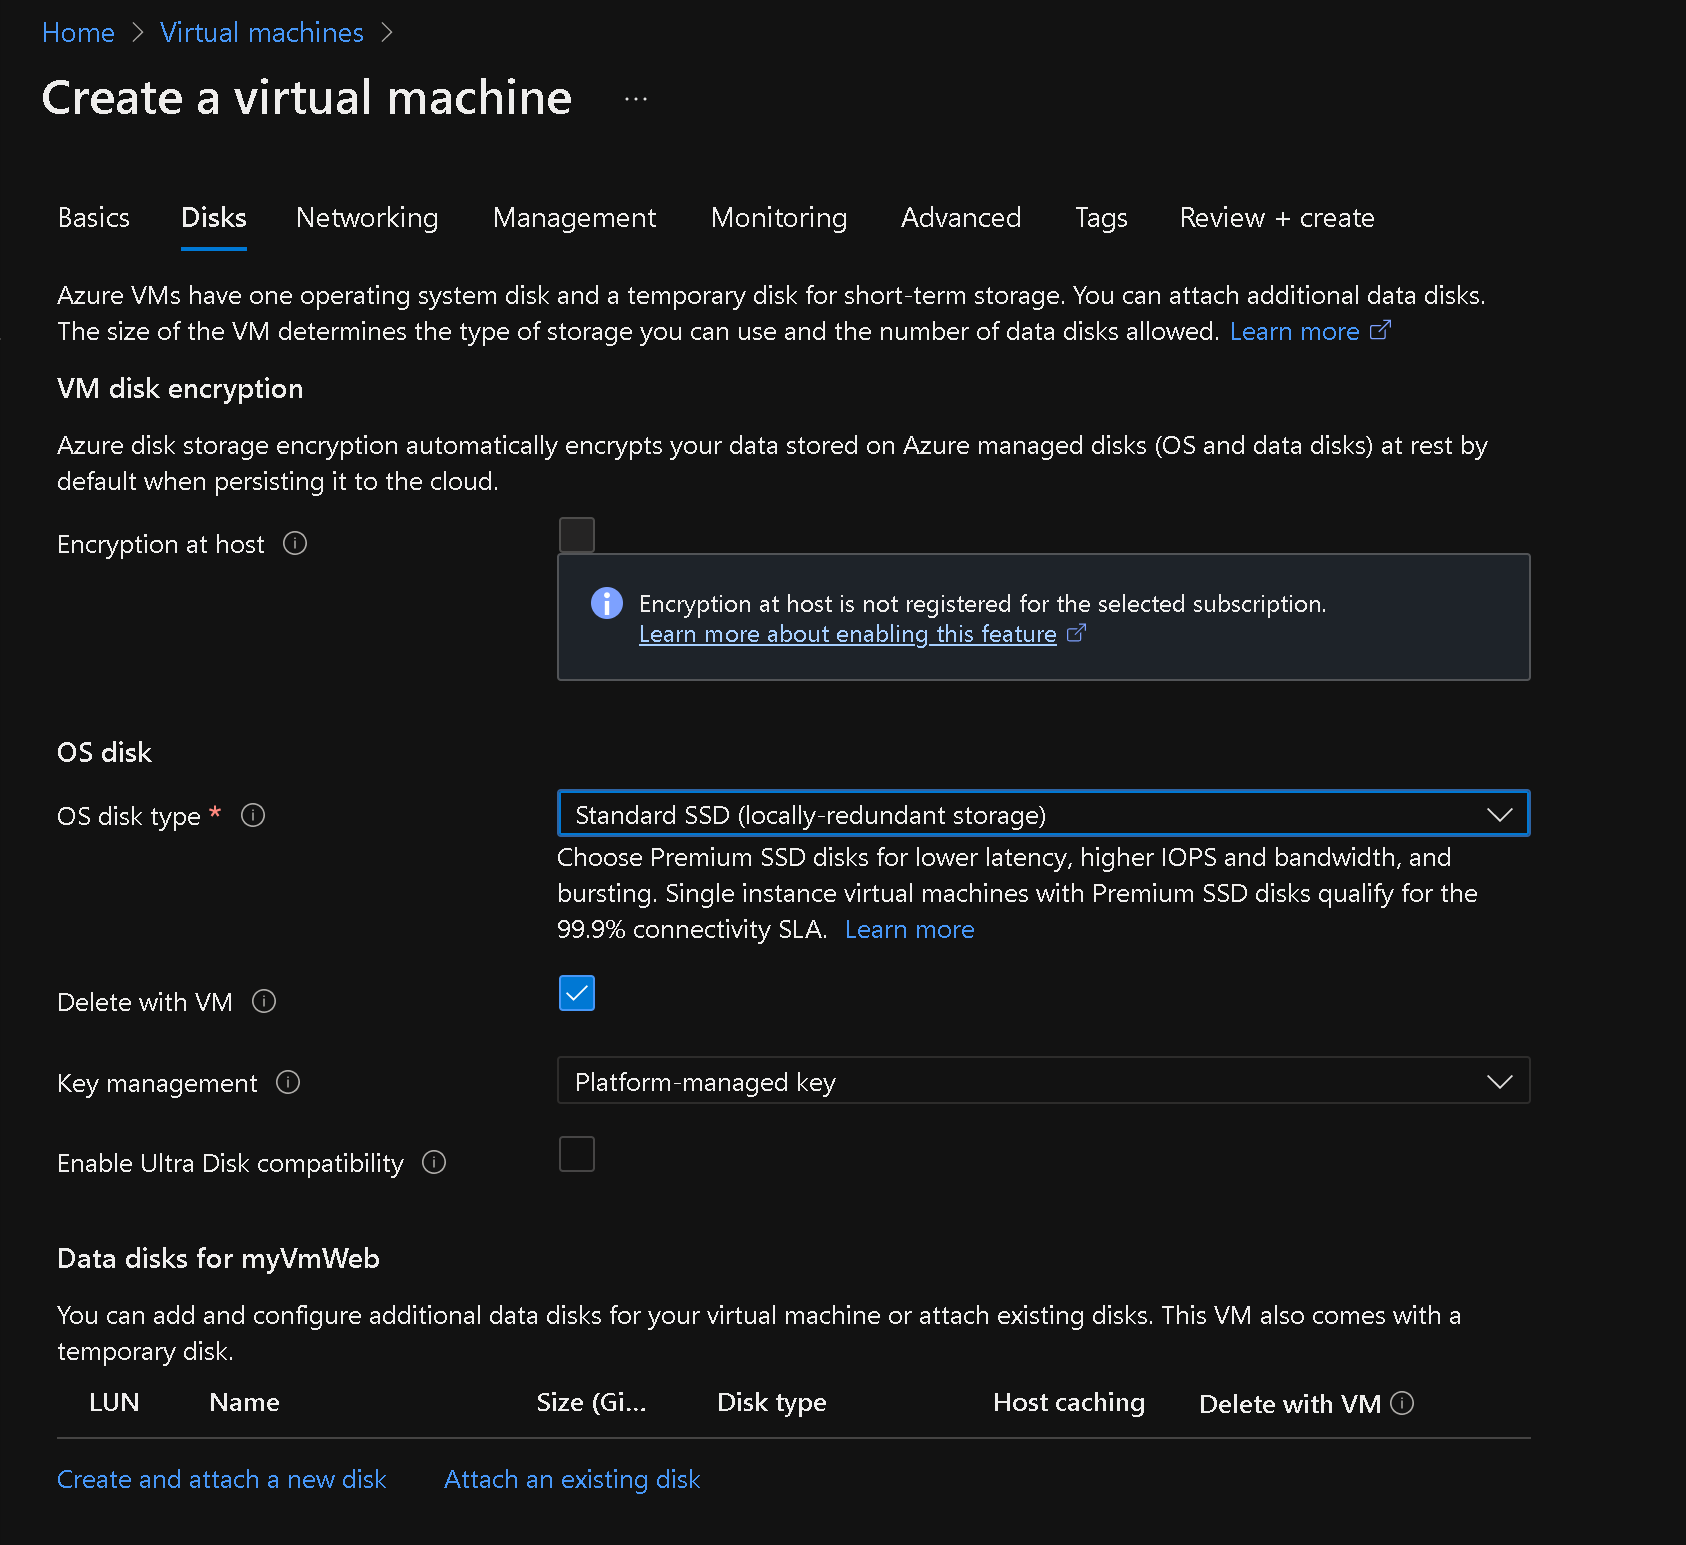
- Click "Next: Disks" and set the OS disk type to
Standard HDD
- Click "Next: Networking" and select the previously created network
myVirtualNetwork - Under "NIC network security group," choose
None

- Click "Next: Management" and then "Next: Monitoring."
- On the "Monitoring" tab, verify that "Boot diagnostics" is enabled with a managed storage account.
| Setting | Value |
|---|---|
| Boot diagnostics | Enabled with managed storage account (recommended) |
- Click "Review + create" and ensure successful validation.
- Click "Create" to deploy the virtual machine.
| Setting | Value |
|---|---|
| Subscription | the name of the Azure subscription you will be using in this lab |
| Resource group | AZ500LAB07 |
| Virtual machine name | myVmWeb |
| Region | (US) South Central US |
| Image | Windows Server 2022 Datacenter: Azure Edition- x64 Gen2 |
| Size | Standard D2s v3 |
| Username | Student |
| Password | Please use your personal password created |
| Confirm password | Retype your password |
| Public inbound ports | None |
| Would you like to use an existing Windows Server License | No |
Exercise 2 ---> Task 2: Create a Management Server Virtual Machine
Navigate to the Azure portal and go to the Virtual machines blade.
Note: The following will be the same as the previous Virtual Machine except for the Management Server, so no pictured image.
- Click
+ Createand select+ Azure virtual machinefrom the dropdown list. - On the Basics tab of the "Create a virtual machine" blade, provide the following settings:
- Subscription: Select the Azure subscription for this lab.
- Resource group: Choose
AZ500LAB07. - Virtual machine name: Enter
myVMMgmt. - Region: Select
South Central US - Image: Choose
Windows Server 2022 Datacenter: Azure Edition - x64 Gen2. - Size: Select
Standard D2s v3. - Username: Enter
Student. - Password: Use your personal password.
- Public inbound ports: Set it to
None. - Already have a Windows Server license: Select
No.
| Setting | Value |
|---|---|
| Subscription | the name of the Azure subscription you will be using in this lab |
| Resource group | AZ500LAB07 |
| Virtual machine name | myVMMgmt |
| Region | South Central US or preferred region that is nearest to you |
| Image | Windows Server 2022 Datacenter: Azure Edition - x64 Gen2 |
| Size | Standard D2s v3 |
| Username | Student |
| Password | Please use your personal password that you create |
| Public inbound ports | None |
| Already have a Windows Server license | No |
Note: For public inbound ports, we will rely on the precreated NSG.
-
Click
Next: Disksand set the OS disk type toStandard HDD -
Click
Next: Networkingand select the previously created networkmyVirtualNetwork -
Under "NIC network security group," choose
None. -
Click "Next: Management" and then
Next: Monitoring. -
On the "Monitoring" tab, verify that
Boot diagnosticsis enabled with a managed storage account. -
Click
Review + createand ensure successful validation. -
Click
Createto deploy the virtual machine.Note: Wait for both virtual machines to be provisioned before continuing.
Exercise 2 ---> Task 3: Associate Network Interfaces with Application Security Groups
Go to the Virtual machines blade in the Azure portal and verify that both virtual machines are listed with the "Running" status.
- Click the entry for the "myVMWeb" virtual machine.
- On the "myVMWeb" blade, click "Networking" in the Settings section.
- On the "myVMWeb | Networking" blade, click the "Application security groups" tab.
- Click "Configure the application security groups" and select "myAsgWebServers" from the Application security group drop-down list.
.png?raw=true)
- Click "Save."
.png?raw=true)
Note: The following steps and settings are the same as previously mentioned with the exception of the change for
myVMMgmtandmyAsgMgmtServers
- Navigate back to the Virtual machines blade and click the entry for the "myVMMgmt" virtual machine.
- On the "myVMMgmt" blade, click "Networking" in the Settings section.
- On the "myVMMgmt | Networking" blade, click the "Application security groups" tab.
- Click "Configure the application security groups" and select "myAsgMgmtServers" from the Application security group drop-down list.
- Click "Save."
Exercise 2 ---> Task 4: Test Network Traffic Filtering and Lab Clean Up
Go to the "myVMMgmt" virtual machine blade in the Azure portal.
- Click "Connect" and select "RDP" from the drop-down menu.
- Download the RDP file and use it to connect to the "myVMMgmt" Azure VM via Remote Desktop using the provided credentials.
- In the Azure portal, navigate to the "myVMWeb" virtual machine blade.
- On the "myVMWeb" blade, in the Operations section, click "Run command" and then select "RunPowerShellScript."
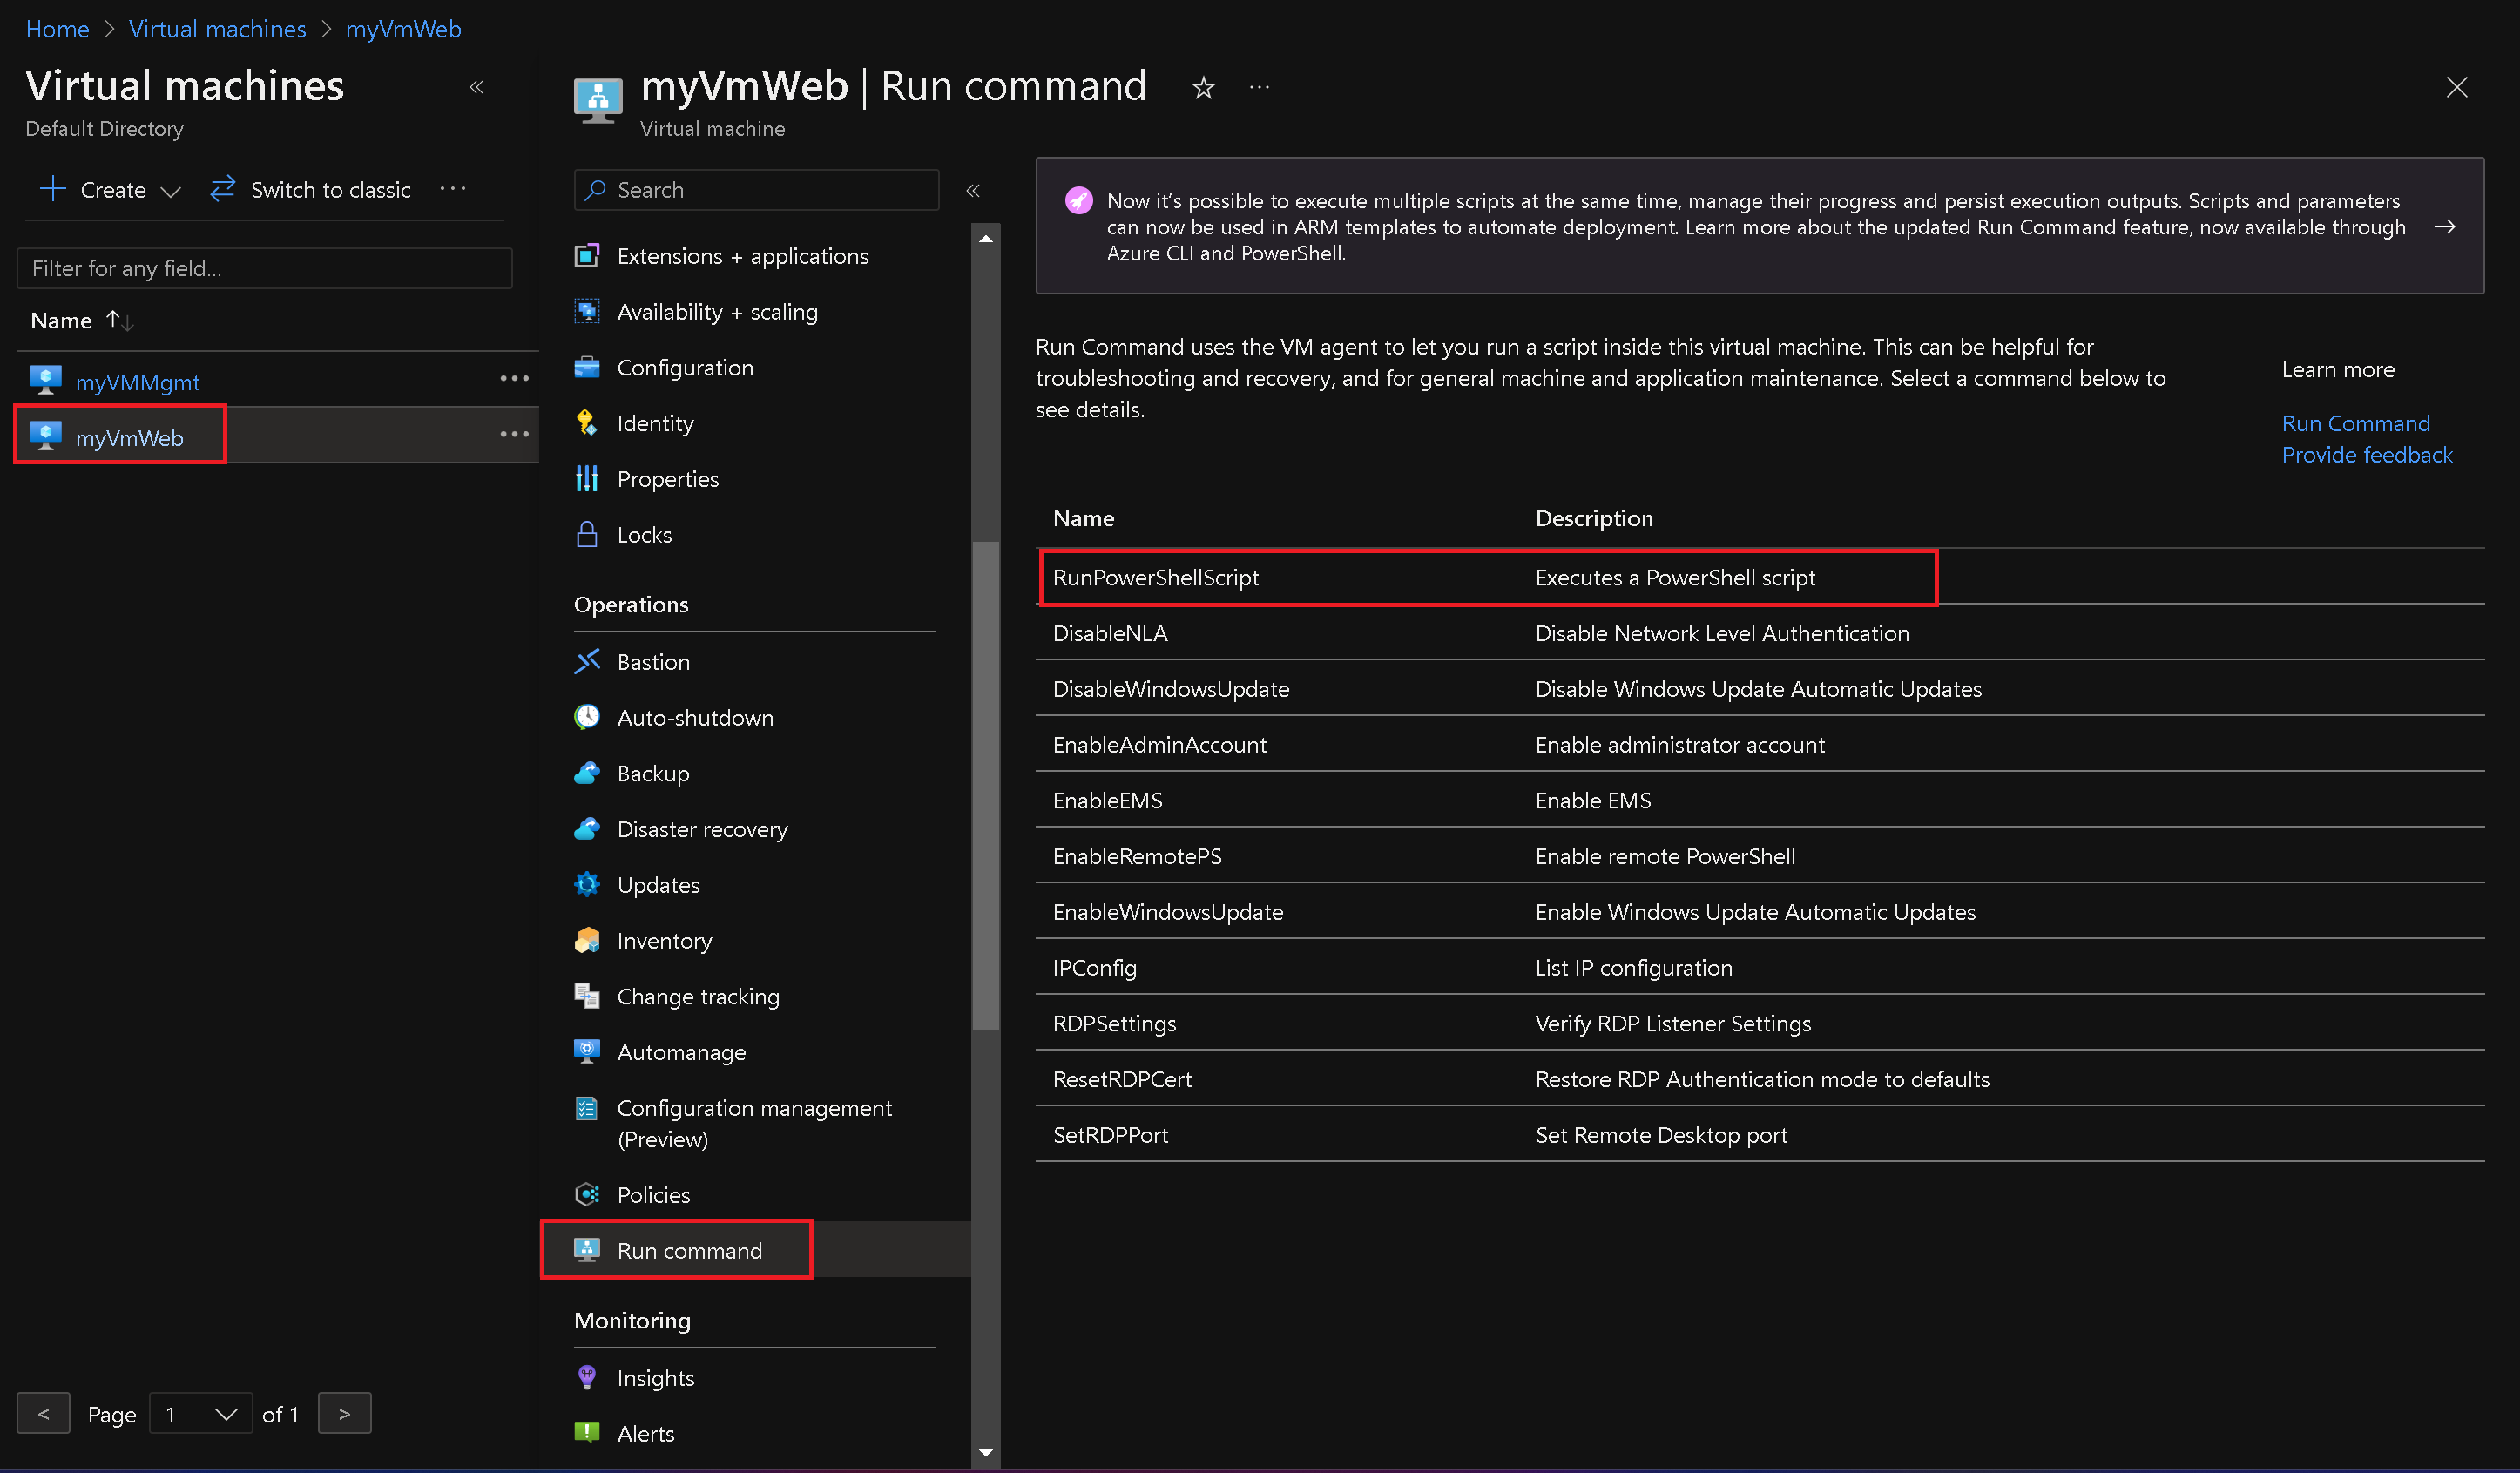
- Run the following command in the Run Command Script pane to install the Web server role on "myVMWeb":
Install-WindowsFeature -name Web-Server -IncludeManagementTools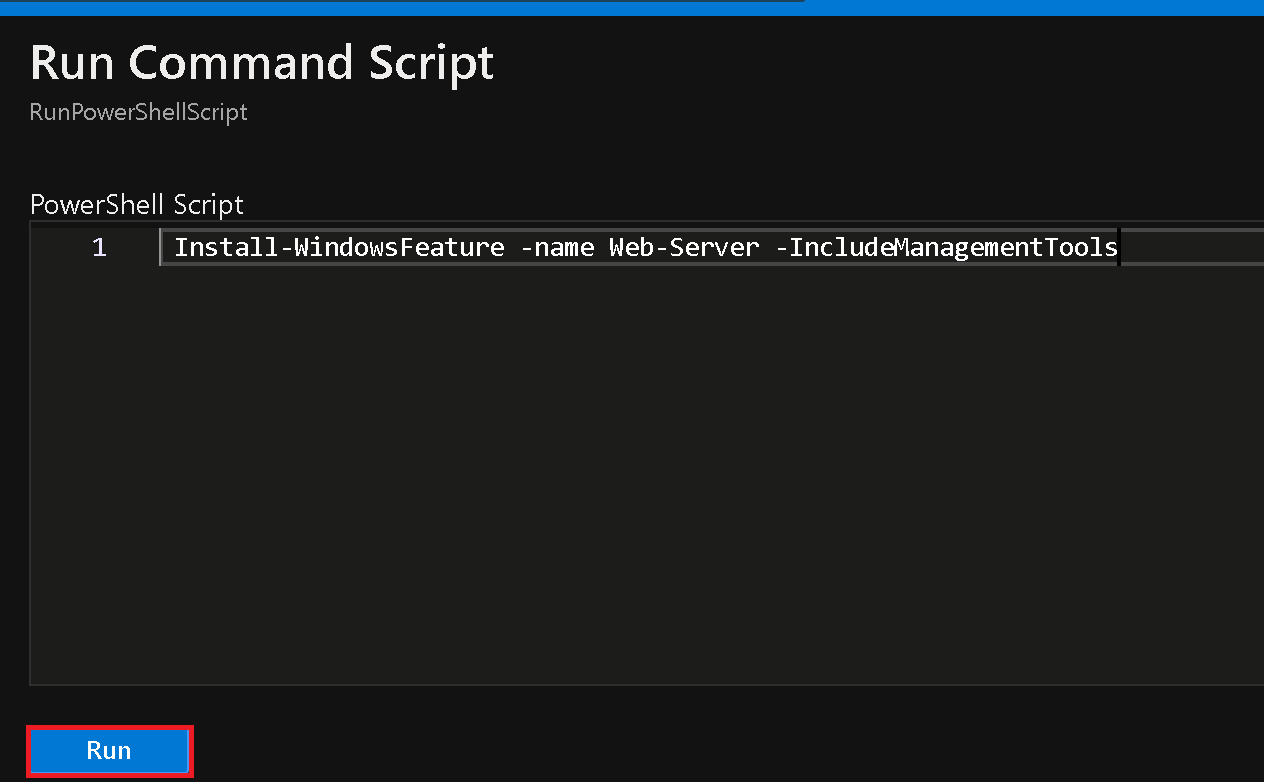
Note: Wait for the installation to complete. There will be a notification of success.
-
In the Azure portal, navigate back to the "myVMWeb" blade.
-
Identify the Public IP address of the "myVmWeb" Azure VM.

-
Open another browser tab and navigate to the identified IP address.
-
Verify that the default IIS web page is displayed, indicating that port 80 is allowed inbound from the internet based on the "myAsgWebServers" application security group.

.png)
.png)
.png)
.png)
.png)

Note:Result: You have successfully validated the network security group (NSG) and application security group (ASG) configuration, and the network traffic is being correctly managed.
Lab Cleanup: To avoid incurring unexpected costs, it is essential to remove any unused Azure resources.
Open the Cloud Shell by clicking the first icon in the top right of the Azure Portal.
If prompted, select PowerShell and Create storage.
In the PowerShell session within the Cloud Shell pane, run the following command to remove the resource group you created in this lab:
Remove-AzResourceGroup -Name "AZ500LAB07" -Force -AsJob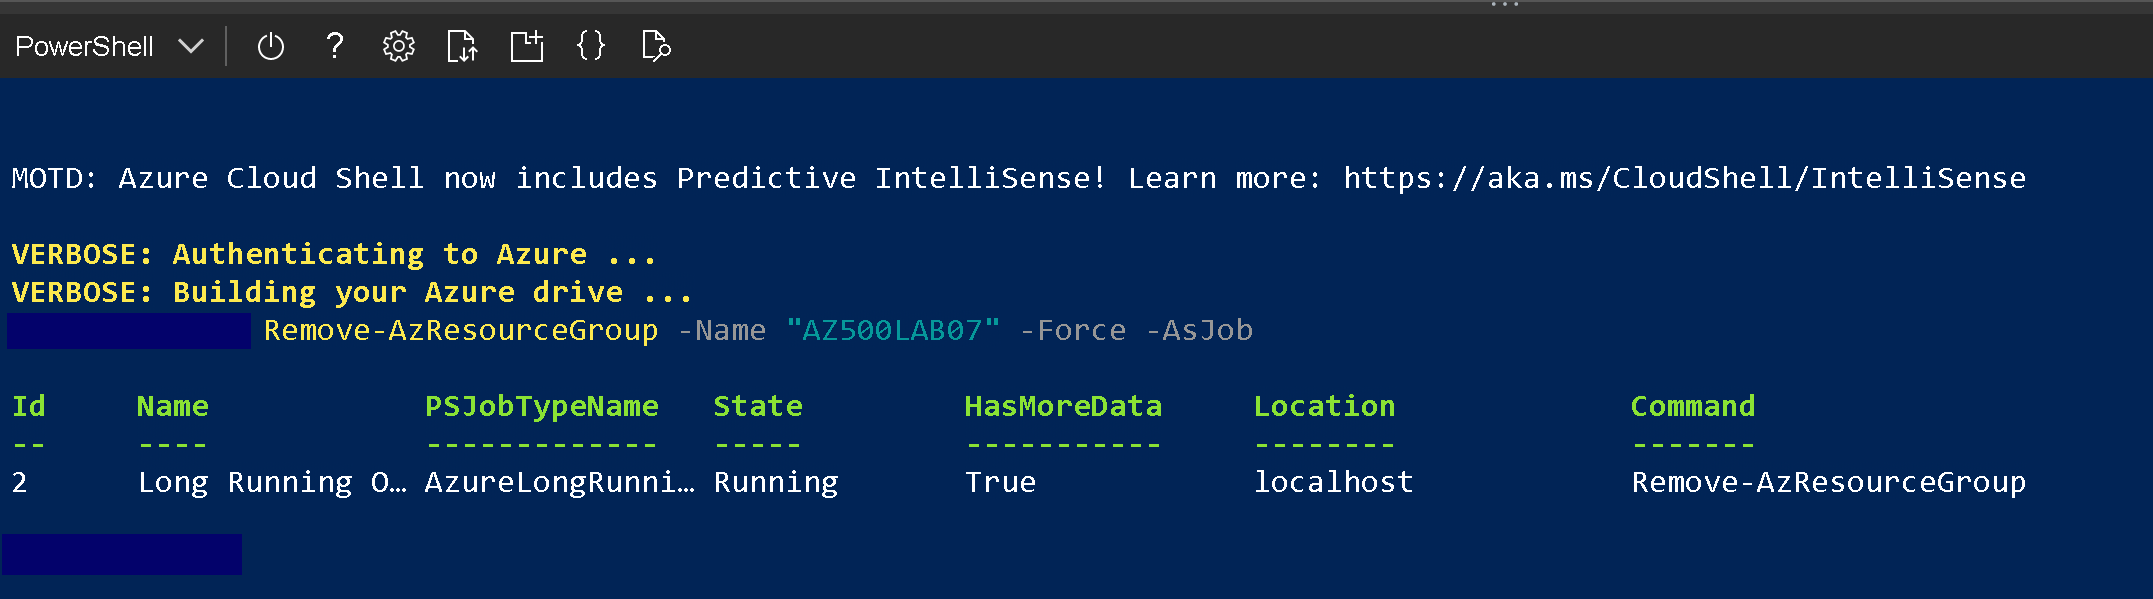
Close the Cloud Shell pane.
Note: Remember to remove any newly created Azure resources that you no longer use. Removing unused resources ensures you will not incur unexpected costs.
Through the process of creating a virtual network, application security groups, and network security groups, I gained hands-on experience in configuring and securing network resources in Azure. This exercise allowed me to understand the importance of properly defining IP addresses, subnets, security rules, and associations between resources.
I learned how to navigate the Azure portal and utilize various settings and options to create and configure virtual machines, assign security groups, and manage network traffic. The step-by-step instructions provided clear guidance, enabling me to follow along and successfully complete the tasks.
By associating network interfaces with application security groups, I experienced firsthand how traffic filtering can be implemented and managed at a granular level. This approach enhances security by allowing only authorized traffic to reach specific resources, such as web servers and management servers.
Overall, this exercise helped me develop practical skills in network resource management and security within the Azure environment. I feel more confident in my ability to create and configure virtual networks and apply appropriate security measures to protect my applications and data.
Creating a VNet (virtual network) and implementing network and application security groups are crucial steps in ensuring the secure and efficient operation of cloud-based resources. Azure provides a booming set of tools and features that streamline the configuration and management of network resources.
Through careful configuration of IP addresses, subnets, and security rules, an organization(s) can create distinct network environments that offer isolation, precise control over traffic, and effective mitigation of potential security vulnerabilities. Application security groups enable fine-grained access control, allowing specific groups of resources to communicate with each other while restricting unauthorized access.
The ability to associate network interfaces with application security groups further enhances security and simplifies management. By grouping resources based on their intended roles or functions, administrators can apply consistent security policies and streamline the management of network traffic.
Through this exercise, I have gained valuable hands-on experience in creating virtual networks, configuring security groups, and managing network traffic in Azure. These skills will prove invaluable in designing and implementing secure and scalable cloud-based architectures.
As I continue to explore Azure and its networking capabilities, I will further refine my understanding of network security best practices and continue to strengthen my ability to design and implement robust and secure network architectures in the cloud.