Fork (October 2020) of David Crespo's emulator with the support of WII Wiimote, based on the emulator of Ramon Martinez and Jorge Fuertes ZX-ESPectrum, with dependencies of the author Pete Todd.
- PSRAM is not used, it works in ESP32 with 520 KB of RAM (TTGO VGA32 v1.x)
- Supports 128K,+2,+3 and +3e modes without lack of PSRAM
- Removed the control support WII
- Replacement of the OSD with a low resource OSD
- Created project compatible with Arduino IDE and Platform IO
- Web Editor and ArduinoDroid (6.3.1) compatible project with tool makeandroid.bat
- Removal of SPIFFS support
- ROM, SNA, SCR, TAP repositioning in Flash progmem
- Size optimization in FLASH
- Video routine optimization (2200 microseconds per frame)
- Support for both 2 core's (50 fps 20000 microseconds) and one core (50 fps 17000 microseconds) modes.
- Kempston mouse emulation with fabgl
- Kempston mouse emulation (reduced library by Rob Kent jazzycamel)
- Kempston emulation with cursor keys (left, right, up, down) and right ALT.
- AY8912 emulation with fabgl, reduced version of dcrespo3d (David Crespo Tascón)
- Redirecting tape recording pulses to the speaker
- Resample option in speaker mode and mix with AY8912 (unstable)
- Possibility to choose brightness mode and 8 color modes in compilation.
- DAC VGA 64 colors (6 bits) and 8 colors (3 bits) (tiny version Ricardo Massaro)
- Removal of the cursors in the menu of +2,+3, as well as the key of erasing
- X, Y screen adjustment (slightly CPU consuming)
- R, G, B color scale, green phosphorous screen style
- Emulation video speed menu
- AUTO emulation speed menu (50 fps 20000 microseconds) as well as a delay in microseconds or without brake, from 150 fps to 396 fps in Lin Ke-Fong's core or from 95 fps to 225 fps in Jose Luis Sanchez's core.
- Support for reading SCR files
- Support for loading screen files into TAP files
- BASIC loading from .TAP (tape routine intercept). Only in Lin Ke-Fong core
- Core support from Lin Ke-Fong and José Luis Sánchez
- Created Windows port under SDL (not available for download)
- Video modes 360x200, 320x240, 320x200
- 128K SNA support
- WIFI support load SCR and SNA
- Precompiled version (flash download 3.9.2) 320x200 core LKF,JLS and AY8912 support
- Option to remove the IEEE (double) rounding calculation from the VGA, to avoid accuracy issues. This anomaly was found as a result of David Crespo Tascón's failure to take video.
- Added 2 video modes 320x200 70Hz and 320x240 with fabgl data.
- Added keyboard support from usb serial terminal, VStudio monitor or putty.
- Added support for reading SNA (only 48K) and SCR from usb serial terminal, VStudio monitor or putty.
https://github.com/rpsubc8/ESP32TinyZXSpectrum/tree/main/esp32/precompile
We must choose the ESP32 type:
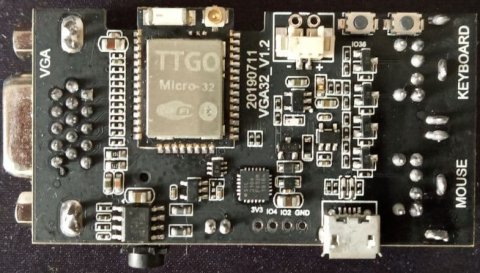
- TTGO VGA32 v1.x (1.0, 1.1, 1.2, 1.4)
- Visual Studio 1.66.1 PLATFORMIO 2.4.3 Espressif32 v3.5.0 (python 3.6)
- Arduino IDE 1.8.11 Espressif System 1.0.6
- ArduinoDroid (6.3.1)
- Arduino fabgl 0.9.0 reduced library (included in PLATFORMIO project)
- Arduino bitluni 0.3.3 reduced library (included in project)
At the end, the script itself ends up deleting the dataFlash directory.
The script uses fart.exe (find and replace text).
Once, it has been successfully executed, it can be used with the ArduinoDroid.
- 48K and 128K ROMS
- SNA of 48K
- Read screenshots of .SCR files. The .SCR file, converted to hexadecimal, contains an image, which is dumped into the video memory area. SCR files are very easy to get, if we use the emulator fuse.
- Read tape screens .TAP. We should have a hexadecimal converted .TAP file with the basic BASIC loader format, followed by a SCREEN data block. The routine that I have done is very basic, and it is in charge of looking for the screen block, and dumping it into video memory.
- Select TAP allows you to select the .TAP and place it in block 0, in order to read the BASIC from a tape. This way, if we select the Tape loader from the 128K menu, or if we type the load "" command from the BASIC, it will proceed to load the BASIC code. We must have a .TAP file converted in hexadecimal with the basic loader format and BASIC code. It is only active for the Lin Ke-Fong core, and only loads the first block of a BASIC program. If that BASIC program ends up launching a RUN or a LOAD, it will not be able to process that new data load, causing a restart or something random.
http://tomeko.net/online_tools/file_to_hex.php?lang=en
- TAB key or F2 key: Display OSD
- SHIFT+2 ("): Send CONTROL + P to ZX48K
- BackSpace (delete): Send SHIFT + 0 to the ZX48K
- ENTER: Send ENTER on the ZX48K
- +: Send ALT_GR
- -: Send SHIFT LEFT
- *: Send CONTROL
- Up: SHIFT + 7 and Kempston Up
- Down: SHIFT + 6 and Kempston Down
- Right: Kempston right
- Left: Kempston left
- A..Z, a..z: a..z
If this option is activated, when we want to load an SCR or an SNA, the OSD menu will ask us if we want to use UART or Flash. If we choose UART, a message will appear on the screen waiting for data from the UART, and if it exceeds a certain timeout, it will stop reading. As soon as we send the data, it will start to display the loaded bytes.
The way to send the data is by converting the binary file to ASCII hexadecimal format, without 0x, commas or strange characters. An example for a valid SCR would be:
0000000000003000000038070000E001 C1C03800070E0E0E0E00383800E0E387As you can see, a byte contains 2 hexadecimal nibbles, for example the value of a 193 byte would be C1.02020202020202020202020202020202 02020202020202020202020202020202
It is normal to compose each line with 16 bytes, i.e. 32 nibbles. Each line will contain a carriage return. This conversion can be done conveniently with the utility:
https://tomeko.net/online_tools/file_to_hex.php?lang=en
We must uncheck the option to include 0x and comma separator, and we can leave the option to include new lines.
An SCR (6912) in this format would occupy about 14688 bytes, which can be copied and pasted into the terminal. A 48K SNA (49179 bytes) in this format typically occupies 104504 bytes.
If we use putty, we must choose the Serial connection with 115200 baud:
- use_lib_mouse_kempston: It uses a mouse connected to the PS/2 port emulating the kempston protocol. Rob Kent's reduced library is used. By using an uninterruptible mode, CPU is consumed in each iteration, reducing emulation frames.
- define use_lib_mouse_kempston If active, it allows to choose by default the mouse in left-handed mode. At any time, from the OSD, you can also change it, as well as choose the inversion of the X and Y, and the speed of increase.
- gb_delay_init_ms: Allows you to specify the milliseconds to wait for mouse initialization.
- gb_ms_mouse: Allows you to specify the mouse polling milliseconds.
- use_lib_sound_ay8912: A 3-channel mixer is used in dirty mode, emulating the AY8912. The speaker uses channel 1 in digital mode, unless the resampling option is activated. The reduced fabgl library is required, which is already inside the project.
- use_lib_resample_speaker: The speaker output is emulated as a sine wave on channel 1. It is still in a very experimental state.
- use_lib_redirect_tapes_speaker: Redirects the tone output from the tape to the speaker.
- use_lib_vga8colors: Forces to use RGB, only 3 pins and no brightness mode, 8 colors
- use_lib_vga64colors: Forced to use RRGGBB, 6-pin, no brightness mode, i.e. with 8 colors
- use_lib_use_bright: Force to use RRGGBB, 6 pins, with brightness mode, 16 colors
- use_lib_vga_low_memory: Experimental mode with low video RAM consumption. In some video mode it gives problems.
- use_lib_vga_thread: Use the video output in a thread. If it is annotated, only one core will be used.
- use_lib_screen_offset: Allows to move left and up the screen. It consumes a little CPU, a couple of microseconds. If active, it can be adjusted from the OSD. Ideally, do not have it active and make the adjustments from the monitor.
- use_lib_skip_frame: Allows to skip frames when emulating
- use_lib_vga360x200x70hz_bitluni: Normal video mode with bitluni parameters.
- use_lib_vga320x200x70hz_bitluni: 320x200 video mode with bitluni parameters.
- use_lib_vga320x240x60hz_bitluni: 320x240 mode with bitluni parameters.
- use_lib_vga320x200x70hz_fabgl:320x200 mode with fabgl parameters.
- use_lib_vga320x240x60hz_fabgl:320x240 mode with fabgl settings.
- use_lib_log_serial: Logs are sent by serial port usb
- gb_ms_keyboard: The number of milliseconds of polling must be specified for the keyboard.
- gb_ms_sound: The number of polling milliseconds must be specified for sound AY8912.
- gb_frame_crt_skip: The number of video frames to be skipped
- gb_delay_emulate_ms: Milliseconds of waiting for each completed frame.
- use_lib_tape_rom_intercept: Controls the 0x056B routine to read tapes. It is only active for the Lin Ke-Fong core, and only loads the first block of a BASIC program. It consumes a few CPU cycles, as it is checking the PC register.
- use_lib_ultrafast_speaker: Fast mode of audio I/O pin activation.
- use_lib_stats_time_unified: It allows to see traces through the serial port with the fps, as well as current microseconds, minimum and maximum per frame. The same for video.
- use_lib_delay_tick_cpu_auto: If it is set to 1, it allows you to set the frame rate to 20000 microseconds, i.e. 20 milliseconds, which is equivalent to 50 fps. Subsequently from the OSD you can change the CPU standby speed.
- use_lib_delay_tick_cpu_micros: If 0, no wait is applied at each instruction execution.
- use_lib_cpu_adjust_mask_instructions: It applies a time reset mask for the 20000 microseconds of each frame. If the mask is 0x03, the binary mask 00000011 is applied, i.e. every 4 instructions.
- use_lib_core_linkefong: Allows to choose the Lin Ke-Fong core. Once compiled, it will be displayed on the OSD.
- use_lib_core_jsanchezv: It allows to choose the core of José Luis Sánchez. Once compiled, it will be displayed on the OSD.
- use_lib_delayContention: If active, it allows to apply the wait of the contained memory, only in the Jose Luis Sanchez core.
- use_lib_wifi: WIFI mode support for loading SCR's and SNA's. (48K mode only)
- use_lib_only_48k: Only supports 48K mode, rom0, ram0, ram2 and ram5.
- use_lib_fix_double_precision: It doesn't use the VGA video frequency calculation with the ESP32 itself, avoiding possible accuracy problems with the mantissa. This is useful for ESP32's that miscalculate the frequency.
- use_lib_scr_uart Allows loading SCR (6912 bytes) by VStudio terminal monitor or from putty
- use_lib_sna_uart Allows to load SNA 48K (49179 bytes) via VStudio terminal monitor or from putty
- use_optimice_writebyte Improves read and write speed to memory, achieving a minimum increase of 20 fps (LIN KE FONG) or 10 fps (JLS) in emulation. This option consumes 16 KB of SRAM.
- use_optimice_writebyte_min_sram Improves read and write speed to memory, achieving a minimum increase of 20 fps (LIN KE FONG) or 10 fps (JLS) in emulation. This option does not consume SRAM.

-
ROMS of 48K
- DIAG: diagnostic utility, for keyboard, ram, rom, 48k, 128k, AY8912 mode, speaker and video test.
- SE: Open SE rom BASIC, which allows you to use BASIC without the 48K mode function keys, so that each keystroke does not generate a function.
- SINCLAIR: The 48k mode
-
ROMS of 128K
- PLUS2A: The spectrum +2
- PLUS3: The spectrum +3
- PLUS3E: The spectrum +3E
- SINCLAIR: The 128K
In the case of the SNA:
- DIAG: ROM and RAM diagnostic utility.
- Fantasy: Gloss support game (16 colors) It allows kempston, which together with the mouse, can be played very comfortably.
- Sppong: The classic pong
- Fire: It is a modified version of Fire, to support kempston mouse, so if you play without it, it will give problems. You can go to the main menu by pressing shift and the space bar. It has support for AY8912, however, the speaker output at the same time as AY8912 is not yet 100% effective. Separately, it is correct.
- 3DcoolKm: 3D tool with kempston mouse support
- AT4openKM: Drawing tool with kempston mouse support
- Sipka: Kempston mouse test tool Allows to change the mouse icon by clicking on the buttons.
- MouseTestZXds: Tool for testing the kempston mouse protocol
- FireKey: The same Fire game but using the keyboard instead of the mouse. It has sound output AY8912 (128K mode) and internal speaker (48K mode).
- Tritone1: Musicdisk that uses internal speaker.
- Z80FULL: The complete z80 test. It must be executed with the RUN command.
For SCR loading from TAP:
- 3D: It doesn't load anything, because this tape only has the BASIC code of 3D.
- 4x4: Load the game car 4x4
For SCRs:
- 4x4: Load the image of the game 4x4.
For loading tapes from BASIC or Tape Loader:
- 3D: Loads a 3D graphics simulation.
Tool data2h
 input/
  roms/
   48k/
    jupiter/
     0.rom - ROM Jupiter Ace
    sinclair/
     0.rom - ROM ZX48K
   128k/
    305zx80IF2/
     0.rom - ROM ZX-80 ROM
    308zx81IF2/
     0.rom - ROM ZX-81 ROM
    SINCLAIR128/
     0.rom - ZX-128 ROM
     1.rom
  scr/
   trixs01.scr
   trixs02.scr
   trixs03.scr
  sna/
   48k/
    coloristic.sna
    GDC.sna
   128k/
    nothing.txt
The concept of numerical rom files (0.rom, 1.rom, 2.rom, 3.rom) follows the same basis as the ZXESPectrum emulator. The name of the folder is what defines the title of rom.
It is mandatory to leave the folder 48k/sinclair/0.rom, because you need the 48k rom to start the emulator.
Then we must copy the directory dataFlash into the project ESP32TinyZXSpectrum\ZXESPectrum overwriting the previous dataFlash folder. It is recommended to clean up the project and recompile it.This tool is very simple, and does not control errors, so it is recommended to leave you the files with very simple names and as simple as possible.
The project in PLATFORM.IO is prepared for 2 MB of Flash. If we need the 4MB of flash, we will have to modify the entry in the file platform.ini
board_build.partitions = huge_app.csvIn the Arduino IDE, we must choose the option Partition Scheme (Huge APP).
By default, it has been left pointing to the project's github pages server:
https://rpsubc8.github.io/ESP32TinyZXSpectrum/www/zxspectrum/output
To activate this mode, uncomment the line use_lib_wifi in gbConfig.h
Given the sram consumption, only 48K mode is allowed, when using WIFI.
We must configure in the gbWIFIConfig.h file the data:
  #define gb_wifi_ssd "nombreDeNuestraRedWIFIdelRooter"
  #define gb_wifi_pass "passwordDeNuestraRedWIFIdelRooter"

  //#define gb_wifi_url_base_path "http://192.168.0.36/zxspectrum/output"
  #define gb_wifi_url_base_path "https://rpsubc8.github.io/ESP32TinyZXSpectrum/www/zxspectrum/output"

  //millisecons delay stream read
  #define gb_wifi_delay_available 0

  #define use_lib_wifi_debug
For now, the configuration is fixed in our gb>gbWIFIConfig.h that we will have to recompile, so, that it will only connect to our rooter network. Therefore, we must change gb_wifi_ssd and gb_wifi_pass.
The gb_wifi_url_base_path is the path where our outlist and outdat directories are located, which contain the list of files, as well as the files themselves, so this path will be different if we use a local server.
The concept is simple, you have:
  outlist --> File with the list of names (length 8) of SCR or SNA. Limit of 128 files
  outdat  --> SCR or SNA files.
For now, to optimize RAM consumption, we have left an 8:3 name length structure, i.e. 8 name characters and 3 extension characters. I leave some intermediate tools to prepare and make the conversion:
  build.bat --> Launches all bats, processing input to output

  data83.bat --> Converts all input files to 8:3 format

  list.bat --> Generates the outlist (list of files).
  dsk.exe --> Generates a txt file containing a list of files with name length 8.
  lowerscr.bat --> Convert SCR extensions to .scr
  lowersna.bat --> The same, but for SNA.
An example of outlist, for example from action.txt, containing:
amc1 batman goody robocop ThePunk
Whenever a file is added, we must regenerate the list with the list.bat or by calling the whole build.bat process.
Inside is the list of files with a maximum length of 8 characters, which is the one that will be shown in the SCR or SNA selection menu in the ESP32. These files, for now, are intended for a maximum of 128 entries, which is equivalent to 1024 bytes (128 x 8).
Each time a request is made to a type, the .TXT file with the list (1024 bytes, 128 names) is loaded. And when it is selected, the request is made to the file in the outdat.
When a file is selected, it will be loaded in outdat with its path. The files must have the extension in lower case.
If you are using an external WEB server, it is possible that policies may prevent you from making consecutive requests, so it is advisable not to make requests too close together.
To debug the WIFI, uncomment use_lib_wifi_debug in the gbWifiConfig.h file.
The 48K SNA format:
 Offset   Size   Description
 ------------------------------------------------------------------------
 0        1      byte   I
 1        8      word   HL',DE',BC',AF'
 9        10     word   HL,DE,BC,IY,IX
 19       1      byte   Interrupt (bit 2 contains IFF2, 1=EI/0=DI)
 20       1      byte   R
 21       4      words  AF,SP
 25       1      byte   IntMode (0=IM0/1=IM1/2=IM2)
 26       1      byte   BorderColor (0..7, not used by Spectrum 1.7)
 27       49152  bytes  RAM dump 16384..65535
 ------------------------------------------------------------------------
 Total: 49179 bytes
The 128K SNA format:
 Offset   Size   Description
 ------------------------------------------------------------------------
 0        27     bytes  SNA header (see above)
 27       16Kb   bytes  RAM bank 5 \
 16411    16Kb   bytes  RAM bank 2  } - as standard 48Kb SNA file
 32795    16Kb   bytes  RAM bank n / (currently paged bank)
 49179    2      word   PC
 49181    1      byte   port 0x7ffd setting
 49182    1      byte   TR-DOS rom paged (1) or not (0)
 49183    16Kb   bytes  remaining RAM banks in ascending order
 ...
 ------------------------------------------------------------------------
 Total: 131103 bytes
The id of the cached bank (bank n) corresponds to the 3 least significant bits of the port (0x7ffd & 0x07). After the 49183 byte of the SNA, go the 8 banks of 16384 bytes, eliminating bank 5, 2 and the currently cached one (bank n).