This document lists different approaches for setting up your machine and using the code in this repository. I recommend browsing through the different sections from top to bottom and then deciding which approach best suits your needs.
If you already have a Python installation on your machine, the quickest way to get started is to install the package requirements from the ../requirements.txt file by executing the following pip installation command from the root directory of this code repository:
pip install -r requirements.txt
If you don't have Python set up on your machine yet, I have written about my personal Python setup preferences in the following directories:
The Using DevContainers section below outlines an alternative approach for installing project dependencies on your machine.
As an alternative to the Setting up Python section above, if you prefer a development setup that isolates a project's dependencies and configurations, using Docker is a highly effective solution. This approach eliminates the need to manually install software packages and libraries and ensures a consistent development environment. You can find more instructions for setting up Docker and using a DevContainer:
There are many good options for code editors. My preferred choice is the popular open-source Visual Studio Code (VSCode) editor, which can be easily enhanced with many useful plugins and extensions (see the VSCode Extensions section below for more information). Download instructions for macOS, Linux, and Windows can be found on the main VSCode website.
If you are using Visual Studio Code (VSCode) as your primary code editor, you can find recommended extensions in the .vscode subfolder. To install these, open the extensions.json file in VSCode and click the "Install" button in the pop-up menu on the lower right.
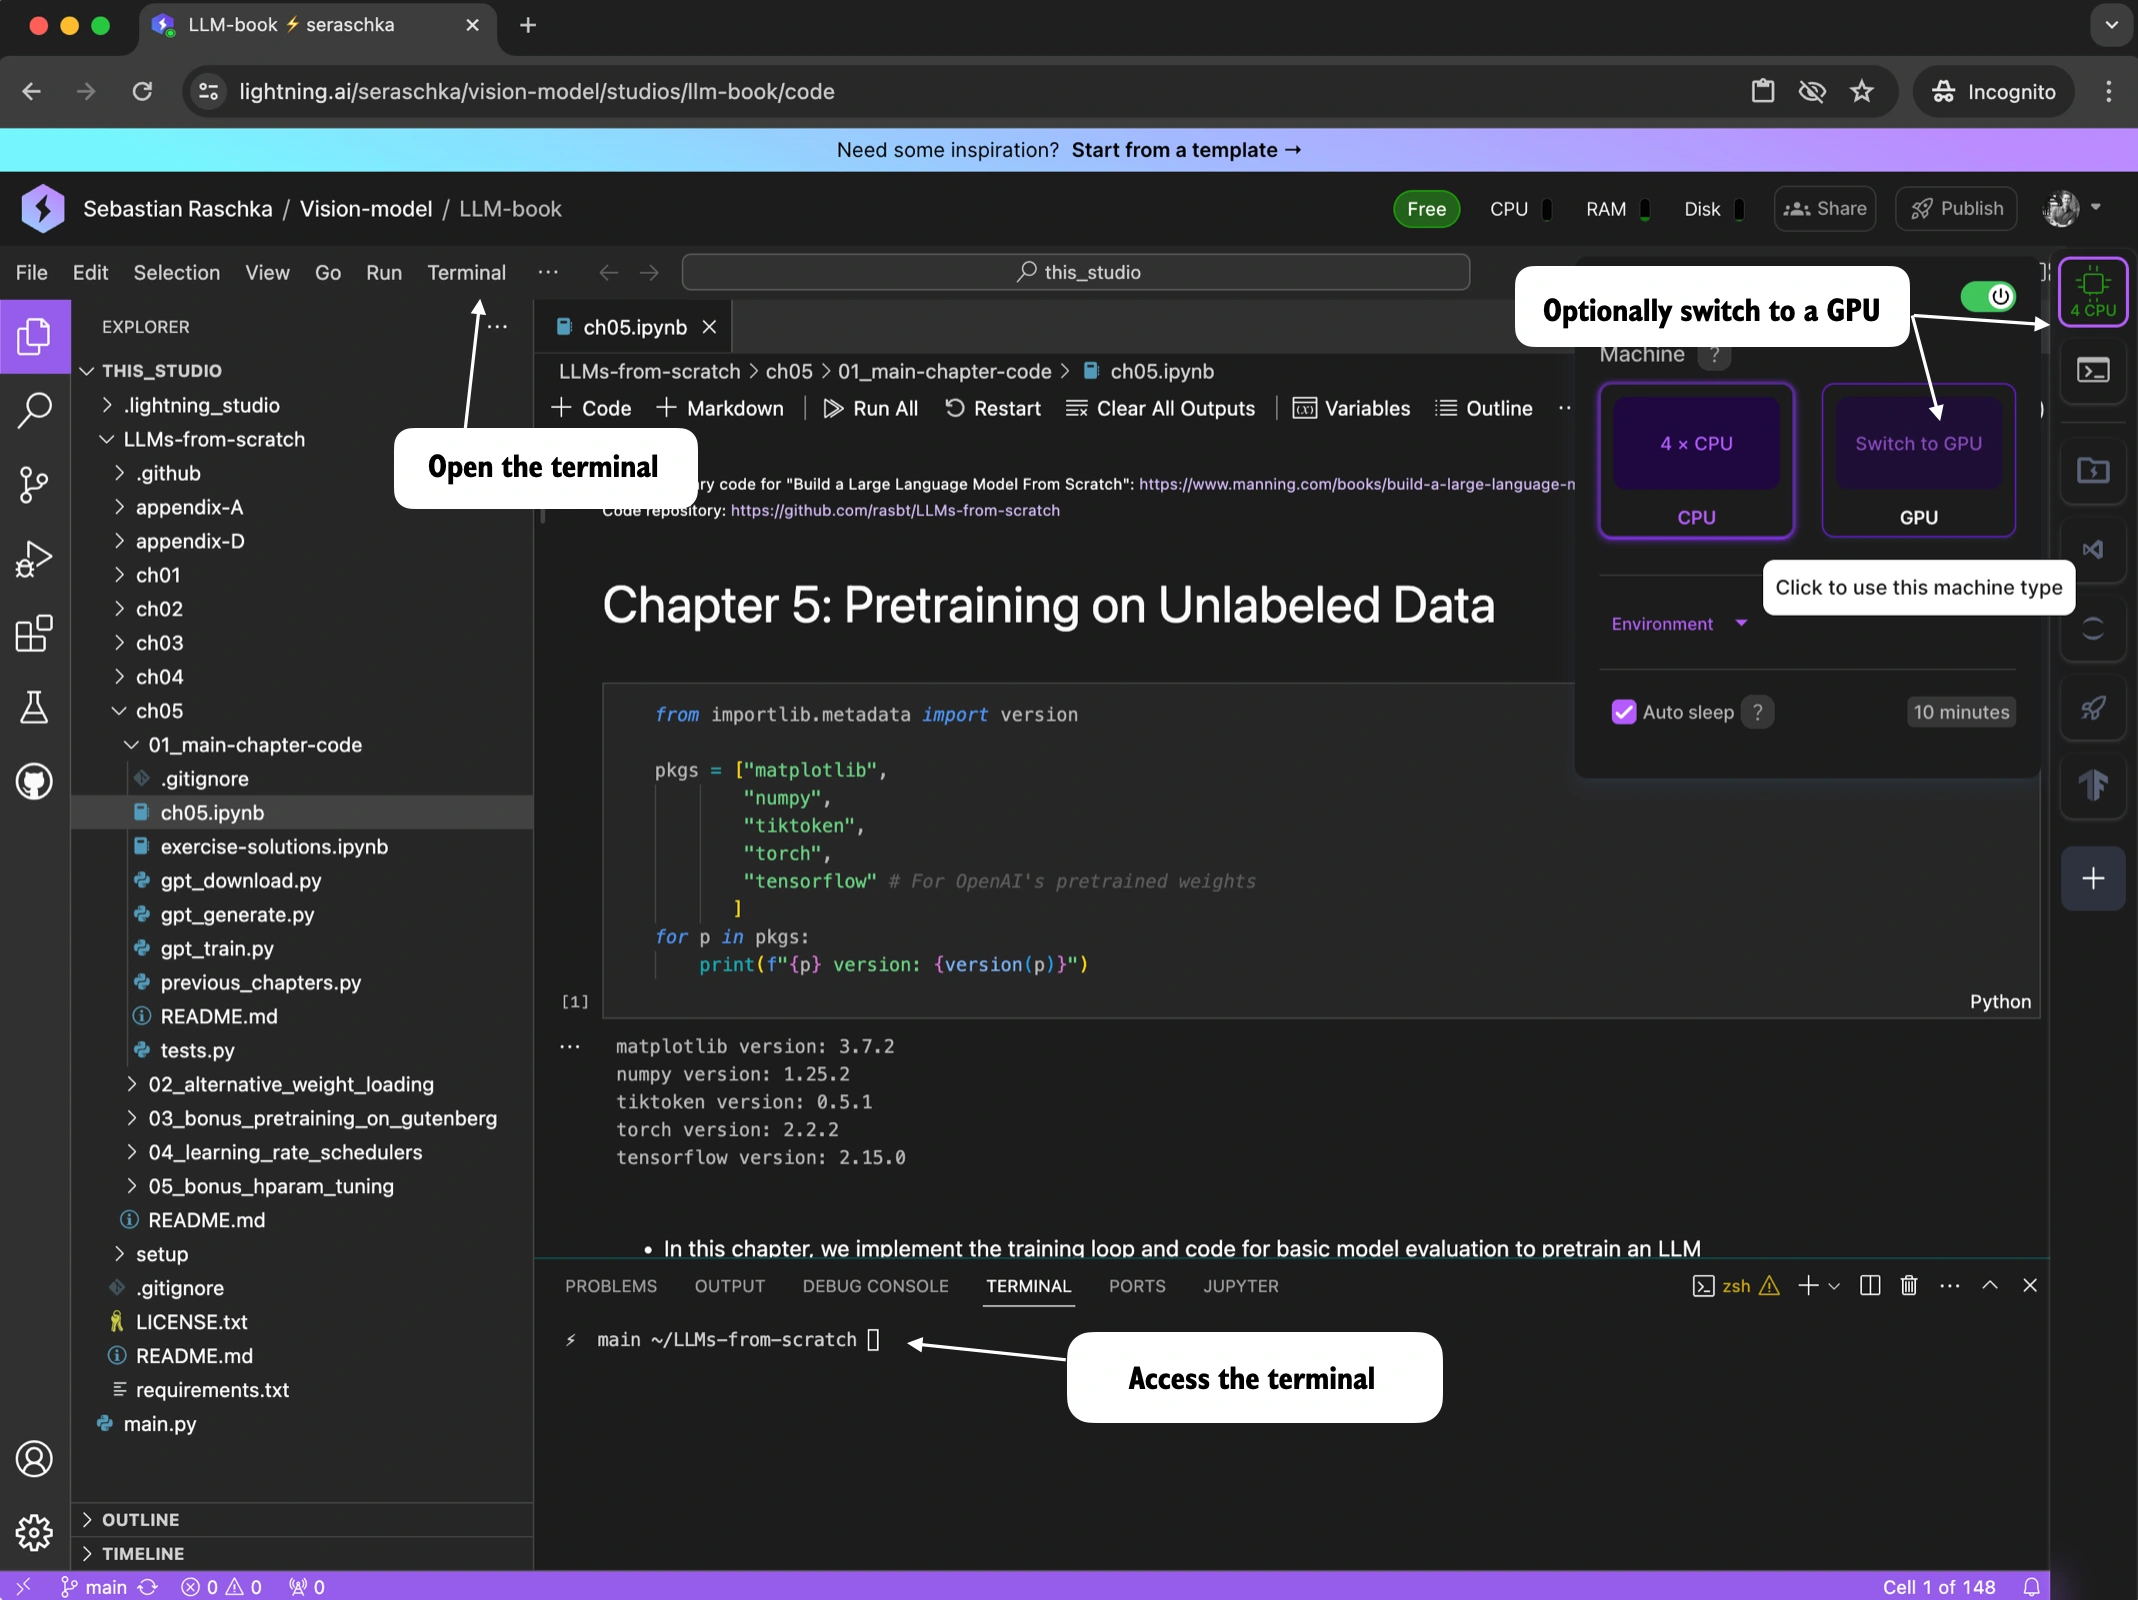
For a smooth development experience in the cloud, I recommend the Lightning AI Studio platform, which allows users to set up a persistent environment and use both VSCode and Jupyter Lab on cloud CPUs and GPUs.
Once you start a new Studio, you can open the terminal and execute the following setup steps to clone the repository and install the dependencies:
git clone https://github.com/rasbt/LLMs-from-scratch.git
cd LLMs-from-scratch
pip install -r requirements.txt
(In contrast to Google Colab, these only need to be executed once since the Lightning AI Studion environments are persistent).
Then, navigate to the Python script or Jupyter Notebook you want to run. Optionally, you can also easily connect a GPU to accelerate the code's runtime, for example, when you are pretraining the LLM in chapter 5 or finetuning it in chapters 6 and 7.
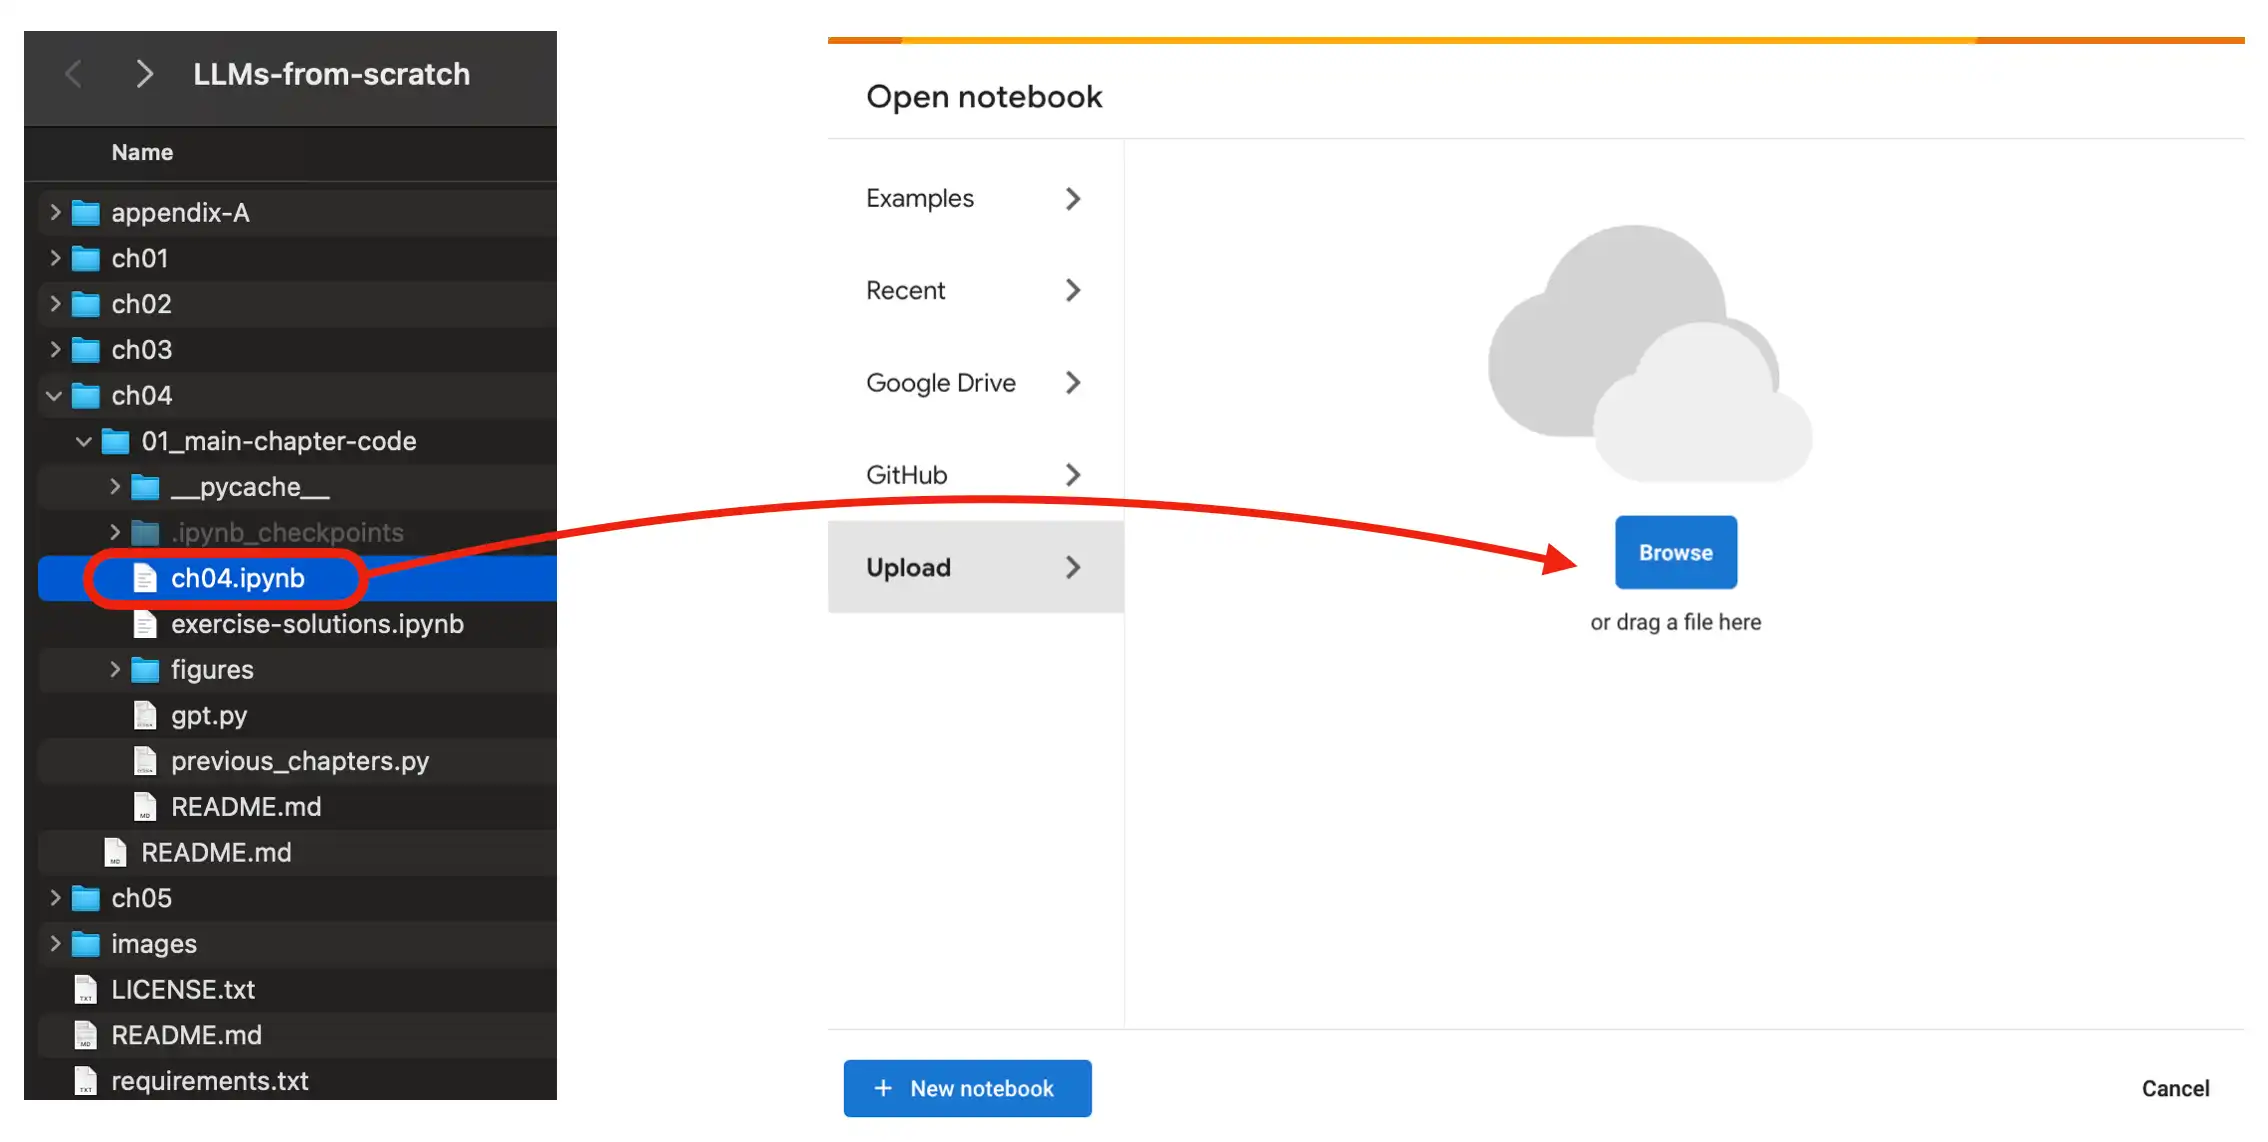
To use a Google Colab environment in the cloud, head over to https://colab.research.google.com/ and open the respective chapter notebook from the GitHub menu or by dragging the notebook into the Upload field as shown in the figure below.
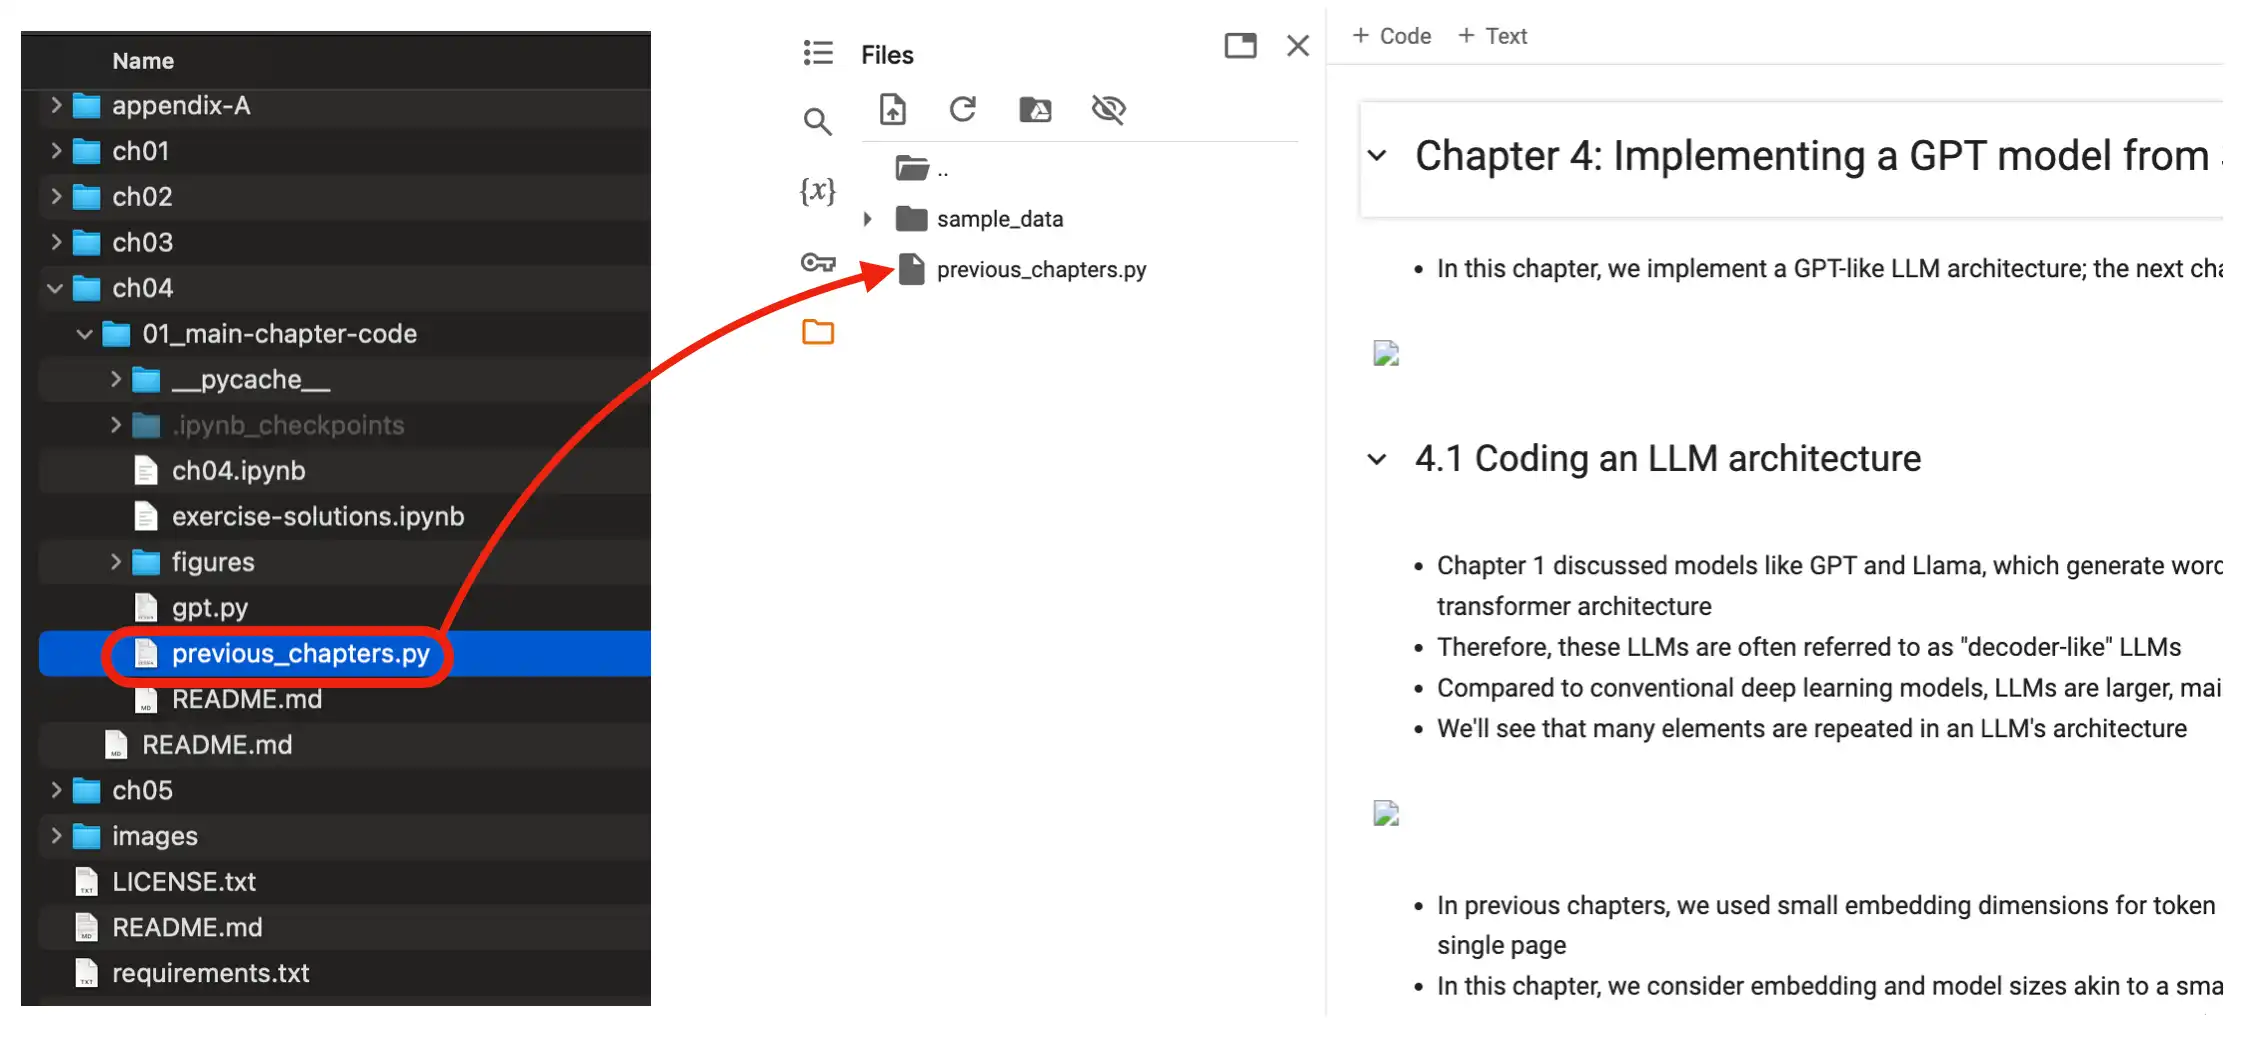
Also make sure you upload the relevant files (dataset files and .py files the notebook is importing from) to the Colab environment as well, as shown below.
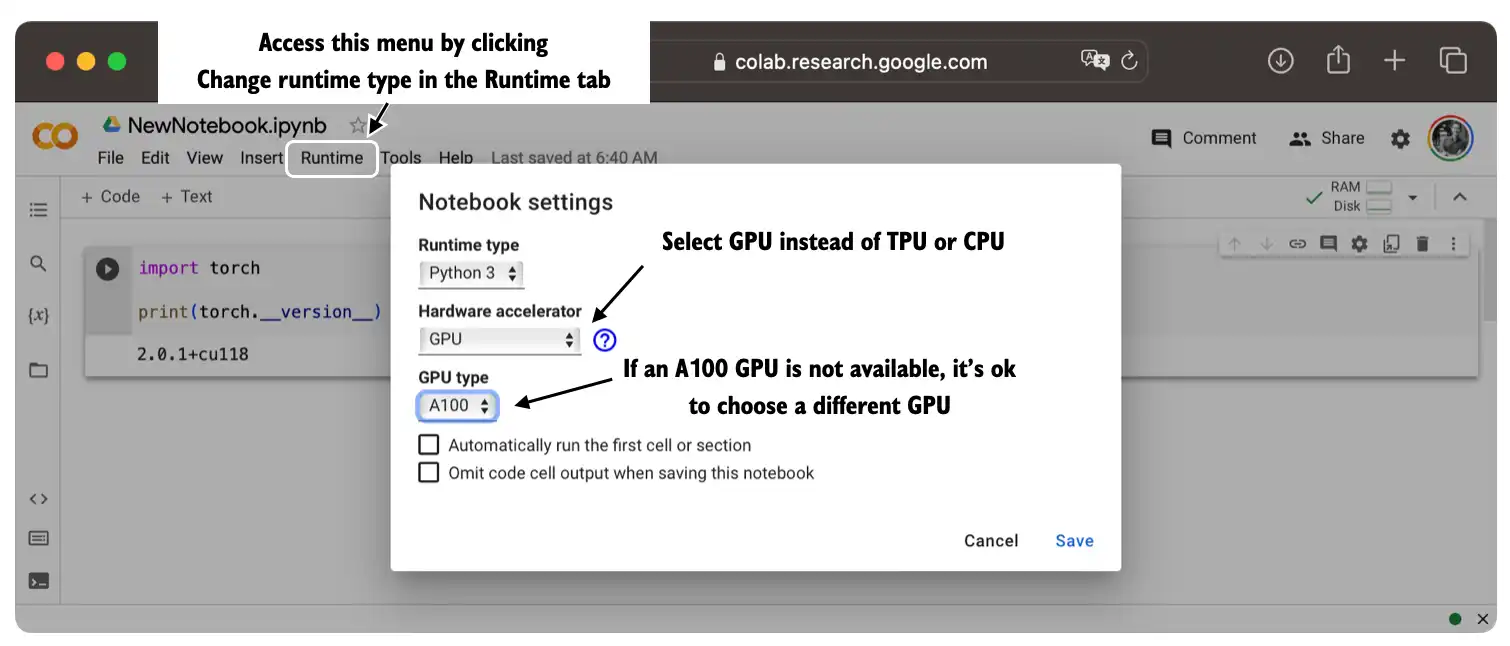
You can optionally run the code on a GPU by changing the Runtime as illustrated in the figure below.
If you have any questions, please don't hesitate to reach out via the Discussions forum in this GitHub repository.