Configure everything from defaults, features, branding, languages and more.
Password Pusher uses a centralized configuration that is stored in config/settings.yml. This file contains all of the settings that is configurable for the application.
There are two ways to modify the settings in this file:
- Use environment variable that override this file
- Modify the file itself
For a few modifications, environment variables are the easy route. For more extensive configuration, it's suggested to maintain your own custom settings.yml file across updates.
Read on for details on both methods.
The settings in the config/settings.yml file can be overridden by environment variables. A listing and description of these environment variables is available in this documentation below and also in the settings.yml file itself.
# Change the default language for the application to French
export PWP__DEFAULT_LOCALE='fr'# Change the default language for the application to French
docker run -d --env PWP__DEFAULT_LOCALE=fr -p "5100:5100" pglombardo/pwpush:latestTip: If you have to set a large number of environment variables for Docker, consider using a Docker env-file. There is an example docker-env-file with instructions available.
If you prefer, you can take the default settings.yml file, modify it and apply it to the Password Pusher Docker container.
Inside the Password Pusher Docker container:
- application code exists in the path
/opt/PasswordPusher/ - the
settings.ymlfile is located at/opt/PasswordPusher/config/settings.yml
To replace this file with your own custom version, you can launch the Docker container with a bind mount option:
    docker run -d \
      --mount type=bind,source=/path/settings.yml,target=/opt/PasswordPusher/config/settings.yml \
-p "5100:5100" pglombardo/pwpush:latestPassword Pusher encrypts sensitive data in the database. This requires a randomly generated encryption key for each application instance.
To set a custom encryption key for your application, set the environment variable PWPUSH_MASTER_KEY:
PWPUSH_MASTER_KEY=0c110f7f9d93d2122f36debf8a24bf835f33f248681714776b336849b801f693
Key generation can be done through the helper tool or on the command line in the application source using Lockbox.generate_key:
bundle
rails c
Lockbox.generate_key
Notes:
- If an encryption key isn't provided, a default key will be used.
- The best security for private instances of Password Pusher is to use your own custom encryption key although it is not required.
- The risk in using the default key is lessened if you keep your instance secure and your push expirations short. e.g. 1 day/1 view versus 100 days/100 views.
- Once a push expires, all encrypted data is deleted.
- Changing an encryption key where old pushes already exist will make those older pushes unreadable. In other words, the payloads will be garbled. New pushes going forward will work fine.
| Environment Variable | Description | Default Value |
|---|---|---|
| PWP__DEFAULT_LOCALE | Sets the default language for the application. See the documentation. | en |
| PWP__SHOW_VERSION | Show the version in the footer | true |
| PWP__SHOW_GDPR_CONSENT_BANNER | Optionally enable or disable the GDPR cookie consent banner. | true |
| PWP__TIMEZONE | Set the application wide timezone. Use a valid timezone string (see note below). | America/New_York |
| SECRET_KEY_BASE | A secret key that is used for various security-related features, including session cookie encryption and other cryptographic operations. Use /opt/PasswordPusher/bin/rails secret to generate a random key string. See the SECRET_KEY_BASE wiki page. |
Randomly Generated on boot |
Note: The list of valid timezone strings can be found at https://en.wikipedia.org/wiki/List_of_tz_database_time_zones.
| Environment Variable | Description | Default Value |
|---|---|---|
| PWP__PW__EXPIRE_AFTER_DAYS_DEFAULT | Controls the "Expire After Days" default value in Password#new | 7 |
| PWP__PW__EXPIRE_AFTER_DAYS_MIN | Controls the "Expire After Days" minimum value in Password#new | 1 |
| PWP__PW__EXPIRE_AFTER_DAYS_MAX | Controls the "Expire After Days" maximum value in Password#new | 90 |
| PWP__PW__EXPIRE_AFTER_VIEWS_DEFAULT | Controls the "Expire After Views" default value in Password#new | 5 |
| PWP__PW__EXPIRE_AFTER_VIEWS_MIN | Controls the "Expire After Views" minimum value in Password#new | 1 |
| PWP__PW__EXPIRE_AFTER_VIEWS_MAX | Controls the "Expire After Views" maximum value in Password#new | 100 |
| PWP__PW__ENABLE_DELETABLE_PUSHES | Can passwords be deleted by viewers? When true, passwords will have a link to optionally delete the password being viewed | false |
| PWP__PW__DELETABLE_PUSHES_DEFAULT | When the above is true, this sets the default value for the option. |
true |
| PWP__PW__ENABLE_RETRIEVAL_STEP | When true, adds an option to have a preliminary step to retrieve passwords. |
true |
| PWP__PW__RETRIEVAL_STEP_DEFAULT | Sets the default value for the retrieval step for newly created passwords. | false |
| PWP__PW__ENABLE_BLUR | Enables or disables the 'blur' effect when showing a push payload to the user. | true |
| Environment Variable | Description | Default Value |
|---|---|---|
| PWP__GEN__HAS_NUMBERS | Controls whether generated passwords have numbers | true |
| PWP__GEN__TITLE_CASED | Controls whether generated passwords will be title cased | true |
| PWP__GEN__USE_SEPARATORS | Controls whether generated passwords will use separators between syllables | true |
| PWP__GEN__CONSONANTS | The list of consonants to generate from | bcdfghklmnprstvz |
| PWP__GEN__VOWELS | The list of vowels to generate from | aeiouy |
| PWP__GEN__SEPARATORS | If use_separators is enabled above, the list of separators to use (randomly) |
-_= |
| PWP__GEN__MAX_SYLLABLE_LENGTH | The maximum length of each syllable that a generated password can have | 3 |
| PWP__GEN__MIN_SYLLABLE_LENGTH | The minimum length of each syllable that a generated password can have | 1 |
| PWP__GEN__SYLLABLES_COUNT | The exact number of syllables that a generated password will have | 3 |
To enable logins in your instance of Password Pusher, you must have an SMTP server available to send emails through. These emails are sent for events such as password reset, unlock, registration etc..
To use logins, you should be running a database backed version of Password Pusher. Logins will likely work in an ephemeral setup but aren't suggested since all data is wiped with every restart.
All of the following environments need to be set (except SMTP authentication if none) for application logins to function properly.
| Environment Variable | Description | Default |
|---|---|---|
| PWP__ENABLE_LOGINS | On/Off switch for logins. | false |
| PWP__ALLOW_ANONYMOUS | When false, requires a login for the front page (to push new passwords). Secret URLs can still be accessed anonymously. | true |
| PWP__MAIL__RAISE_DELIVERY_ERRORS | Email delivery errors will be shown in the application | true |
| PWP__MAIL__SMTP_ADDRESS | Allows you to use a remote mail server. Just change it from its default "localhost" setting. | smtp.domain.com |
| PWP__MAIL__SMTP_PORT | Port of the SMTP server | 587 |
| PWP__MAIL__SMTP_USER_NAME | If your mail server requires authentication, set the username in this setting. | smtp_username |
| PWP__MAIL__SMTP_PASSWORD | If your mail server requires authentication, set the password in this setting. | smtp_password |
| PWP__MAIL__SMTP_AUTHENTICATION | If your mail server requires authentication, you need to specify the authentication type here. This is a string and one of :plain (will send the password in the clear), :login (will send password Base64 encoded) or :cram_md5 (combines a Challenge/Response mechanism to exchange information and a cryptographic Message Digest 5 algorithm to hash important information) | plain |
| PWP__MAIL__SMTP_STARTTLS | Use STARTTLS when connecting to your SMTP server and fail if unsupported. | true |
| PWP__MAIL__SMTP_ENABLE_STARTTLS_AUTO | Detects if STARTTLS is enabled in your SMTP server and starts to use it | true |
| PWP__MAIL__OPEN_TIMEOUT | Number of seconds to wait while attempting to open a connection. | 10 |
| PWP__MAIL__READ_TIMEOUT | Number of seconds to wait until timing-out a read(2) call. | 10 |
| PWP__HOST_DOMAIN | Used to build fully qualified URLs in emails. Where is your instance hosted? | pwpush.com |
| PWP__HOST_PROTOCOL | The protocol to access your Password Pusher instance. HTTPS advised. | https |
| PWP__MAIL__MAILER_SENDER | This is the "From" address in sent emails. | '"Company Name" user@example.com' |
| PWP__DISABLE_SIGNUPS | Once your user accounts are created, you can set this to disable any further user account creation. Sign up links and related backend functionality is disabled when true. |
false |
| PWP__SIGNUP_EMAIL_REGEXP | The regular expression used to validate emails for new user signups. This can be modified to limit new account creation to a subset of domains. e.g. \A[^@\s]+@(hey.com|gmail.com)\z. Tip: use https://rubular.com to test out your regular expressions. It includes a guide to what each component means in regexp. |
\A[^@\s]+@[^@\s]+\z |
export PWP__ENABLE_LOGINS=true
export PWP__MAIL__RAISE_DELIVERY_ERRORS=true
export PWP__MAIL__SMTP_ADDRESS=smtp.mycompany.org
export PWP__MAIL__SMTP_PORT=587
export PWP__MAIL__SMTP_USER_NAME=yolo
export PWP__MAIL__SMTP_PASSWORD=secret
export PWP__MAIL__SMTP_AUTHENTICATION=plain
export PWP__MAIL__SMTP_STARTTLS=true
export PWP__MAIL__OPEN_TIMEOUT=10
export PWP__MAIL__READ_TIMEOUT=10
export PWP__HOST_DOMAIN=pwpush.mycompany.org
export PWP__HOST_PROTOCOL=https
export PWP__MAIL__MAILER_SENDER='"Spiderman" <thespider@mycompany.org>'
- See also this Github discussion.
- External Documentation on mailer configuration for the underlying technology if you need more details for configuration issues.
To enable file uploads (File Pushes) in your instance of Password Pusher, there are a few requirements:
- you must have logins enabled (see above)
- specify a place to store uploaded files
- If you use cloud storage, configure the CORS configuration in your buckets (detailed below)
The following settings enable/disable the feature and specify where to store uploaded files.
This feature can store uploads on local disk (not valid for Docker containers), Amazon S3, Google Cloud Storage or Azure Storage.
| Environment Variable | Description | Value(s) |
|---|---|---|
| PWP__ENABLE_FILE_PUSHES | On/Off switch for File Pushes. | false |
| PWP__FILES__STORAGE | Chooses the storage area for uploaded files. | local, amazon, google or microsoft |
| PWP__FILES__ENABLE_BLUR | Enables or disables the 'blur' effect when showing a text payload to the user. | true |
| PWP__FILES__ENABLE_DELETABLE_PUSHES | Can passwords be deleted by viewers? When true, passwords will have a link to optionally delete the password being viewed | false |
| PWP__FILES__DELETABLE_PUSHES_DEFAULT | When the above is true, this sets the default value for the option. |
true |
| PWP__FILES__ENABLE_RETRIEVAL_STEP | When true, adds an option to have a preliminary step to retrieve passwords. |
true |
| PWP__FILES__RETRIEVAL_STEP_DEFAULT | Sets the default value for the retrieval step for newly created passwords. | false |
| PWP__FILES__MAX_FILE_UPLOADS | Sets the maximum number of files that can be added to a single push. | 10 |
| Environment Variable | Description | Default Value |
|---|---|---|
| PWP__FILES__EXPIRE_AFTER_DAYS_DEFAULT | Controls the "Expire After Days" default value in Password#new | 7 |
| PWP__FILES__EXPIRE_AFTER_DAYS_MIN | Controls the "Expire After Days" minimum value in Password#new | 1 |
| PWP__FILES__EXPIRE_AFTER_DAYS_MAX | Controls the "Expire After Days" maximum value in Password#new | 90 |
| PWP__FILES__EXPIRE_AFTER_VIEWS_DEFAULT | Controls the "Expire After Views" default value in Password#new | 5 |
| PWP__FILES__EXPIRE_AFTER_VIEWS_MIN | Controls the "Expire After Views" minimum value in Password#new | 1 |
| PWP__FILES__EXPIRE_AFTER_VIEWS_MAX | Controls the "Expire After Views" maximum value in Password#new | 100 |
PWP__FILES__STORAGE=local
The default location for local storage is ./storage.
If using containers and you prefer local storage, you can add a volume mount to the container at the path /opt/PasswordPusher/storage:
docker run -d -p "5100:5100" -v /var/lib/pwpush/files:/opt/PasswordPusher/storage pglombardo/pwpush:latest
Please make sure that the directory is writeable by the docker container.
A CORS configuration is not required for local storage.
To configure the application to store files in an Amazon S3 bucket, you have to:
- set the required environment variables detailed below (or the equivalent values in
settings.yml) - apply a CORS configuration to your S3 bucket (see next section)
| Environment Variable | Description | Value(s) |
|---|---|---|
| PWP__FILES__STORAGE | Storage Provider Selection | amazon |
| PWP__FILES__S3__ENDPOINT | S3 Endpoint | None |
| PWP__FILES__S3__ACCESS_KEY_ID | Access Key ID | None |
| PWP__FILES__S3__SECRET_ACCESS_KEY | Secret Access Key | None |
| PWP__FILES__S3__REGION | S3 Region | None |
| PWP__FILES__S3__BUCKET | The S3 bucket name | None |
The application performs direct uploads from the browser to your Amazon S3 bucket. This provides better performance and reduces load on the application itself.
For this to work, you have to add a CORS configuration to your bucket.
This direct upload functionality is done using a library called ActiveStorage. For the full documentation on configuring CORS for ActiveStorage, see here.
[
  {
    "AllowedHeaders": [
      "Content-Type",
      "Content-MD5",
      "Content-Disposition"
    ],
    "AllowedMethods": [
      "PUT"
    ],
    "AllowedOrigins": [
      "https://www.example.com"  << Change to your URL
    ],
    "MaxAgeSeconds": 3600
  }
]To configure the application to store files in Google Cloud Storage, you have to:
- set the required environment variables detailed below (or the equivalent values in
settings.yml) - apply a CORS configuration (see next section)
| Environment Variable | Description | Value(s) |
|---|---|---|
| PWP__FILES__STORAGE | Storage Provider Selection | google |
| PWP__FILES__GCS__PROJECT | GCS Project | None |
| PWP__FILES__GCS__CREDENTIALS | GCS Credentials | None |
| PWP__FILES__GCS__BUCKET | The GCS bucket name | None |
The application performs direct uploads from the browser to Google Cloud Storage. This provides better performance and reduces load on the application itself.
For this to work, you have to add a CORS configuration.
This direct upload functionality is done using a library called ActiveStorage. For the full documentation on configuring CORS for ActiveStorage, see here.
[
  {
    "origin": ["https://www.example.com"],
    "method": ["PUT"],
    "responseHeader": ["Content-Type", "Content-MD5", "Content-Disposition"],
    "maxAgeSeconds": 3600
  }
]To configure the application to store files in Azure Storage, you have to:
- set the required environment variables detailed below (or the equivalent values in
settings.yml) - apply a CORS configuration (see next section)
| Environment Variable | Description | Value(s) |
|---|---|---|
| PWP__FILES__STORAGE | Storage Provider Selection | microsoft |
| PWP__FILES__AS__STORAGE_ACCOUNT_NAME | Azure Storage Account Name | None |
| PWP__FILES__AS__STORAGE_ACCESS_KEY | Azure Storage Account Key | None |
| PWP__FILES__AS__CONTAINER | Azure Storage Container Name | None |
The application performs direct uploads from the browser to Azure Storage. This provides better performance and reduces load on the application itself.
For this to work, you have to add a CORS configuration.
This direct upload functionality is done using a library called ActiveStorage. For the full documentation on configuring CORS for ActiveStorage, see here.
<Cors>
  <CorsRule>
    <AllowedOrigins>https://www.example.com</AllowedOrigins>
    <AllowedMethods>PUT</AllowedMethods>
    <AllowedHeaders>Content-Type, Content-MD5, x-ms-blob-content-disposition, x-ms-blob-type</AllowedHeaders>
    <MaxAgeInSeconds>3600</MaxAgeInSeconds>
  </CorsRule>
</Cors>Similar to file pushes, URL pushes also require logins to be enabled.
| Environment Variable | Description | Default |
|---|---|---|
| PWP__ENABLE_URL_PUSHES | On/Off switch for URL Pushes. | false |
| Environment Variable | Description | Default Value |
|---|---|---|
| PWP__URL__EXPIRE_AFTER_DAYS_DEFAULT | Controls the "Expire After Days" default value in Password#new | 7 |
| PWP__URL__EXPIRE_AFTER_DAYS_MIN | Controls the "Expire After Days" minimum value in Password#new | 1 |
| PWP__URL__EXPIRE_AFTER_DAYS_MAX | Controls the "Expire After Days" maximum value in Password#new | 90 |
| PWP__URL__EXPIRE_AFTER_VIEWS_DEFAULT | Controls the "Expire After Views" default value in Password#new | 5 |
| PWP__URL__EXPIRE_AFTER_VIEWS_MIN | Controls the "Expire After Views" minimum value in Password#new | 1 |
| PWP__URL__EXPIRE_AFTER_VIEWS_MAX | Controls the "Expire After Views" maximum value in Password#new | 100 |
| PWP__URL__ENABLE_DELETABLE_PUSHES | Can passwords be deleted by viewers? When true, passwords will have a link to optionally delete the password being viewed | false |
| PWP__URL__DELETABLE_PUSHES_DEFAULT | When the above is true, this sets the default value for the option. |
true |
| PWP__URL__ENABLE_RETRIEVAL_STEP | When true, adds an option to have a preliminary step to retrieve passwords. |
true |
| PWP__URL__RETRIEVAL_STEP_DEFAULT | Sets the default value for the retrieval step for newly created passwords. | false |
Password Pusher has the ability to be re-branded with your own site title, tagline and logo.
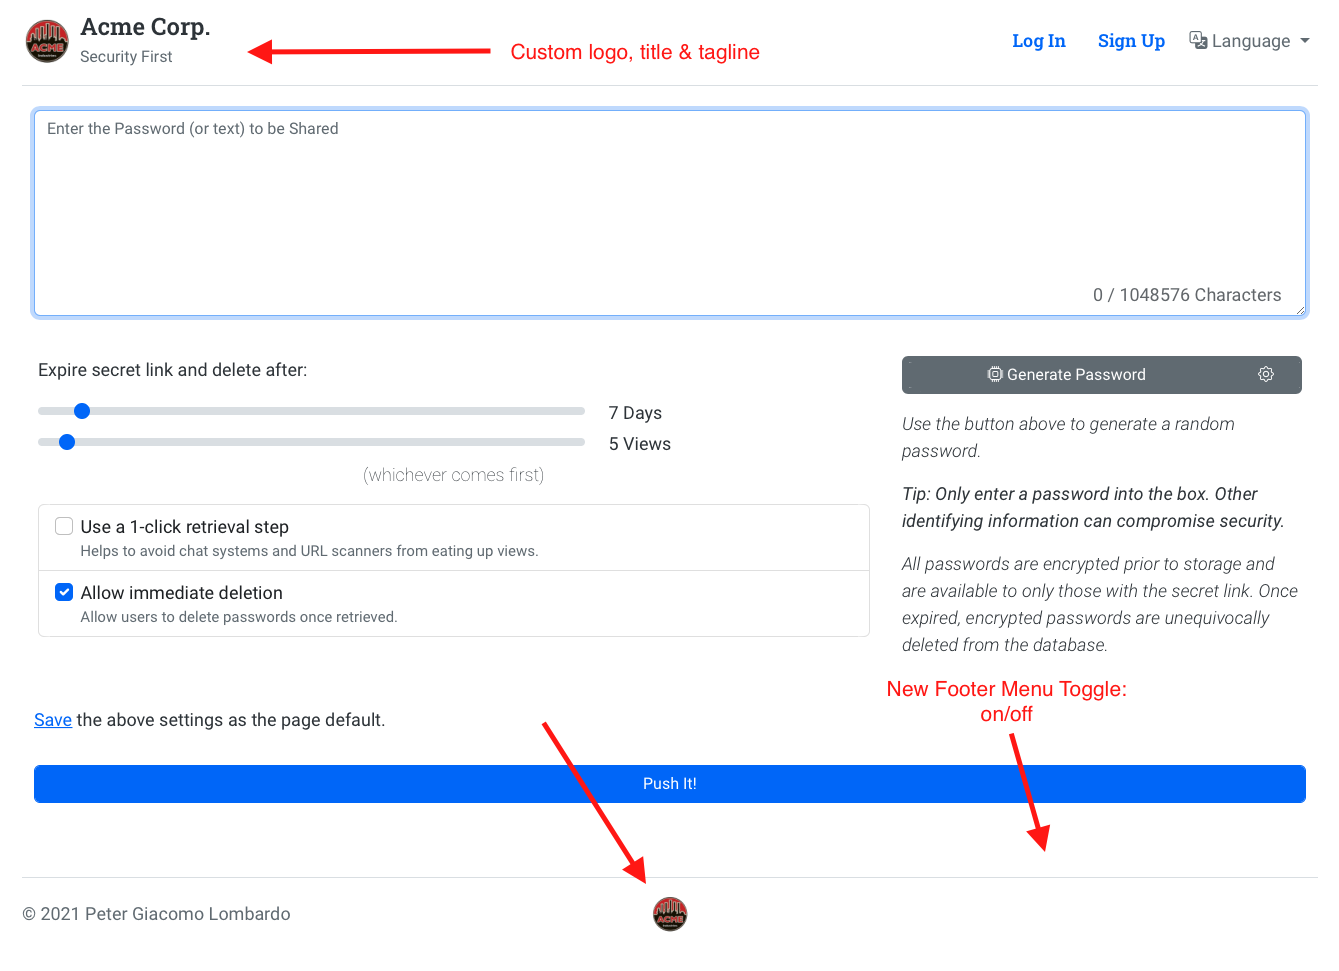
This can be done with the following environment variables:
| Environment Variable | Description | Default Value |
|---|---|---|
| PWP__BRAND__TITLE | Title for the site. | Password Pusher |
| PWP__BRAND__TAGLINE | Tagline for the site. | Go Ahead. Email Another Password. |
| PWP__BRAND__DISCLAIMER | Disclaimer for the site. | Undefined |
| PWP__BRAND__SHOW_FOOTER_MENU | On/Off switch for the footer menu. | true |
| PWP__BRAND__LIGHT_LOGO | Site logo image for the light theme. | logo-transparent-sm-bare.png |
| PWP__BRAND__DARK_LOGO | Site logo image for the dark theme. | logo-transparent-sm-bare.png |
The values for the *_LOGO images can either be:
- Fully qualified HTTP(s) URLS such as
https://pwpush.fra1.cdn.digitaloceanspaces.com/dev%2Facme-logo.jpg(easiest) - Relative path that is mounted inside the container
As an example for #2 above, say you place your logo images locally into /var/lib/pwpush/logos/. You would then mount that directory into the container:
docker run -d -p "5100:5100" -v /var/lib/pwpush/logos:/opt/PasswordPusher/public/logos pglombardo/pwpush:latest
or alternatively for a docker-compose.yml file:
volumes:
  # Example of a persistent volume for the storage directory (file uploads)
  - /var/lib/pwpush/logos:/opt/PasswordPusher/public/logos:r
See here for a larger Docker Compose explanation.
With this setup, you can then set your LOGO environment variables (or settings.yml options) to:
PWP__BRAND__LIGHT_LOGO=/logos/mylogo.png
The application favicons can also be changed to your own assets.
These favicons are used in browser tabs, in bookmarks and in browser history.
At a bare minimum, make sure to set at least icon_57x57 and icon_96x96. Without these two, things are guaranteed
to not work.
To create favicons you can use an icon generator such as:
https://www.favicongenerator.com or https://www.favicon-generator.org
See the Rebranding:Favicon section of the settings.yml file for more specifics.
- the
brandsection of settings.yml for more details, examples and description. - this issue comment on how to mount images into the contianer and set your environment variables accordingly
The application comes with more than 24 languages bundled in which are selectable inside the application. The default language of the application is English. If you would like to change this default language, simply set the following environment variable for your application.
PWP__DEFAULT_LOCALE=is
A list of supported languages (and their language codes) can be found in the settings.yml file under language_codes.
Choose which language you would like to have as the default language, and use the two letter code as the value for the environment variable.
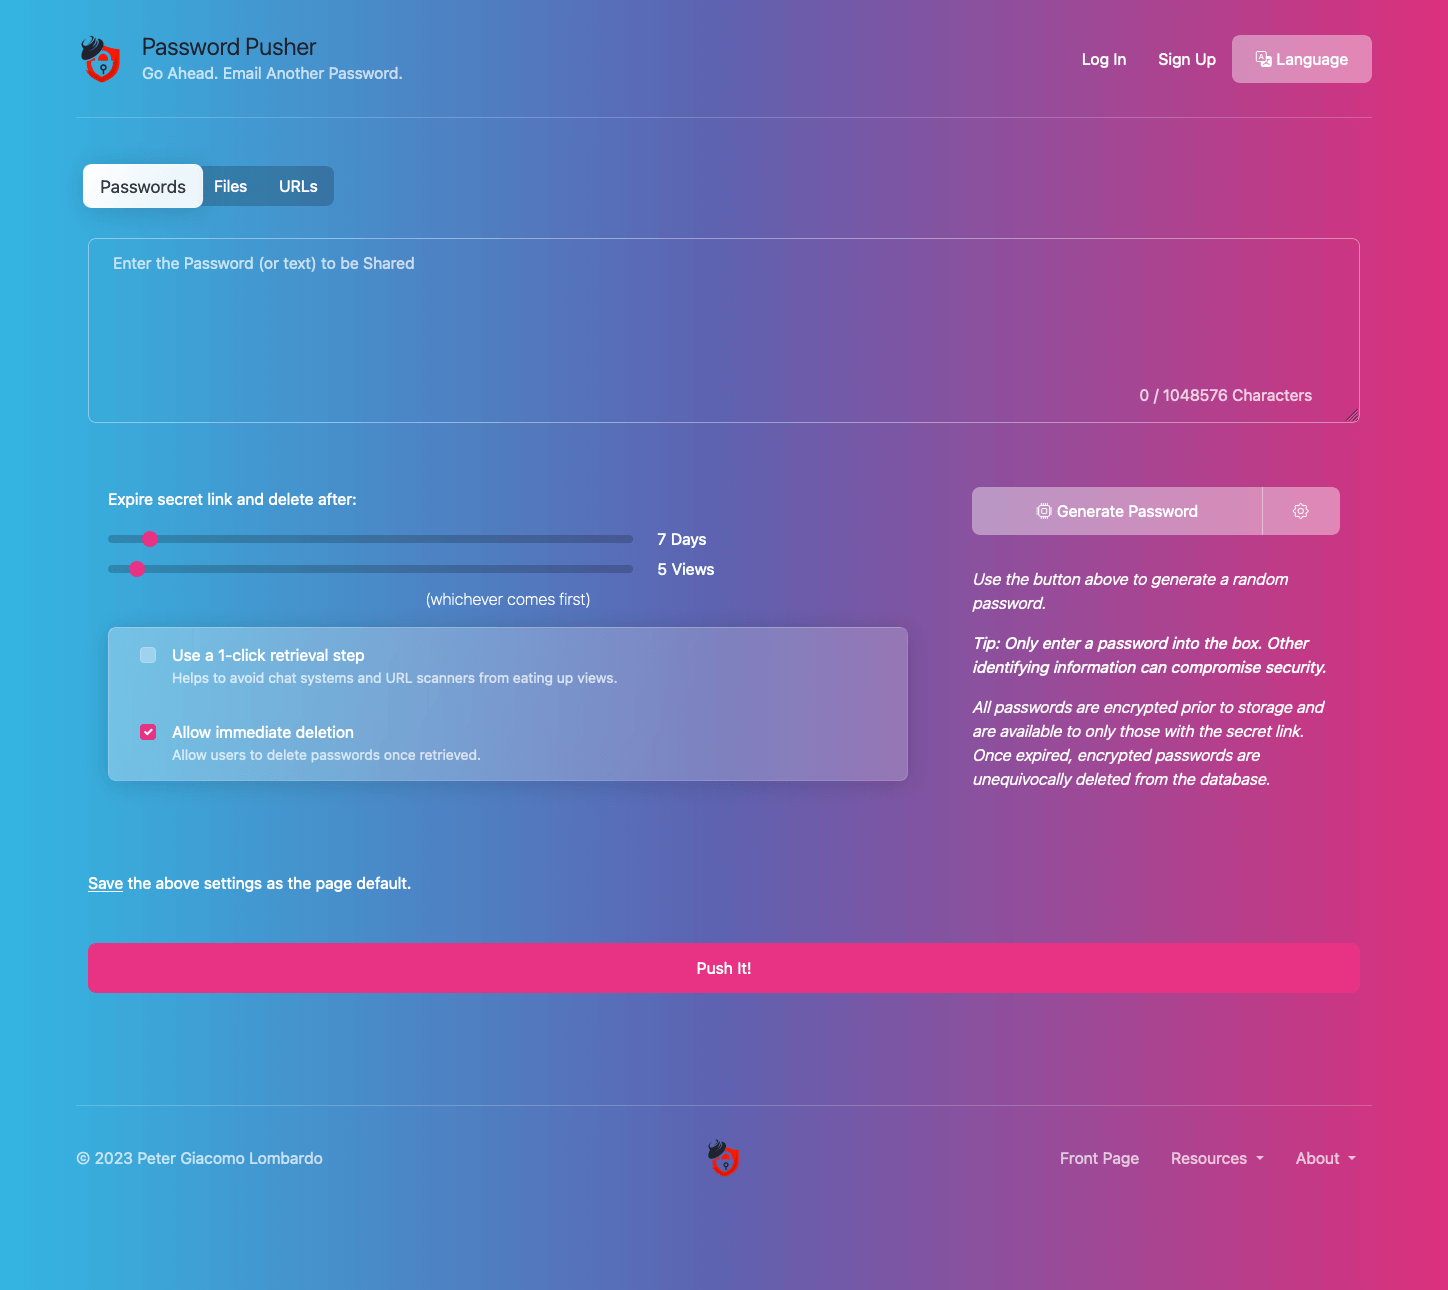
Password Pusher supports 26 themes out of the box. These themes are taken directly from the great Bootswatch project and are unmodified.
As such, themes mostly work although there may be a rare edge cases where fonts may not be clear or something doesn't display correctly. If this is the case you can add custom CSS styles to fix any such issues. See the next section on how to add custom styling.
---> Checkout the Themes Gallery!
The Bootswatch themes are licensed under the MIT license.
To specify a theme for your Password Pusher instance, you must set two environment variables:the PWP__THEME environment variable to specify the theme and PWP_PRECOMPILE=true environment variable to have CSS assets recompiled on container boot.
Make sure to set both PWP__THEME and PWP_PRECOMPILE for the selected theme to work. 👍
| Environment Variable | Description | Possible Values |
|---|---|---|
| PWP__THEME | Theme used for the application. | 'cerulean', 'cosmo', 'cyborg', 'darkly', 'flatly', 'journal', 'litera', 'lumen', 'lux', 'materia', 'minty', 'morph', 'pulse', 'quartz', 'sandstone', 'simplex', 'sketchy', 'slate', 'solar', 'spacelab', 'superhero', 'united', 'vapor', 'yeti', 'zephyr' |
| PWP_PRECOMPILE | Forces a rebuild of the theme CSS on boot. | true |
---> See the Themes Gallery for examples of each.
Note: Since the theme is a boot level selection, the theme can only be selected by setting the PWP__THEME environment variable (and not modifying settings.yml).
So to set the quartz theme for a Docker container:
docker run --env PWP__THEME=quartz --env PWP_PRECOMPILE=true -p "5100:5100" pglombardo/pwpush:latestor alternatively for source code:
export PWP__THEME=quartz
bin/rails asset:precompile # manually recompile assets
bin/rails serverPassword Pusher has a pre-compilation step of assets. This is used to fingerprint assets and pre-process CSS code for better performance.
If using Docker containers, you can simply set the PWP_PRECOMPILE=true environment variable. On container boot, all assets will be precompiled and bundled into /assets.
Note: Precompiling all application assets for a new theme on container boot can add 30-90 seconds to the boot process (depending on the system). Make sure to allow this time in your health checks before declaring the container as unresponsive.
To manually precompile assets run bin/rails assets:precompile.
The PWP__THEME environment variable simply causes the application to load a css file from app/assets/stylesheets/themes/{$PWP__THEME}.css. If you were to place a completely custom CSS file into that directory, you could then set the PWP__THEME environment variable to the filename that you added.
For example:
Add app/assets/stylesheets/themes/mynewtheme.css and set PWP__THEME=mynewtheme.
This would cause that CSS file to be loaded and used as the theme for the site. Please refer to existing themes if you would like to author your theme for Password Pusher.
Remember that after the new theme is configured, assets must be precompiled again. See the the previous section for instructions
Password Pusher supports adding custom CSS to the application. The application hosts a custom.css file located at app/assets/stylesheets/custom.css. This file is loaded last so it take precedence over all built in themes and styling.
This file can either be modified directly or in the case of Docker containers, a new file mounted over the existing one.
When changing this file inside a Docker container, make sure to set the precompile option PWP_PRECOMPILE=true. This will assure that the custom CSS is incorporated correctly.
An example Docker command to override that file would be:
docker run -e PWP_PRECOMPILE=true --mount type=bind,source=/path/to/my/custom.css,target=/opt/PasswordPusher/app/assets/stylesheets/custom.css -p 5100:5100 pglombardo/pwpush:latest
or the docker-compose.yml equivalent:
version: '2.1'
services:

  pwpush:
    image: docker.io/pglombardo/pwpush:latest
    ports:
      - "5100:5100"
    environment:
      PWP_PRECOMPILE: 'true'
    volumes:
      - type: bind
        source: /path/to/my/custom.css
        target: /opt/PasswordPusher/app/assets/stylesheets/custom.css
Remember that when doing this, this new CSS code has to be precompiled.
To do this in Docker containers, simply set the environment variable PWP_PRECOMPILE=true. For source code, run bin/rails assets:precompile. This compilation process will incorporate the custom CSS into the updated site theme.
| Environment Variable | Description |
|---|---|
| GA_ENABLE | The existence of this variable will enable the Google Analytics for the application. See app/views/layouts/_ga.html.erb. |
| GA_ACCOUNT | The Google Analytics account id. E.g. UA-XXXXXXXX-X |
| GA_DOMAIN | The domain where the application is hosted. E.g. pwpush.com |
Throttling enforces a minimum time interval between subsequent HTTP requests from a particular client, as well as by defining a maximum number of allowed HTTP requests per a given time period (per second, minute, hourly, or daily).
| Environment Variable | Description | Default Value |
|---|---|---|
| PWP__THROTTLING__DAILY | The maximum number of allowed HTTP requests per day | 5000 |
| PWP__THROTTLING__HOURLY | The maximum number of allowed HTTP requests per hour | 600 |
| PWP__THROTTLING__MINUTE | The maximum number of allowed HTTP requests per minute | 60 |
| PWP__THROTTLING__SECOND | The maximum number of allowed HTTP requests per second | 20 |
| Environment Variable | Description |
|---|---|
| PWP__LOG_LEVEL | Set the logging level for the application. Valid values are: debug, info, warn, error and fatal. Note: lowercase. |
| PWP__LOG_TO_STDOUT | Set to 'true' to have log output sent to STDOUT instead of log files. Default: false |
See also the Proxies section below.
| Environment Variable | Description |
|---|---|
| FORCE_SSL | (Deprecated) The existence of this variable will set config.force_ssl to true and generate HTTPS based secret URLs |
Note: This is a legacy setting and is no longer suggested for use. If using a proxy, make sure to have your proxy forward the X-Forwarded-Host, X-Forwarded-Port and X-Forwarded-Proto HTTP headers. See the "Proxies" section for more information and instructions.
_
An occasional issue is that when using Password Pusher behind a proxy, the generated secret URLs are incorrect. They often have the backend URL & port instead of the public fully qualified URL - or use HTTP instead of HTTPS (or all of the preceding).
To resolve this, make sure your proxy properly forwards the X-Forwarded-Host, X-Forwarded-Port and X-Forwarded-Proto headers.
The values in these headers represent the front end request. When these headers are sent, Password Pusher can then build the correct URLs.
As an example, for nginx, the addition could be:
proxy_set_header  X-Forwarded-Port $server_port;
proxy_set_header  X-Forwarded-Host $host;
proxy_set_header  X-Forwarded-Proto $scheme;
proxy_set_header  X-Forwarded-Ssl on;
If you are unable to have these headers passed to the application for any reason, you could instead force an override of the base URL using the PWP__OVERRIDE_BASE_URL environment variable.
| Environment Variable | Description | Example Value |
|---|---|---|
| PWP__OVERRIDE_BASE_URL | Set this value (without a trailing slash) to force the base URL of generated links. | 'https://subdomain.domain.dev' |
Password Pusher bundles an Admin dashboard for self-hosted instances available at /admin. This dashboard allows for direct database access, so care should be taken.
It is only enabled with logins are enabled (enable_logins) and access is limited to accounts marked as "Administrator" only.
Note: Make sure you are running v1.40.3 or newer to have access to the Admin Dashboard.
Access to the Admin dashboard grants direct access to the application's database.
Accessing the admin dashboard is accessible by accounts that you specifically mark as "Administrator". Make sure to restrict access to authorized personnel only to prevent unauthorized access and potential security breaches.
To access the Admin dashboard, you must have:
- Logins enabled for your instance
- An account registered, confirmed and marked as an "Administrator"
For instructions on enabling logins and account registration, see previous sections above.
To mark a user account as an Administrator, you will need the email that the account registered with. With that email, follow these steps:
-
Open an application console by accessing the server where the application code resides. For example, if using Docker, navigate to
/opt/PasswordPusher:docker exec -it <container_id> bash cd /opt/PasswordPusher bin/rails console
-
From the application console, call the
PasswordPusher.grant_system_admin!method with the email of the target account:PasswordPusher.grant_system_admin!('user@example.com')
This grants System Administrator privileges to the specified user account.
Note: Ensure to replace
'user@example.com'with the actual email address of the target account. -
Upon successful execution, you will receive a confirmation message indicating that the user account has been granted System Administrator privileges.
If the specified email address is invalid or if the command fails to execute successfully, an appropriate error message will be displayed. Verify the email address and troubleshoot any issues encountered.
To revoke Administrator privileges from a user account, use the PasswordPusher.revoke_system_admin! method:
PasswordPusher.revoke_system_admin!('user@example.com')This revokes System Administrator privileges from the specified user account. Ensure to replace 'user@example.com' with the actual email address of the target account.
Upon successful execution, you will receive a confirmation message indicating that Administrator privileges have been revoked from the user account.
If you encounter any difficulties or have suggestions for improvement, let me know or file an issue in Github.