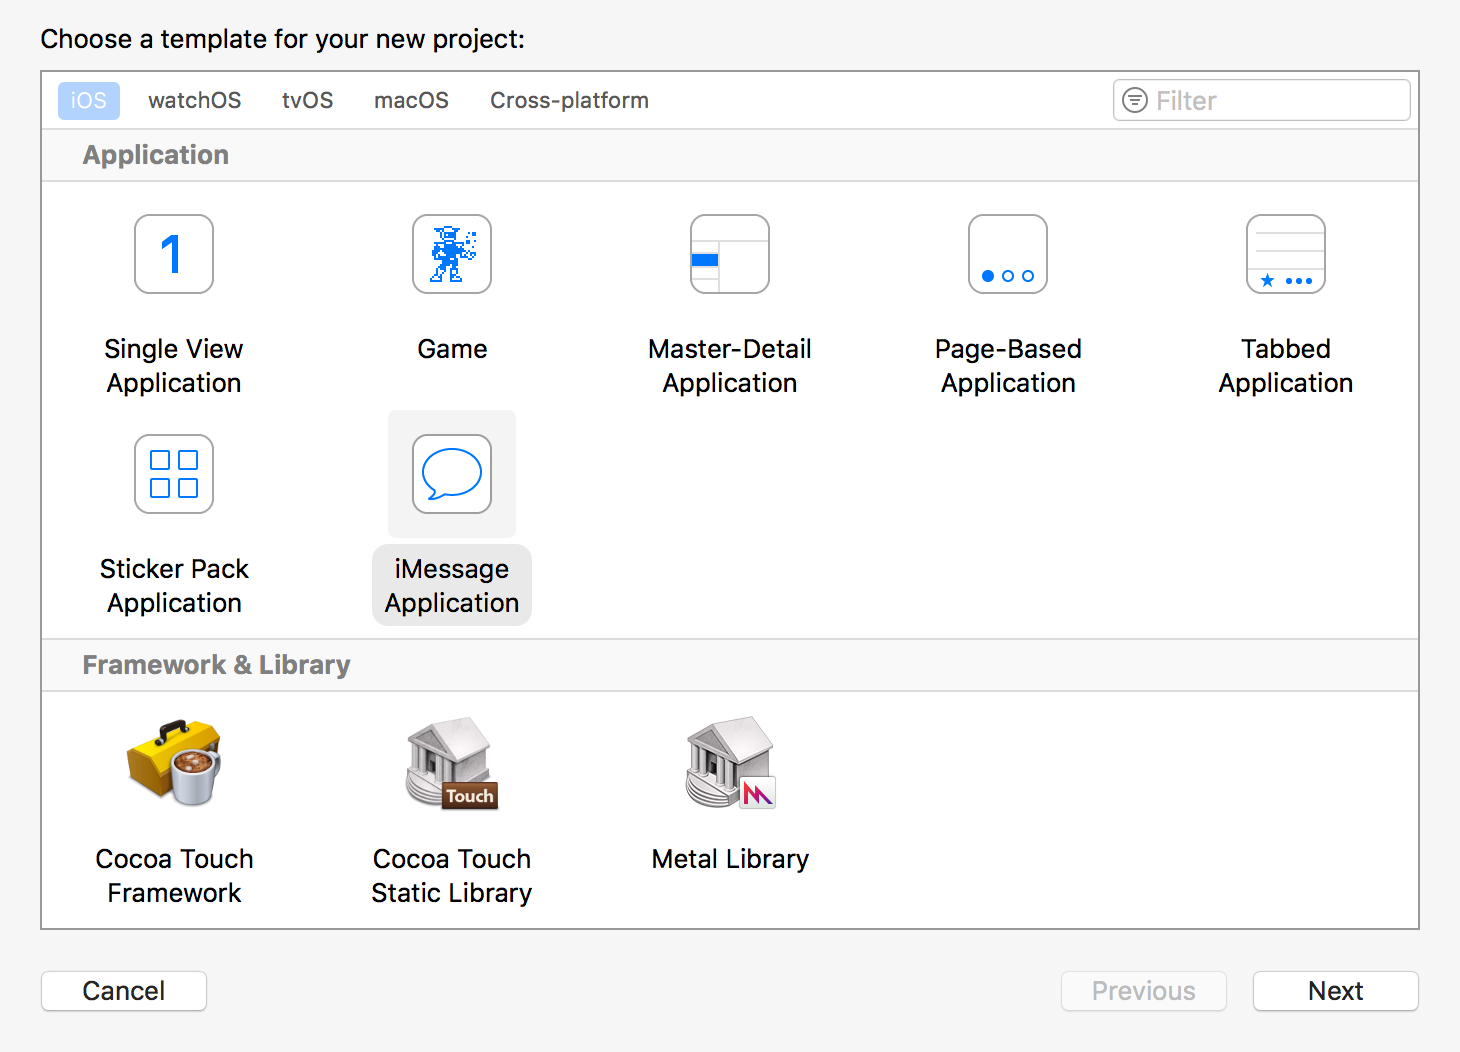
In this tutorial, we will create an extension to the Messages app that provides custom stickers to go along with the regular messages. You can start the project on Xcode by selecting File -> New -> Project, then coosing the iMessage Application template under the iOS tab. Give the project whatever name you like, and move on to the next section.
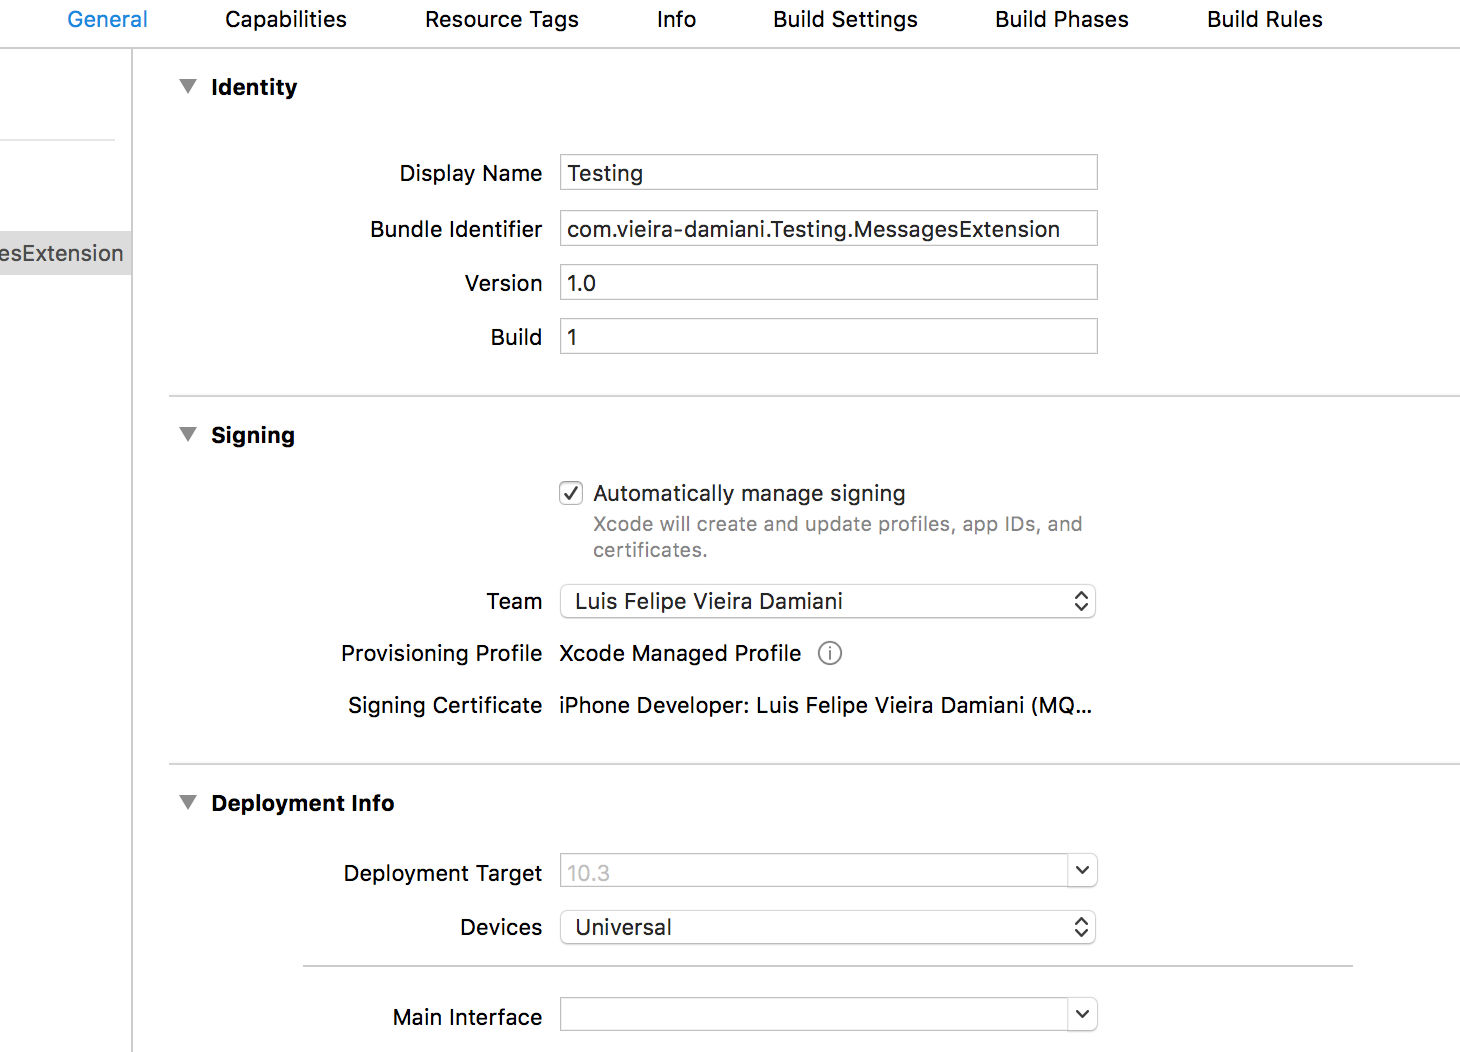
I find it preferable to deal with views programmatically when programming app extensions. In order to do so, go to the General tab for the MessagesExtension target. Set the Main Interface field under Deployment Info to blank.
Next, you need to change the Info.plist file for your target. Right-click on it, the choose Open As -> Source Code. Under the <dict> key, add the following:
<key>NSExtensionPrincipalClass</key>
<string>$(PRODUCT_MODULE_NAME).MessagesViewController</string>
Should you ever rename your MessagesViewController.swift file, you will need to also update your Info.plist. if you build and run now, you will only see a black screen, but the extension will not crash. You can now safely delete the MainInterface.storyboard file.
In the MessagesViewController.swift file, we will now create a simple label. Add the code below to the MessagesViewController class:
let label: UILabel = {
    let label = UILabel()
    label.text = "Hello, Messages!"
    label.textColor = .black
    label.sizeToFit()
    label.translatesAutoresizingMaskIntoConstraints = false
    return label
}()
Since we are not using storyboards, we need to deal with this label's constraints programmatically. This is a very easy task, just add the function below to your MessagesViewController class:
func setupLabelConstraints() {
    let horizontalConstraint = NSLayoutConstraint(item: label, attribute: .centerX, relatedBy: .equal, toItem: view, attribute: .centerX, multiplier: 1, constant: 0)
    let verticalConstraint = NSLayoutConstraint(item: label, attribute: .centerY, relatedBy: .equal, toItem: view, attribute: .centerY, multiplier: 1, constant: 0)
    NSLayoutConstraint.activate([horizontalConstraint, verticalConstraint])
}
The code above centers the label in the view. Note that we do not need to specify constraints for the size of the label, as we called sizeToFit() in its construction. Finally, to add the label to the view, add the lines below to your viewDidLoad():
view.backgroundColor = .white
view.addSubview(label)
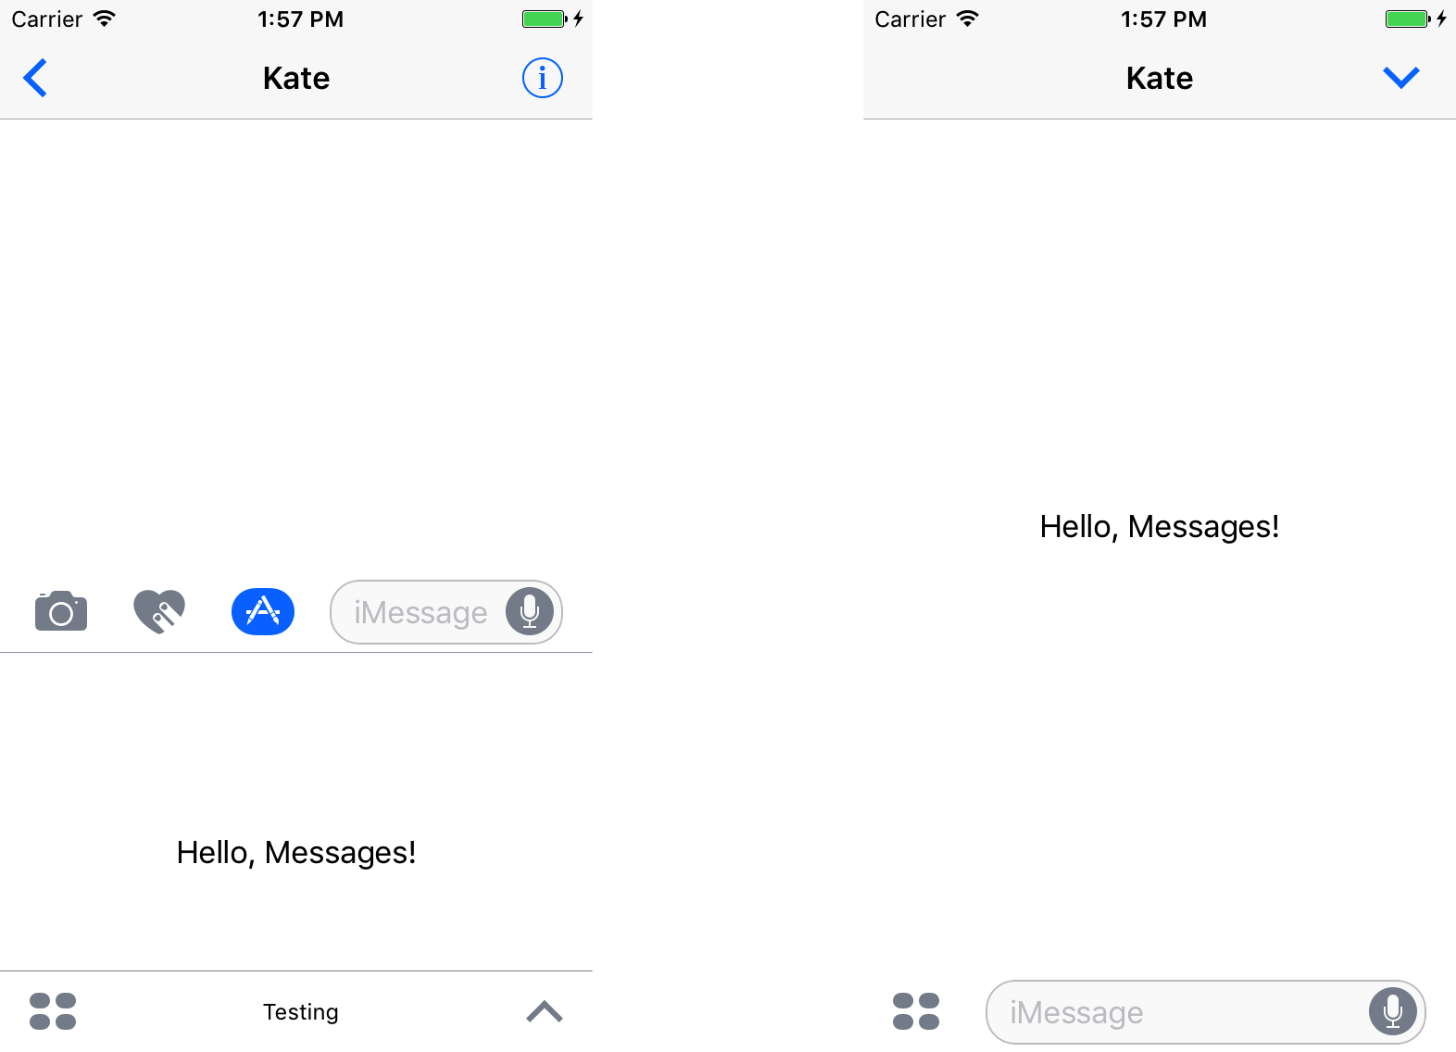
setupLabelConstraints()It is crucial that you call setupLabelConstraints() after you have called view.addSubview(label), otherwise your app will crash. The result is shown below: