You will need each of the following in order to complete the workshop:
- Docker (installed locally)
- Kubernetes (installed locally or have remote access to a cluster)
- Meshery (installed locally)
You will access to a Kubernetes cluster in this training. While any Kubernetes cluster should work, instructions for Docker Desktop and Minikube are included in these labs as the example Kubernetes platforms. Alternatively, you may choose to use any of the other supported Kubernetes platform.
-
Download and install Docker Desktop.
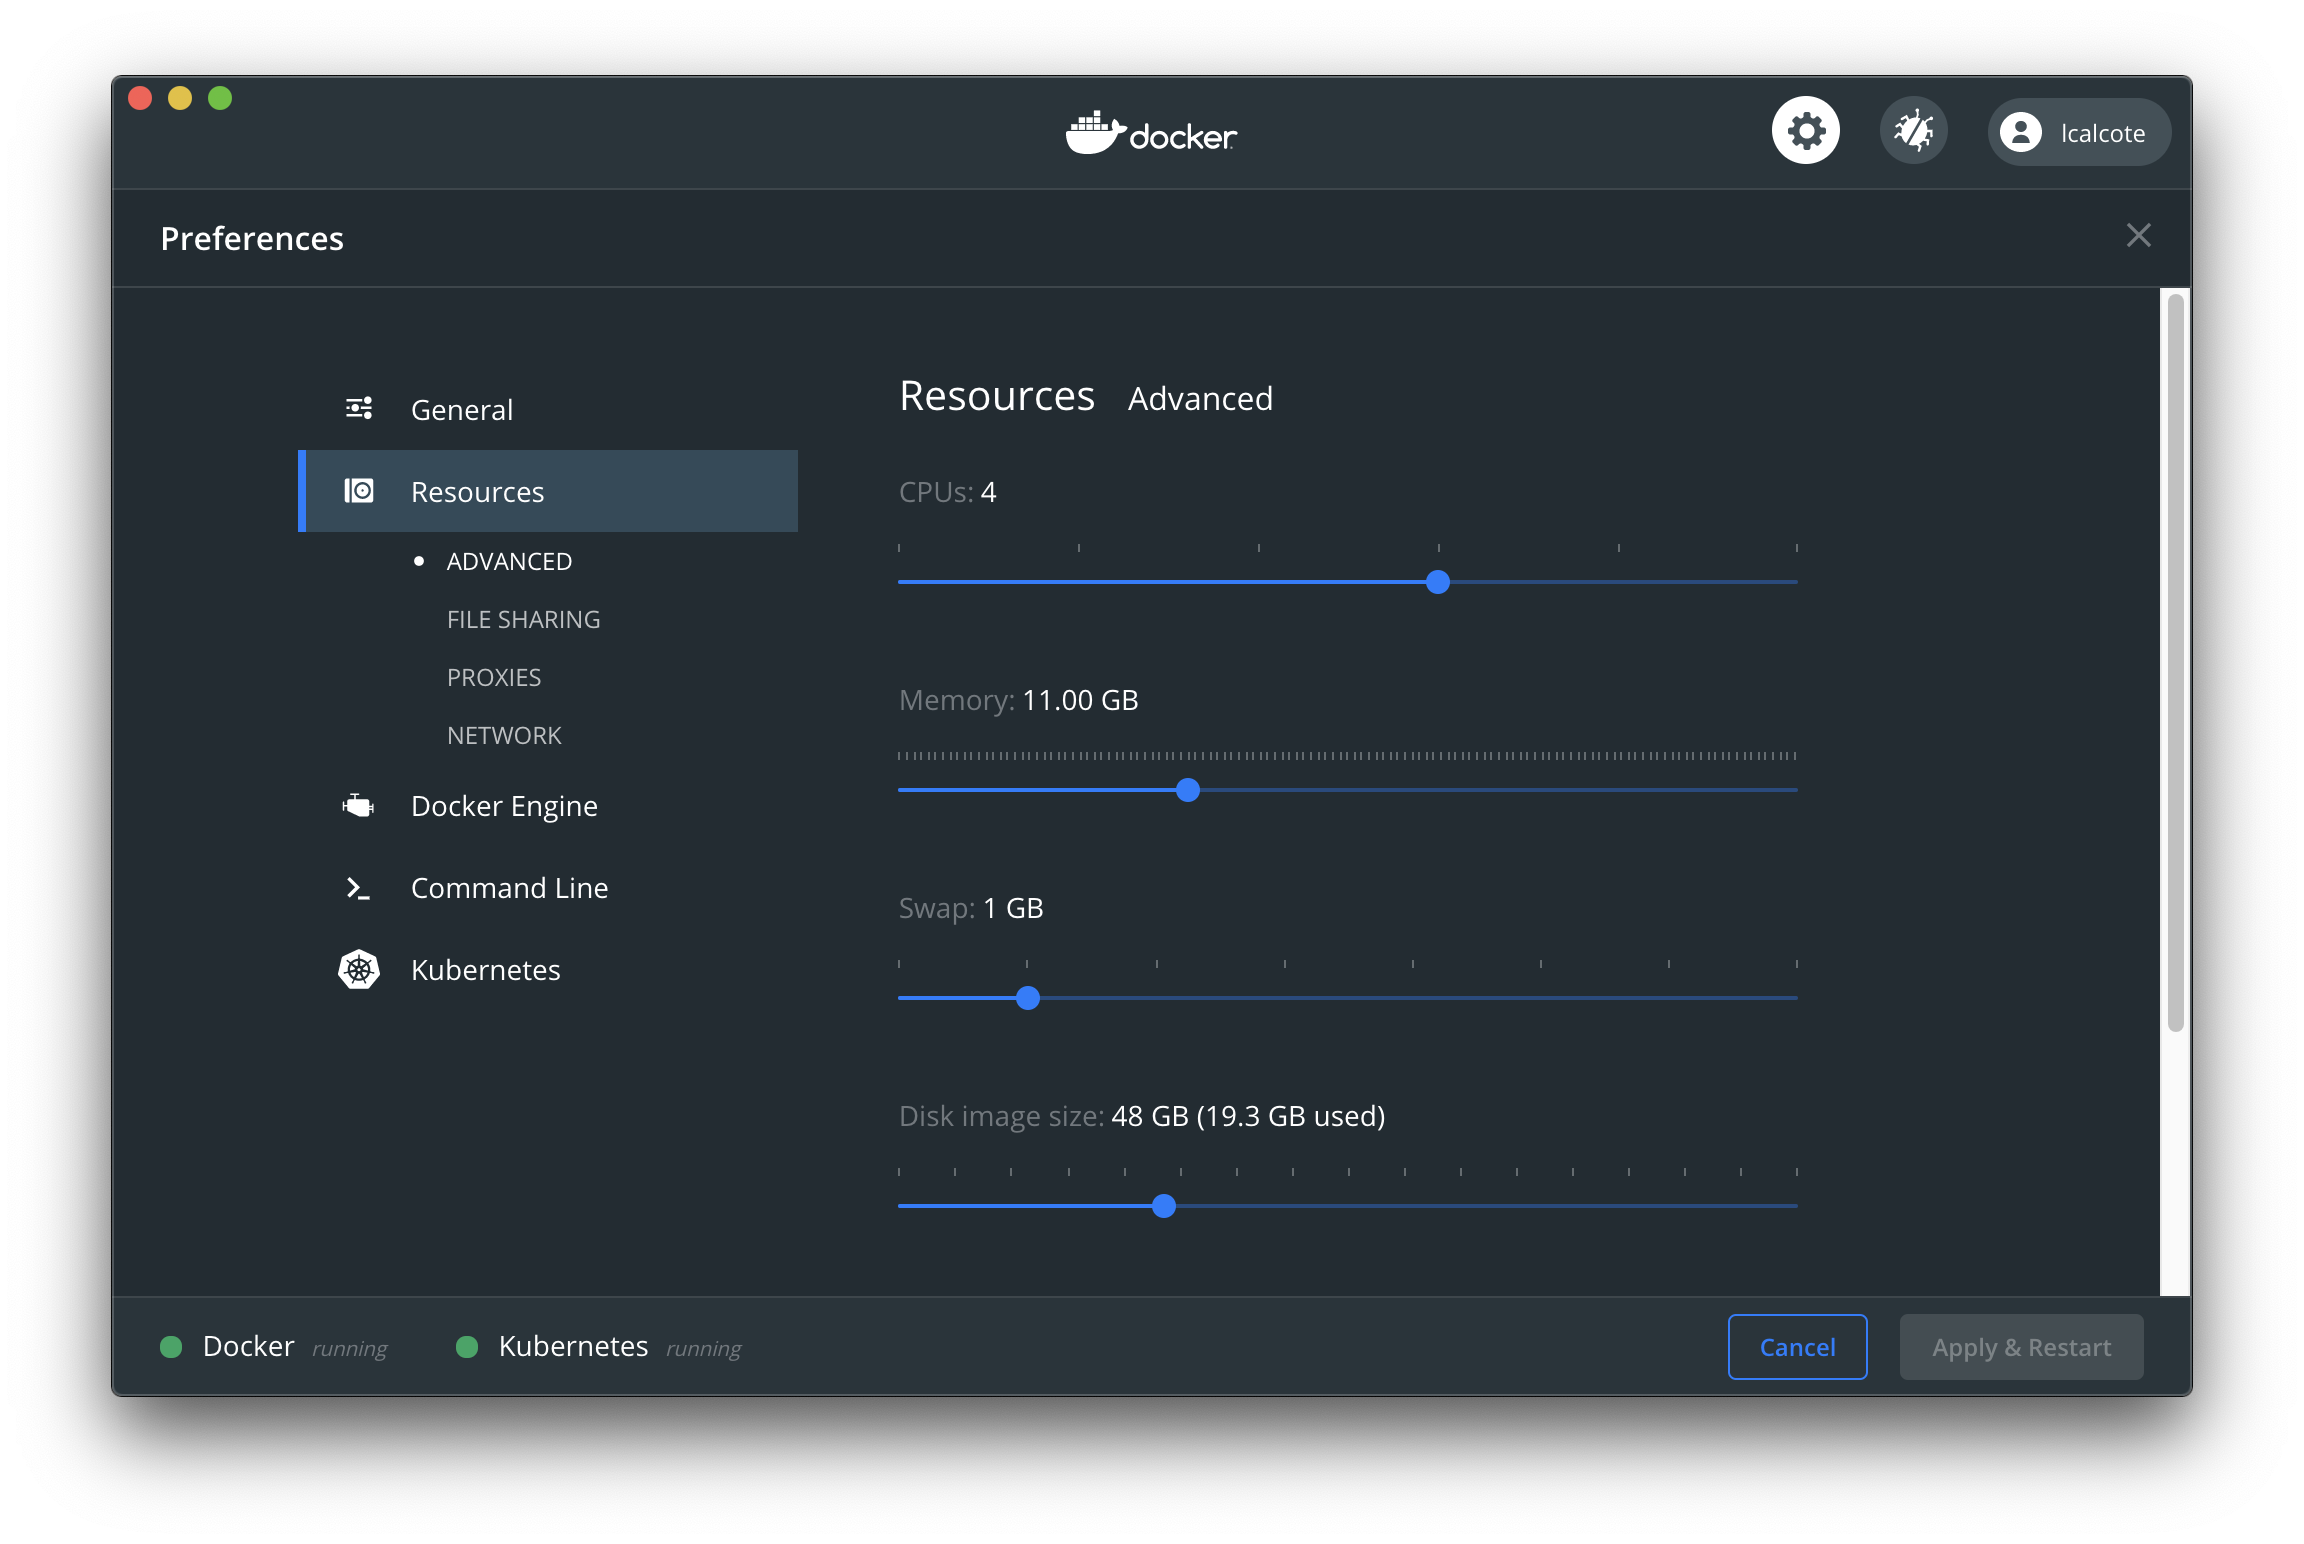
- Ensure 4GB is allocated to your Docker Desktop VM in Docker Desktop preferences (see screenshot).
-
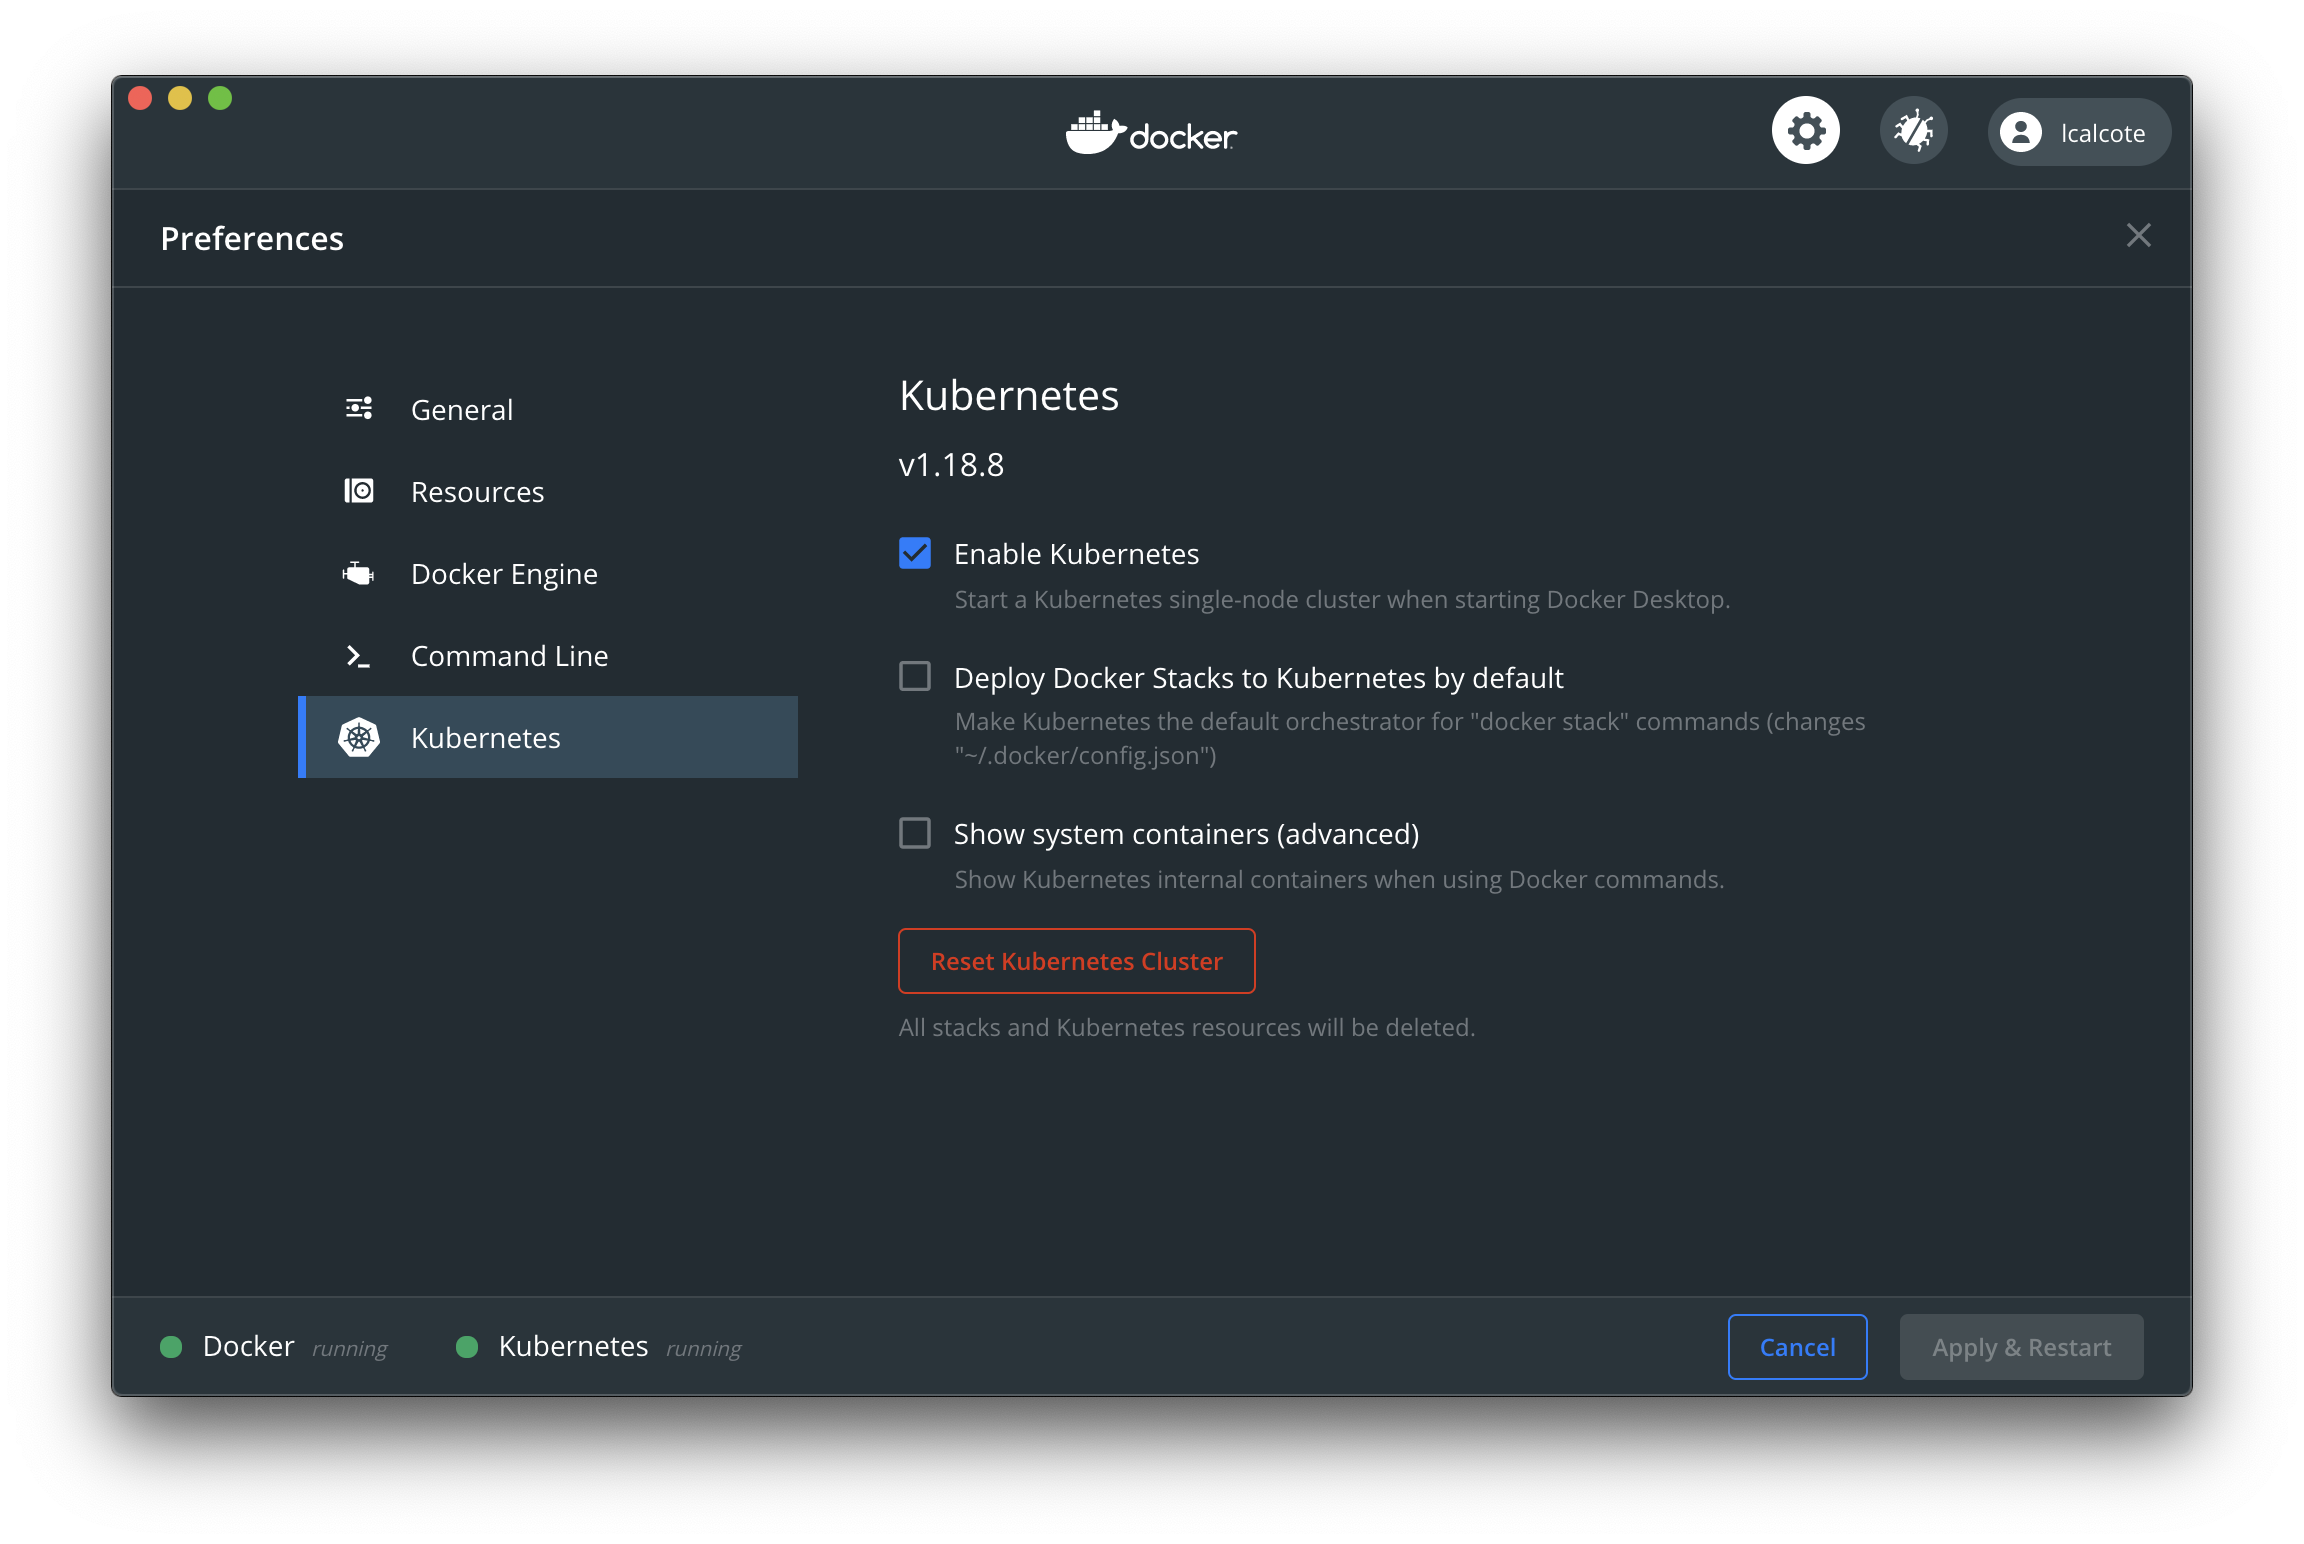
Create Kubernetes cluster. Enable Kubernetes in Docker Desktop preferences (see screenshot).
-
Please open
~/.kube/configand check thedocker-desktopcluster underclusterssection and ensure you see something like the image below:
Note: If you see
https://localhost:6443as the value for server, please get the IP address of your host and replacelocalhostwith the the IP address. The end result should look like thishttps://1.2.3.4:6443.

- Mac and Windows users may continue this workshop with Kubernetes on Docker Desktop.
- Install minikube.
- Create Kubernetes cluster:
minikube start.
Check the status of the nodes. Ensure Ready state.
[node1 ~]$ kubectl get nodes
NAME      STATUS    ROLES     AGE       VERSION
node1     Ready     master    1h        v1.15.2
Check the status of the pods next:
[node1 ~]$ kubectl get pods --all-namespaces
NAMESPACE     NAME                            READY     STATUS    RESTARTS   AGE
kube-system   etcd-node1                      1/1       Running   0          1h
kube-system   kube-apiserver-node1            1/1       Running   0          1h
kube-system   kube-controller-manager-node1   1/1       Running   0          1h
kube-system   kube-dns-545bc4bfd4-nnbwn       3/3       Running   0          1h
kube-system   kube-proxy-pxq27                1/1       Running   0          1h
kube-system   kube-scheduler-node1            1/1       Running   0          1h
If all pods are in a Running state, you have an operational Kubernetes cluster. Please continue to download and run Meshery.
In this workshop, Meshery will run "off-cluster", which is to say it will be running outside of the Kubernetes cluster. You will be running Meshery in your local Docker instance.

Install Meshery on your local machine (running Docker) by executing the following:
brew install layer5io/mesheryctl
mesheryctl system start
curl -L https://git.io/meshery | bash -
- Use Scoop.
or
- Download and unzip
mesheryctlfrom the Meshery releases page. - Add
mesheryctlto your PATH for ease of use. Then, execute:
./mesheryctl system start
Upon starting Meshery successfully, instructions to access Meshery will be printed on the sceen.
Meshery will automatically launch in your browser.
Sign into Meshery (see screenshot) using either Twitter, Linkedin, GitHub or Google authentication.
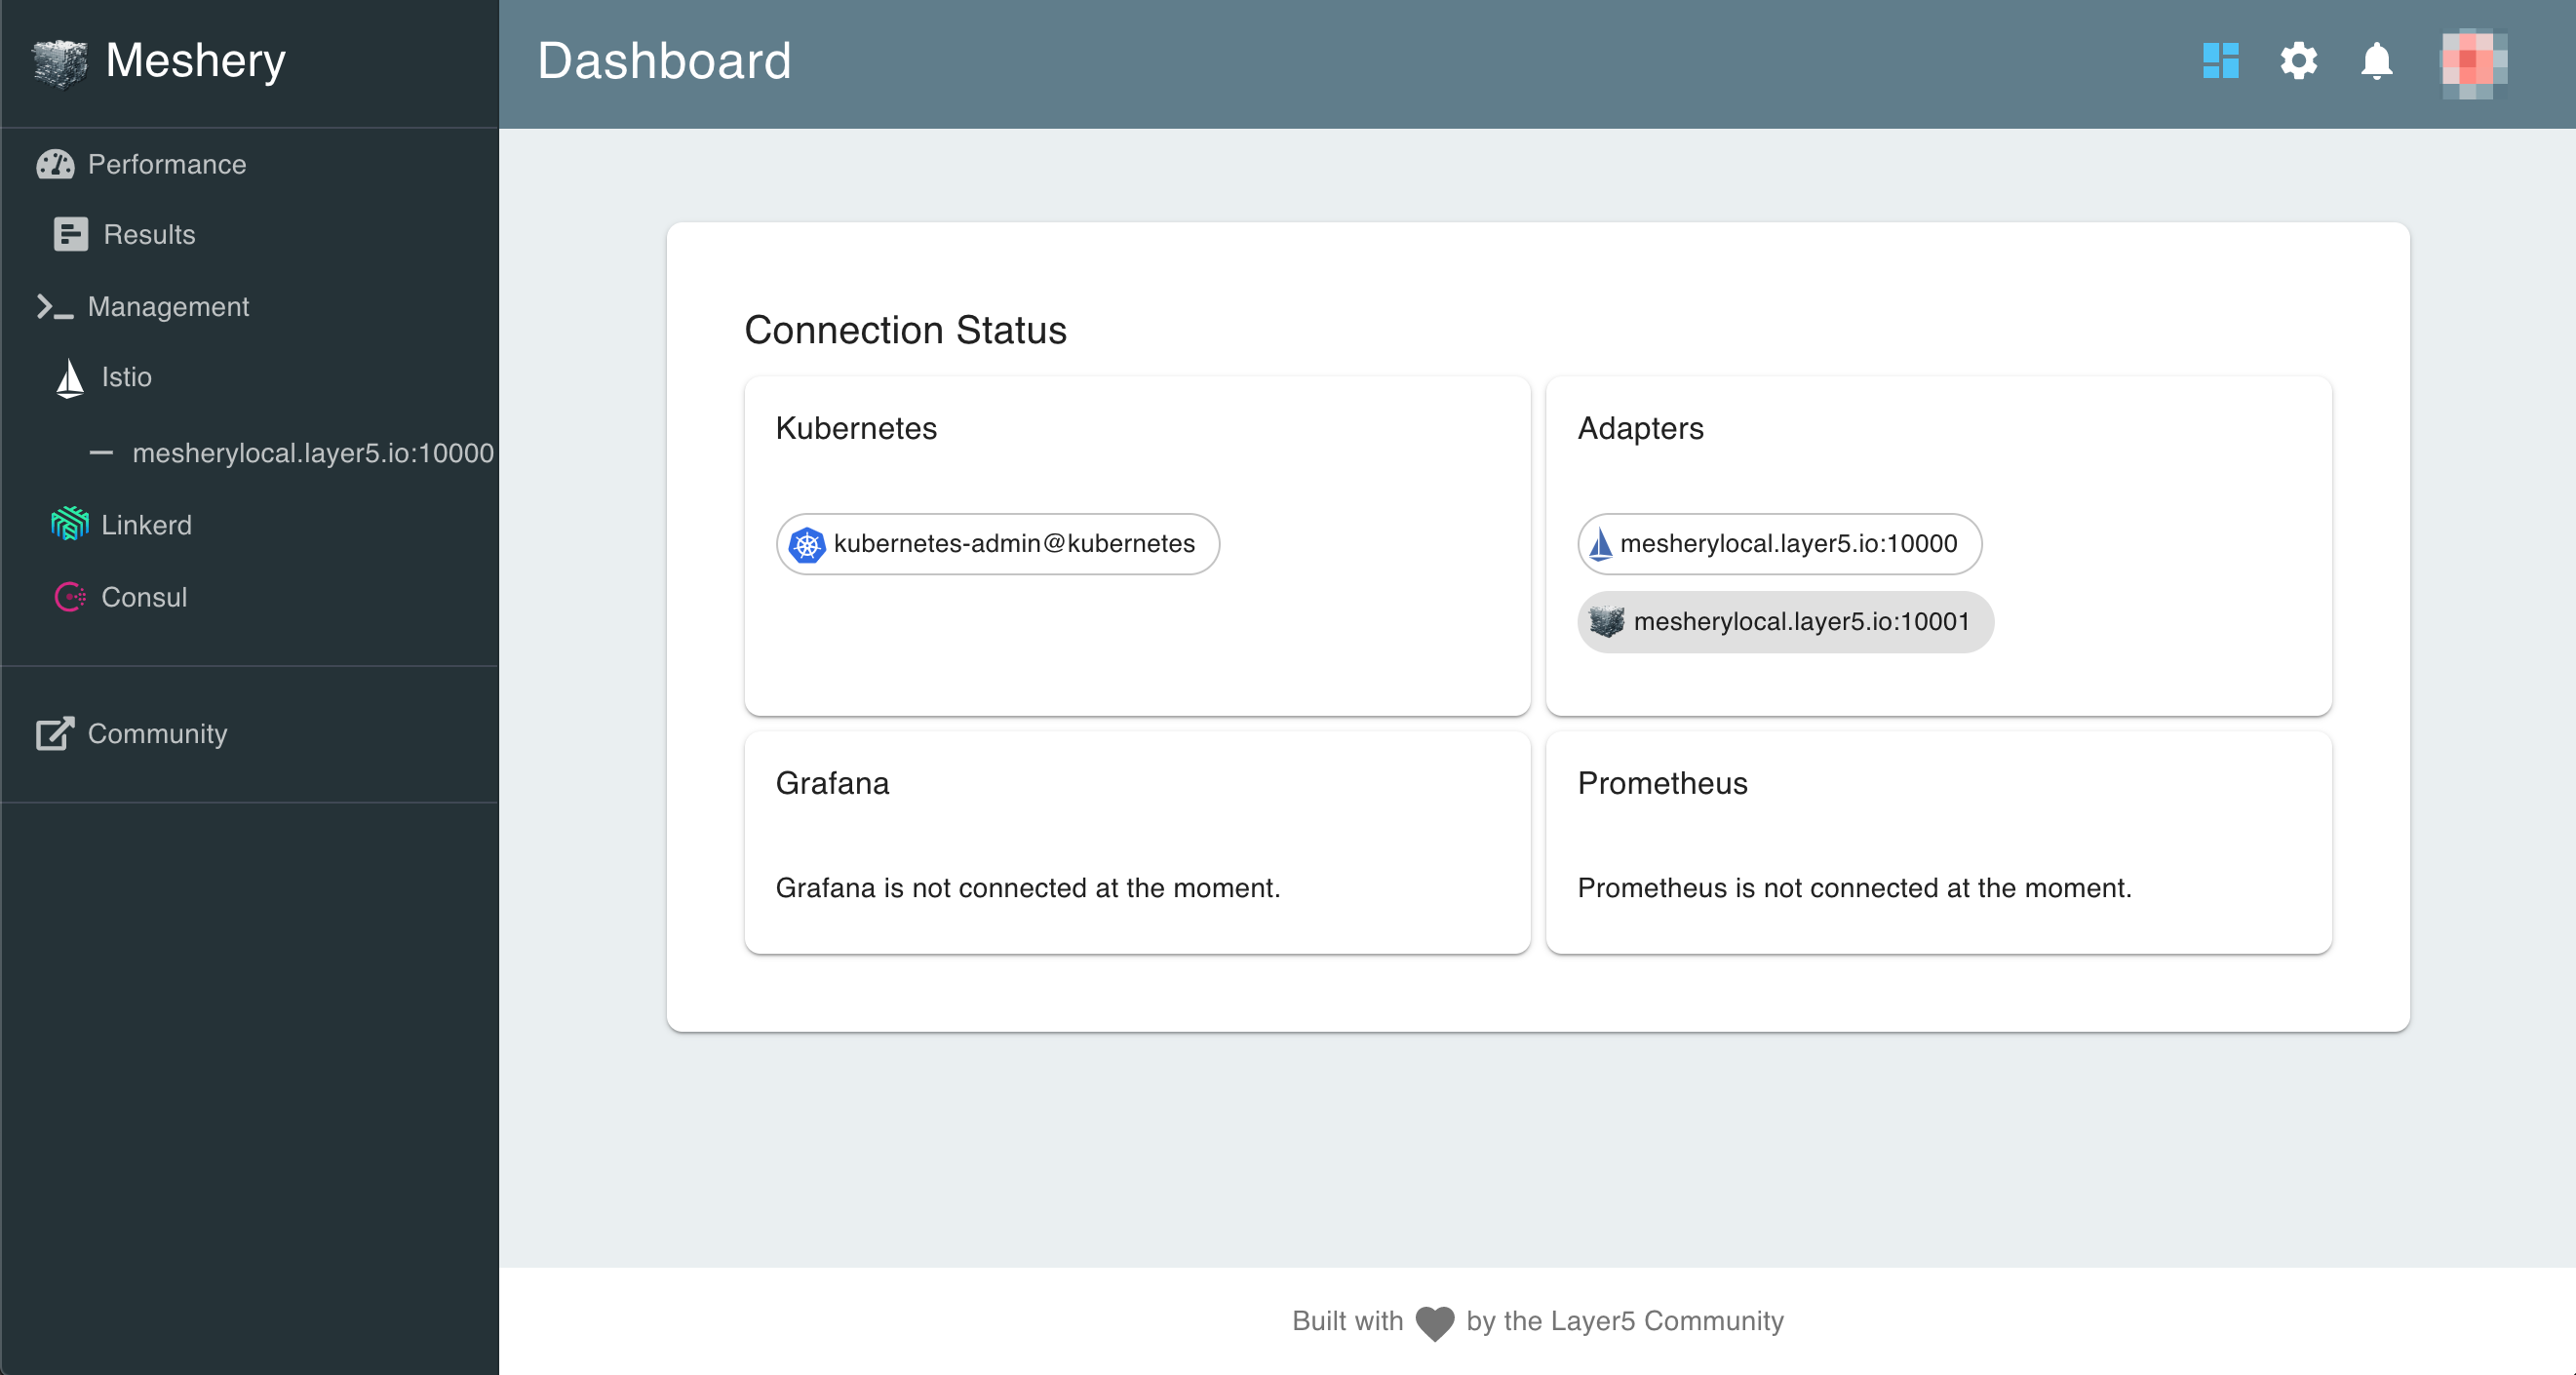
Meshery attempts to automatically connect with your Kubernetes cluster by loading the kubeconfig found in your $HOME/.kube folder and connecting existing service mesh adapters (see screenshot).
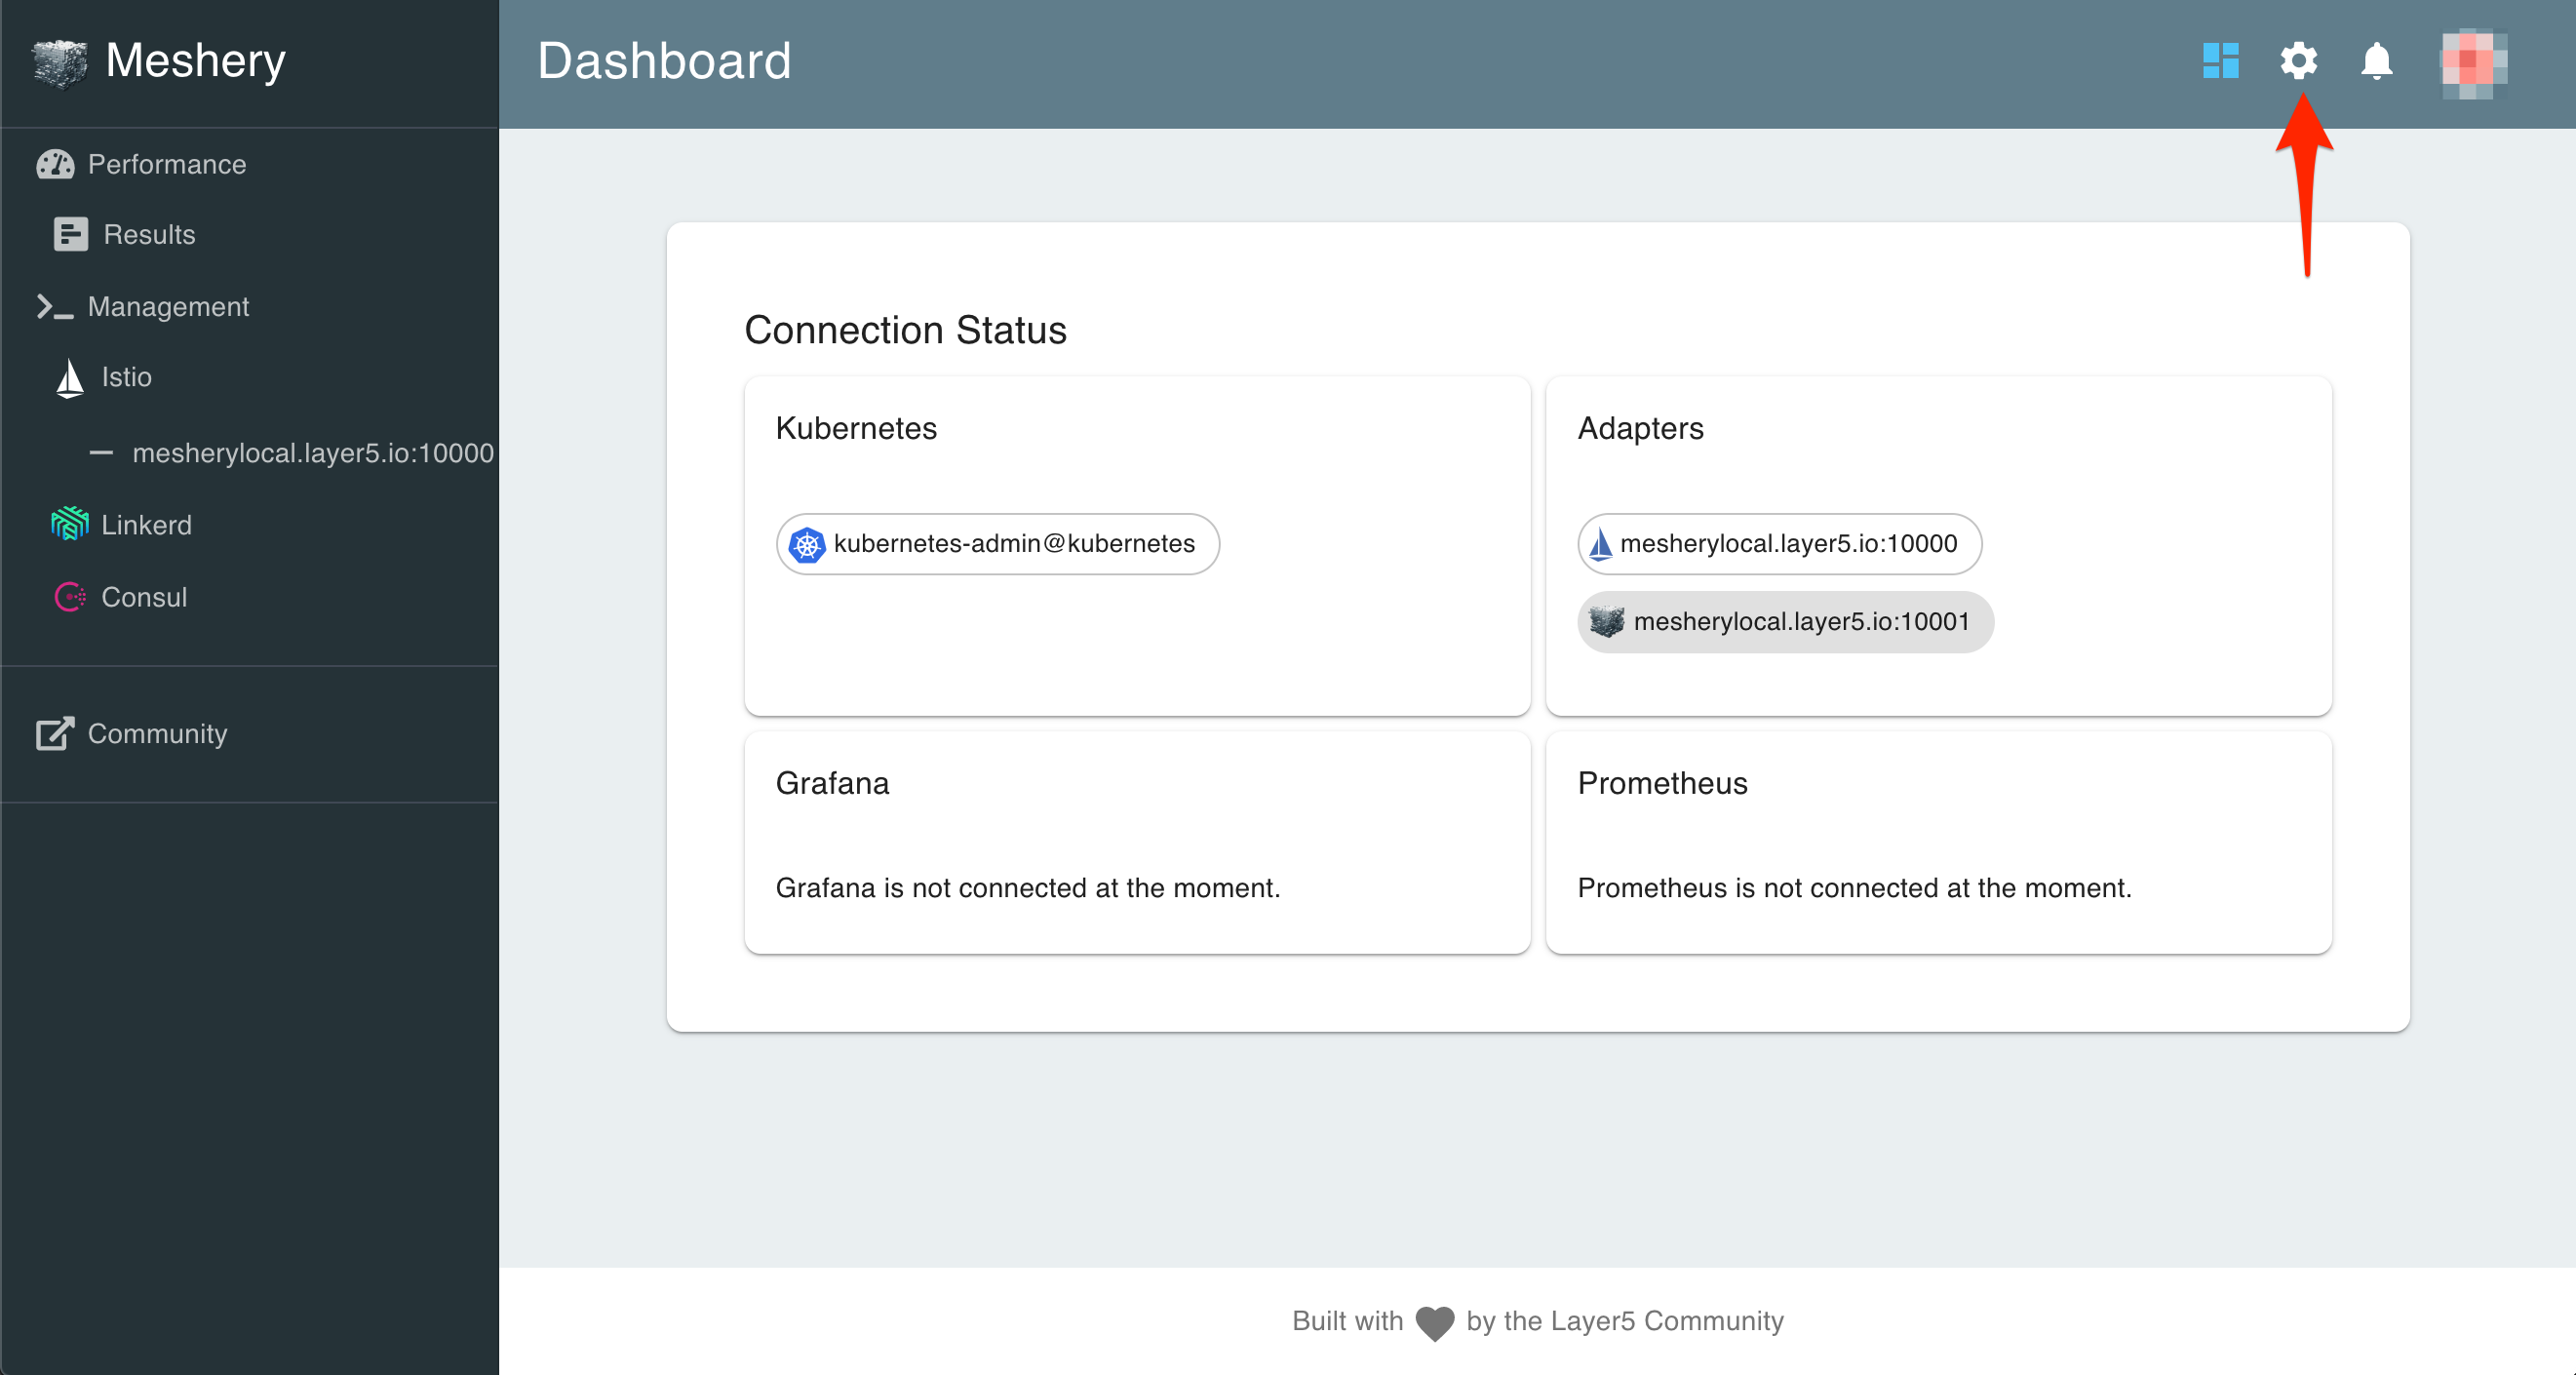
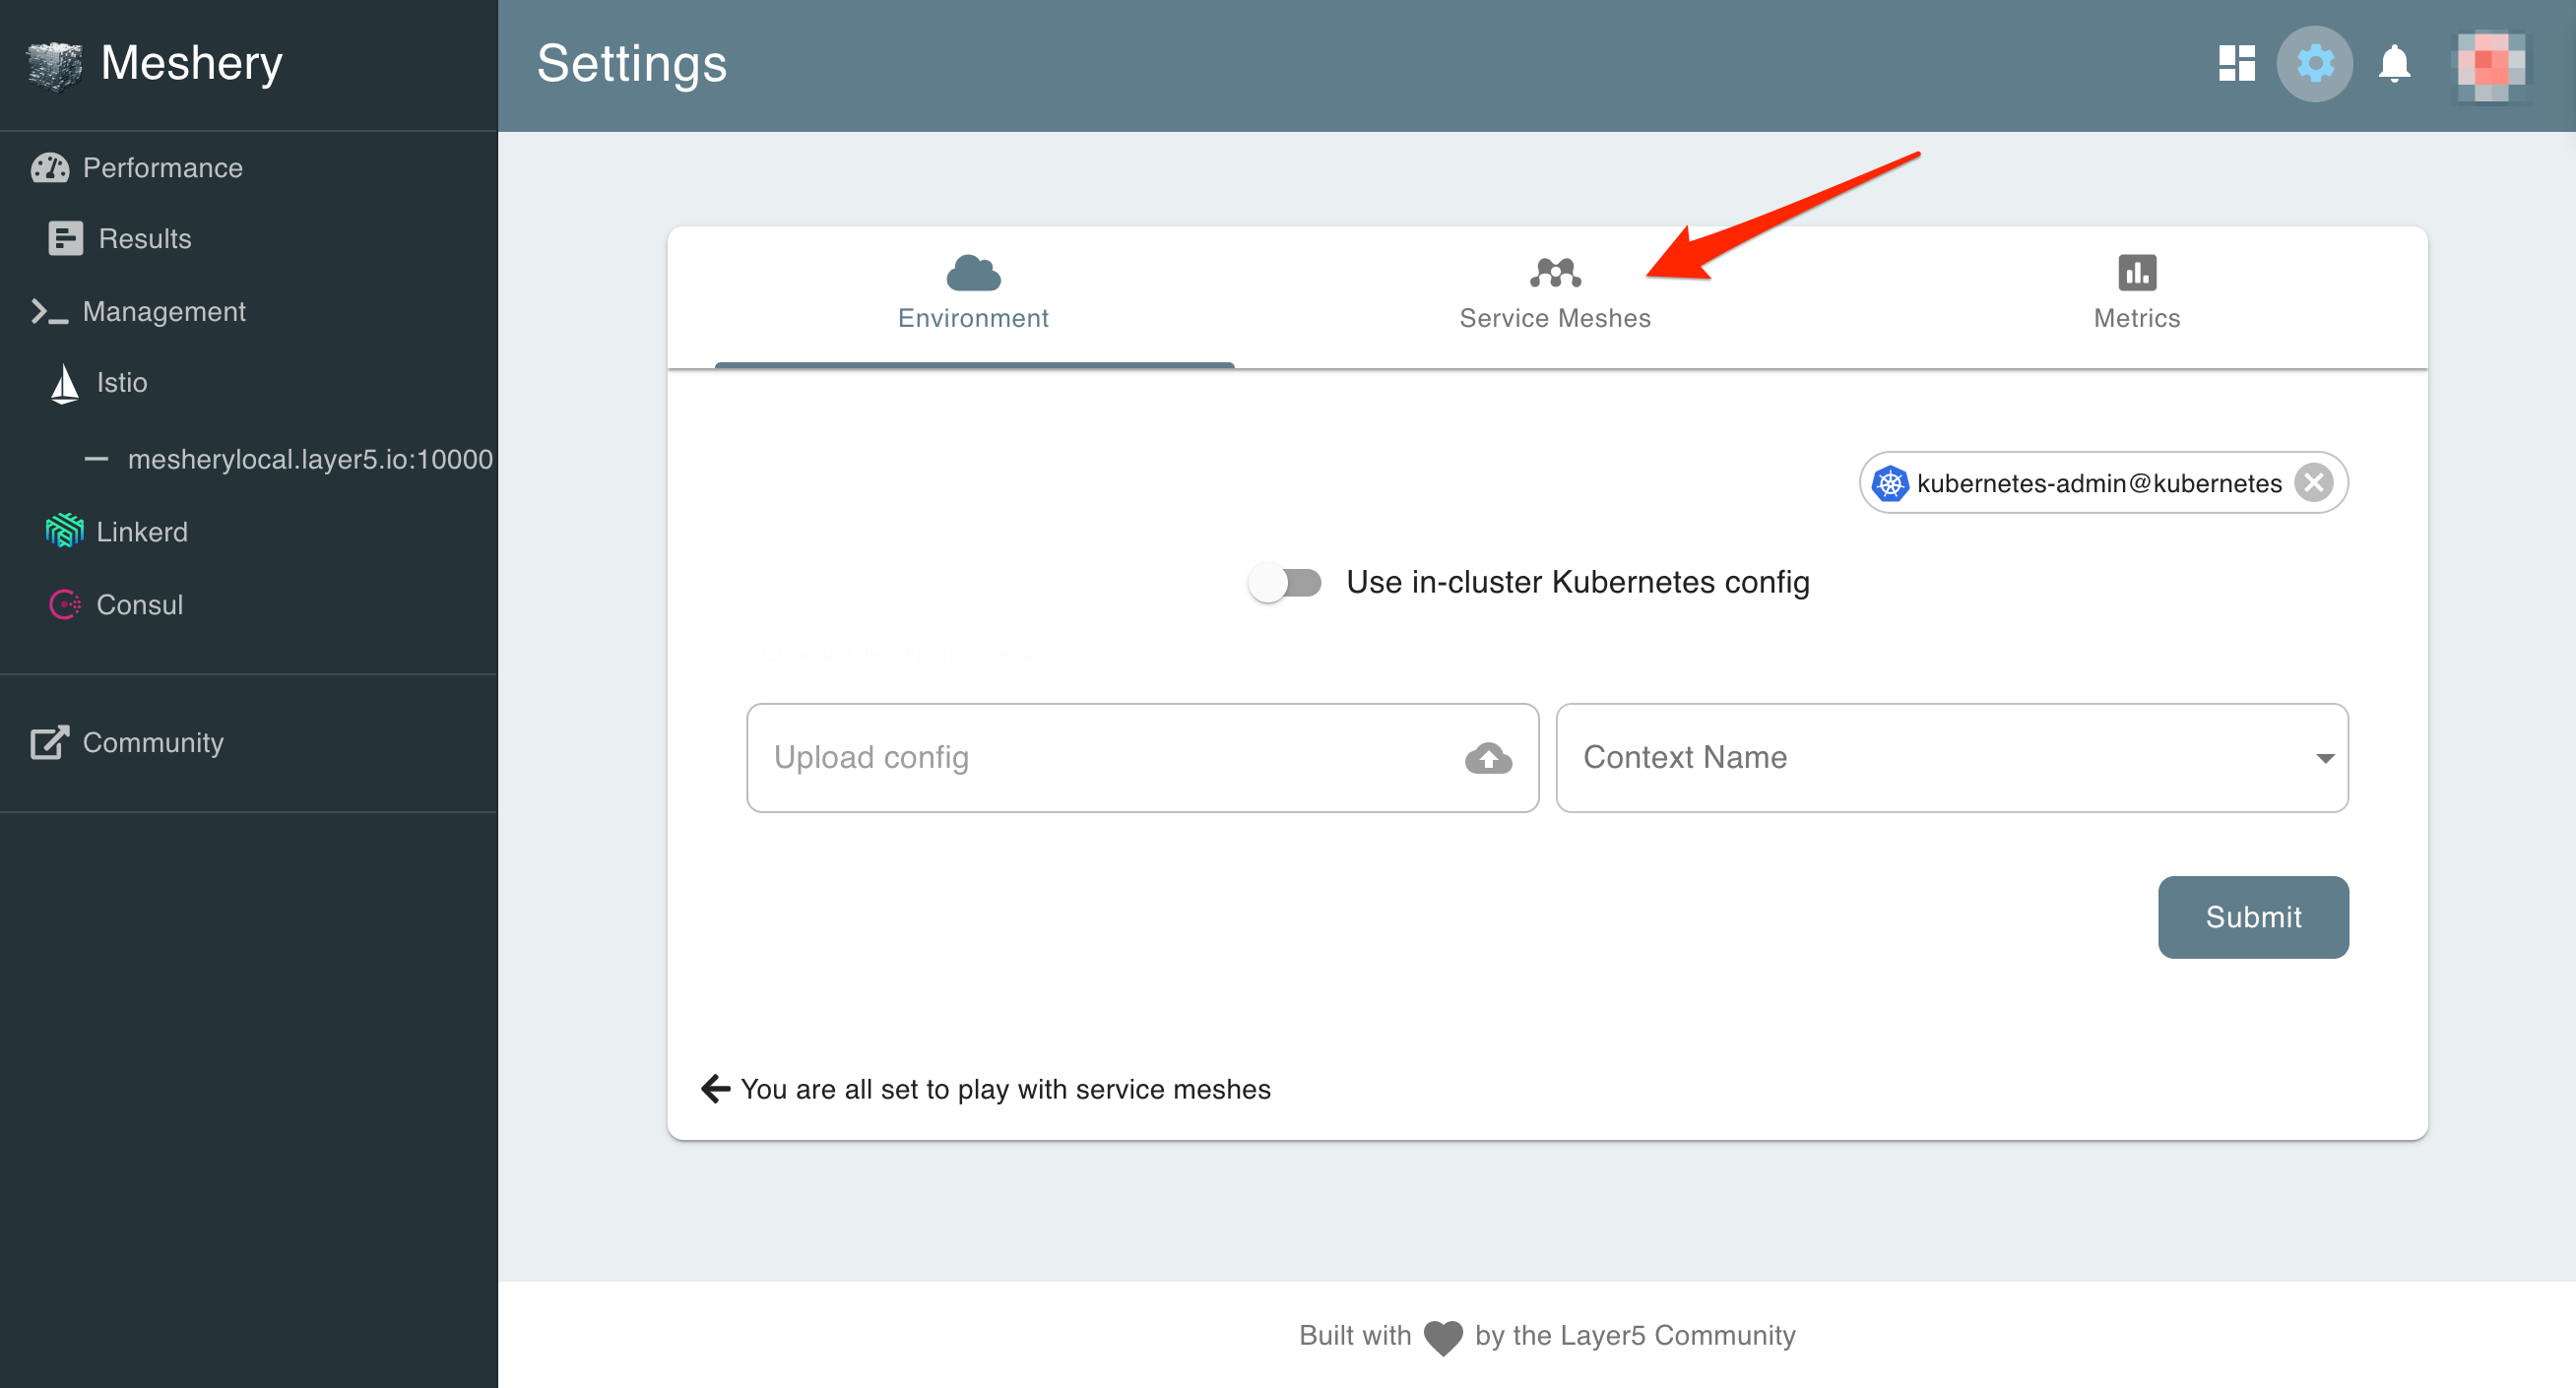
If your kubeconfig is in a different location (i.e. if you are not using Docker Desktop), point Meshery to your kubeconfig location by navigating to the Settings page. Navigate to Settings by clicking the gear icon on the right top of the screen (see screenshot).
This will take the user to the Settings page and here you can load up your new config file and select the context to use (see screenshot).
If you are using minikube: To configure Meshery to use minikube:
- Login to Meshery. Under your user profile, click
Get Token. - Use
mesheryctlto configure Meshery to use minikube. Execute:
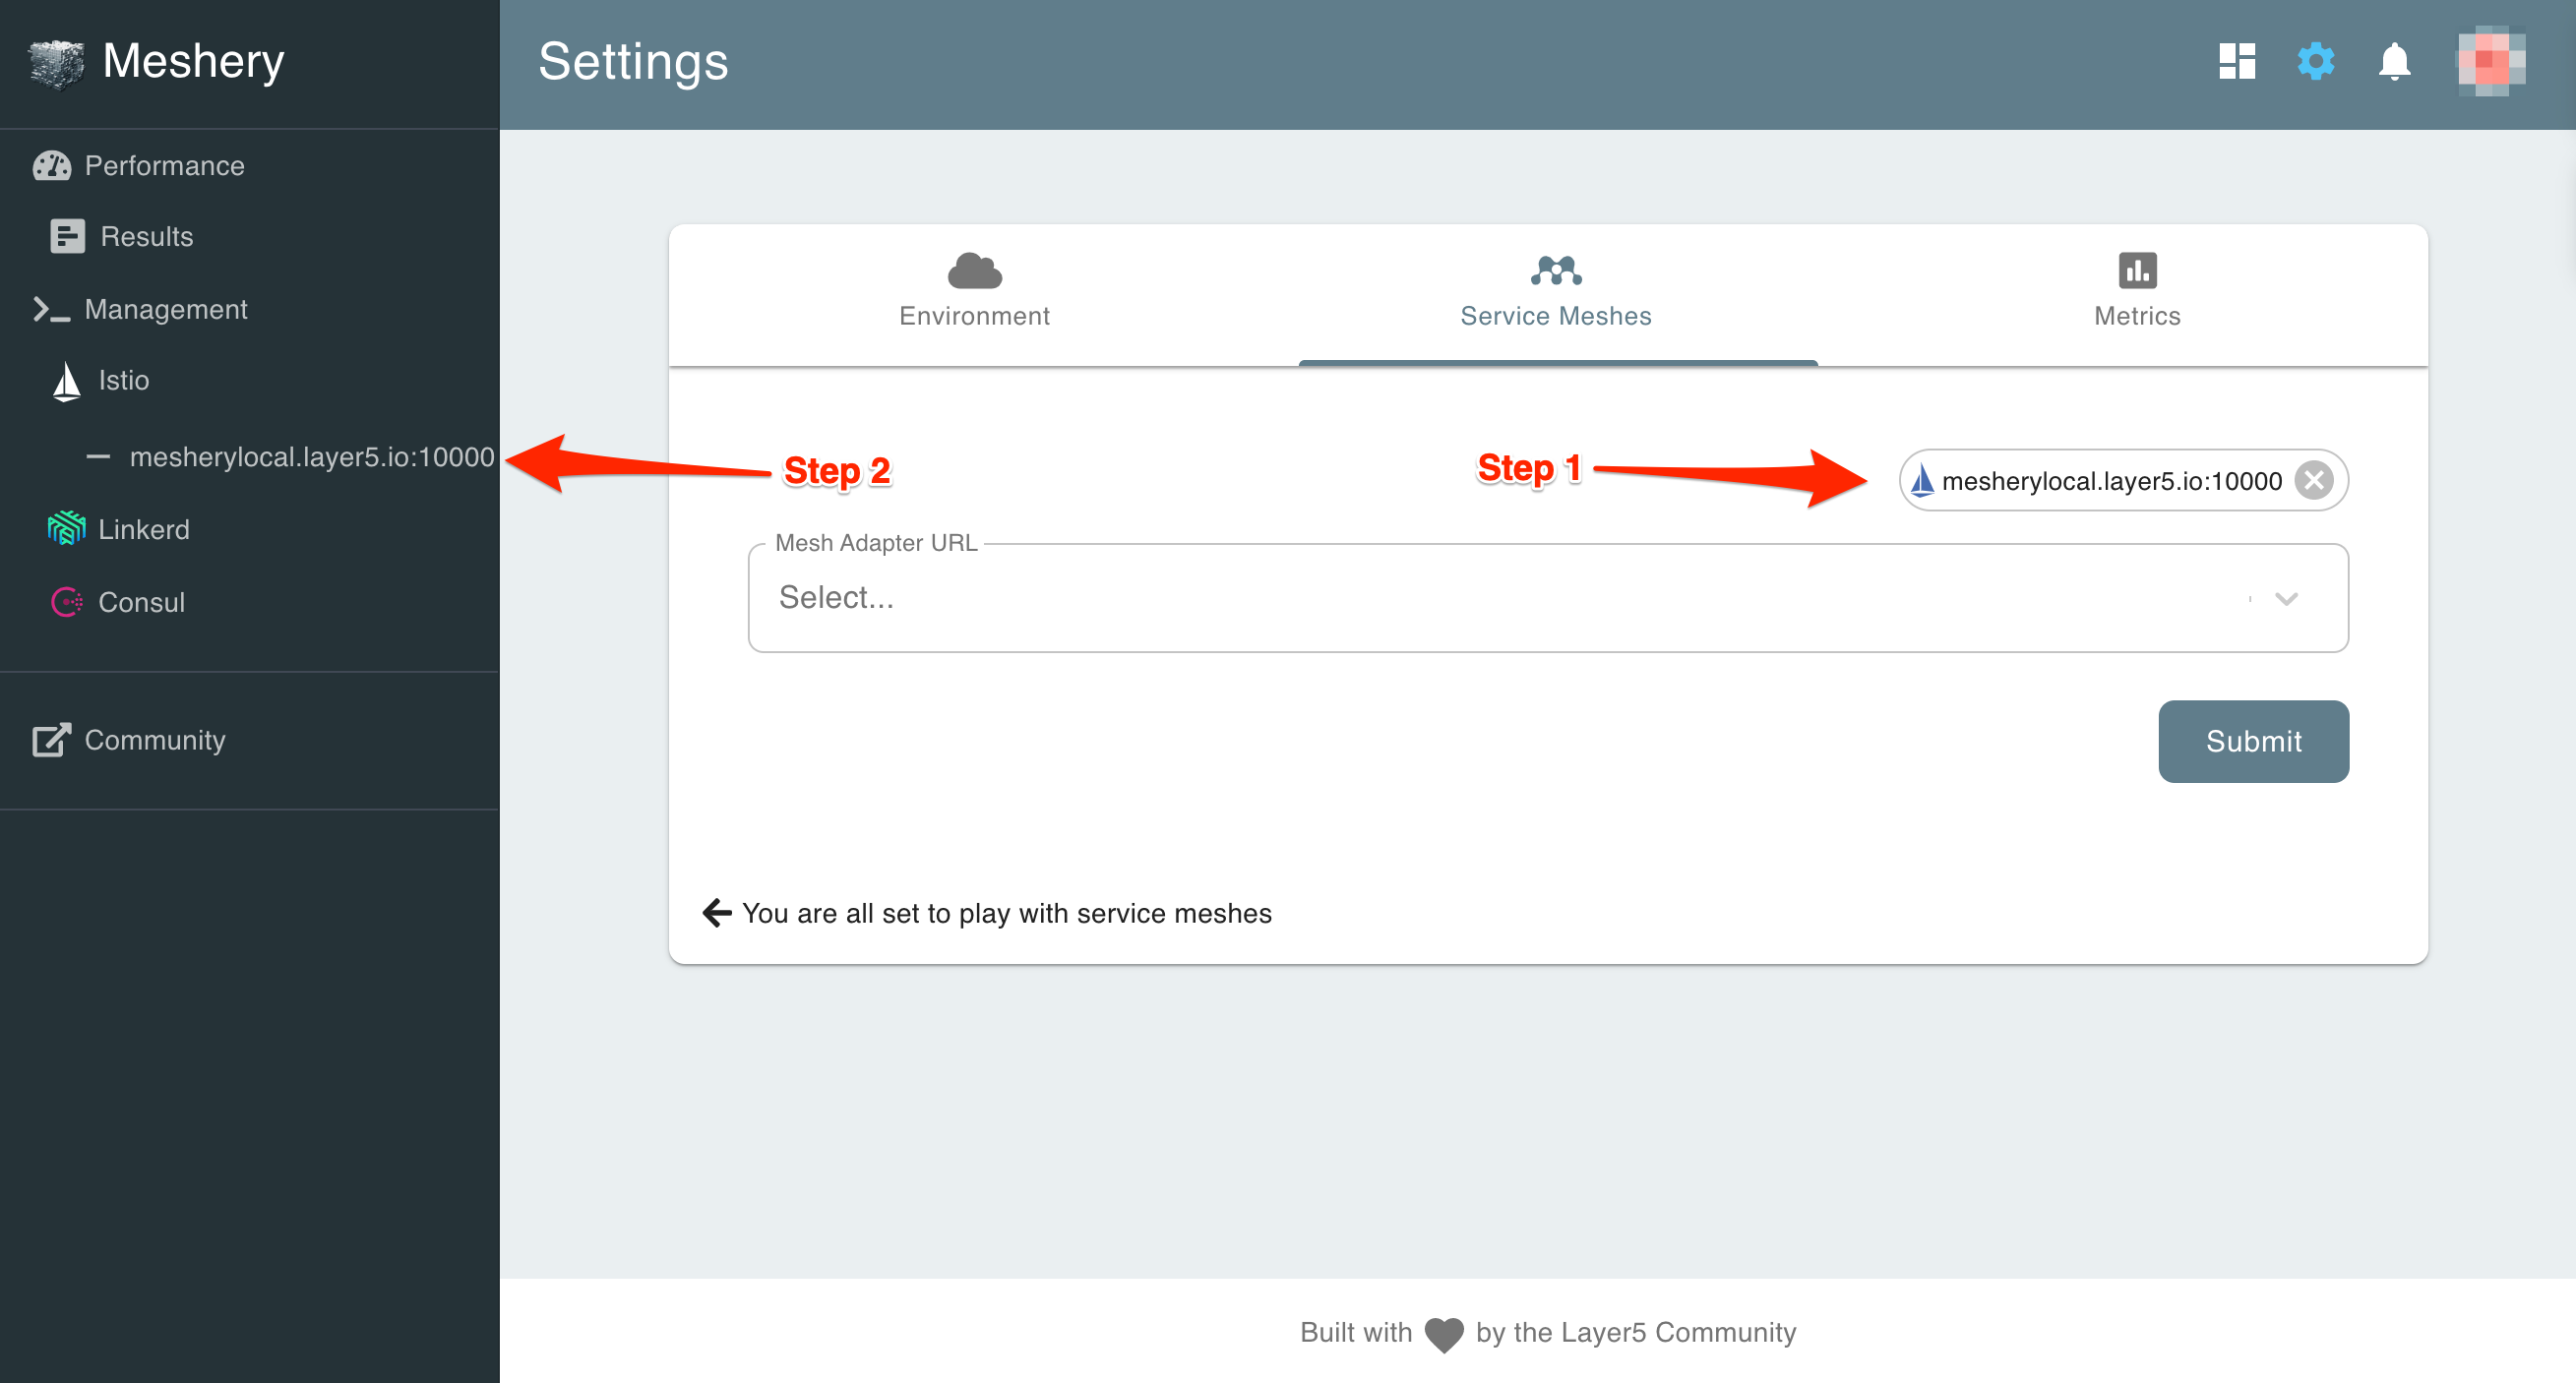
mesheryctl system config minikube -t ~/Downloads/auth.jsonIn a similar fashion, if you don't see the Linkerd adapter loaded, you should be able to switch to the Service Meshes tab in the Settings page and connect to existing adapters from the drop down (see screenshot).
Once an adapter is connected, you will also see it added to the nav menu on the left (see screenshot).