A family wiki and photoalbum engine.
- Pages with Markdown text
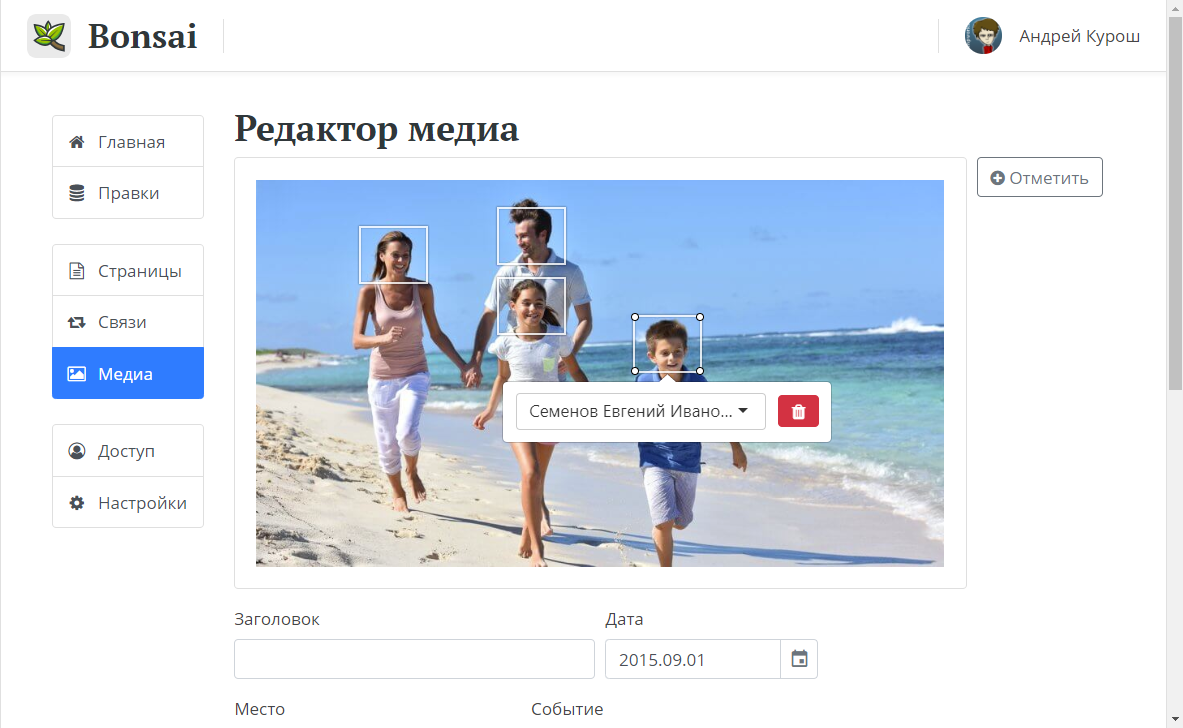
- Media files: photos, videos (PDF documents will be supported later)
- Person tags on photos
- Relations: validation, inferrence
- Fact storage (birthday, gender, blood type, languages, hobbies, etc.)
- Access control: editor, reader and guest roles
- Changesets: browse changes to any page/media, see diffs, easily revert if necessary


-
Download the docker-compose.lite.yml.
-
Set the locale to English:
Modify
docker-compose.lite.yml: ChangeLocale=ru-RUtoLocale=en-US. -
Optional:
Configure your Bonsai instance to use HTTPS for better security.
You can use any vendor-specific options: e.g. Cloudflare Tunnel (free, fairly easy to configure, but requires a domain), Synology DDNS (free, very easy, requires a Synology NAS device), etc.
This requires a bit of work, so if you just want to give Bonsai a quick spin - feel free to skip or postpone this one and the next.
-
Optional:
Create a Google Authorization app (or Yandex / VK.com).
Modify
docker-compose.lite.yml:- Save Google authorization credentials to
Auth__Google__ClientIdandAuth__Google__ClientSecretconfig properties - Set
Auth__AllowPasswordAuth=falseif you want to disable the less-secure password authorization
- Save Google authorization credentials to
-
Bring everything up using
docker compose:docker-compose -f docker-compose.lite.yml up -d -
After everything is brought up Bonsai will listen on port
8080.
For development, you will need the following:
- .NET 8: the main runtime for Bonsai
-
Install NodeJS 14
-
Download ffmpeg shared binaries for your system and extract the archive's contents into
External/ffmpegfolder in the solution root (must contain bothffmpegandffprobeexecutables). -
Create a file called
appsettings.Development.json, add the connection string:{ "ConnectionStrings": { "EmbeddedDatabase": "Data Source=App_Data/bonsai.db", "UseEmbeddedDatabase": true }, "Auth": { "AllowPasswordAuth": true } } -
Optional, but suggested:
Create a Google Authorization App (or Yandex / VK.com).
Add the retrieved authorization credentials to the
appsettings.Development.jsonand setAllowPasswordAuthtofalse:{ "Auth": { "AllowPasswordAuth": false, "Google": { "ClientId": "<...>", "ClientSecret": "<...>" }, "Yandex": { "ClientId": "<...>", "ClientSecret": "<...>" }, "Vkontakte": { "ClientId": "<...>", "ClientSecret": "<...>" } } } -
Create the database:
dotnet ef database update -
Build the styles and scripts:
npm install npm run build -
Run the app (as Visual Studio project or using
dotnet run).
If you value the data that you store in Bonsai, make sure that you SET UP BACKUPS.
You will need to back up the following:
- Database (approximately tens of megabytes)
- Uploaded media in
wwwroot/media(may contain gigabytes of data)
There are many options available, free and paid: uploading to a cloud storage, copying to external drives, etc. Please consider your usage/budget and select a combination that works best for you.
Bonsai features two authorization methods: OAuth and password authorization.
OAuth is the preferred method: it's easier to use for end users, more secure and versatile. Please use the OAuth method if you can! For OAuth, you will need to create an authorization app on Google, Vkontakte, or Yandex as described in the installation steps. You can enable multiple authorization apps at the same time: users will pick the one they prefer.
As a fallback, you can also create an account with classic login/password authorization. It can be used for two purposes:
- Playing around with Bonsai (easier to set up: no auth app and https configuration required)
- Giving access to elder family members who don't have a social network account
Please keep the following facts in mind:
- Any user account can only have one authorization method: password, or Facebook, or Google, etc.
- It is not possible to change the authorization type for an account once it has been created.
- Password-based accounts can be locked out if there are too many consecutive failed login attempts.
- Account password can only be reset by an administrator manually. If you only have one admin account, it is password-based, and the password is lost - there's no way to regain access besides direct database manipulation!