INAV configurator uses the glTF format for the 3d models, so any software that can export in this format is fine.
In this tutorial we see how to export glTF from Blender
- Blender, when i wrote this tutorial i was using the version 3.1, but also the next versions should be fine.
Create the model in your preferred 3D package. I use Fusion 360 and created quite large models. The size doesn't matter, it can be resized in Blender. I simply created the model, combined most parts, and added colour where I wanted it. The annoying thing is that the materials don't copy across in to Blender. But it's easier to get everything set with the package you're comfortable with. I would also highly reccomend naming each object in the model, as it will make things simpler later on. I also name the materials, as I'm sure Blender understands the material names. Once you're happy with the model, export it as an .obj file.
Open Blender, and import your .obj. This should be pretty uneventful.
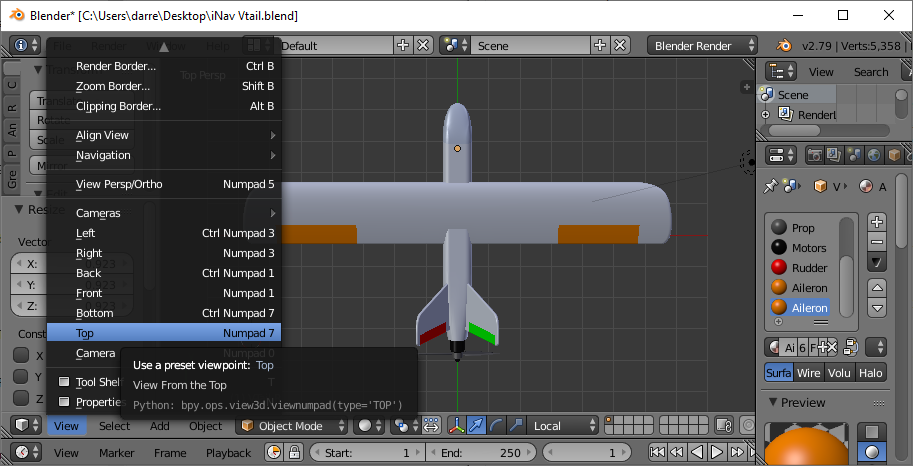
But if your model is large, you may just see an obstructed camera. If this is the case, switch to a flat on view (Top, Bottom, Left, Right, Front, or Back); which you access from the View menu in the bottom left corner of the screen, next to the 3D cube.
At that point, you should be able to use the + and - keys on the number pad to zoom in and out. Zoom out until you can see your complete model. Then click the Scale button and move the mouse to resize the model. You want to make it smaller until you can see a grid area underneath it. A good size seems to be around 2.75 empty grid squares around the largest dimensions.
At this point, your model should be the right size. However, it may not be facing the correct way. From the Top view, you should be looking down on the top of your model. However, when using the Front view, I have found that looking at the back of the model is the correct way around for Configurator. To rotate your model, click the Rotate button and move the mouse. If you hold the shift key while moving the mouse, you have finer control.
Next up, you will want to replicate the materials that you selected when designing the model. I'm not going to go in to detail, but select the part that you wish to edit from the list in the top right of the screen. Below that is a button menu for what you can modify. Find the 3D sphere and click that. There you will find the materials editor, where you can change colours etc.

The final stage before exporting the model is joining all the individual parts. You can still edit things afterwards. But if you don't do this, you will only export the last selected part. First, select all the parts of the 3D model that you want visible in configurator. Click on the triangle to the left of the object name, in the obkect list in the top right of the screen. Hold the shift key to select multiples. Once they're all selected, hold Ctrl and press J. The parts should all now join, and you will see only one object in the list (objects not selected to be joined will of course still be there). If it didn't work, try Ctrl + J again, as sometimes I have had to issue the command twice.
Select you joined object and head to the top menu with File > Export > glTF 2.0 (.glb/.gltf). Select the format glTF Embedded (.gltf), Select the export folder and give it a name should be pretty straight forward. These export settings have worked fine for me.

You can then put the .gltf model in the Configurator /resources/models/ folder, and ammend the code to display the model.
The old .json files was converted to .glTF using this tool