A proxy tool deployed on Deno Deploy that can convert an OpenAI request into an Azure OpenAI request, facilitating use as a backend for various open-source ChatGPTs without the need for servers and free to use.
- Support one-click deployment!
- Compared to Cloudflare Workers, it can be used directly without a proxy.
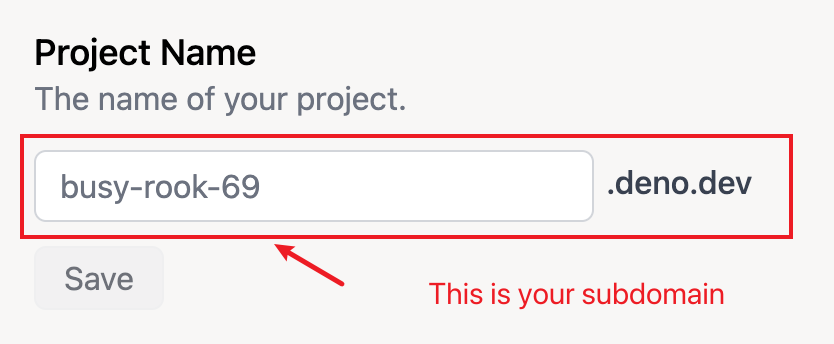
- Support for custom second-level domain names (*.deno.dev) or binding your own domain name.
- Support for typewriter mode of streaming responses.
- Supports mapper, which allows for custom model mapping rules,also supports directly passing through the model name.
- No server required, free online deployment, with a daily limit of 100,000 requests.
- 23.8.3 Update supports GPT-4-32k model.
- 23.6.16 Update to support custom api version, see the specific version on ApiVersion.
- 23.5.30 update apiVersion and improve response speed.
- 23.5.2 Update support fot the embeddings interface, thanks to the amazing Shuenhoy!
- 23.4.27 Update support for setting the values of resourceName and mapper through environment variables, as well as support for one-click deployment.
- 23.4.12 Updated support for mapper model mapping rules
- Click Deploy on Deno(For the first click, you need to log in to Deno Deploy. After logging in, click this link again to proceed with deployment.)
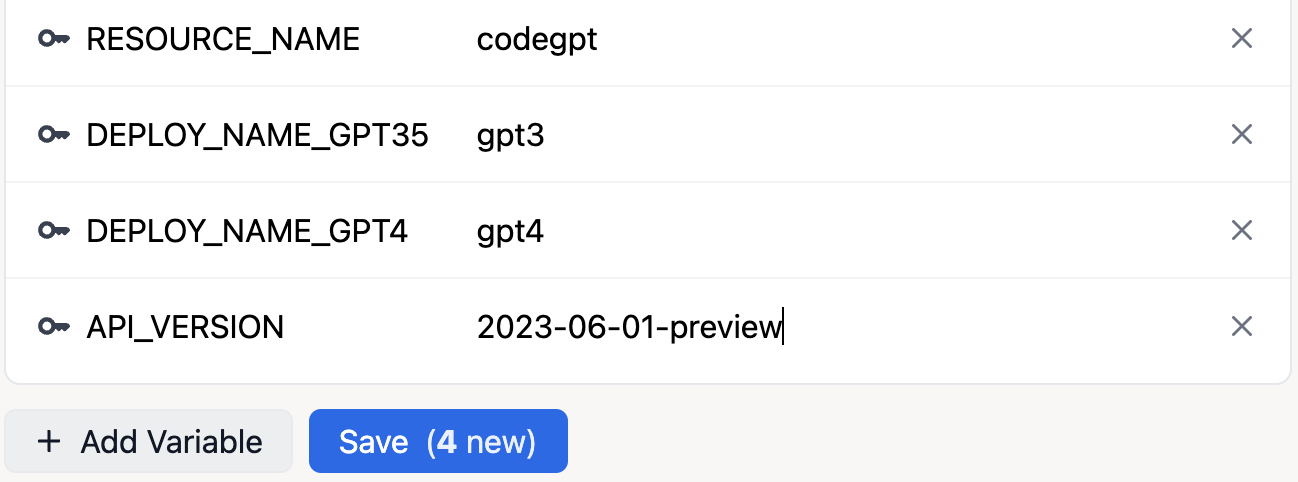
- After deployment, set the environment variables.
- Method for setting environment variables
Without modifying the source code being copied, Click on Add Variable in the Environment Variables section of the project's settings.

- Customize your own subdomain or bind your own domain in the settings of the project.
- Visit https://dash.deno.com/ and register and log in (you can directly use your GitHub account).
- Click "New Project" to create a new project.
- Click "play" on the right side of the code editor to enter edit mode.
- Copy and paste the contents of main.ts from this repository into the editor.
- Adjust the values of resourceName and mapper directly by modifying them or through environment variables.
- Mapper configuration example: If you have deployed the GPT-3.5 Turbo and GPT-4 models on Azure with deployment names 'gpt35' and 'gpt4', respectively, then the mapper should be configured as follows.
Other map rules can be continued directly in this format.
const mapper:any = {
  'gpt-3.5-turbo': 'gpt35',
  'gpt-4': 'gpt4'
};
- Click "save and deploy" to save and deploy the project.
- Customize your own secondary domain or bind your own domain in the project settings.
Fill in your custom subdomain or bound domain in the GPT API project you're using, select a model that has been set up with a mapper and fill in your own Azure OpenAI key in the API key field to use.
MIT
If you have any questions, please feel free to raise an issue. If you find this project helpful, we welcome your star!
Inspired by https://github.com/haibbo/cf-openai-azure-proxy