Note
If you discover issues with custom builds or are not using the provided binaries in the releases page, make sure you inform in the issue of what you modified in the sketch. If it's a general firmware issue, see if it happens in the precompiled builds first.
If you're using Arduino IDE for the first time, the setup is relatively simple:
- Install the Arduino IDE for your system (or for Linux users, from your system's package manager)
- Windows users, install the USB drivers when prompted.
- Once installed, open Arduino, and from the top bar, click on File -> Preferences.
- In the Preferences window, the Additional Boards Manager URLs path should be empty. Copy and paste this string:
https://adafruit.github.io/arduino-board-index/package_adafruit_index.json,https://github.com/SeongGino/arduino-pico/releases/download/3.6.1-fix/package_rp2040_fix_index.jsonand paste it in there. Click OK to confirm. - Back in the main window, go to Tools -> Board: {some board name} -> Boards Manager (IDE 1.8.x) || select Board Manager from the sidebar (IDE 2.x) and install the latest version of
Adafruit SAMD Boards(for M0/M4) andRaspberry Pi Pico/RP2040 (Fix) - Go to Tools -> Manage Libraries... (IDE 1.8.x) || select Library Manager (IDE 2.x), and install
Adafruit DotStar,Adafruit NeoPixel, &Adafruit SPI Flash.
Warning
If you're building for RP2040 (and thus are using the provided "fixed" core above), remove the Adafruit TinyUSB Library if it's installed as a dependency! Having the TinyUSB library will unfortunately override the fixed version provided in the core, which will cause board freezes when serial communication is happening!
- Under Tools, make sure to select your board of choice, and set the compiler optimize level to
Faster (-O3)/Optimize Even More (-O3)and set the USB stack to(Adafruit) TinyUSB.- Linux users should have their user in the
uucpgroup. If not, add oneself to it (sudo usermod -a -G uucp username), then relogin to see the board's serial port.
- Linux users should have their user in the
Extract the SamcoEnhanced and libraries folders from the source repository/releases into your Arduino sketches folder. Defaults are:
- Windows:
Documents\Arduino - Linux:
~/Arduino
Now just go to File -> Open, and load SamcoEnhanced.ino.
The sketch has build configurations for various boards in the top section of SamcoEnhanced.ino, mostly to accomodate different boards' layouts, sizes, and exposed I2C Clock/Data lines.
Tactile extras can be defined/unset by simply (un)commenting the respective defines.
If your gun is going to be hardset to player 1/2/3/4 e.g. for an arcade build, change #define PLAYER_NUMBER to 1, 2, 3, or 4 depending on what keys you want the Start/Select buttons to correlate to. Remember that guns can be remapped to any player number arrangement at any time if needed by sending an XR# command over Serial - where # is the player number.
Since v2.0-rev1 (That Heart, That Power), these parameters are easily found and can be redefined in the sketch configuration area - just above the PLAYER_NUMBER indicator!
#define MANUFACTURER_NAME "3DP"
#define DEVICE_NAME "GUN4ALL-Con"
#define DEVICE_VID 0x0920
#define DEVICE_PID 0x1998
You may change these to suit whatever your heart desires - though the only parts necessary to change for multiplayer are the DEVICE_VID and DEVICE_PID pairs. Then, just reflash the board!
Remember that the sketch uses the Arduino GPIO pin numbers; on many boards, including the Raspberry Pi Pico and the Adafruit Itsybitsy RP2040, these are the silkscreen labels on the underside of the microcontroller (marked GP00-29). Note that this does not apply to the analog pins (A0-A3), which does work and map as expected if used in lieu of GPIO numbers. Refer to this interactive webpage for detailed information on the Pico's layout, or Adafruit's learn page for their board.
The default button:pins layout used is as follows (aside from the power pins and the camera, you may deviate from this as much as desired so long as that's reflected in the sketch!):
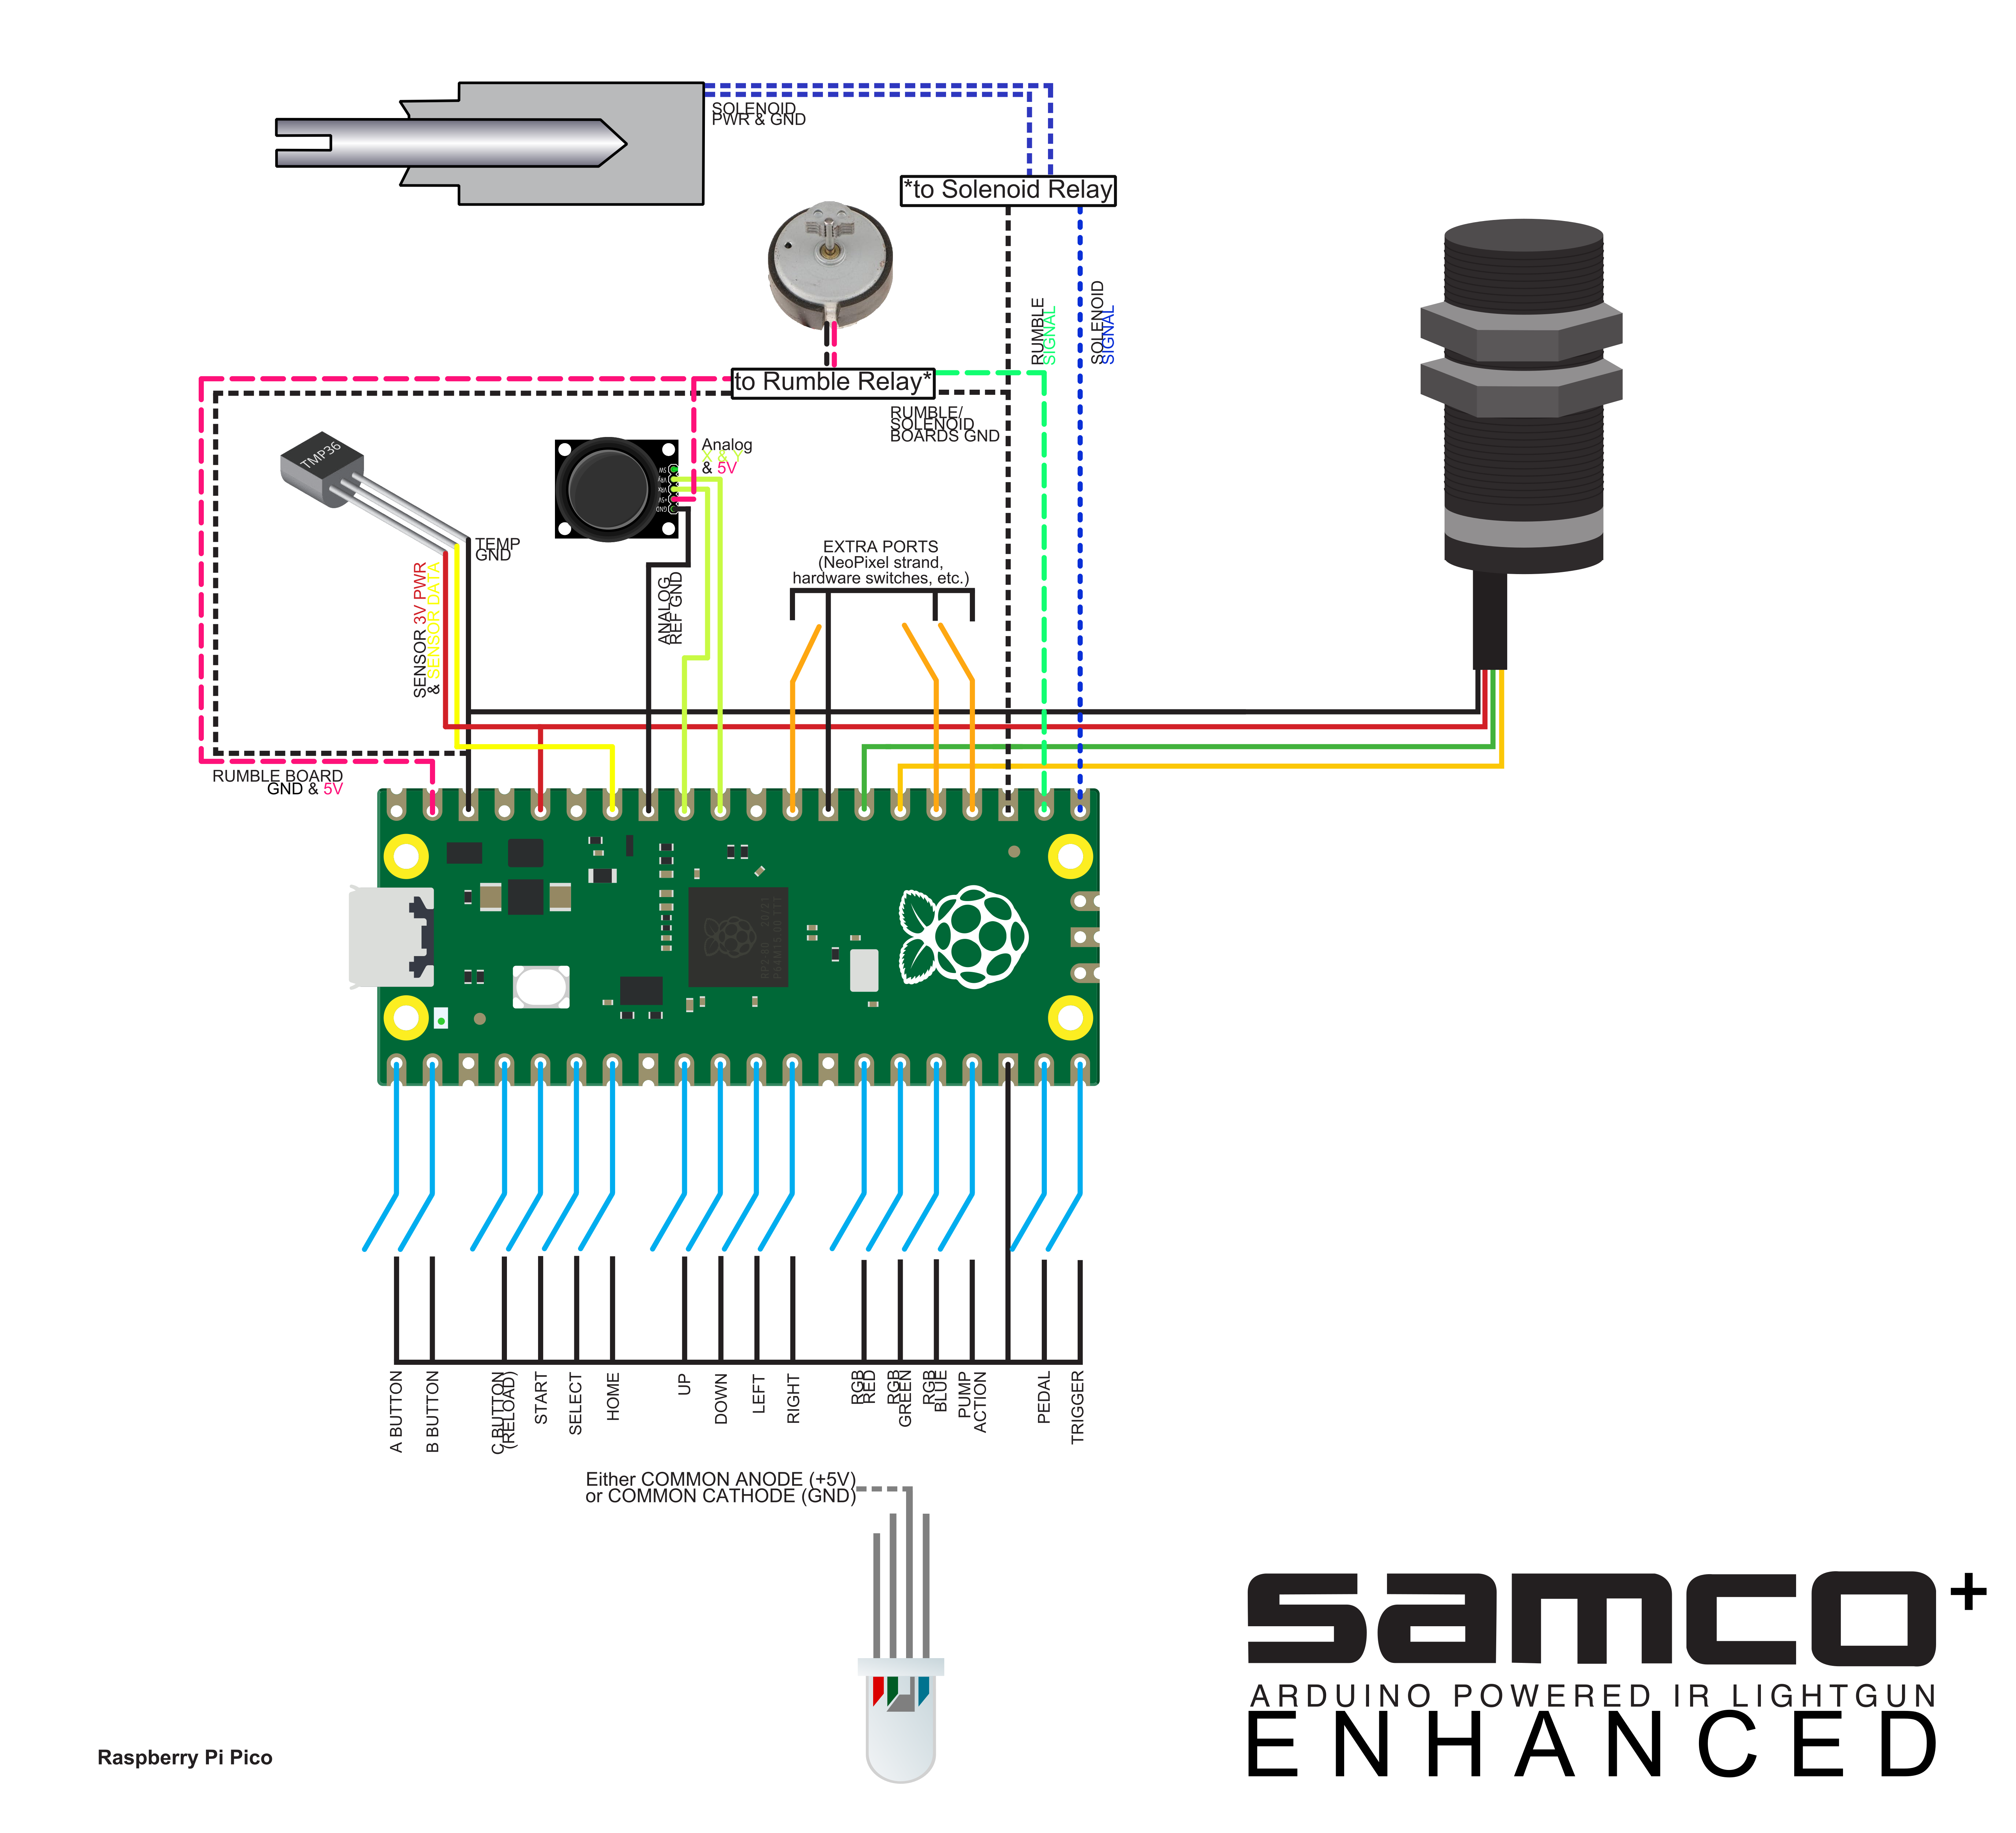

Also remember that the pins layout can be changed at runtime by pulling saved values from EEPROM, which will take priority if custom pins mode is enabled.
Once the sketch is configured to your liking, plug the board into a USB port, click Upload (the arrow button next to the checkmark) and your board will reconnect a few times until it's recognized as a combined mouse/keyboard/gamepad device!