This document guide you to setup AAD and Azure Bot Service, which are the pre-requisites steps to enable Bot SSO.
This step will create an AAD app, it will be reused wherever it needs AAD throughout this sample to simpler the steps.
-
Navigate to Azure App Registration Blade
-
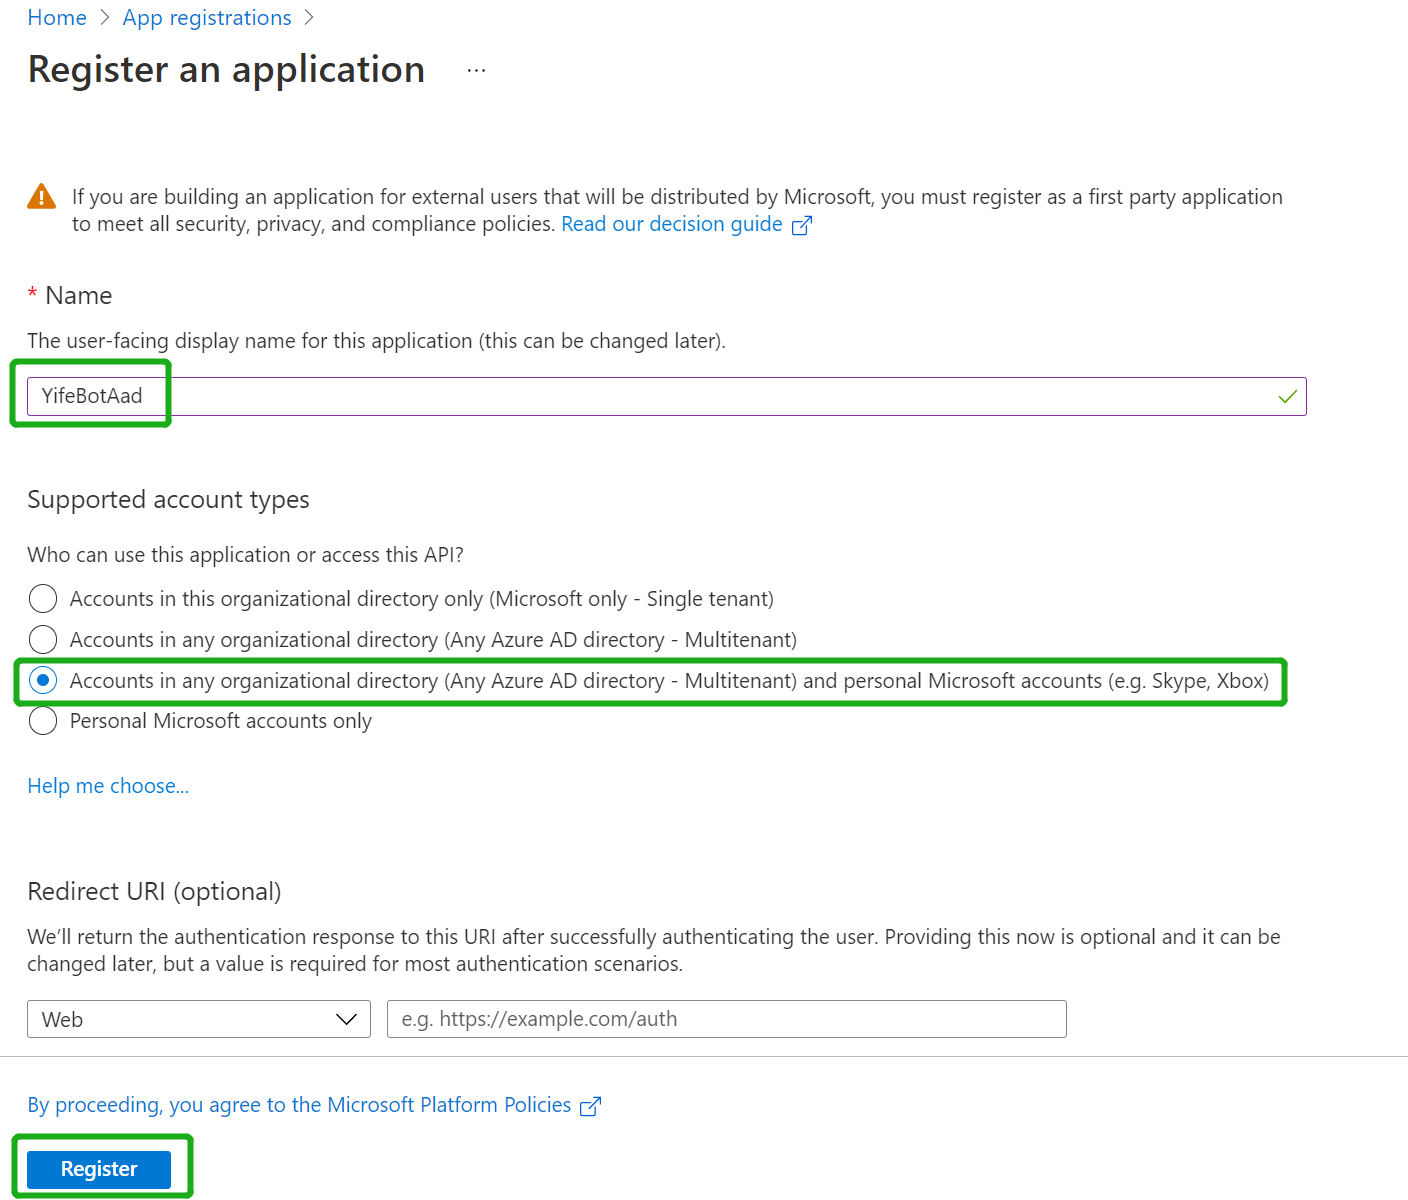
Click "New Registration" on the upper left corner
-
Fill out name and select third option for supported account type
-
Set Redirect Uri to "https://token.botframework.com/.auth/web/redirect" and click "Register":
-
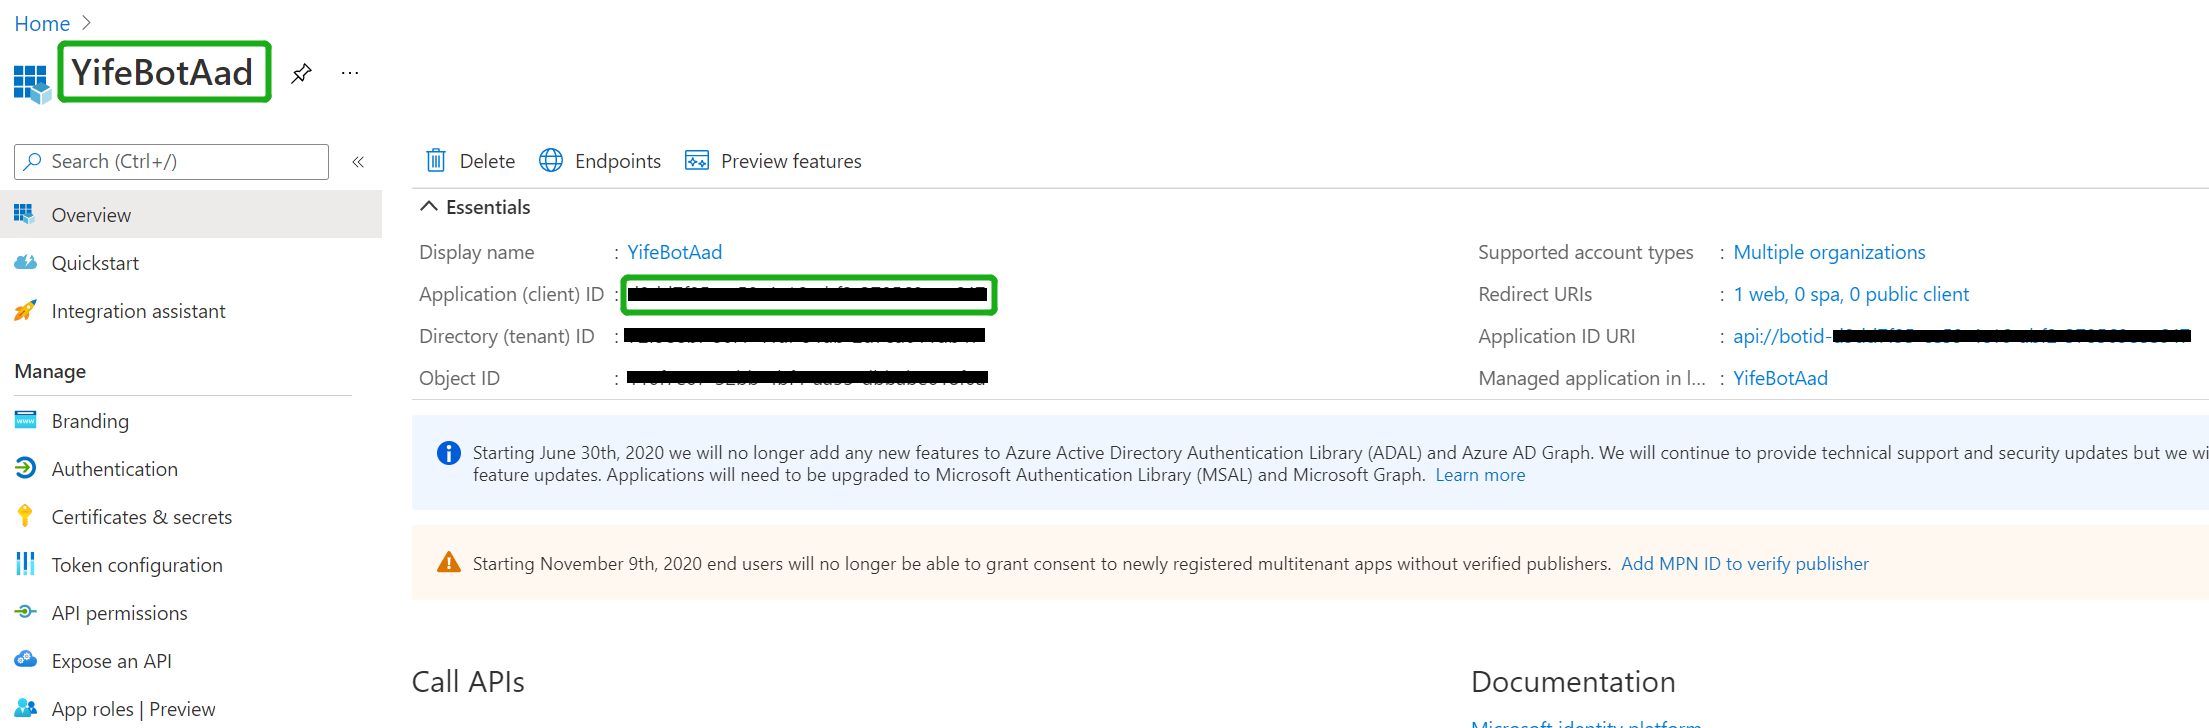
Navigate to the AAD app you just created, copy and paste the Application ID(will referred as AppId in this document) somewhere safe. You'll need it in a future step:
-
Navigate to the "Certificates & secrets" blade and add a client secret by clicking "New Client Secret"
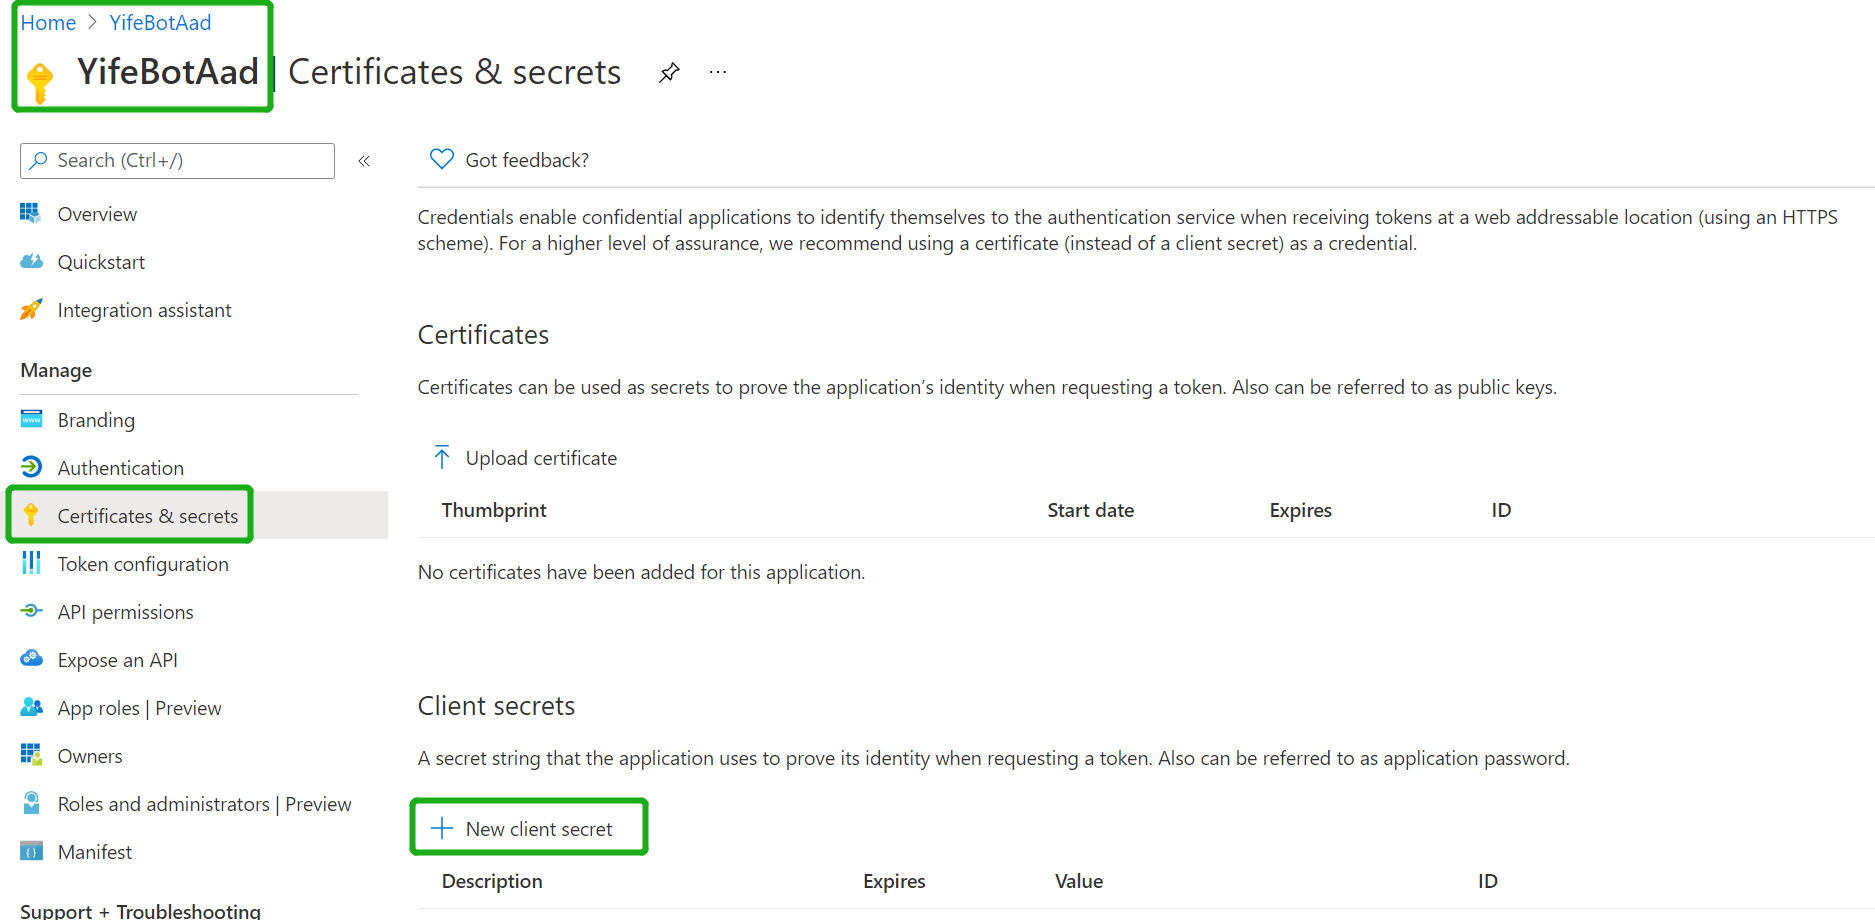
- Copy and paste the secret value somewhere safe. You'll need it in a future step
-
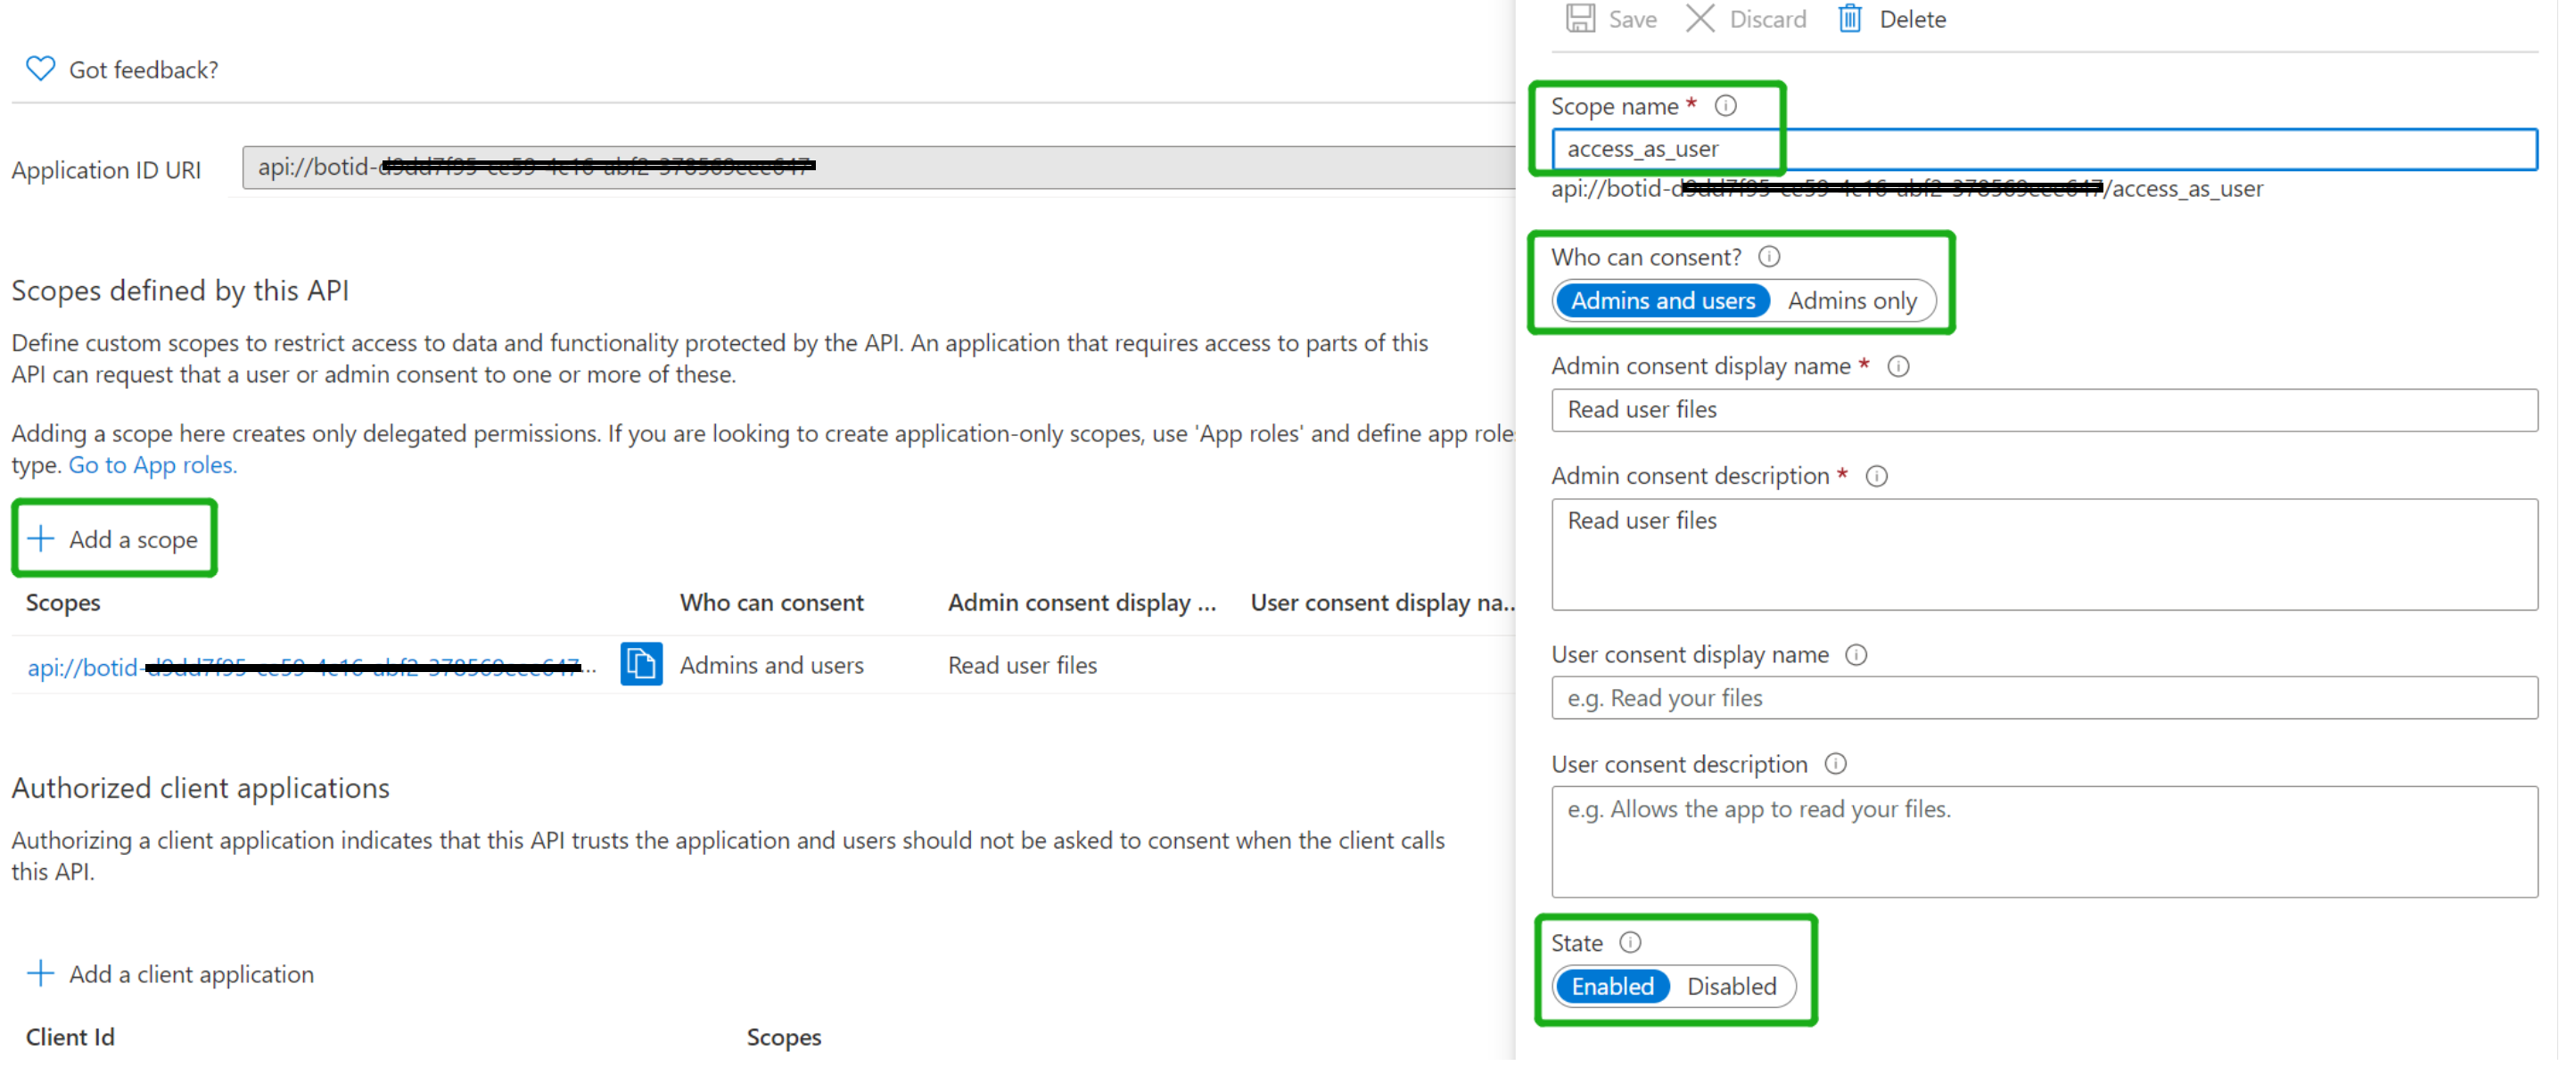
Click "Expose an API" in the left rail
-
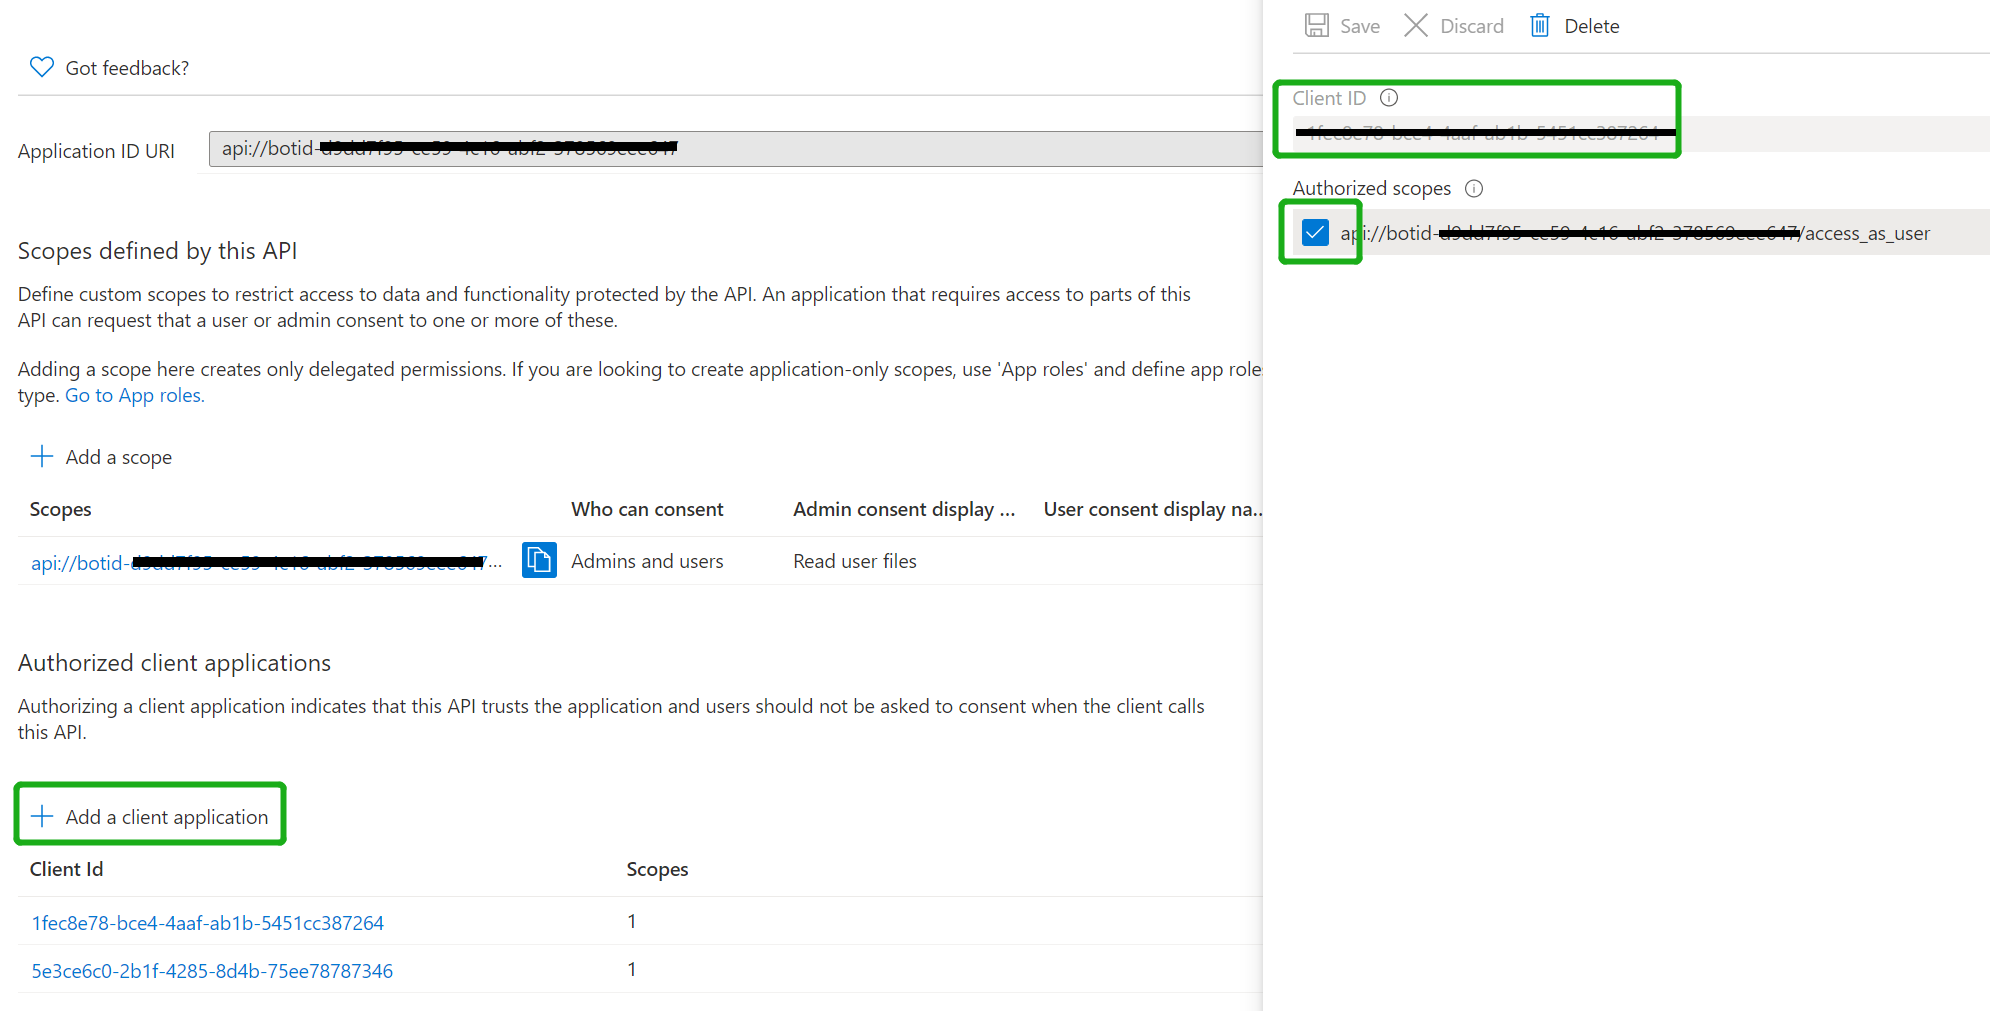
Set your Application ID URL to include your bot id - api://botid-, where is the id of the bot that will be making the SSO request and found in your Teams Application Manifest, which is the same you create and saved in step1.1:

-
Click "Add a scope"
-
access_as_user as the Scope name.
-
Set Who can consent? to Admins and users
-
Fill in the fields for configuring the admin and user consent prompts with values that are appropriate for the access_as_user scope. Suggestions:
-
Admin consent display name: Teams can access the user’s profile
-
Admin consent description: Allows Teams to call the app’s web APIs as the current user.
-
User consent display name: Teams can access your user profile and make requests on your behalf
-
User consent description: Enable Teams to call this app’s APIs with the same rights that you have
-
-
Ensure that State is set to Enabled
-
Click on Add scope button (Note: The domain part of the Scope name displayed just below the text field should automatically match the Application ID URI set in the previous step, with /access_as_user appended to the end)
-
-
Add the following Ids as authorized clients for your application
-
1fec8e78-bce4-4aaf-ab1b-5451cc387264 (Teams mobile/desktop application)
-
5e3ce6c0-2b1f-4285-8d4b-75ee78787346 (Teams web application)
-
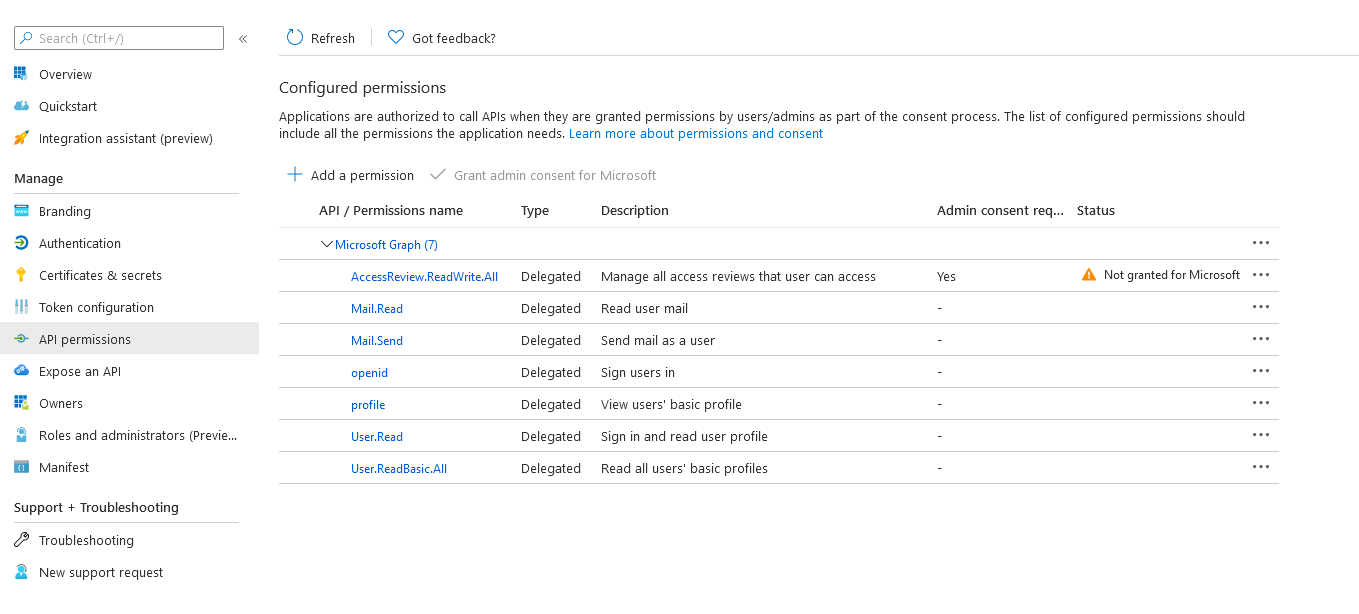
Navigate to "API permissions" blade on the left hand side
-
Add any user delegated permissions that your app will need to downstream APIs. This quick start only requires User.Read.
-
Navigate to "Authentication"
-
Check the Access tokens and ID tokens boxes and click on Save button.
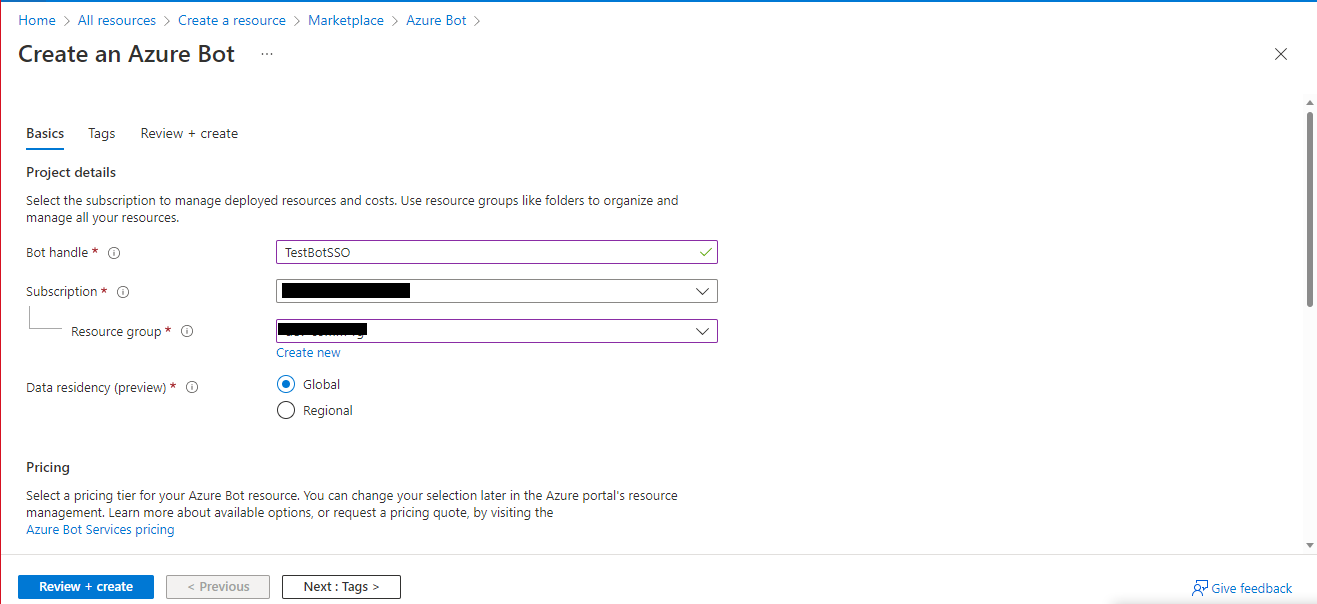
ngrok http 3978 --host-header="localhost:3978"Create Azure Bot resource in Azure
-
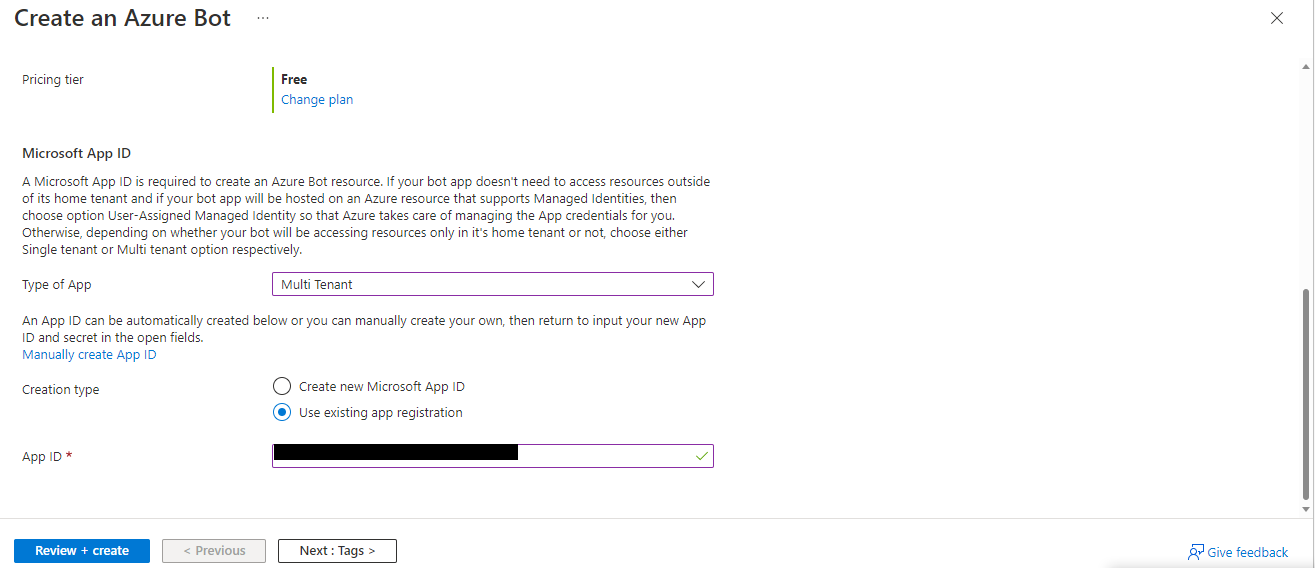
Select Type of App as "Multi Tenant" or as per your need
-
Select Creation type as "Use existing app registration"
-
Use the copied AppId from the above step and fill in AppId.
-
Click on Create on the Azure bot.
-
Go to the created resource, navigate to channels and ensure that you've enabled the Teams Channel
-
Go to the created resource, navigate to and update the "Messaging endpoint", use the current
httpsURL you were given by running ngrok. Append with the path/api/messages: -
For "Microsoft App ID and password", click "Create New", fill in the AppId and client secret you created in step1.1 and step 1.2:
-
After you select Create, it will take a few moments for your bot service to be provisioned. Once you see a notification indicating the validation process is complete, navigate back to Home > Bot Services to find your bot. You may have to refresh the page to see your bot listed.
-
Ensure that you've enabled the Teams Channel
-
In the Azure Portal, navigate back to the Azure Bot resource created in Step 2
-
Switch to the "Settings" blade and click "Add Setting" under the OAuth Connection Settings section
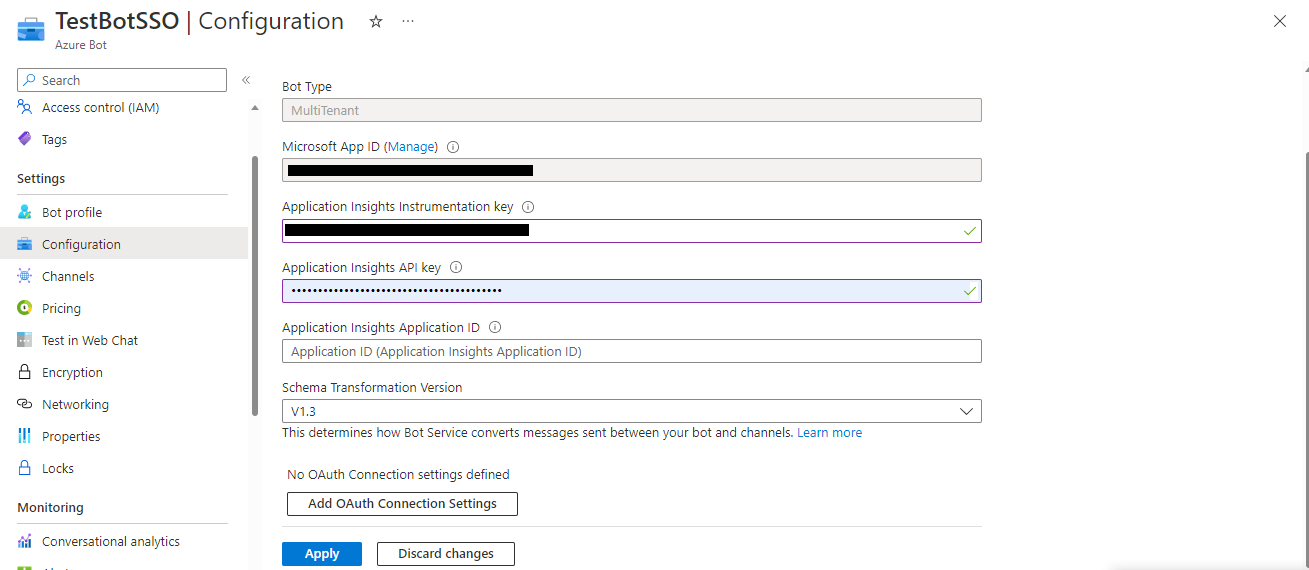
-
Fill out the Connection Setting form
-
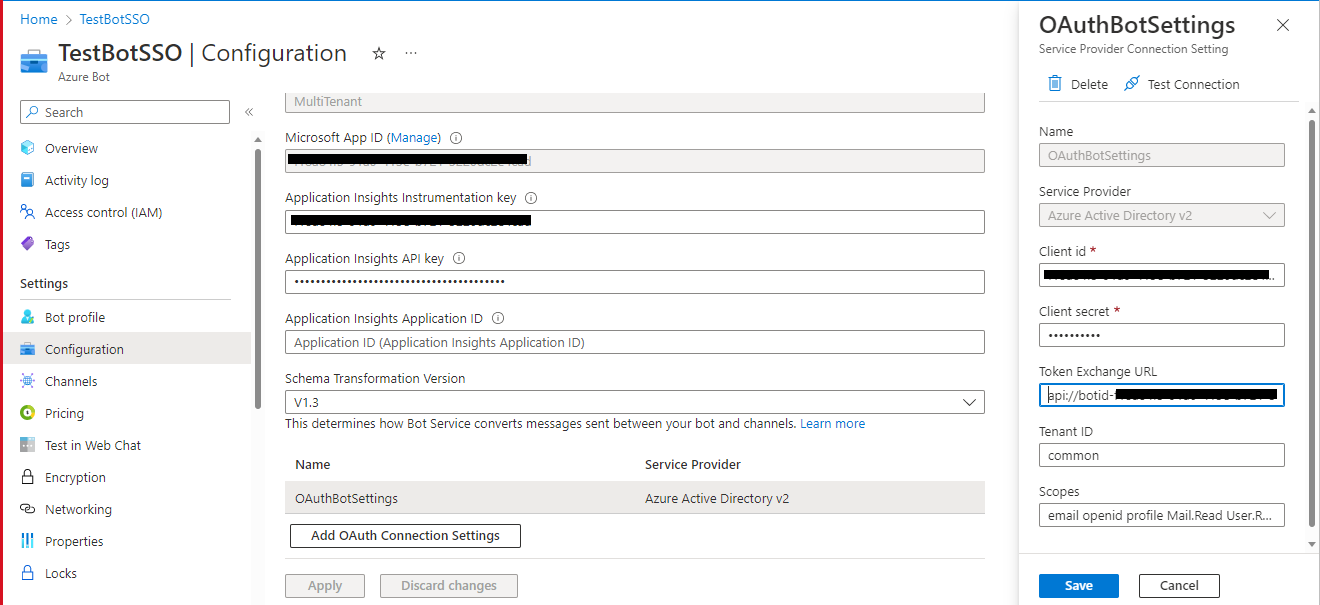
Enter a name for your new Connection setting. This will be the name that gets referenced inside the settings of your bot service code in step 5
-
In the Service Provider dropdown, select Azure Active Directory V2
-
Enter in the client id and client secret obtained in step 1.1 and 1.2
-
For the Token Exchange URL use the Application ID URL obtained in step 1.3
-
Specify "common" as the Tenant ID. If you are using Single Tenant app registration then set your tenant Id where the bot is registered.
-
Add all the scopes configured when specifying permissions to downstream APIs in step 1.3
-
Click "Save"
-