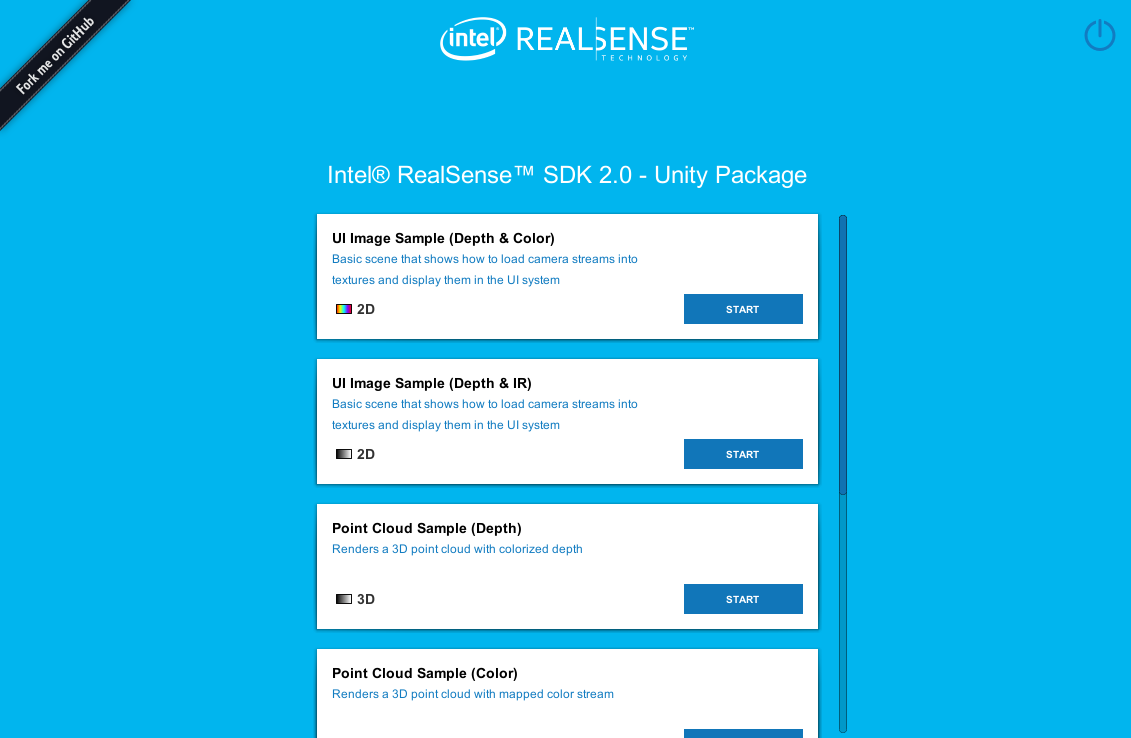
Download realsense.unitypackage and go to
Assets > Scenes > Start Hereto see the home screen above
The Unity wrapper for RealSense SDK 2.0 allows Unity developers to add streams from RealSense devices to their scenes using provided textures. We aim to provide an easy to use prefab which allows device configuration, and texture binding using the Unity Inspector, without having to code a single line of code. Using this wrapper, Unity developers can get a live stream of Color, Depth and Infrared textures. In addition we provide a simple way to align textures to one another (using Depth), and an example of background segmentation.
The Unity wrapper for RealSense SDK 2.0 examples have been designed and tested with Unity 2017-2020 versions no higher than 2020.1.8f1. Working with newer versions may require code changes.
The Unity wrapper depends on the C# wrapper provided by the RealSense SDK 2.0. At the end of this step, the Unity project will be available in the CMake output folder:
-
Generate the VS solution using cmake (run from librealsense root dir):
mkdir build
cd build
cmake .. -DBUILD_CSHARP_BINDINGS=ON -DBUILD_UNITY_BINDINGS=ON -DBUILD_SHARED_LIBS=ON \
-DDOTNET_VERSION_LIBRARY=3.5 -DCMAKE_GENERATOR_PLATFORM=x64 \
-DUNITY_PATH=<path_to_unityeditor>/Unity.exe
-
The file 'realsense2.sln' should be created in 'build' folder, open the file with Visual Studio, C# examples and library will be available in the solution under 'Wrappers/csharp'.
-
Build Intel.RealSense project, this step will build both the native library and the .NET wrapper and will copy both DLLs to the Unity project Plugins folder.
-
In case Unity is installed and activated, a Unity package should be created at build/<configuration>/realsense.unitypackage. This file can be imported by the Unity editor. If Unity is not installed or activated a Unity project folder will still be avilable at 'build/wrappers/unity'.
NOTE: Unity requires that manage assemblies (such as the C# wrapper) are targeted to .NET Framework 3.5 and lower. The .NET wrapper provides assemblies for multiple targets, one of which is .NET 3.5 (net35).
The Unity wrapper provides several example scenes to help you get started with RealSense in Unity. Open one of the following scenes under unity/Assets/RealSenseSDK2.0/Scenes (Sorted from basic to advanced):
- Start Here - A menu that concentrate all the sample scenes into one place.
- Textures Depth and Infrared - Basic 2D scene demonstrating how to bind textures to a RealSense device stream. The Scene provides 2 live streams and 2 different textures: Depth and Infrared.
- Textures Depth and Color (Only cameras with RGB sensor are supported) - Basic 2D scene demonstrating how to bind textures to a RealSense device stream. The Scene provides 2 live streams and 3 different textures: Depth, Color and Color with background segmentation.
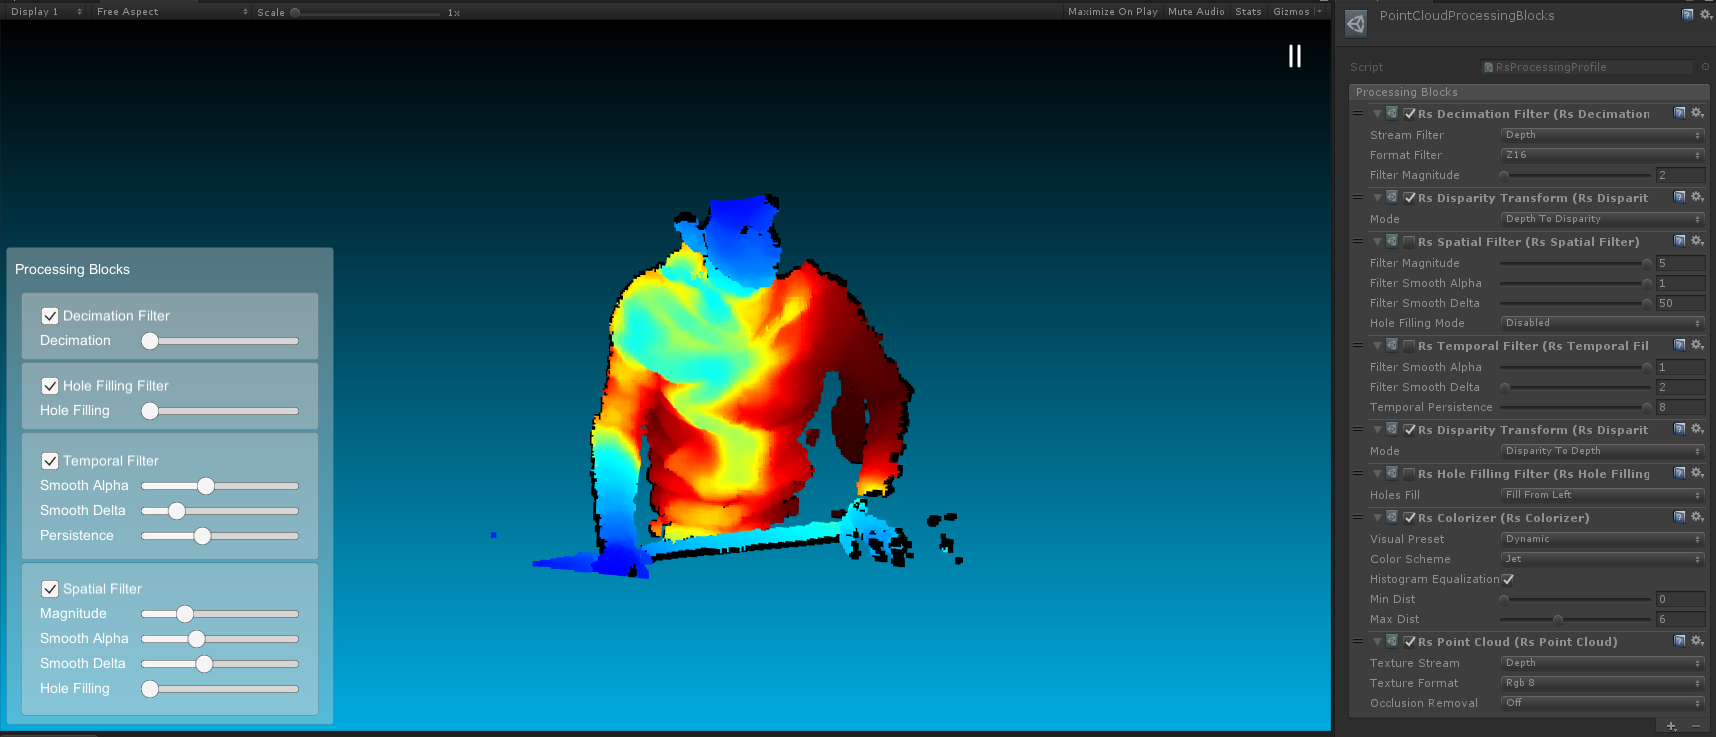
- PointCloud Processing Blocks - 3D scene demonstrating both processing block usage and capabilities and binding a PointCloud prefab to RealSense device depth stream.
- PointCloud Depth and Color - 3D scene demonstrating how to bind a PointCloud prefab to RealSense device depth and color streams.
- Alignment - 2D scene demonstrating the usage of the alignment processing block.
- AR Background - 2D scene demonstrating augmented reality capabilities (Not available in Unity 2020).
The RealSenseDevice provides an encapsulation of a single device connected to the system. The following image displays the RealSenseDevice script:
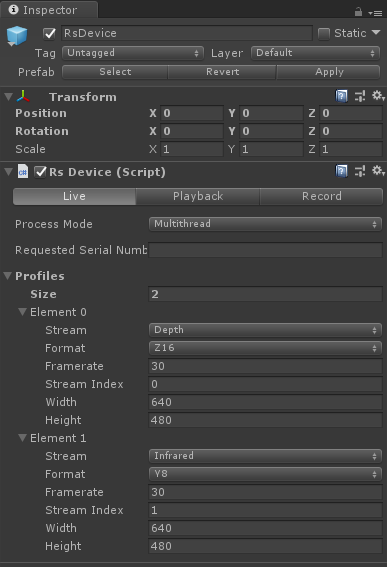
This option indicates which threading model the user expects to use.
- Multithread - A separate thread will be used to raise device frames.
- UnityThread - Unity thread will be used to raise new frames from the device.
Note that this option affects all other scripts that do any sort of frame processing.
The device is configured the same way that a Pipeline is, i.e. with a Config. In order to make it available via Unity Inspector, a Profiles object is exposed for each RealSenseDevice. When Starting the scene, the device will try to start streaming the requested profiles (Pipeline.Start(config) is called).
Upon starting the device, the device will begin raising frames via its OnNewSamplepublic event. These frames are raised either from a separate thread or from the Unity thread, depending on the user's choice of Process Mode.
In addition to stream configuration, the panel also allows users to select a specific device by providing its serial number. Setting the profile count to 0 will fall to the default configuration of the device.
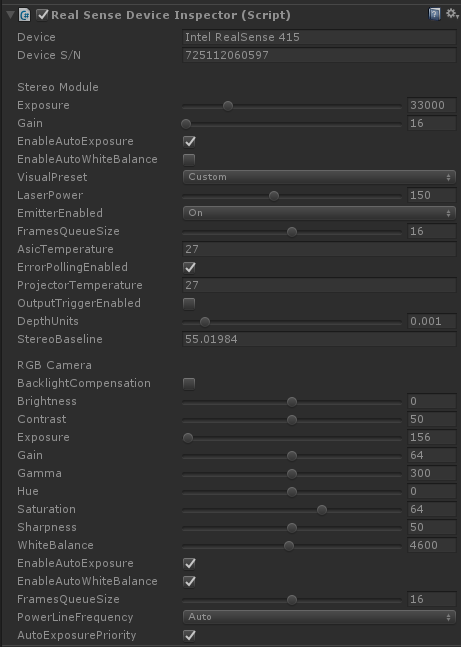
Once the device is streaming, Unity Inspector will show the device's sensors and allow controlling their options via the GUI under the RealSenseDeviceInspector script. Changing these options affect the sensor directly on runtime:
Under the RsDeivce object in Unity's Hierarchy view, you can find a number of textures that are binded to a 'RsFrameProvider' (RsDevice or RsProcessingPipe) frame callbacks and allow a texture to be updated upon frame arrival.
Each texture stream is associated with the RealSenseStreamTexture script which allows user to bind their textures so that they will be updated with each new frame. The following screenshot displays the configurations available for users when using a texture stream:
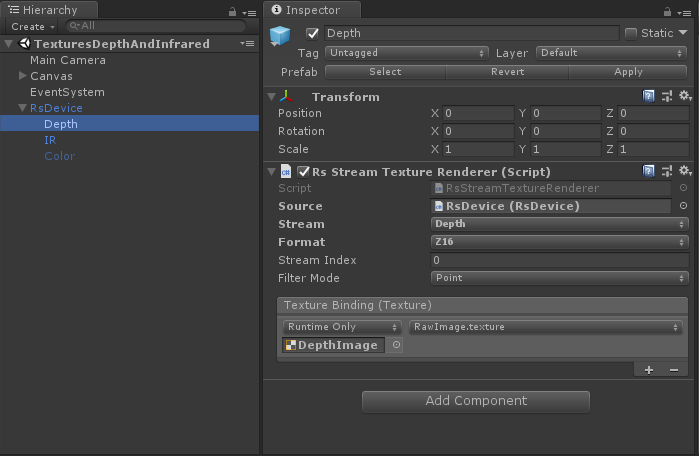
- Source - Select the requested RsFrameProvider
- Stream / Format / Index - Filter out frames that doesn't match the requested profile. Stream and Format must be provided, the index field can be set to 0 to accept any value.
- Texture Binding - Allows the user to bind textures to the script. Multiple textures can be bound to a single script.
The 'RsProcessingPipe' prefab use the 'RsProcessingProfile' asset to attach a set of processing blocks to a 'RsFrameProvider' (RsDevice or RsProcessingPipe). Each processing block has its own properties that can be modified on run time.
A processing profile can be created as shown below:
Create a new processing profile
Attach the processing profile to the RsProcessingPipe prefab
Add and configure processing blocks
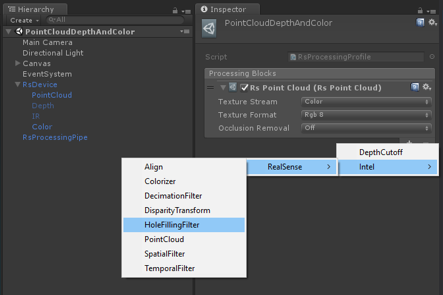
An example for the usage of the processing blocks can be found in "PointCloudProcessingBlocks" scene and "AlignmentSample" scense.
Under the RealSenseDeivce object in each of the point cloud sample scenes, you can find PointCloud object that provides a 3D point cloud of the depth data.
The PointCloud object uses the PointCloudGenerator.cs script.
A texture for the point cloud can be provided using RealSenseStreamTexture.cs by binding it to PointCloudMat.


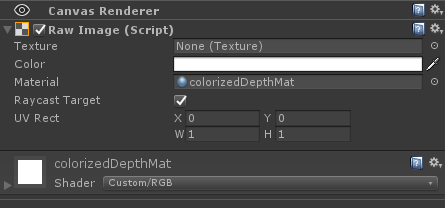
The Unity wrapper comes with a set of Unity Materials alongside matching Shaders to provide users with textures created from the device's frames: