Many consumer-facing applications allow creators to upload audio files as a part of the creative experience. If you’re running an application with a similar use case, you may want to extract the text from the audio file and then classify based on the content. For example, you may want to categorize content or add appropriate tags for search indexing. The process of having humans listening to content is problematic if you have a large volume of content. Having users supplying their own tags may also be problematic because they may not include all useful tags or they may tag inaccurately.
Through the use of machine learning, you can build an automated categorization pipeline. This solution describes an approach to automating the review process for audio files using machine learning APIs.
This example only supports the encoding formats currently supported by the Speech API.
If you try to use .mp3 or another file type, then you may need to perform preprocessing to convert your file into an accepted encoding type.
The solution involves creating five GCS buckets using default configuration settings. Because of
this, no object lifecycle management policies are
configured. If you would like to specify different retention policies you can enable
this using gsutil while following the deployment process.
During processing, audio files are moved between buckets as they progress
through various stages of the pipeline. Specifically, the audio file should first be moved to the
staging bucket. After the Speech API completes processing the file, the audio file is moved from
the staging bucket to either the processed or error bucket, depending on whether the Speech
API returned a success or error response.
- Open a Linux terminal window or Cloud Shell, and enter the following to configure your desired project id.
export PROJECT=[project_id]
- Create a new GCP project
gcloud config create project $PROJECT
- Set your terminal to use that project
gcloud config set project $PROJECT
Step 1: Deploy the App Engine frontend
Step 2a: Use gcloud for remaining resources
Step 2b: Use terraform for remaining resources
Step 3: View Results
- In your terminal type the following to clone the professional-services repository:
git clone https://github.com/GoogleCloudPlatform/professional-services
- Change directories into this project
cd examples/ml-audio-content-profiling/
cd app
2a. Compile the angular frontend application. Note that this requires installing Angular on your device and compiling the output.
npm install -g @angular/cli
cd angular/
npm install
ng build --prod
cd ..
2b. There is also an Open Sourced moderator UI
which contains detailed features for sorting through results from the Perspective API. Note that
this will not display any results from the NLP API or a transcript itself, but you may add in these
additional features if you wish. This is an alternative to the frontend in the app folder in this
repository.
- Deploy the application.
gcloud app deploy
You will be prompted to use a region to serve the location from. You may pick any region, but you cannot change this value later.
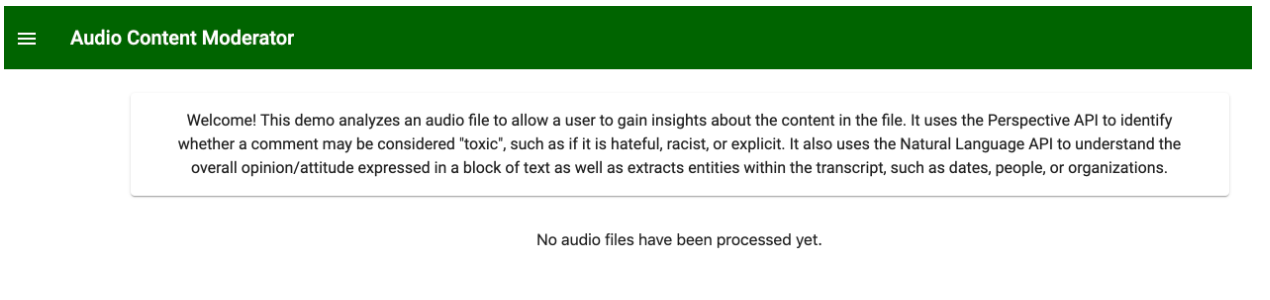
You can verify that the app was deployed correctly by navigating to
https://$PROJECT.appspot.google.com. You should see the following UI:
gcloud services enable language.googleapis.com
gcloud services enable speech.googleapis.com
gcloud services enable cloudfunctions.googleapis.com
gcloud services enable commentanalyzer.googleapis.com
gcloud services enable cloudscheduler.googleapis.com
- Change directories to be at the root directory again.
cd ..
- Create PubSub topic named stt_queue
export TOPIC_NAME=stt_queue

gcloud pubsub topics create $TOPIC_NAME
- Create subscription to stt_queue topic
export SUBSCRIPTION_NAME=pull_stt_ids

gcloud pubsub subscriptions create $SUBSCRIPTION_NAME --topic=$TOPIC_NAME
- Generate a static UUID that you will need in each of your bucket names to ensure that they are unique.
3a. First install uuidgen. If it is already installed or if you are using Cloud Shell, skip this step.
sudo apt-get install uuid-runtime
3b. Then generate the random UUID
export STATIC_UUID=$(echo $(uuidgen | tr '[:upper:]' '[:lower:]') | cut -c1-20)
- Create five GCP buckets to hold the output files
export staging_audio_bucket=staging-audio-files-$STATIC_UUID

gsutil mb gs://$staging_audio_bucket
export processed_audio_bucket=processed-audio-files-$STATIC_UUID
gsutil mb gs://$processed_audio_bucket
export error_audio_bucket=error-audio-files-$STATIC_UUID
gsutil mb gs://$error_audio_bucket
export transcription_bucket=transcription-files-$STATIC_UUID
gsutil mb gs://$transcription_bucket
export output_bucket=output-files-$STATIC_UUID
gsutil mb gs://$output_bucket
- Deploy first Cloud Function to Send STT API
Change directories into the send_stt_api_function directory
cd send_stt_api_function/
Deploy function
gcloud functions deploy send_stt_api \
  --entry-point main \
  --runtime python37 \
  --trigger-resource $staging_audio_bucket \
  --trigger-event google.storage.object.finalize \
  --timeout 540s \
  --set-env-vars topic_name=$TOPIC_NAME,error_bucket=$error_audio_bucket
- Deploy second Cloud Function to Read STT API Output
Change directories into the read_stt_api_function
cd ../read_stt_api_function/
gcloud functions deploy read_stt_api \
  --entry-point main \
   --runtime python37 \
   --trigger-resource cron_topic \
   --trigger-event google.pubsub.topic.publish \
   --timeout 540s \
   --set-env-vars topic_name=$TOPIC_NAME,subscription_name=$SUBSCRIPTION_NAME,transcription_bucket=$transcription_bucket,staging_audio_bucket=$staging_audio_bucket,processed_audio_bucket=$processed_audio_bucket,error_audio_bucket=$error_audio_bucket
- Deploy Cloud Scheduler Job
gcloud scheduler jobs create pubsub check_stt_job \
  --schedule "*/10 * * * *" \
  --topic cron_topic \
  --message-body "Check Speech-to-text results"
Note that you can edit the schedule flag to be any interval in UNIX cron. By default, our solution
uses every 10 minutes.
- Deploy Perspective API Function
Change directories into the perspective_api_function directory
cd ../perspective_api_function/
gcloud functions deploy perspective_api \
  --entry-point main \
  --runtime python37 \
  --trigger-resource $transcription_bucket \
  --trigger-event google.storage.object.finalize \
  --timeout 540s \
  --set-env-vars output_bucket=$output_bucket
- Deploy NLP Function
Change directories into the nlp_api_function directory
cd ../nlp_api_function/
gcloud functions deploy nlp_api \
  --entry-point main \
  --runtime python37 \
  --trigger-resource $transcription_bucket \
  --trigger-event google.storage.object.finalize \
  --timeout 540s \
  --set-env-vars output_bucket=$output_bucket
-
Copy
terraform.tfvars.sampleto create theterraform.tfvarsfile. You must input theproject_idinside of the quotes. If you wish to edit any of the other default values for the other variables specified invariables.tf, you may add them in yourterraform.tfvars. -
In your terminal, cd into the
terraform/directory.
cd terraform/
- Enter the following commands, ensuring that there are no errors:
terraform init
terraform plan
terraform apply
yes
All of the resources should be deployed.
-
You can start by trying to upload an audio file in GCS. You can do this using
gsutilor in the UI under the staging bucket. This will triggersend_stt_api_function. This submits the request to the Speech API and publishes the job id to PubSub. -
By default,
read_stt_api_functionis scheduled to run every ten minutes, as configured by Cloud Scheduler. If you want to test it earlier, you can navigate to Cloud Scheduler in the console and click 'Run Now'. This will pull from the PubSub topic to grab any job ids. It then calls the Speech API to see if the job is complete. If it is not complete, it repushes the id back to PubSub. If it is complete, it extracts the transcript from the Speech API response. Finally, it then saves this transcript in GCS in the transcription files bucket. It also moves the audio file from the staging staging bucket to the processed audio bucket. If there were any errors, it moves the audio file instead to the error audio bucket.

-
The upload in the previous step to the transcription files bucket then triggers the other two functions:
perpsective_api_functionandnlp_api_function. Each of these downloads the transcription file from GCS and then calls its respective API with it to receive insight about the probability of toxic content in the file as well as entities mentioned. Each then publishes the response into its respective GCS bucket. -
You can view the result of the entire pipeline by using the deployed App Engine app. Navigate to: https://
[PROJECT_ID].appspot.com. This will present a table of all files that have been uploaded and which already have completed processing through the pipeline. You can click through each file to view the resulting transcript, toxicity, and entity/sentiment analysis.
