Aliro is a platform to help researchers leverage supervised machine learning techniques to analyze data without needing an extensive data science background,and can also assist more experienced users with tasks such as choosing appropriate models for data. Users interact with Aliro via a web interface that allows them to execute machine learning experiments and explore generated models, and has an AI recommendation engine that will automatically choose appropriate models and parameters. Dataset profiles are generated and added to a knowledgebase as experiments are run, and the recommendation engine learns from this to give more informed recommendations as it is used. This allows the AI recommender to become tailored to specific data environments. Aliro comes with an initial knowledgebase generated from the PMLB benchmark suite.
- Docker
- Most recent stable release, minimum version is 17.06.0
- Runtime Memory: (Mac and Windows only) We recommend docker VM to be configured with at least 6GB of runtime memory (Mac configuration, Windows configuration). By default, docker VM on Windows or Mac starts with 2G runtime memory.
- File Sharing: (Windows only) Share the drive that will contain the Aliro directory with Docker by opening Docker Desktop, navigating to Resources->File Sharing and sharing the drive. Docker Desktop File Sharing
- Docker-Compose (Version 1.22.0 or greater, Linux only) - Separate installation is only needed for linux, docker-compose is bundled with windows and mac docker installations
- Download the production zip
Aliro-*.zipfrom the asset section of the latest release- Note that this is different from the source code zip file.
- Unzip the archive
We have built a custom Raspberry Pi OS Image containing Aliro (configured to be up and running as soon as you boot up the Operating System.)
- Raspberry Pi 400
- A computer running Windows 10 or higher
- A Card Reader
- If your computer does not have an integrated card reader, you will need a USB card reader.
- MicroSD Card
- Minimum capacity: 32GB
- Note: There are different speed classes for MicroSD Cards, Application Performance Class 1 (A1) and Application Performance 2 (A2). A2 cards are highly recommended as these are much faster than A1 cards.
- A copy of the aliro-imager.exe
- Insert the MicroSD Card in your card reader.
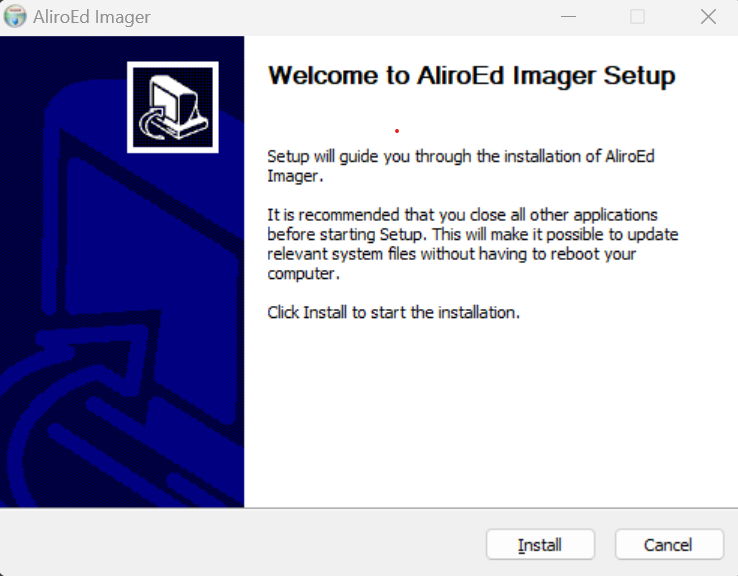
- Double-click the aliro-imager.exe on you computer. If prompted to allow the application to run, select Yes. You may need to enter your computer's Administrator password to continue.
- Follow the prompts to proceed with the installation.
- Once installed, you can run the AliroEd Imager from the Start Menu. When
the program starts up you will see this screen:
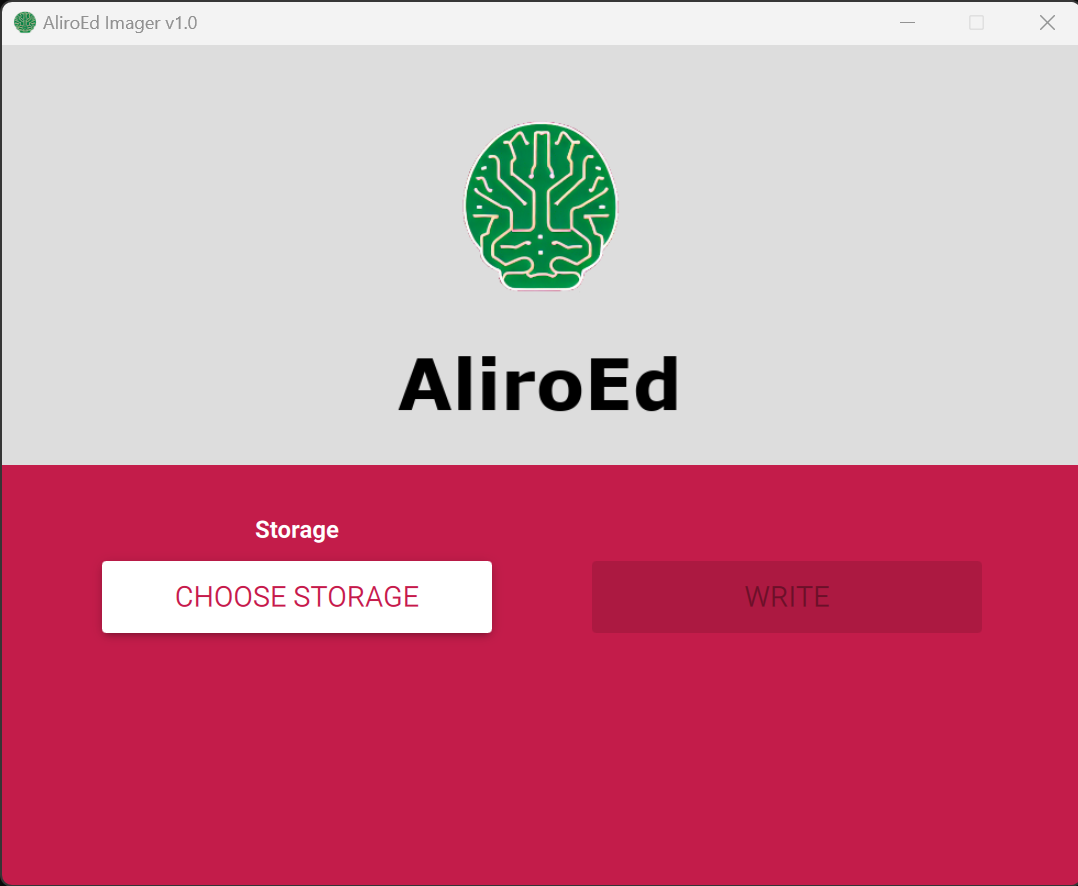
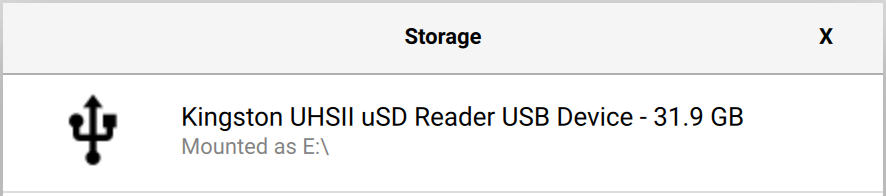
- Click the CHOOSE STORAGE button and select your MicroSD Card from the
popup menu.
- Click the WRITE button to begin writing the Operatying System to your
MicroSD Card.
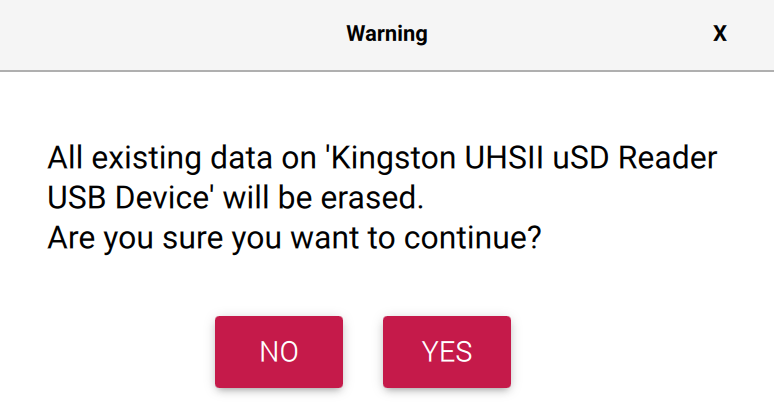
 - Note that this will format your MicroSD Card and all existing data will
be erased. Click Yes at the prompt to proceed.
- Note that this will format your MicroSD Card and all existing data will
be erased. Click Yes at the prompt to proceed.
 - This writing process may take several minutes, the progress will be shown
on the AliroEd Imager.
- This writing process may take several minutes, the progress will be shown
on the AliroEd Imager.
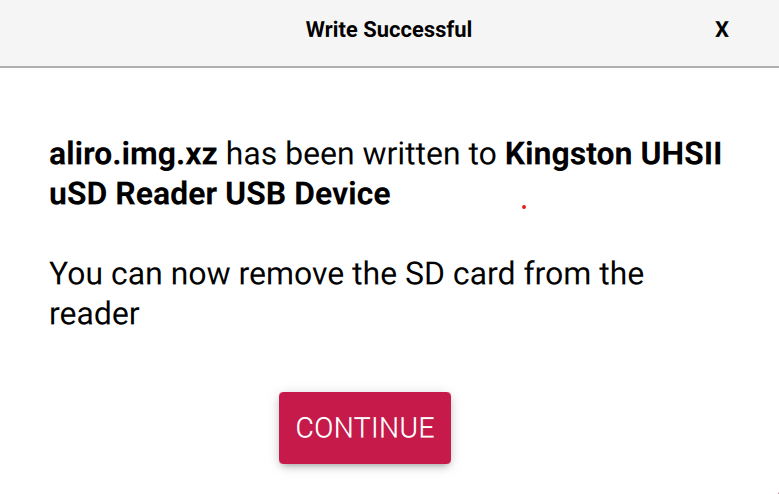
- Insert the MicroSD Card into your Raspberry Pi 400 and start it up.
- When the Operating System has finished starting up, double-click the AliroEd Icon on the Destop or launch the Web Browser.
Now that Aliro is up and running, you are ready to run experiments, AliroEd comes preloaded with some data sets for you to experiment with. Other datasets can be downloaded from the Penn Machine Learning Benchmarks
You may also load your own datasets, please see the following sections below for further instructions:
To start Aliro, from the command line, navigate to the Aliro directory run the
command docker-compose up. To stop Aliro, kill the process with ctrl+c and
wait for the server to shut down. It may take a few minutes to build the first
time Aliro is run.
To reset the datasets and experiments in the server, start Aliro with the
command docker-compose up --force-recreate or run the command
docker-compose down after the server has stopped.
Once the webserver is up, connect to http://localhost:5080/ to access the website. You should see the Datasets page. If it is your first time starting Aliro, there should be a message instructing one to add new datasets.
One can add new datasets using a UI form within the website or manually add new datasets to the data directory. Datasets have the following restrictions:
- Datasets must have the extension .csv or .tsv
- Datasets cannot have any null or empty values
- Dataset values must be numeric. All categorical features must be encoded to a numeric value prior to upload.
- Files must be smaller then 8mb
Some example datasets can be found in the classification section of the Penn Machine Learning Benchmarks github repository.
To upload new datasets from the website, click the "Add new Datasets" button on
the Datasets page to navigate to the upload form. Select a file using the
form's file browser and enter the corresponding information about the dataset:
the name of the dependent column, a JSON of key/value pairs of ordinal
features, for example {"ord" : ["first", "second", "third"]}, and a comma
separated list of categorical column names without quotes, such as
cat1, cat2. Once uploaded, the dataset should be available to use within the
system.
Labeled datasets can also be loaded when Aliro starts by adding them to the
data/datasets/user directory. Aliro must be restarted if new datasets are
added while it is running. If errors are encountered when validating a dataset,
they will appear in a log file in target/logs/loadInitialDatasets.log and
that dataset will not be uploaded. Data can be placed in subfolders in this
directory.
An optional json configuration file can be provided with each dataset to specify the column that contains the label, the prediction type (classification or regression), and any categorical or ordinal features. By default, the label column is assumed to be 'class', the prediction type for the dataset is assumed to be classification, and all fields are numeric.
The coresponding configuration file must be in the same directory as the
dataset. If the file is named myDatafile.*sv, the configuration file must be
named myDatafile_metadata.json
- Example configuration file:
{
  "target_column": "my_custom_target_column_name",
  "prediction_type": "classification",
  "categorical_features": ["cat1", "cat2"],
  "ordinal_features": { "ord": ["first", "second", "third"] }
}To run a classification machine learning experiment, from the click Build New
Experiment page, choose the desired algorithm and experiment parameters and
click 'Launch Experiment'. To start the AI, from the Datasets page click
the AI toggle. The AI will start issuing experiments according to the
parameters in config/ai.config. This file can be modified to change the
recommendation engine being used and how may recommendations the AI will give.
By default, the AI will make 10 recommendations.
From the Datasets page, click 'completed experiments' to navigate to the Experiments page for that dataset filtered for the completed experiments. If an experiment completed successfully, use the 'Actions' dropdown to download the fitted model for that experiment and a python script that can be used to run the model on other datasets. Click elsewhere on the row to navigate to the experiment Results page.
A pickled version of the fitted model and an example script for using that model can be downloded for any completed experiment from the Experiments page.
Please see the Jupiter Notebook script demo for instructions on using the scripts and model exported from Aliro to reproduce the findings on the results page and classify new datasets.
This document explains how to interact with the ChatGPT component. The guide covers the following topics:
- Where to get your OpenAI API key
- How to connect to OpenAI using your API key
- How to use the ChatGPT (Expert)
Before you can start using the ChatGPT component, you'll need an API key from OpenAI. To get one:
- Visit the OpenAI website
- Create an account or log in if you already have one
- Click on your account icon in the top-right corner, then select "View API keys."
- Generate your API key by clicking on "+ Create new secret key."
- Please copy your API key and store it in a secure location.
After obtaining your API key, you can effortlessly connect to OpenAI. Once your machine learning experiment is complete, navigate to the results page to view performance metrics. A popup window will appear, prompting you to enter your OpenAI API key. Upon successful connection, a new popup window will display the message, "Connection to OpenAI is established," and the "Expert" button will turn blue.
Once you click on the blue "Expert" button, a chat interface will appear on the right side of the page.
Settings
At the top of the chat interface, you'll find the "Settings" tab and a "+ New Chat" button. Within "Settings," you can adjust the model, temperature, and define prompt engineering.
Renaming a ChatBox
To rename the first ChatBox to "EDA":
- Double-click the ChatBox to enable editing.
- Type in the new name, for example, "EDA."
- Mouse over the pencil emoji, which will then change to a checkmark.
- Click the checkmark to save the new name.
Creating a New ChatBox
To create a new chatBox:
- Click the "+ New Chat" button.
- Name the new ChatBox following the process outlined in the "Renaming a ChatBox" section.
Removing Chat Tabs
To remove a ChatBox:
- Click on the trash bin emoji associated with that tab.
Code Generation and Editing
To request Python code from ChatGPT, you can ask, for example: "Please write Python code to generate 10 random numbers and print them."
To edit the generated code:
- Double-click the code box.
- Make your changes.
- To save, press the ESC key or click the "Run" button.
Installing New Packages
If you need to install new packages to run the given code, a "Install and Run" button will appear. Clicking this will install the necessary packages and execute the code.
Code Error Handling
When encountering an error while running code, a button labeled "Submit Error" will appear. Clicking this button will prompt ChatGPT to provide an alternative code snippet to resolve the error.