Sample clip mounting holes #103
Comments
|
Hi @jhitesma thanks for getting in touch - clearly I should have tested out those holes on more printers before I pushed them out! they should self tap nicely with M3 screws, and it's odd that we get different results with the same printer! I made a test object at some point to get the size of those holes right, I will see if I can find it as it would be interesting to see what settings work for you. |
|
The nut traps for the dovetail are intended to be optional by the way, which is why they're not in the docs; the holes should be M3 "self tapping" triangles, but I guess those turned out too loose as well. I would be curious to know whether the holes in the motor lugs are the right size - they should self tap with M4 screws. Lastly, the print times in there are probably off because I put them in when I was pushing the printer to go faster (I might even have been using an 0.6mm nozzle). 10 hours is about what I'd expect with 0.2mm layers, I often use 0.3 though, and that prints fine too. |
|
The motor lug holes self tap with M4's just fine. The dovetail also threaded with m3's but did seem a bit loose so I was glad the nuts were there. Same with the holes in the Pi housing base - they self tapped with m3's just fine for me.
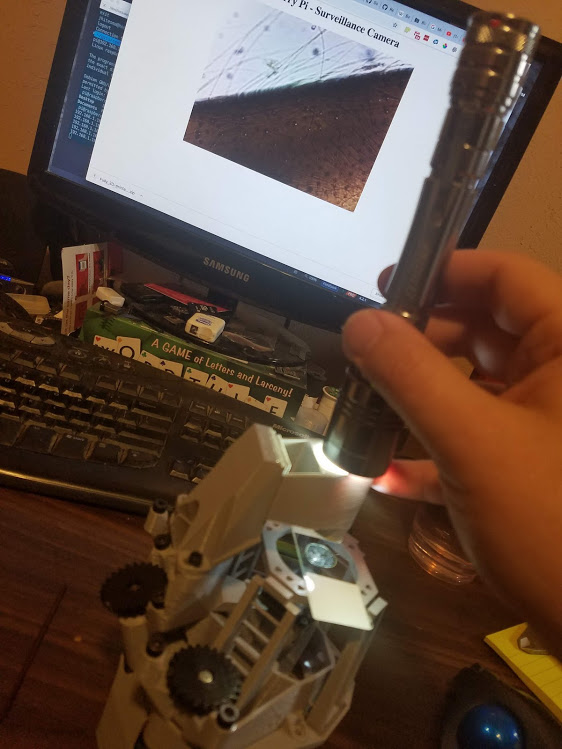
I had the base screws out since I was working on things last night - but they did self tap very nicely. Did some initial tests with it last night after I opened the issue and really happy with it so far, still have to wire up an illumination LED and without the O-rings adjustments are a bit limited but I'm really impressed by what the pi cam optics and your design are capable of so far.
Thanks so much for sharing your design! |
|
One other thing I noticed and had forgot about but remembered last night as I was falling asleep. I didn't have to drill out the actuator holes even though I saw there was a drill guide now included. The M3 screws were a very easy loose fit with no drilling. Not sure if that may be related to the sample clip holes being loose or not but figured it was worth mentioning. |
|
Awesome! Well done :) The drilling jig isn't usually required - only when the holes come out too small (usually due to the printer overextruding a bit). If your holes are, on the whole, coming out a bit large, I would have been quite surprised if you'd needed to drill them. |
|
Scope is working great. I took a look through the code and don't see anything that should cause the holes in the stage to be any larger than any of the other m3 holes. Yet for some reason all the others were able to self-tap with no issues for me so this is really perplexing. All I can think is that since the stage is essentially printed on top of a bridge maybe something in the printing process caused them to come out slightly distorted due to the "shaky foundation". Really impressed with it overall. I'm just using a quick and dirty python script to stream the video out right now and adjusting things manually since I haven't wired up the steppers yet and am running the pi headless. Here's a quick screencap of testing it on a commercial slide of a pine stem: Started experimenting with the openflexure_microscope control script but can't seem to bring up video yet - nothing happens when I hit 'v'. I haven't looked at the code there yet but I'm guessing it may be because I'm using VNC to bring up a remote desktop, so if the video is just fed straight to the HDMI output I won't see it. Kind of liking using it through a webpage like this though. The very slight delay is a bit of a bummer, but it's kind of neat having a web connected microscope :D Letting my parents on the other side of the country and my daughter explore together is pretty cool 👍 |
|
Thanks for posting - that's awesome :) I was going to check the code to see if those holes were accidentally larger, but you've beaten me to it. Thanks! I would expect the bottom of the stage to print a bit funny due to the bridging, but it should be sorted out by the time you get to the top so it does surprise me a bit that those holes are coming out bigger. I've made a little test object (in the repository as well in e3ee8d9) with differently sized holes. If you fancied printing it and letting me know which holes tapped nicely, that would be really helpful. Given that this is now a really nice build report, it might be worth re-raising the original issue about the holes, to publicise the form and test piece, which is currently in a gist because I can't upload it to an issue. |
|
I'll give the test piece a try tonight, I'm really perplexed by it as well. The screw does seem to start to tap just before it bottoms out in those holes on the stage - but just for one or two threads so not enough to hold the clips. (I tried longer screws to confirm I wasn't just using too short of screws - but they didn't bite any better.) Want me to rename this as a build report? Do you want to open a new issue dedicated to the holes or did you want me to do that? |
|
Just shared my first results on the test piece. Everything from 2.6 to 3.2 was usable. Though 3.2 was a little loose and 2.6 was a little tight. But...I need to do a few more tests. I used a different brand of PLA and I accidentally sliced at 0.15mm instead of the 0.2 I used for the scope. Will try with a few different brands of PLA and layer heights. If I get time this weekend (3 day weekend for me so there's a decent chance I'll find time) I may try making a test piece that uses the actual stage from your .scad files but which is just the stage on some short feet. So it would print a lot quicker than the hole scope but would let me see how the stage itself prints in real life. BTW - I really like the idea of the trylinders. Just driving me crazy trying to figure out why the ones on the stage didn't work very well for me. |
|
thanks - that is interesting. For me, the biggest one that worked was 3.2 or 3.4, so it's really not that different. Trying it out on the actual stage would be interesting. I guess it can be worked around (e.g. by drilling out the hole and putting a nut underneath) but that's not very satisfying, and I am a bit mystified. It would be interesting to see if you can reproduce the issue in a stage-shaped test piece. I guess just cropping out the relevant bit from an STL of the microscope might already do it... |
|
Just for the record, the line that makes the holes is definitely trying to make them the same as the others. I know you checked that already, just wanted to give it a second pair of eyes... |
|
Also, I checked a few of my printed bodies - I hadn't noticed before, but the trylinder holes in the stage are definitely looser. Mine just about work, but I think I might just make them 10% smaller on the grounds that it clearly isn't just my printer! I've got a body I printed on the Ultimaker somewhere that I should test as well. |
|
Good to know it's not just me then :D I haven't had time to try and test just a stage yet but it's high on my priority list. Very interesting that apparently it's consistent across printers - I can easily see loosing some precision printing on top of a bridge like that. I just wouldn't have expected it to manifest like this. |
|
The repository is moving to GitLab, and this issue has been migrated. I'll close all the issues here in due course, but am leaving notices on all the currently-open ones. If you head over to the other repository, this issue will be updated there. |
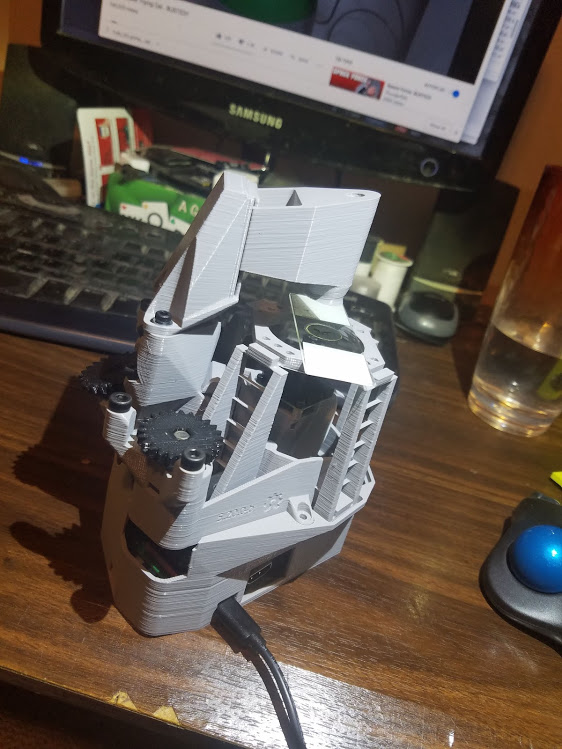
Working on building the 5.2 release. Not sure choosing a beta release as my first try was a great decision but figured why not go with the latest and give some feedback - it's only a few hours of printing if I need to do it again.
So far it's going well and I haven't run into any real issues. All the parts printed well and seem to fit well. Finding suitable O-rings in the US has proven a bit difficult. At least at the local level. I found some at McMaster Carr but they won't be here until Monday and the only ones close I found find in town were too thick and either too big or too small so I may try and find some suitable rubber bands in the meantime so I can try it out this weekend.
There is one issue I just found though and that's the holes for the sample clips to screw into. They're too loose. M3 screws go right in and don't bite into the material at all. But the holes in the clips are too small for M4 screws and M4 screws won't fit into the mounting holes either. All the other hole sizes seem correct just these are way loose for me.
Only other feedback so far is that the docs haven't been updated to mention the nut traps for mounting the dovetail to the main body. Nice addition though! Also the estimated print times in the docs seem quite a bit off. The v5.2 main body (with motor mounts since I have a bunch of 28byj steppers laying around) on my Prusa MK3 with prusa's default 0.2mm settings took 10 hours which is about double what the docs estimate.
The text was updated successfully, but these errors were encountered: