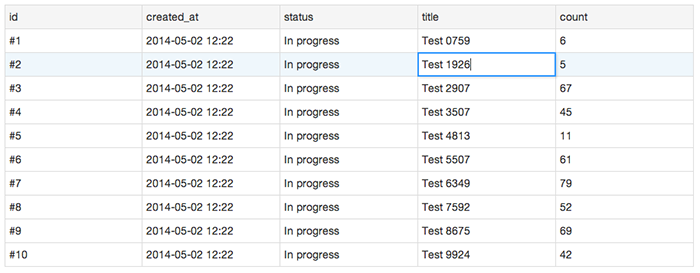
Simple data grid library written in JavaScript. The data grid is part of Datazenit, a web-based database administration tool.
Dependencies: jQuery and underscore.js/lodash. The example in this repository also uses Twitter Bootstrap for default styles.
Demo: http://datazenit.com/static/sensei-grid/examples/index.html
- Simplicity: Sensei Grid will be a single purpose data grid without unrelated functionality.
- Small code base: Bloatware and dirty workarounds/hacks will be avoided as much as possible to keep the code base small and tidy.
- Extensibility: Even though Sensei Grid will be kept simple, we will put serious effort to make it easy to extend and customize.
- Stability: Sensei Grid is backed by Datazenit, meaning that the project is financially supported and will be constantly maintained and improved.
The simplest way to get all necessary files is via bower: bower install sensei-grid.
If you don't want to use bower, just download an archive from the latest release page or clone the whole repository.
When you have obtained a copy of Sensei Grid, you must include all dependecies, sensei-grid.js and sensei-grid.css.
Sensei Grid depends on jQuery and lodash/underscore.js. For your convenience all dependecies can be found in lib/ folder.
Warning: By default Sensei Grid does not apply any styles to the table. It means that you need to create your own stylesheet or you can just use bootstrap.css as shown in the example below.
<link rel="stylesheet" type="text/css" href="dist/css/sensei-grid.css"/>
<link rel="stylesheet" type="text/css" href="lib/bootstrap/dist/css/bootstrap.min.css"/>

<script src="lib/jquery/dist/jquery.min.js"></script>
<script src="lib/lodash/lodash.min.js"></script>
<script src="dist/sensei-grid.js"></script>Define your data array. Each row is represented by an object.
var data = [
    {id: 1, title: "test"},
    {id: 2, title: "foo bar"}
];
Currently it is mandatory to define columns in a separate array for Sensei Grid to work
var columns = [
    {name: "id", type: "string"},
    {name: "title", type: "string"}
];
Initialize grid with data and columns
var grid = $(".example").grid(data, columns);Register at least one editor (BasicEditor is bundled with Sensei Grid)
grid.registerEditor(BasicEditor);Render data grid in .example container.
grid.render();By default Sensei Grid is bundled with several grid editors that can be registered for a data grid.
List of available editors:
- BasicEditor - simple text field to edit basic data
- BooleanEditor - checkbox editor for boolean values (true/false)
- TextareaEditor - large text field for editing large text
- SelectEditor - dropdown select box to choose a value from a list
- DateEditor - datetime editor to choose a specific date from a calendar, provided by pickadate.js
- DisabledEditor - sample editor that can't be edited
- [new] AutocompleteEditor - text field with autocomplete support, based on typeahead.js
- Work and open source #2: Sensei Grid
- First public release of Sensei Grid
- Sensei Grid Roadmap
- Sensei Grid Daily Overview
Planned for the upcoming releases:
Delete/duplicate row keyboard shortcutNew row supportEvent callbacks (e.g., save, load, render)Field types (e.g., string, int, float)- Optional column definition (if the structure of data is simple, assume default column settings)
Firefox compatibility issues- More configuration parameters for grid
Example editor for specific field types(an example select box editor can be found in examples/example.js)- Touch support for mobile devices
Column sorting callbacks- Column resizing (to be discussed)
Implement undo/redo (to be discussed)
