How to Configure & Send Apple Push Notifications using PushSharp
The tutorial requires that you use a Mac, and that you have an Apple Developer account, with an App ID already setup.
- Navigate to https://developer.apple.com/membercenter/index.action and Login.
- Click on Certificates, Identifiers & Profiles.

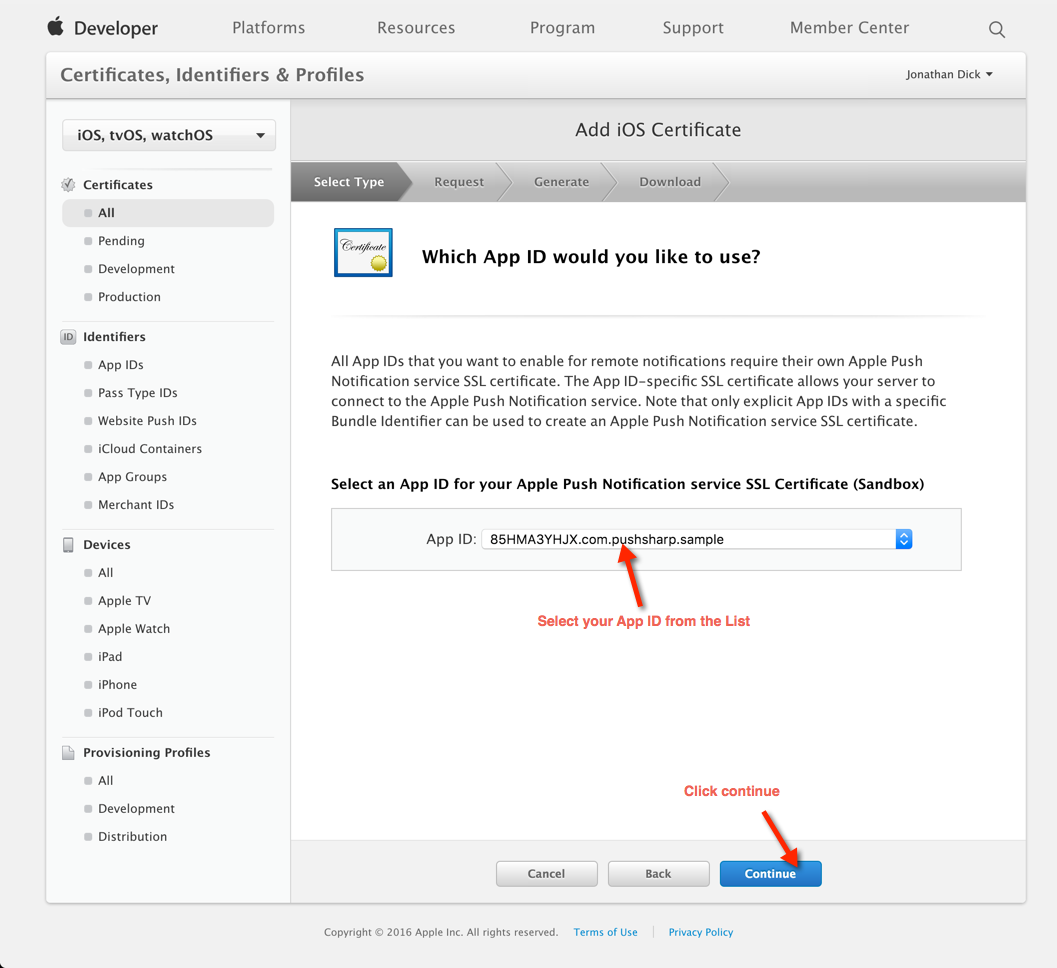
- Select your App ID from the list (You must have already created your App ID).
- Click Continue.
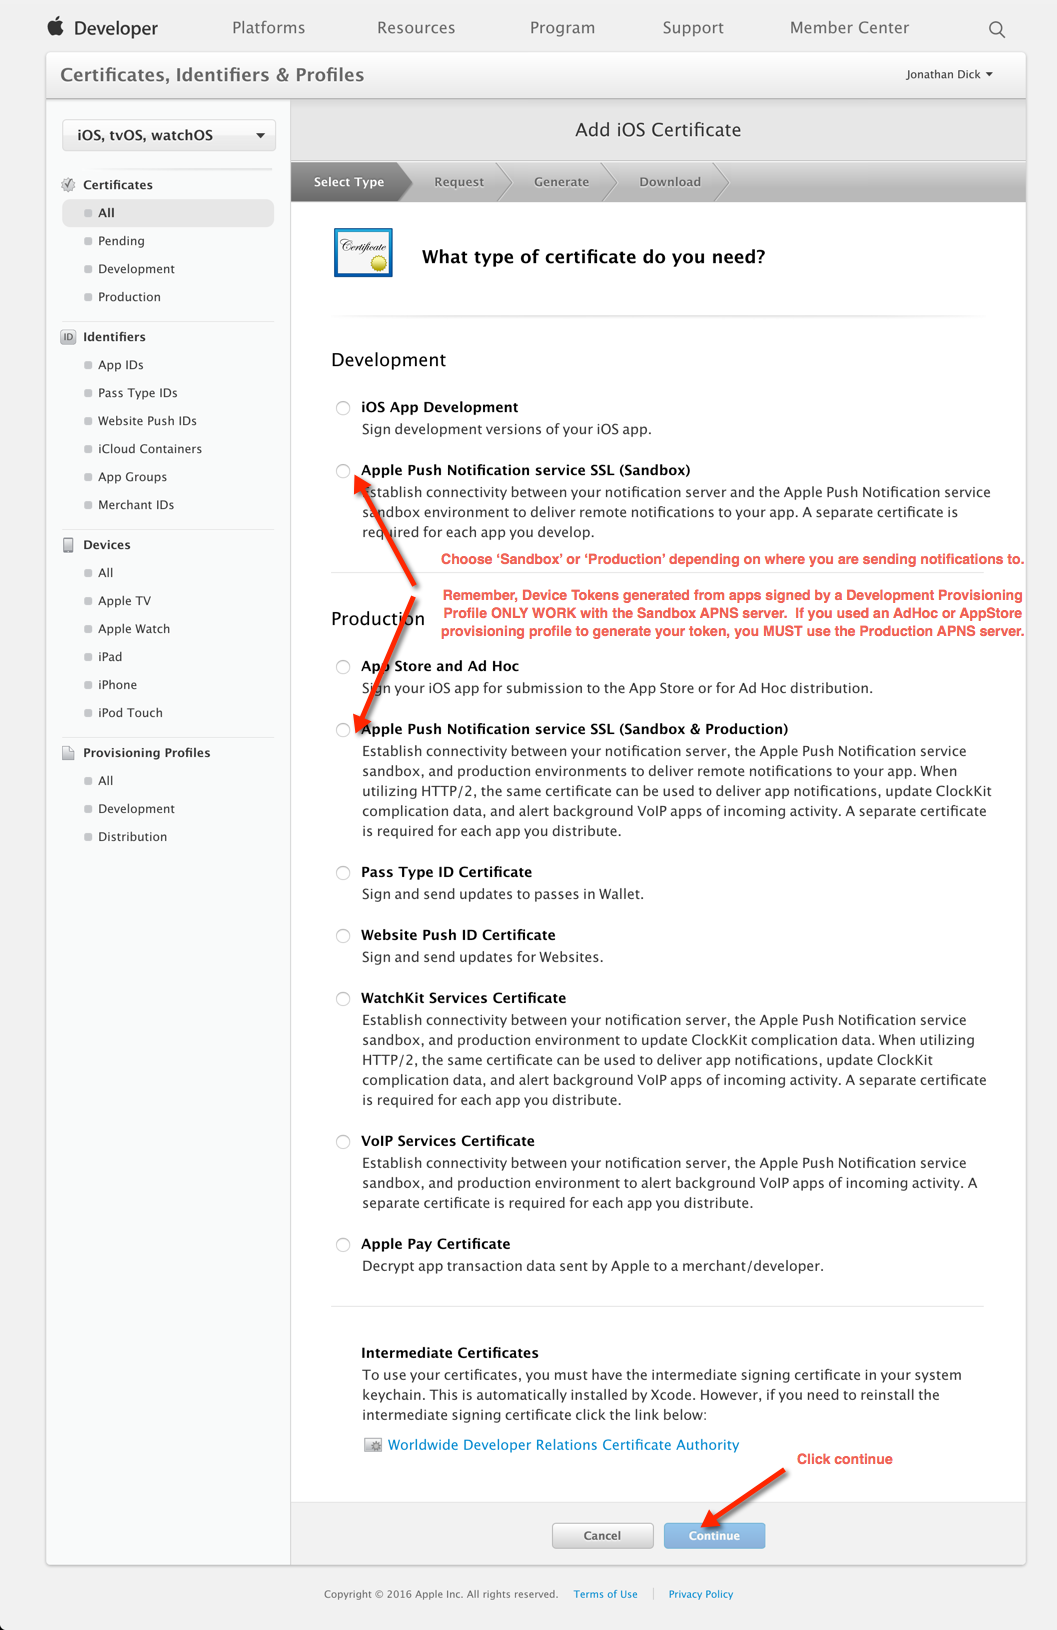
- Choose either Apple Push Notification service SSL (Sandbox) or Apple Push Notification service SSL (Sandbox & Production) as the certificate type, depending on which server you need to connect to.
- Click Continue.
It's important to choose the correct type of certificate here for what you plan on doing.
A Device Token generated by an app signed with a Development Provisioning Profile is only valid for use with the Sandbox APNS server.
A Device Token generated by an app signed with an AdHoc or AppStore Provisioning Profile is only valid for use with the Production APNS server.
NOTE: Some users have reported issues with notification delivery using the combined Apple Push Notification service SSL (Sandbox & Production) certificate when trying to send notifications to the Sandbox APNS server.
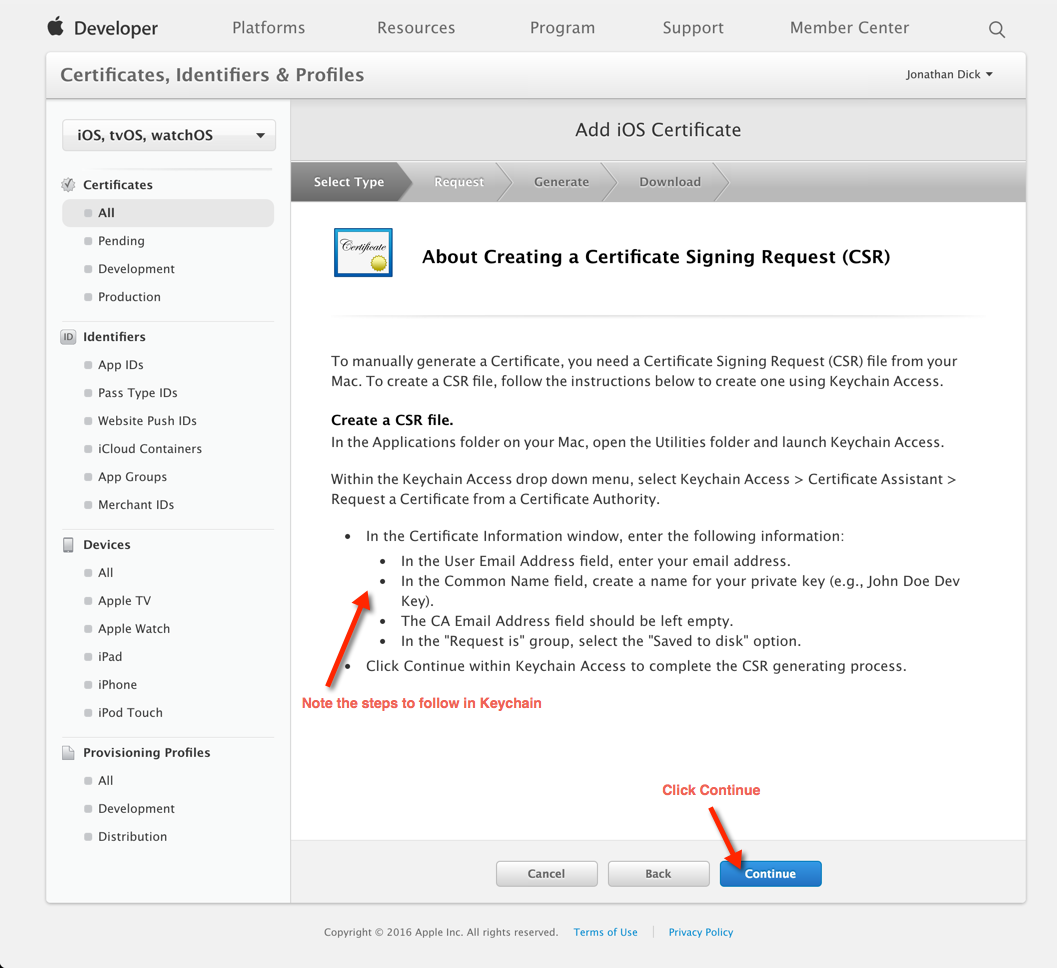
- Note the information about creating a CSR (Certificate Signing Request).
- Click Continue.
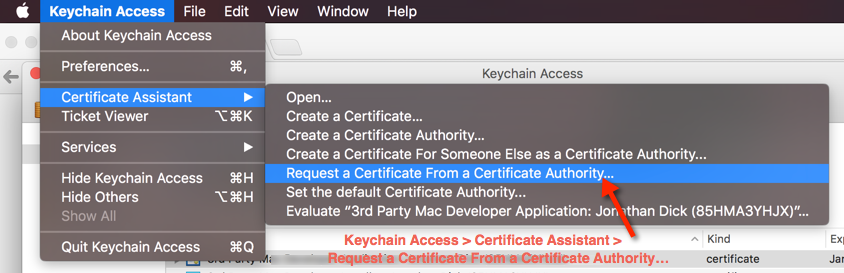
- Open the Keychain Access app.

- Click the Keychain Access menu bar item
- Open the Certificate Assistant menu sub item
- Click the Request a Certificate From a Certificate Authority... menu sub item
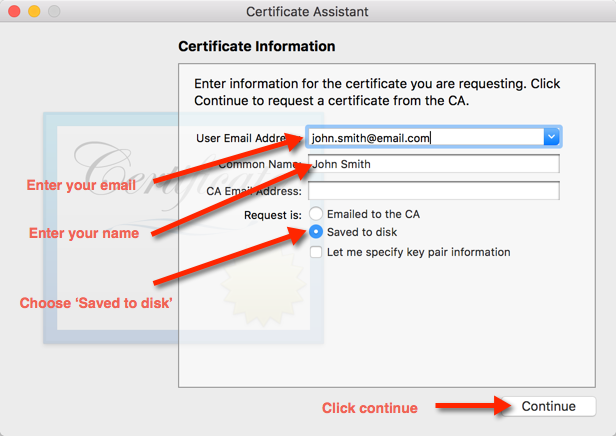
- Enter your email address (to be safe, make it the same as your Apple ID developer account email address).
- Enter a Common Name (eg: your name)
- Choose Request is: Saved to disk
- Click Continue.
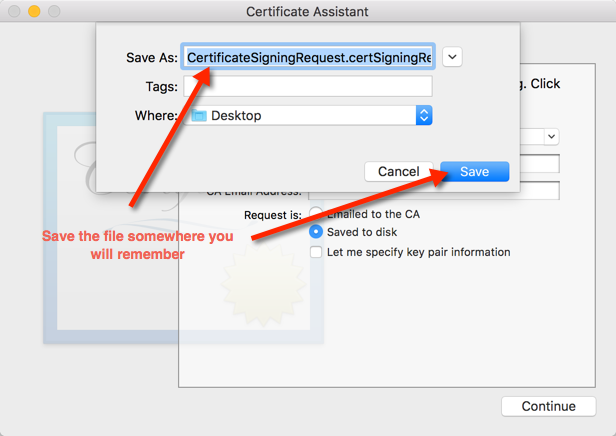
- Pick a location and filename to save the request to
- Click Save.
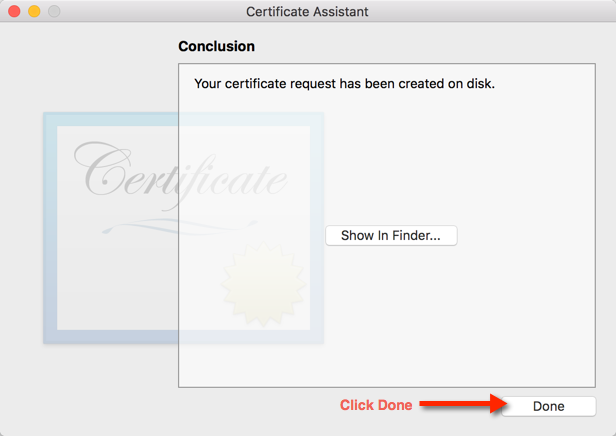
- Click Done.
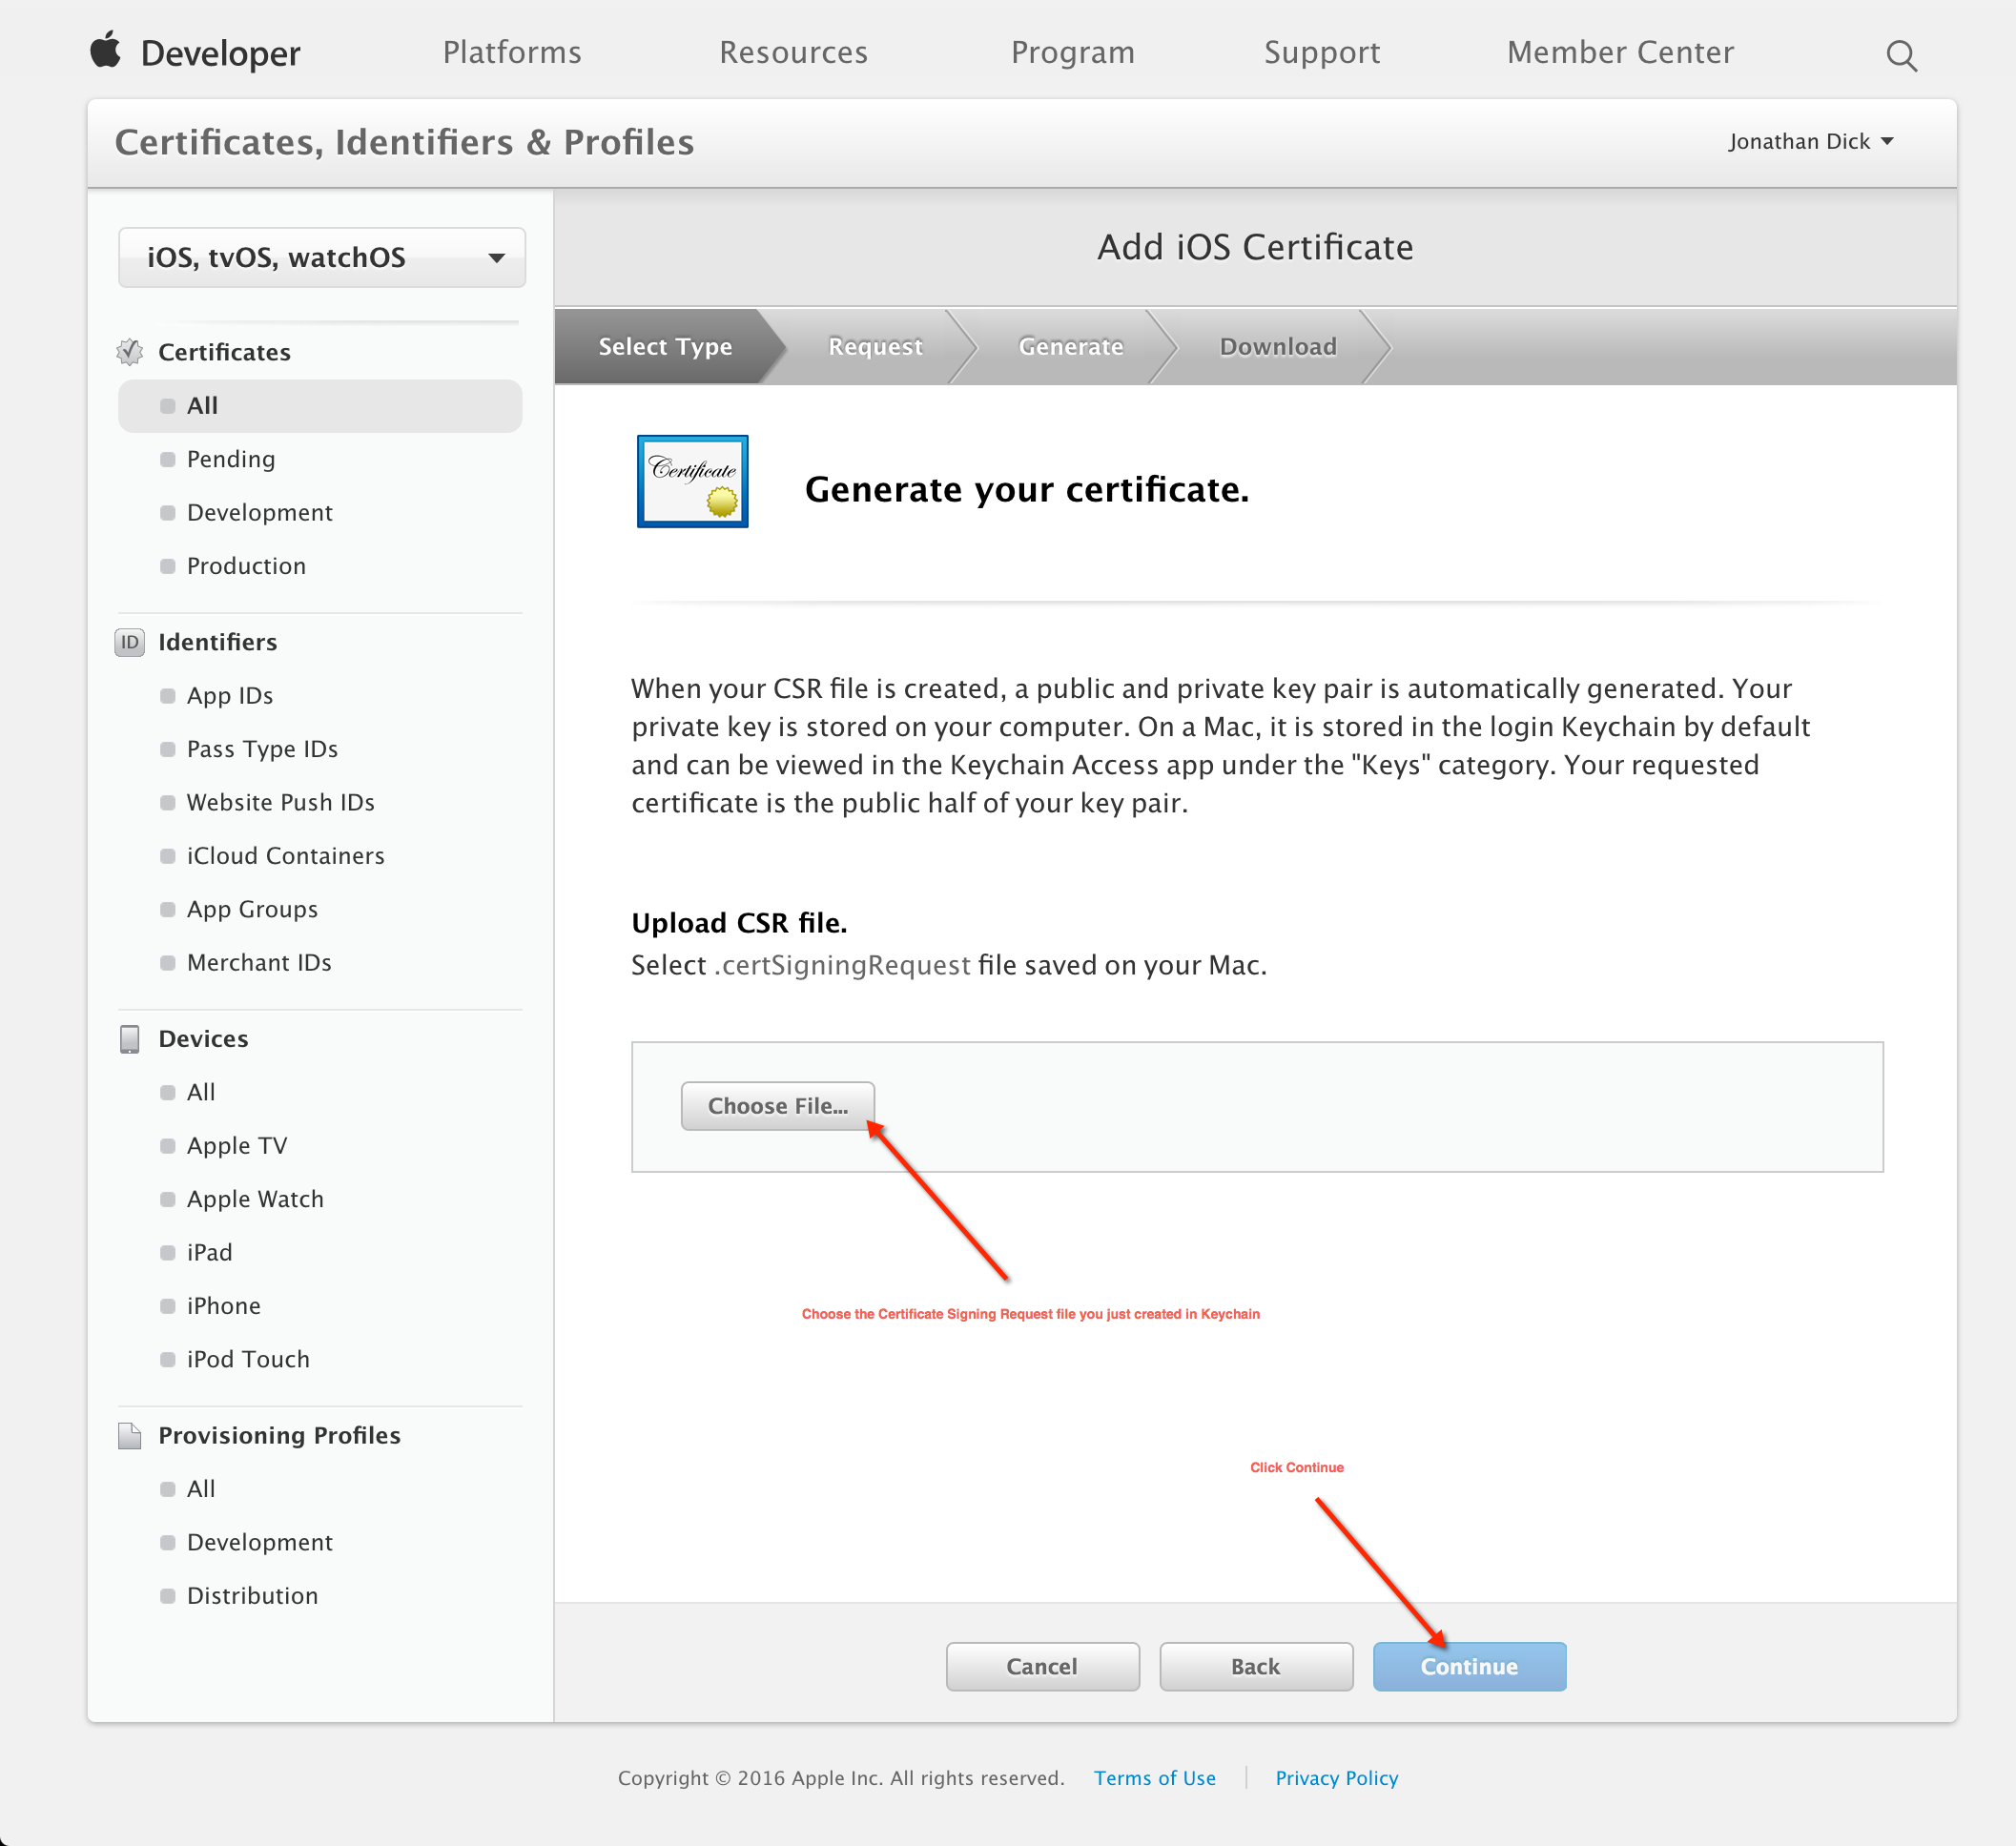
- Switch back to your browser.
- Click Choose File...
- Select the Certificate Signing Request file you just created and saved.
- Click Continue.
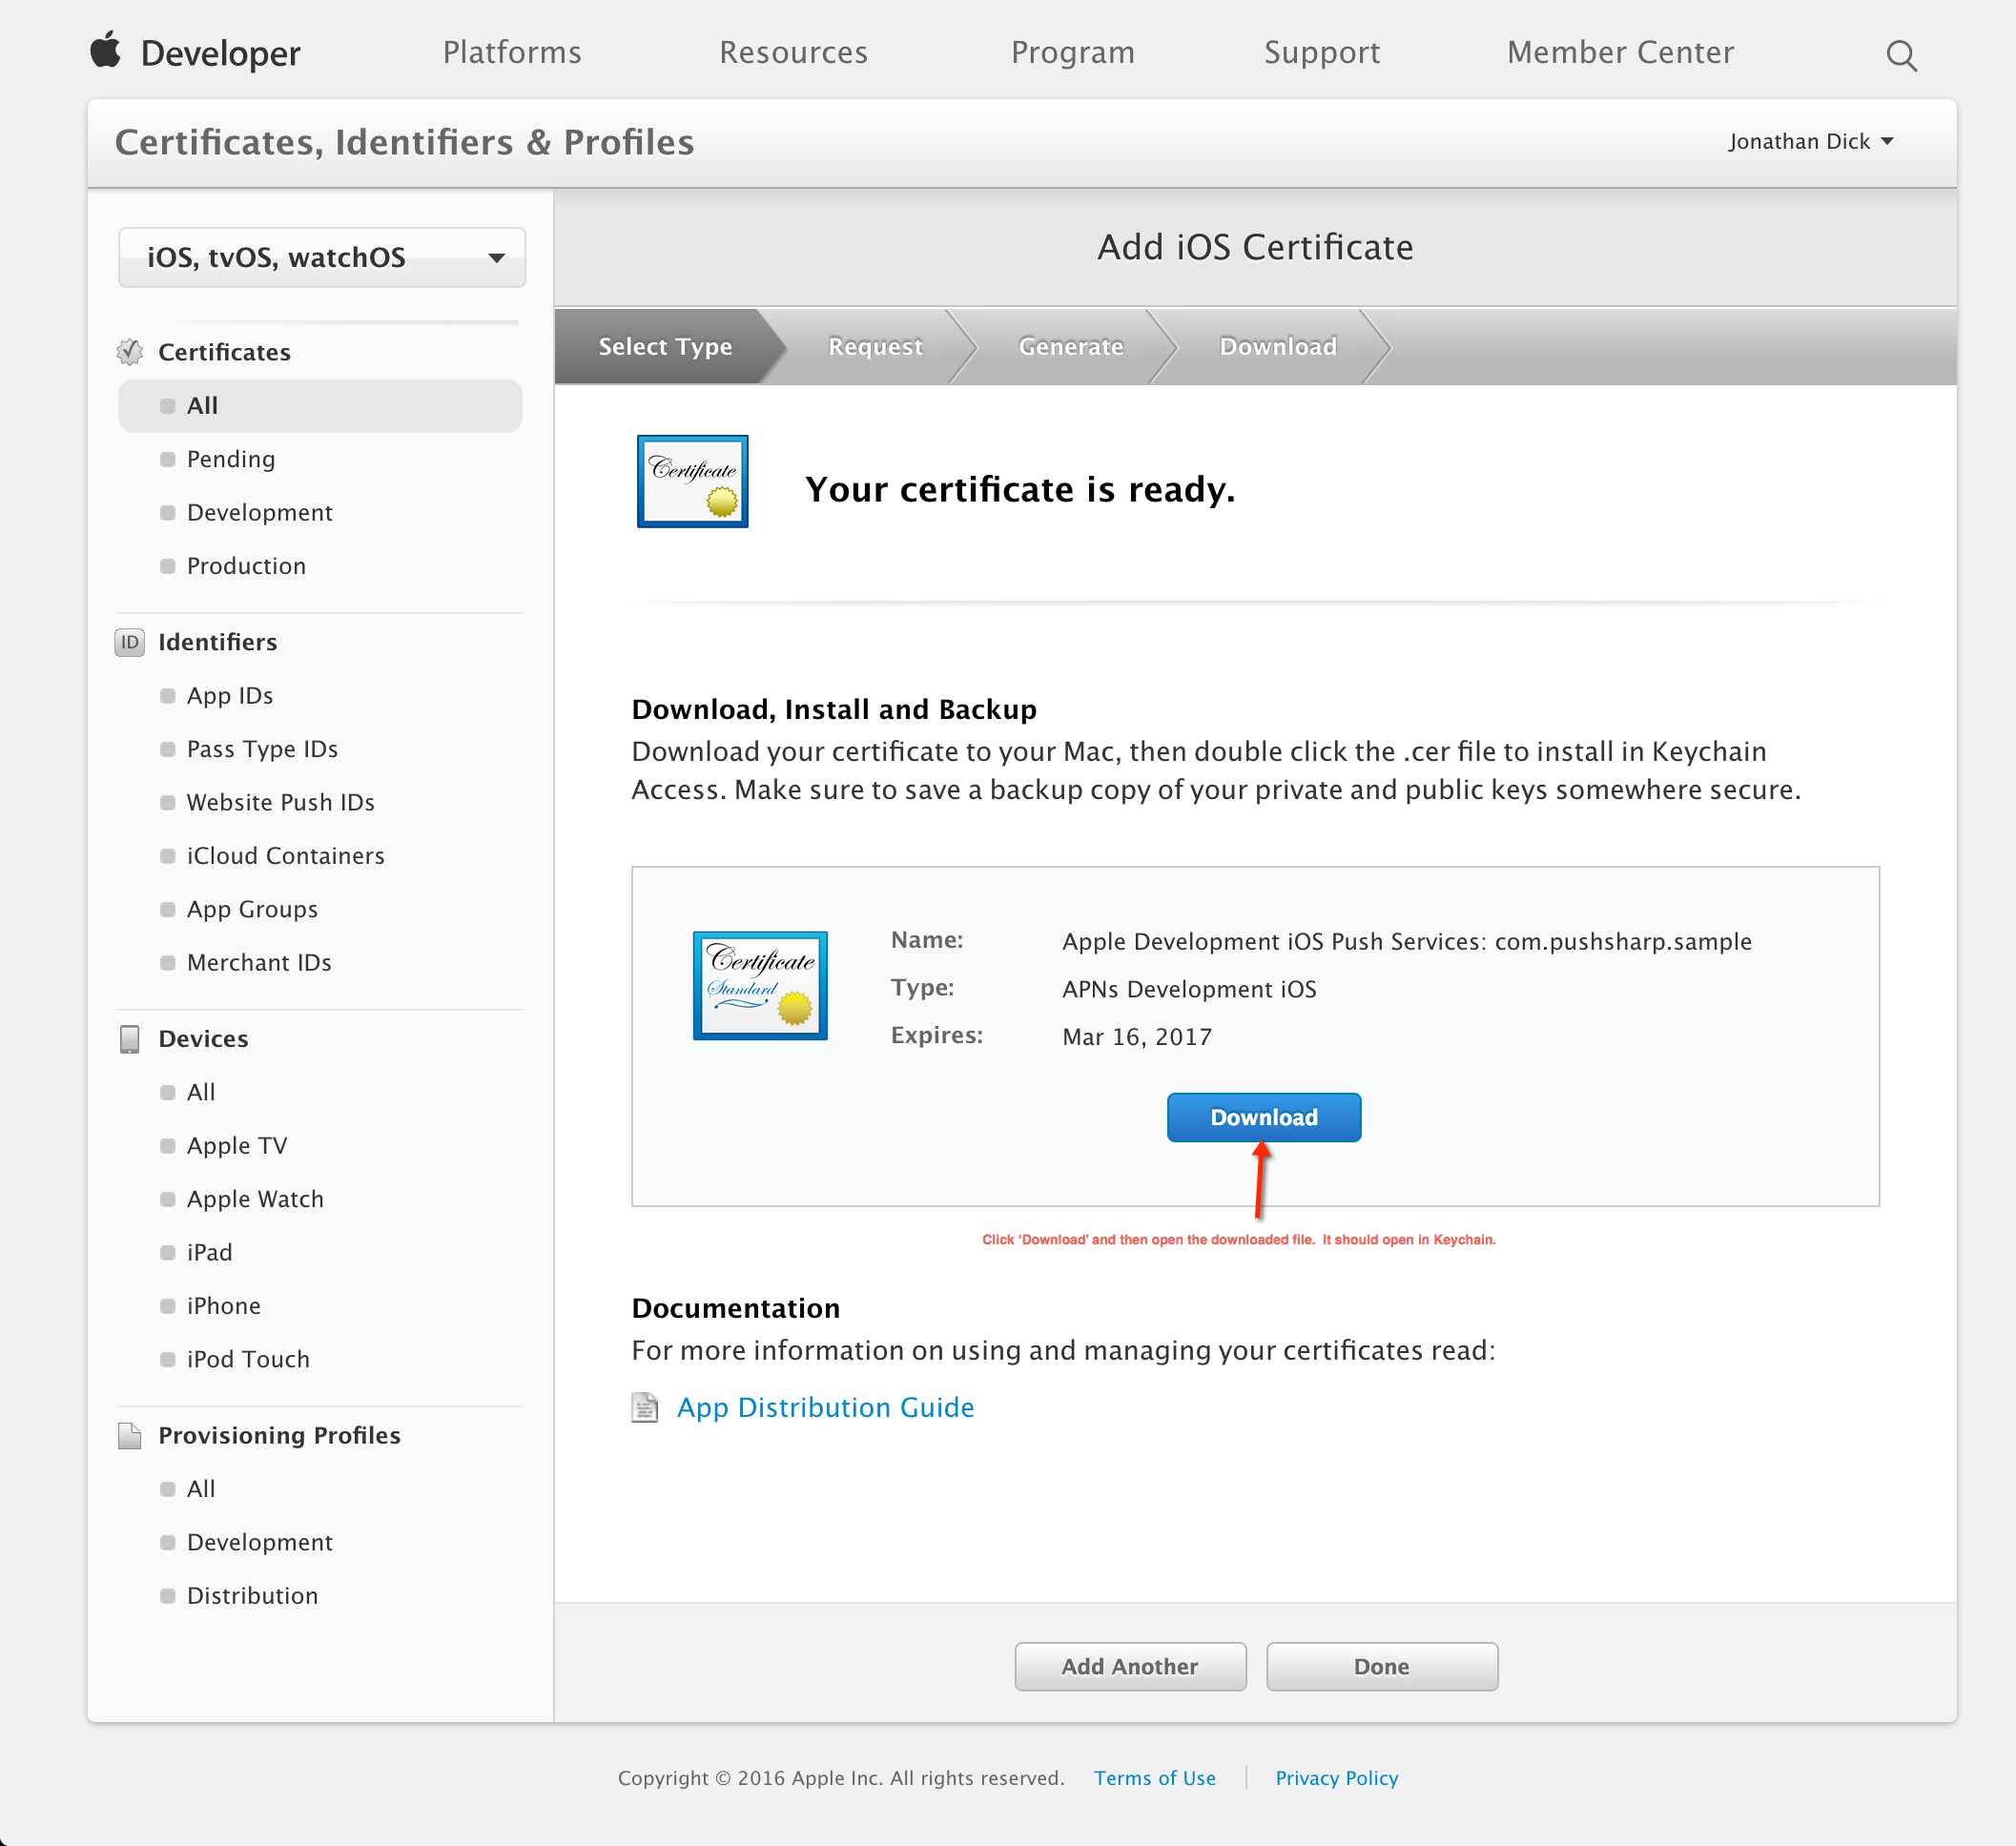
- Your certificate should be ready.
- Click Download to download the certificate.
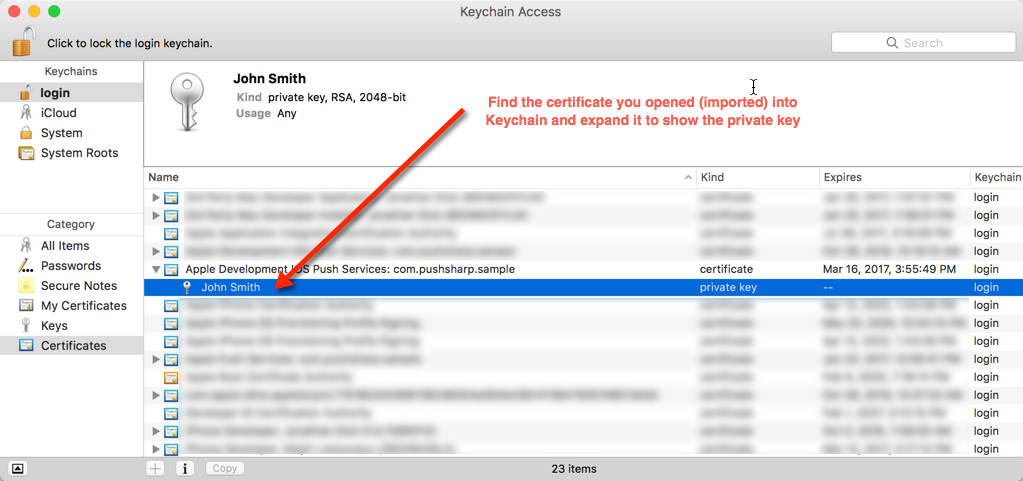
- Open the downloaded certificate file (it should automatically open in Keychain Access, otherwise open it manually in Keychain Access)
- Find the certificate you just opened/imported in Keychain Access
- Expand the certificate to show the Private Key
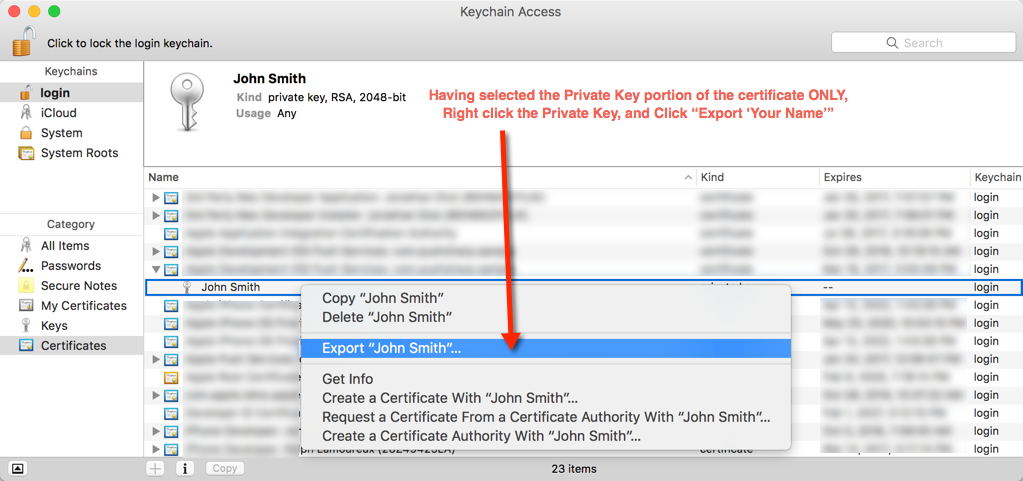
- Select only the Private Key portion of the certificate
- Right click the Private Key portion of the certificate
- Click Export "Common Name"... on the popup menu.
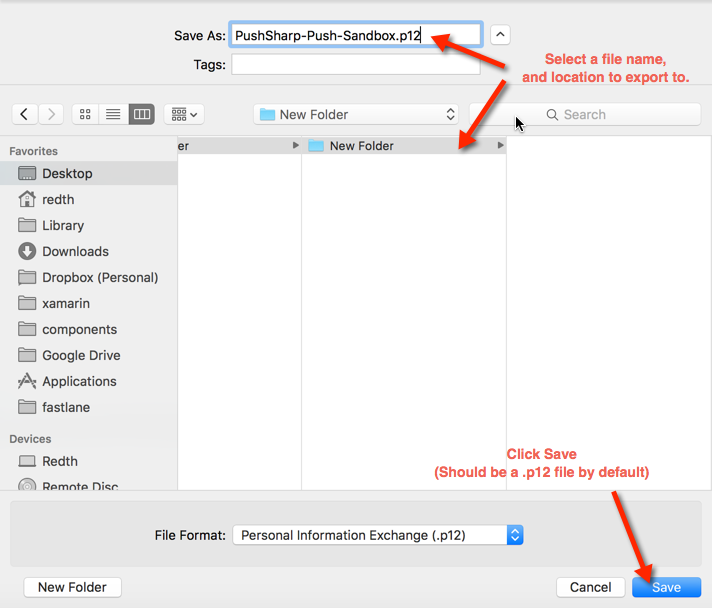
- Choose a location and filename to export the .p12 file to
- Click Save.
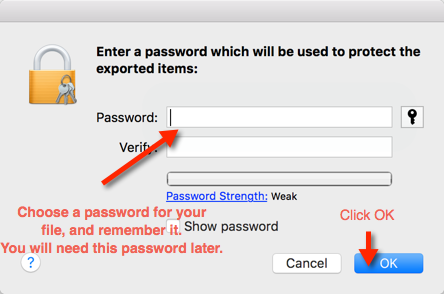
- Optionally choose a password for the .p12 file to protect its private key contents.
- Click OK.
You should now have a .p12 file that contains the private key for connecting to Apple's APNS servers. This certificate file can be used in PushSharp with the password for it.
Congratulations, you did it!
The Connection default in ApnsServiceBroker is 1.
You can change the value using ChangeScale.
this.ApnBroker = new ApnsServiceBroker(appleConfig);
this.ApnBroker.ChangeScale(10);
There is a timer in each connection. The timer is triggered every 750 ms or when the number of notifications in each connection reaches 1000.
var appleConfig = new ApnsConfiguration(environment,certificateData, certificateFilePwd);
appleConfig.InternalBatchSize = 2000;
appleConfig.InternalBatchingWaitPeriod = System.TimeSpan.FromMilliseconds(500);